Tag: how to fish

  • Part Three: When Dry Flies Stop Working — Adding Streamers and Fishing With Intent

    Part Three: When Dry Flies Stop Working — Adding Streamers and Fishing With Intent

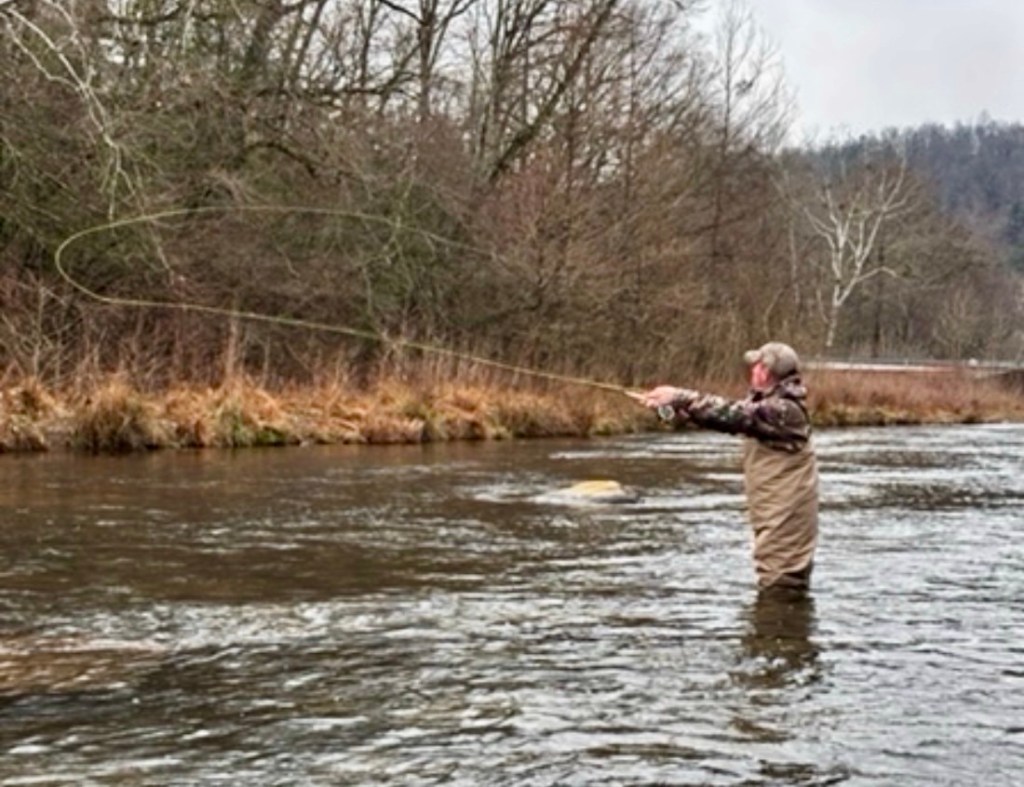
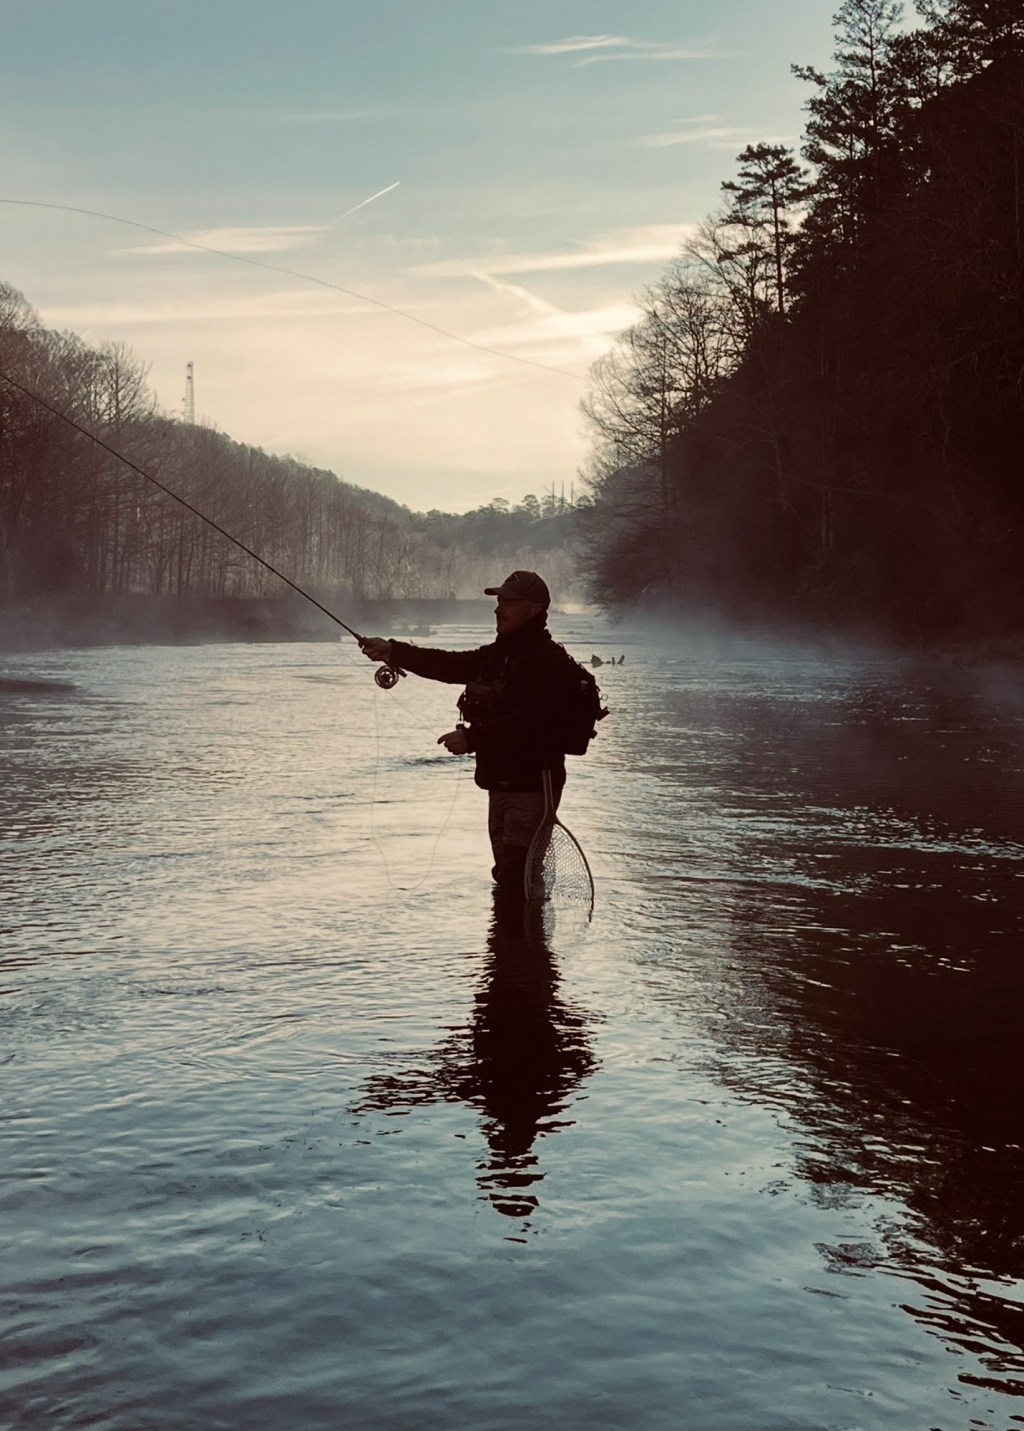
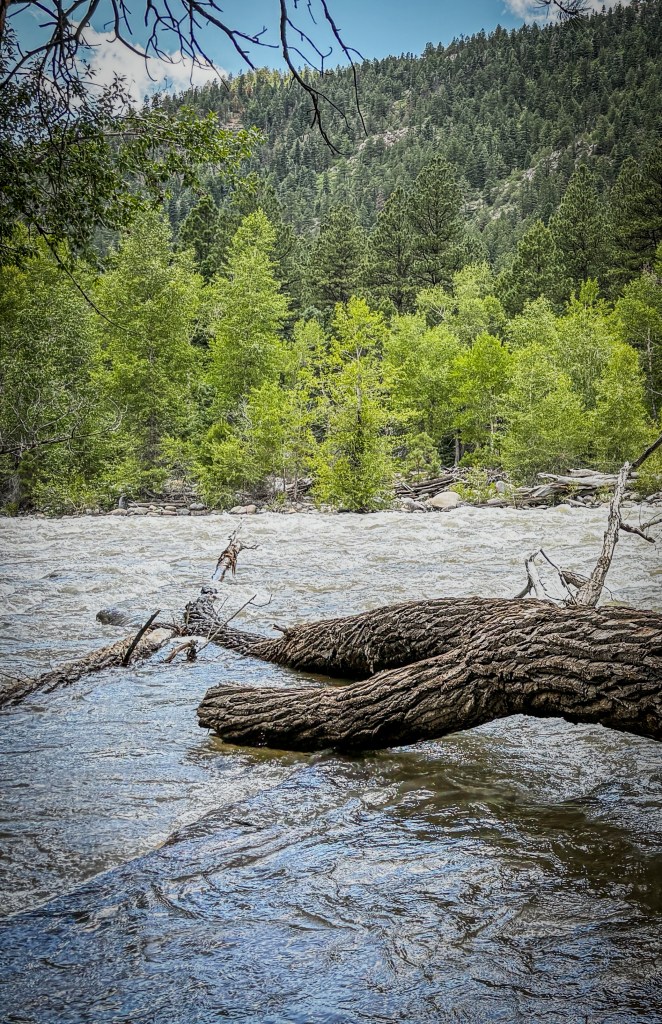
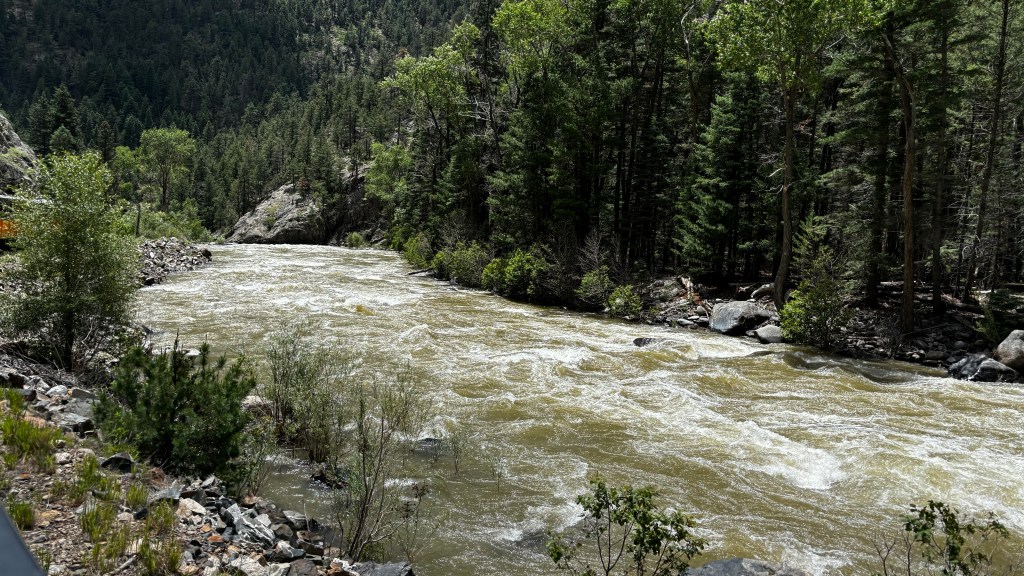
    There’s a point on most days when the river tells you it’s time to change tactics.

    After working dries and adjusting to conditions, I reached that moment on this river. The fish were still there, but surface activity slowed. The water had enough movement and depth that trout weren’t locked into feeding on top—they were positioned to ambush.

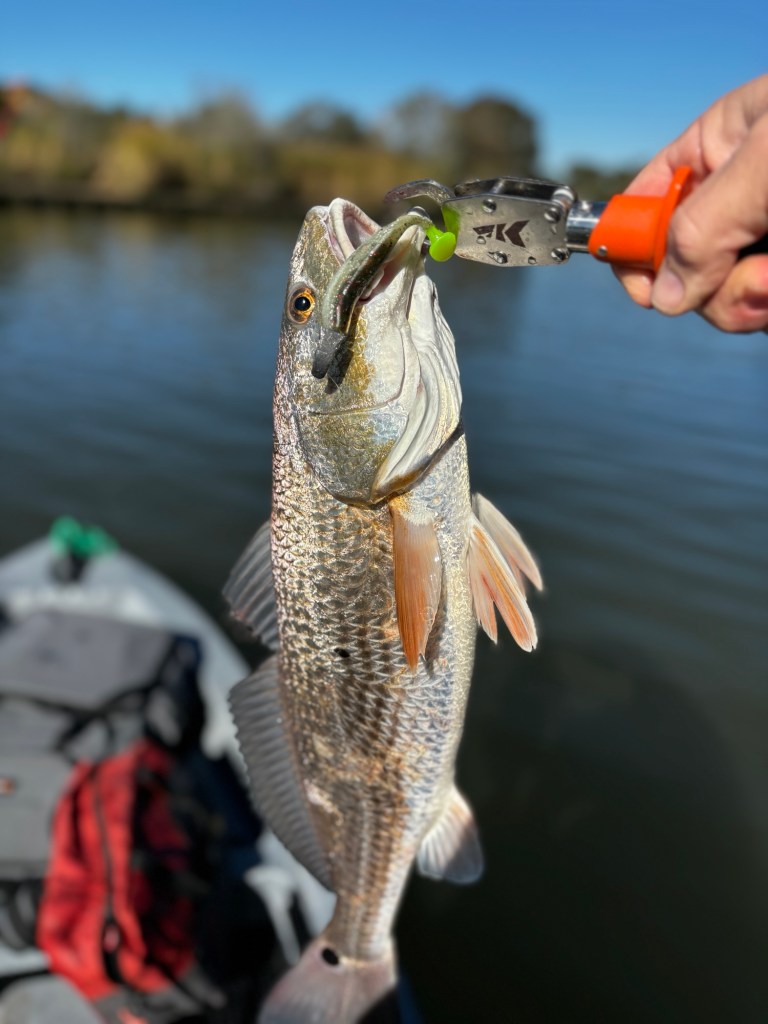
    That’s when streamers entered the picture.

    Not as a last resort—but as a deliberate choice.

    Why Streamers Made Sense in These Conditions

    Streamers shine when trout shift from feeding to reacting.

    With:

    • Broken water

    • Variable depth

    • Reduced visibility

    • Fish holding near structure

    A moving fly becomes an opportunity trigger rather than a match-the-hatch exercise.

    The goal wasn’t imitation—it was movement, angle, and control.

    Presentation Over Pattern: How the Streamer Was Fished

    The most important lesson from this day wasn’t which streamer I tied on—it was how it was presented.

    I focused on:

    • Casting across and slightly downstream

    • Allowing the fly to sink and settle

    • Swinging the streamer through likely holding water

    The swing did the work. As the fly moved across current, it naturally rose and accelerated—exactly what triggers predatory behavior.

    But the key detail was maintaining a tight line throughout the entire swing.

    Slack kills streamer effectiveness.

    The Tight Line Lesson: Where the Strikes Really Happened

    As the day went on, a clear pattern started to emerge.

    I was catching fish consistently—but I was also missing a lot of takes. Almost all of those missed strikes happened at the same point in the presentation: right as the streamer began to turn head-up at the end of the swing.

    That moment—when the fly changes direction and speed—is a trigger. The streamer looks like it’s trying to escape, and trout commit aggressively.

    But when no strike came immediately after the fly turned, the presentation wasn’t over.

    Instead of picking up and recasting, I started giving the streamer a few short, random strips at the end of the swing. Nothing aggressive—just subtle, erratic movement.

    That adjustment made a difference.

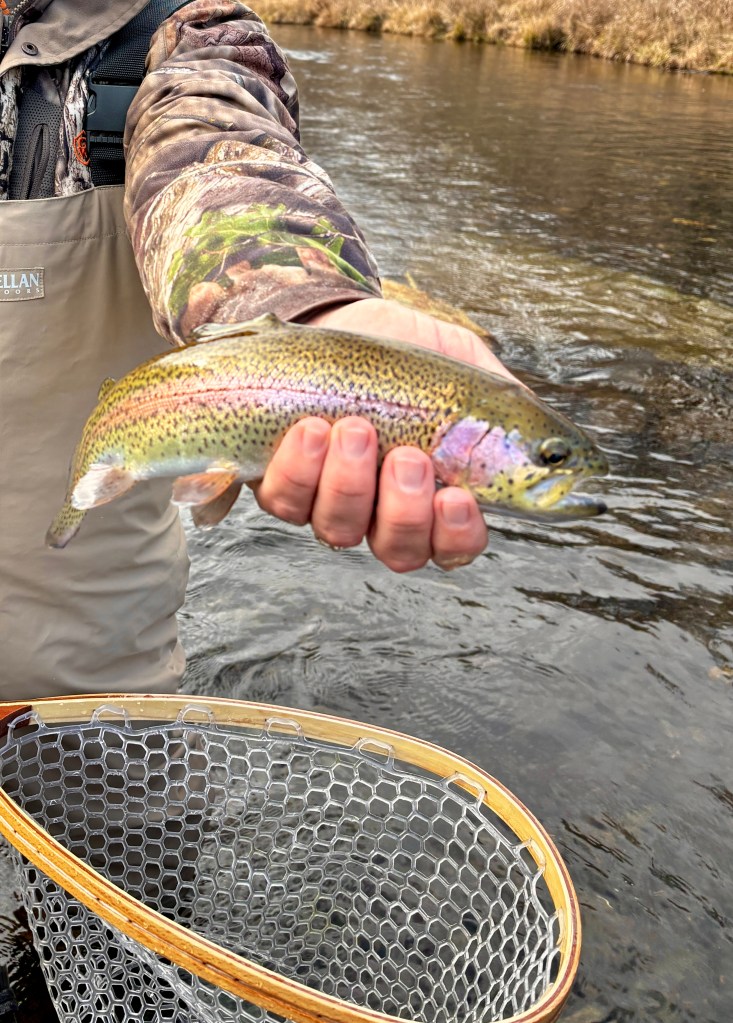
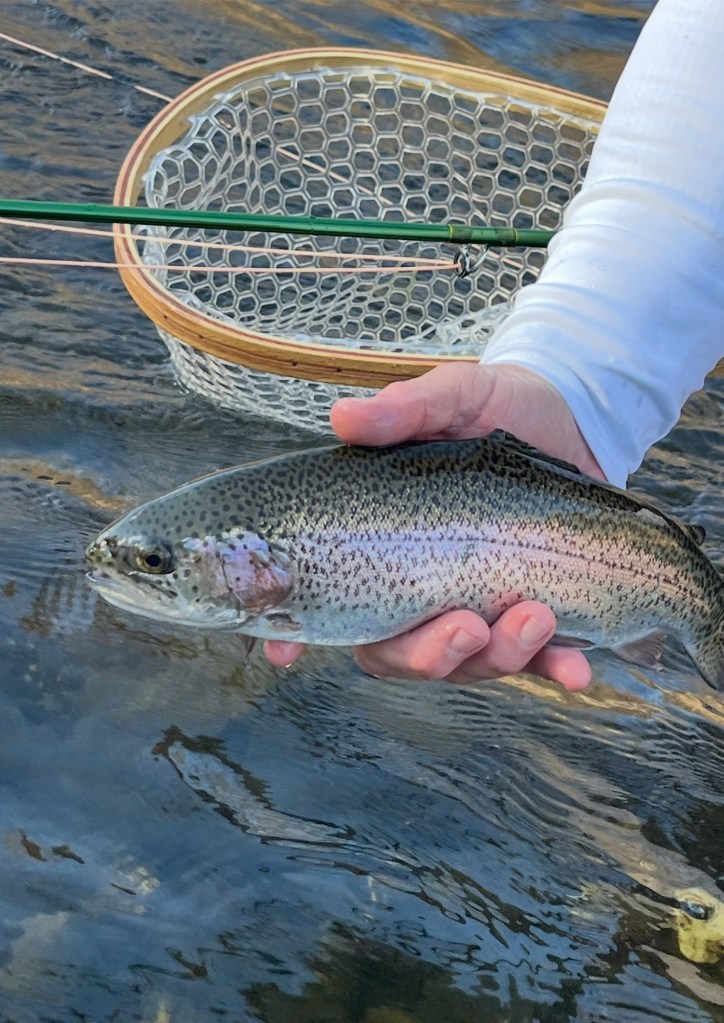
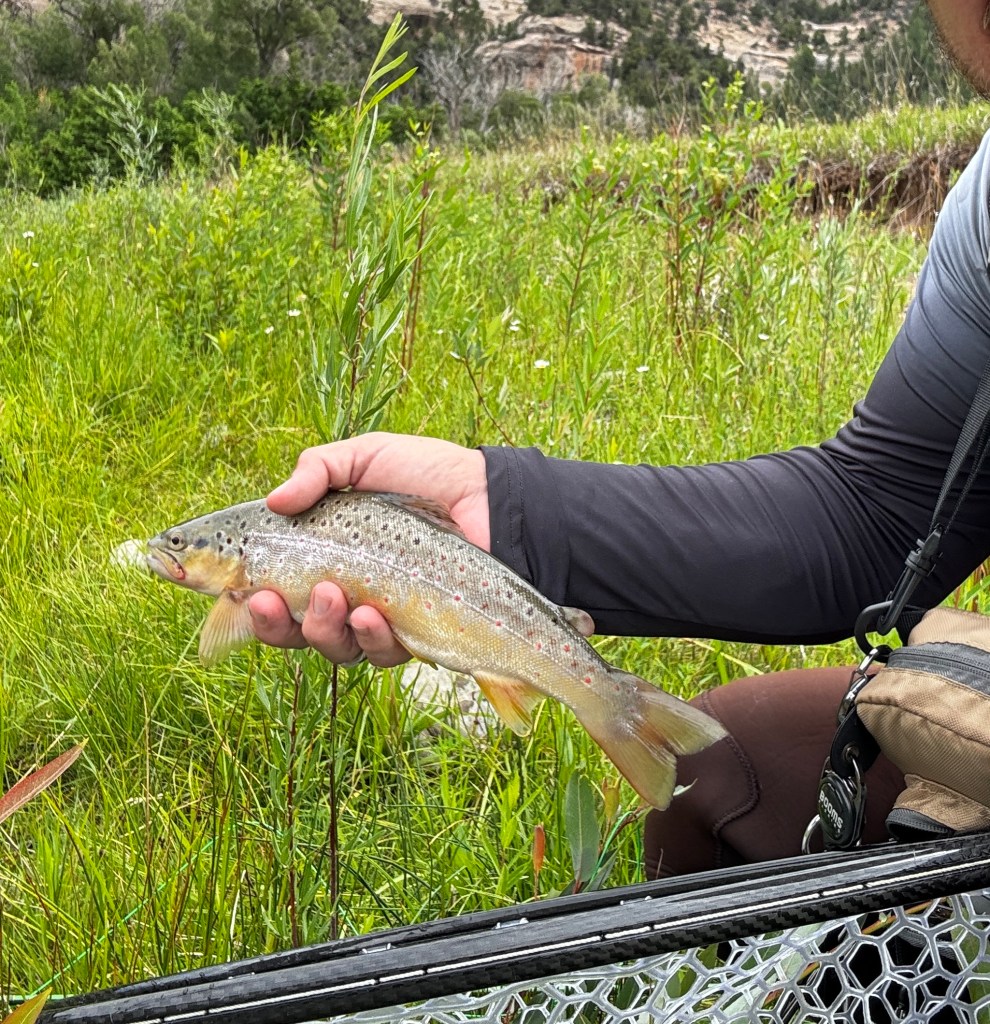
    Occasionally, one of those small strips was all it took. The fly would pulse, change direction slightly, and a trout that hadn’t committed on the swing would eat decisively. Those hookups reinforced the idea that even when the “primary” presentation is finished, the fly can still trigger a reaction if you stay engaged.

    Strip Set First, Lift Second

    Another adjustment made a big difference.

    Instead of immediately lifting the rod on a strike, I focused on:

    1. Strip setting first to drive the hook

    2. Then lifting the rod to maintain pressure

    This kept the hook solid and reduced missed fish—especially on aggressive eats at the end of the swing.

    With streamers, trout often eat with force. Let them load the line, then commit.

    Why the Swing Works So Well

    Swinging a streamer does a few critical things:

    • Keeps the fly in the strike zone longer

    • Maintains natural movement without overworking the fly

    • Allows consistent line tension for solid hook sets

    It also forces patience. You’re not rushing the retrieve—you’re letting the current and the fly do what they’re meant to do.

    A Familiar Reminder: Stay Engaged Through the Entire Drift

    That pattern of missed strikes reinforced a lesson that carried over from dry flies:

    The presentation doesn’t stop until the fly is completely finished.

    Whether it’s a dry drifting through a seam or a streamer completing its swing, trout often eat at the moment anglers relax.

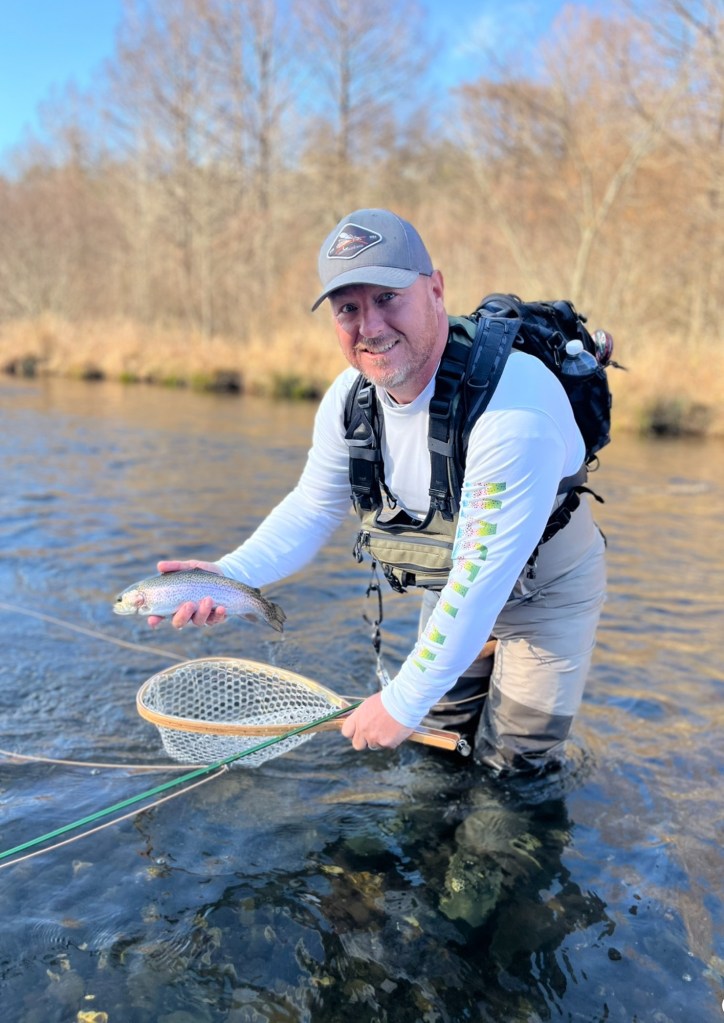
    Staying connected—mentally and physically—through the entire presentation turned missed opportunities into landed fish.

    Part Three Takeaway: Intentional Movement Triggers Reactions

    Streamers aren’t about randomness or covering water blindly.

    They’re about:

    • Controlled swings

    • Tight lines

    • Reading when fish are ready to react

    When you fish them with intention, streamers become one of the most effective tools you can use—especially when surface activity fades.

    This adjustment tied directly back to a theme running through this entire series.

    Whether it’s a dry fly drifting through a seam or a streamer completing its swing, the presentation doesn’t end until the fly is completely out of the water.

    Those short, random strips weren’t a separate technique—they were a continuation of the presentation. Staying alert through that final moment turned missed opportunities into landed fish.

  • Part Two: Same River, Different Conditions — Adapting Dry Fly Tactics to Cloudy Water and Higher Flows

    Part Two: Same River, Different Conditions — Adapting Dry Fly Tactics to Cloudy Water and Higher Flows

    If Part One was about precision, restraint, and subtle adjustments, this day on the river demanded the opposite.

    As the river changed, so did the results. What really stood out was that my brother started catching more trout. That forced me to pause and study what he was doing differently instead of stubbornly sticking to my approach. His drifts were cleaner. His fly was riding naturally with less drag. And most importantly, he was targeting slightly softer water than I was — just off the heavier current, where trout could hold comfortably in the higher flows without expending unnecessary energy.

    That adjustment was the turning point. In cloudy water and elevated flows, trout shift into protection mode. They slide into seams, softer edges, and subtle pockets that are easy to overlook. Watching him find success reminded me that adapting isn’t just about changing flies — it’s about changing perspective. Sometimes the biggest lesson on the river comes from paying attention to what’s working right beside you.

    Same river. Completely different game.

    This is where understanding conditions over patterns becomes critical.

    Reading the River Again: What Changed With Higher CFS

    Higher flows reshape a river fast.

    With increased CFS:

    • Seams widen and shift

    • Soft water becomes more valuable

    • Fish slide closer to structure and edges

    • Feeding lanes compress instead of spreading out

    Instead of holding in obvious mid-river seams like before, trout positioned themselves tighter to:

    • Inside bends

    • Cushion water behind rocks

    • Softer edges just off the main current

    Fish were still feeding—but they were doing it more opportunistically than selectively.

    Cloudy Skies and Stained Water: Visibility Becomes the Priority

    Under cloud cover and reduced visibility, trout don’t inspect flies the same way they do in clear, bright conditions.

    This changes everything.

    On this day:

    • Fish had less time to analyze a fly

    • Movement and visibility mattered more than perfect imitation

    • Drift was still important—but forgiveness increased

    Instead of downsizing, I leaned into flies that:

    • Rode a little higher

    • Had more contrast

    • Were easier for fish to track in broken water

    The exact match mattered less than the fly being noticeable and natural.

    Dry Fly Presentation in Faster, Dirtier Water

    Higher flows don’t eliminate dry fly opportunities—but they do change how you approach them.

    Key adjustments:

    • Shorter, more controlled drifts

    • Targeting specific soft pockets instead of long seams

    • Letting the fly land with intention, not delicacy

    In this water, trout weren’t sipping calmly—they were making quick decisions. The goal was to put the fly where they could see it and eat it without expending unnecessary energy.

    Tippet, Leader, and Confidence Adjustments

    Unlike the clear-water conditions from Part One, this wasn’t the time to go ultra-light.

    With more color in the water and less direct light:

    • Slightly heavier tippet didn’t hurt takes

    • Fly control improved

    • Hook sets were more confident in faster current

    This was a reminder that there’s no universal “best” setup—only the best setup for right now.

    Why the Same Fly Can Fail—or Succeed—Depending on Conditions

    One of the biggest takeaways from fishing the same river under different conditions is understanding that flies don’t work in isolation.

    A fly that felt too visible or unnatural in clear water suddenly became effective when:

    • Light was reduced

    • Water speed increased

    • Fish shifted from selective feeding to opportunistic behavior

    The pattern didn’t change—the context did.

    This reinforces a key lesson:

    Choosing a fly isn’t just about the hatch. It’s about water clarity, flow rate, light, and fish positioning.

    Slowing Down Still Matters—Just in a Different Way

    Even in tougher conditions, the solution wasn’t to rush or fish blindly.

    It meant:

    • Watching where fish positioned themselves

    • Adjusting target zones

    • Fishing fewer spots more intentionally

    Instead of long observation of insect life, the focus shifted to water movement and structure.

    Different inputs. Same mindset.

    Part Two Takeaway: Conditions Dictate Strategy

    This day on the river proved something important:

    The fundamentals don’t change—but how you apply them must.

    Clear water demands subtlety.

    Higher water demands visibility and control.

    Bright days punish mistakes.

    Cloudy days forgive—but still require intention.

    Understanding those shifts is what separates anglers who adapt from those who rely on habit.

    Coming Up Next in the Series

    In the next part of this series, we’ll dive deeper into:

    • When to abandon the dry fly altogether and streamer tactics

  • When Observation Changes Everything: A Moment in the River

    When Observation Changes Everything: A Moment in the River

    There’s a moment that stands out to me clearly—and it’s one I think most anglers can relate to.

    I was standing mid-river, watching trout rise steadily in the same seam I had already cast into several times without a single eat. The rises were consistent, deliberate, and confident. The fish were there. The fly was drifting through the zone. Yet nothing happened.

    That’s when I stepped back—not physically, but mentally—and asked myself the question we should all ask more often:

    Are they not eating my fly… or am I not presenting it correctly?

    Instead of immediately tying on something different, I slowed down and started observing.

    As I looked closer, I noticed small mayflies beginning to fly around me. They were subtle, light-bodied, and noticeably smaller than the size 14 mayfly I had tied on. At the same time, it became obvious just how clear the water was. The conditions were demanding precision—not just in fly choice, but in everything attached to it.

    That realization led to two changes:

    • I dropped down to a smaller fly that better matched the insects I was seeing

    • I downsized my tippet to reduce visibility and improve drift

    Nothing else changed. Same seam. Same casting angle. Same water.

    The difference was immediate.

    Once the fly matched the size of the insects drifting naturally—and the lighter tippet allowed it to move freely—the trout began to eat. One after another, fish that had ignored my fly minutes earlier suddenly committed.

    That moment reinforced a lesson I come back to often:

    It’s rarely one single thing—it’s the combination of observation, presentation, and restraint.

    Understanding Why That Adjustment Worked

    That experience highlights why dry fly fishing demands attention to detail.

    In clear water, trout have more time to inspect a fly. A slightly oversized pattern or a heavier tippet can be enough to trigger refusal—even when everything else seems right. The fish weren’t being selective out of stubbornness; they were simply reacting to what didn’t quite fit the natural drift they were keyed in on.

    Once the fly looked right and moved right, the puzzle solved itself.

    The Bigger Lesson: Slow Down Before You Switch Flies

    Moments like this are why I try to limit unnecessary fly changes. The answer often isn’t buried at the bottom of the fly box—it’s right in front of you if you’re willing to pause and observe.

    Before cutting off a fly, ask:

    • Does the size truly match what I’m seeing?

    • Is my tippet appropriate for this clarity and flow?

    • Is my fly drifting the same way the naturals are?

    Those questions lead to more consistent success than chasing patterns ever will.

  • Dry Fly Fishing Fundamentals: Presentation, Observation, and Choosing the Right Fly

    Dry Fly Fishing Fundamentals: Presentation, Observation, and Choosing the Right Fly

    Dry fly fishing is one of the most visual and rewarding ways to catch trout—but it’s also one of the most misunderstood. Many anglers obsess over exact fly patterns while overlooking the fundamentals that actually matter: presentation, observation, and reading the water.

    In this post, we’ll break down the core principles that consistently lead to success with dry flies—without falling into the trap of endless fly changes. This approach builds confidence, saves time on the water, and helps you understand why a fly works instead of relying on luck.

    Dry Fly Presentation: The Make-or-Break Factor

    You can have the “perfect” fly and still never get a take if the presentation is off.

    Trout see thousands of drifting insects every day. What they don’t see is insects dragging sideways, skating unnaturally, or moving at a different speed than the current.

    Key presentation elements to focus on:

    Drag-free drift – The fly must move at the exact speed of the current it’s floating in.

    Line and leader control – Mends matter more than fly choice.

    Approach angle – Casting slightly upstream or across allows the fly to drift naturally into the fish’s window.

    A mediocre fly with a perfect drift will outfish the “right” fly with a poor presentation almost every time.

    Look Around First: Let the River Tell You What to Use

    Before tying anything on, slow down and observe your surroundings.

    Ask yourself:

    • Are insects actively flying?

    • Do you see bugs on rocks, grass, or logs near the river?

    • Are fish rising consistently or sporadically?

    You don’t need to identify every insect down to the species. Instead, focus on:

    Size

    Color

    General shape

    Matching those three elements gets you 90% of the way there.

    If you see small, dark mayflies hovering and fish rising gently, you already know more than someone blindly cycling through fly boxes.

    Stop Pattern Chasing: Limit Your Time Searching for the “Perfect” Fly

    One of the biggest mistakes anglers make is changing flies too often.

    Constantly swapping patterns does three things:

    1. Breaks your rhythm

    2. Wastes fishing time

    3. Masks the real problem—usually presentation

    A better approach:

    • Pick one confidence pattern

    • Fish it thoroughly

    • Adjust how you fish it before changing what you fish

    If the fly drifts well and matches the general hatch profile, it deserves time in the water.

    Reading the Water: Where Dry Flies Actually Get Eaten

    Dry flies don’t get eaten everywhere—they get eaten in predictable places.

    Focus on:

    • Seams where fast and slow water meet

    • Foam lines that collect drifting insects

    • Inside bends with softer current

    • Tailouts below riffles

    These areas funnel food naturally and allow trout to feed efficiently. A perfect dry fly dropped into dead water with no feeding lanes is still a low-percentage cast.

    Understanding water movement often matters more than matching the hatch.

    Why One Fly Works Over Another (Even When They’re Similar)

    Ever notice how two flies in the same pattern family produce completely different results?

    That’s rarely coincidence.

    Subtle differences matter:

    Silhouette – A fly that rides lower may look more natural

    Hackle density – Sparse vs bushy can change how a fly drifts

    Float posture – Upright vs flush in the film

    Visibility – Not just for you, but for the fish

    Sometimes the “better” fly isn’t closer to the insect—it’s closer to how that insect behaves in the current.

    Instead of asking “What fly should I use?” start asking:

    “How is this fly interacting with the water?”

    That mindset shift changes everything.

    Choosing Flies With Intention, Not Guesswork

    Confidence comes from understanding—not luck.

    When choosing a dry fly:

    1. Match size and profile first

    2. Consider how the fly will float

    3. Think about the water type you’re fishing

    4. Commit to fishing it well

    The goal isn’t to own more flies—it’s to understand the ones you already trust.

    What’s Next: Going Deeper Into Dry Fly Strategy

    This post lays the foundation, but there’s more to unpack.

    In the upcoming follow-up series, we’ll dive deeper into:

    • Specific dry fly patterns and when to use them

    • Adjusting presentations for different water types

    • When to switch from dries to emergers or streamers 

    • How weather and light affect dry fly success

    • Reading subtle rise forms and feeding behavior

    Dry fly fishing isn’t about perfection—it’s about awareness, patience, and understanding how trout interact with moving water.

    And once you get that dialed in, the surface comes alive.

  • January Fly Fishing in Broken Bow, Oklahoma: Winter Streamer Tactics for Big Rainbow Trout

    January Fly Fishing in Broken Bow, Oklahoma: Winter Streamer Tactics for Big Rainbow Trout

    January in Broken Bow, Oklahoma, is one of those trips that tests your patience—and rewards it if you’re willing to adjust. Cold mornings, cold water, and plenty of anglers on the river. This trip was a perfect reminder that winter fly fishing is less about forcing a pattern and more about reading the water, adapting your tactics, and committing to what the conditions are telling you.

    Winter Conditions on the Lower Mountain Fork River

    Most days started with air temps in the 30–40° range, and water temps hovered in the low-to-mid 40s. Some days were overcast with that soft winter light that feels fishy all day long, while others were bright and clear, putting the fish on edge—especially with moderate to heavy fishing pressure.

    These conditions made trout less willing to move far for a meal. They weren’t looking up much, and they definitely weren’t chasing flies across the river. Everything about the water screamed slow, deliberate, and close to structure.

    Starting with Dry Flies in Winter Conditions

    Like most trips, I started optimistic—throwing dries during the warmer parts of the day. While there were occasional looks and a few half-hearted rises, dry fly action was limited. Winter bugs were sparse, and any surface activity was short-lived.

    That’s when the switch needed to happen.

    Committing to Streamers:

    Once I stopped fishing dries and committed to streamers, the entire trip changed.

    The fly that consistently produced was a damsel green olive marabou streamer. Simple profile, tons of movement, and just enough flash to get noticed without spooking pressured fish.

    Why It Worked

    In cold water, trout don’t want to waste energy. That marabou breathed with the current, even on slow swings, making the fly look alive without aggressive stripping. The color matched winter forage well, and the subtle action triggered reaction strikes rather than feeding strikes.

    Reading the Water: Finding Winter Trout on the Lower Mountain Fork

    The key wasn’t just the fly—it was where and how it was fished.

    Seams and Soft Edges

    Most of the better fish came from seams, especially where faster water dumped into slower runs. I focused on:

    • The inside edge of seams

    • Transitions from riffles into deeper runs

    • Water where fish could sit comfortably and let food come to them

    Casting across the seam and allowing the fly to swing naturally through that transition zone was deadly.

    Big Boulders and Structure

    The Lower Mountain Fork has plenty of large boulders, and in winter, those rocks are prime holding water.

    I targeted:

    • The downstream side of boulders

    • Slight depressions created by current wrapping around structure

    • Soft pockets directly behind rocks where trout could rest

    These spots consistently held bigger rainbows, especially when other anglers walked right past them.

    The Streamer Swing: Keeping a Tight Line for Reaction Strikes

    One of the biggest producers on this trip was keeping constant tension on the line.

    Instead of stripping aggressively, I let the streamer swing under tension, rod tip slightly downstream. That tight line did two things:

    1. It let the marabou pulse naturally in the current

    2. It allowed me to feel subtle takes instantly

    Most strikes happened mid-swing or right as the fly started to straighten out below me. Big rainbows would crush the fly with intent—it wasn’t subtle when it happened.

    Beating Fishing Pressure on the Lower Mountain Fork River

    Even on crowded days, this approach produced more bites and better fish than what I saw around me. While others were cycling flies or pounding the same obvious runs, slowing down and working structure paid off.

    Winter trout aren’t everywhere—but when you find them, they’re usually grouped up and willing to eat if you present the fly correctly.

    Final Takeaways from January Fly Fishing in Broken Bow, Oklahoma

    This trip reinforced a few winter fly fishing truths:

    • Cold water means less movement, not no movement

    • Streamers shine when surface activity fades

    • Structure and seams are non-negotiable in winter

    • Keeping a tight line on the swing triggers reaction bites

    Broken Bow in January isn’t about numbers—it’s about dialing in tactics and being patient enough to let the river show you where the fish live. When it all comes together, those cold-weather rainbows make every frozen finger worth it.

    If you’re heading to Broken Bow this winter, don’t be afraid to put the dries away and let a streamer do the talking.

  • Kayak Fishing for Redfish & Speckled Trout Tips & Tactics

    Kayak Fishing for Redfish & Speckled Trout Tips & Tactics

    Kayak fishing brings you closer to the water, offering an unmatched level of stealth and accessibility when targeting inshore species like redfish and speckled trout. Gliding through the marsh, feeling the rhythm of the tides, and watching a redfish tail in the shallows—these moments define why so many anglers choose kayaks for their fishing adventures. But success in a kayak isn’t just about casting in the right spot. Proper preparation, technique, and safety play just as big a role as choosing the right lure.

    In this guide, we’ll cover essential gear, fishing techniques, and key safety considerations to ensure your time on the water is both productive and enjoyable.

    Kayak Fishing: Why It’s Perfect for Redfish & Speckled Trout

    Fishing from a kayak allows you to reach areas boats can’t, where pressured fish find refuge in the shallows. These quieter waters are often rich with bait, making them prime feeding grounds. Redfish thrive in skinny water, pushing into grass flats to hunt for shrimp and crabs, while speckled trout hold near oyster beds, waiting to ambush baitfish. The kayak’s silent approach gives you a major advantage in these scenarios, allowing you to get close without spooking fish.

    But with the rewards of kayak fishing come unique challenges. Unlike fishing from a boat, you need to account for factors like stability, positioning, and the ever-changing coastal environment. That’s why having the right gear and knowledge is essential.

    Essential Kayak Gear for Saltwater Fishing

    The Right Kayak

    A stable sit-on-top fishing kayak is ideal for inshore waters. Look for a model with:

    Good Stability – Wider kayaks allow you to stand and sight fish.

    Adequate Storage – You’ll need space for tackle, rods, and safety gear.

    Pedal or Paddle Drive – Pedal kayaks keep your hands free, but a quality paddle is crucial.

    Must-Have Accessories

    Push Pole – A lightweight push pole is invaluable for silently maneuvering through shallow water without disturbing fish.

    Anchor System – A stake-out pole works best for shallow flats, while a small anchor or drag chain helps in deeper water or current.

    Rod Holders & Tackle Crate – Organizing your gear prevents clutter and makes for a smoother fishing experience.

    Dry Bag & Waterproof Case – Keep your phone, keys, and important items dry and secure.

    Safety Gear

    PFD (Personal Flotation Device) – Always wear a PFD, no exceptions. A fishing-specific PFD has extra pockets for storing essentials.

    Whistle & Light – Coast Guard regulations require a whistle and a light for low-light conditions.

    First-Aid Kit – Accidents happen. Be prepared for hooks, cuts, or stings.

    Bilge Pump or Sponge – For draining excess water from your kayak.

    Kayak Positioning & Anchoring Correctly

    Staying in the right position while fishing is crucial. The wind, tide, and current all play a role in where your kayak drifts, so knowing how to control your positioning keeps you on fish longer.

    Stake-Out Pole – For shallow waters, a stake-out pole allows you to quietly anchor without disturbing the bottom.

    Drift Anchors – A drift sock slows your kayak’s movement when fishing open flats or channels in windy conditions.

    Anchoring with a Rope System – If using a traditional anchor, attach it to an anchor trolley system to adjust your positioning without changing your cast direction.

    A key tip: Always place your anchor off the bow or stern to prevent your kayak from tipping sideways in strong currents.

    Weather Monitoring & Tidal Awareness

    The conditions on the water can change quickly, and being prepared can make the difference between a great trip and a dangerous situation.

    Check the Weather Forecast – Wind speeds over 15 mph make kayaking challenging. Storms can develop quickly, so always check the radar before heading out.

    Know the Tide Charts – Both redfish and speckled trout are heavily influenced by tides. An incoming tide often brings fish into shallow feeding zones, while an outgoing tide funnels bait into deeper water, creating ambush points.

    Watch for Lightning – If you hear thunder, it’s time to head in. Open water is one of the worst places to be during a storm.

    Finding Redfish & Speckled Trout from a Kayak

    Redfish Hotspots:

    Shallow Grass Flats & Marshes – Redfish love feeding on crabs and shrimp in the grass. Look for tailing fish or nervous bait.

    Tidal Drains & Creek Mouths – As the tide moves, redfish wait in deeper cuts for bait to be pulled into their strike zone.

    Shorelines with Structure – Wind-blown shorelines, oyster bars, and submerged grass beds all hold redfish.

    Speckled Trout Hotspots:

    Oyster Reefs & Drop-Offs – Trout use reefs as feeding grounds, especially near deeper water.

    Sand and Grass Pockets – Speckled trout roam these areas, ambushing baitfish.

    Current Edges & Channels – Trout hold near points where baitfish get swept past them.

    Best Lures for Kayak Fishing

    For Redfish:

    Paddle Tail Soft Plastics – JVS Custom Baits Rip Rap in Copper Penny and H&H/DOA Paddle Tails are great for covering water.

    Gold Spoon – A classic lure for redfish, especially in stained water.

    Topwater Lures – Early mornings or calm days call for walking baits like the Super Spook Jr.

    For Speckled Trout:

    Soft Plastics on a Jig Head – The JVS Speed Shrimp in White and Gold is a deadly choice.

    Topwater Lures – Trout are aggressive surface feeders, and the Heddon One Knocker Spook can trigger explosive strikes.

    Suspending Twitch Baits – The MirrOlure 52MR is excellent for cooler months when trout feed deeper.

    Kayak Fishing Strategies for Success

    Stealth & Approach

    Kayaks give you a natural advantage in stealth, but even the smallest noise can spook fish in shallow water.

    Paddle quietly – Use soft, controlled strokes or a push pole to move.

    Avoid sudden movements – Even shifting your weight too fast can send out unnatural ripples.

    Cast ahead of your target – Let the fish come to your lure instead of landing it right on their head.

    Using the Wind & Current to Your Advantage

    Drift fishing – Let the wind and current carry you naturally along a shoreline or over a reef while casting.

    Positioning – Set up so you’re casting with the wind for longer, more accurate presentations.

    Final Thoughts

    Kayak fishing for redfish and speckled trout is one of the most rewarding ways to experience inshore fishing. With the right preparation, awareness of conditions, and strategic approach, you’ll put more fish in the kayak while staying safe on the water.

    Stay Connected with Beyond the Cast

    Thanks for reading! If you enjoyed this post and want more fishing tips, trip reports, and on-the-water action, be sure to follow along.

    Subscribe to our YouTube channel for in-depth videos, gear breakdowns, and on-the-water adventures. Stay up to date by following us on Facebook, where we share fishing reports, trip updates, and connect with fellow anglers.

    Join the conversation, share your catches, and let’s keep exploring the water together.

    Tight lines, and see you Beyond the Cast!

    What’s your top kayak fishing tip? Drop a comment below!

  • Part 6: Full Circle — What the Backcountry Teaches Us

    Part 6: Full Circle — What the Backcountry Teaches Us

    There’s a rhythm that sets in when you spend days wandering rivers, casting dry flies, and capturing the land through your lens. After hiking into La Plata, following the Pine River Trail, rising early on the Animas, and whispering along the Dolores, something starts to shift—not just in the way you fish, but in how you move through the world.

    This final chapter isn’t about a specific cast or photo. It’s about what all of this meant once I came off the trail, rinsed the mud off my boots, and looked back at the miles behind me.

    From Maps to Moments

    When I first sat down to plan this trip, it was a checklist: routes to hike, rivers to fish, hatches to chase. I studied topo maps and overlays on Google Earth, watched weather systems roll in and out of the San Juans, and marked backup camp spots in case storms closed the trail.

    But once you’re out there, none of that matters as much as the small moments. Like the first rise in a quiet pool. Or the sound of elk bugling across a valley at dawn. Or finding the perfect shaft of morning light filtering through lodgepoles, with a river bend waiting beneath it.

    The Camera Changed Everything

    I brought my Canon R5 to document the trip, but photography became more than just documentation—it became a second way of fishing. I wasn’t just casting for trout anymore. I was casting for light. Waiting for angles. Watching how clouds moved across the sunlit ridges. Timing the shutter for a take or the ripple of a rise.

    Using Sigma and Canon L-series lenses, I played with depth and storytelling: wide shots to show scale, macro shots to capture tiny streamside blooms, long exposures for rivers flowing like silk. Editing in Lightroom on my iPad Pro, often while huddled in a tent during afternoon showers, gave me time to reflect while still on location.

    What the Rivers Taught Me

    Each river had something to say.

    La Plata taught me to slow down and observe.

    The Pine River showed me the power of patience and hiking deep.

    The Animas reminded me to cast boldly, to adapt, and to respect fast water.

    The Dolores whispered the importance of silence, solitude, and light.

    Fly fishing in these places wasn’t just about catching trout—it was about connectingwith wild places. And photography made me see them differently. Not just as terrain to cover or fish to find—but as stories, shapes, and shifting light worth remembering.

    The Final Campfire

    On the last night, I sat at a bluff above the Dolores, fire crackling, stars just beginning to show. I had one more trout on the line earlier that evening, and one more photo of the sky turning peach above the canyon wall. The tent was pitched, the boots were drying, and my gear—rod and camera alike—was dusty but intact.

    It hit me then: This trip was less about fish and more about presence. About choosing to walk farther, wait longer, and look more closely. About building a rhythm between motion and stillness, casts and clicks, silence and shutter.

    So What Comes Next?

    I’ll be back on the flats of the Texas Coast soon—casting from my kayak, camera tucked into my hatch. And later this year, another mountain trip to Maine where I’ll be fishing for brooks. Then up to Colorado and Utah. Maybe back to New Mexico. That’s the beauty of it: the stories never end. The rivers are always waiting.

    Final Reflections and Tips

    Planning is critical, but stay flexible—rivers don’t follow your itinerary.

    Photography adds depth to fishing; carry your camera, even if it slows you down.

    Capture everything, not just the fish—landscape, weather, details, movement.

    Don’t chase numbers. Chase the experience. The cast. The quiet. The light.

    Bring a journal or use your camera as one. Tell your story while you’re still in it.

    Thanks for following this journey.

    Whether you’re chasing trout in the Rockies or tailing reds on a coastal flat, I hope this series inspires you to slow down, look deeper, and carry both a rod and a lens. The wild places are out there—and they’re best explored with muddy boots, weathered gear, and eyes open to everything between the casts.

    Want to revisit the full series?

    Check out the landing page https://beyond-the-cast.com/wilderness-water-a-colorado-fly-fishing-and-photography-series/ where all six parts are organized and downloadable.

  • Part 4: Animas Mornings — Big Water and Bigger Scenes

    Part 4: Animas Mornings — Big Water and Bigger Scenes

    The Animas River is a different kind of challenge. It’s not a quiet alpine trickle or a glassy meadow stream—it’s loud, wide, and unapologetically wild. Flowing straight through Durango, Colorado, the Animas is part urban fishery, part wilderness artery. It forces you to think bigger—wider water, heavier flies, longer casts—but still rewards that same backcountry patience.

    This part of my trip was about rising early, walking the banks in the soft golden light, and chasing browns and rainbows with both rod and camera in hand.

    Sunrise in Durango

    I woke up before first light, the streets of Durango still quiet. With a thermos of hot coffee, my Sage Spectrum C reel rigged on a 9’ 5wt rod, and my Canon R5 slung over my shoulder, I made my way to the water’s edge just as the sky began to glow.

    The Animas River Trail makes access easy through town, but don’t let that fool you—there are real fish in this river, and they know how to fight. I found a spot just below a rocky chute, where the water slowed into a deep green run bordered by cottonwoods.

    Casting into the Current

    Big water requires smart setups. I tied on a #10 Pat’s Rubber Legs with a #14 Flashback Pheasant Tail dropper, running under an indicator with a bit of split shot to get it deep. These trout hold tight to seams and structure, often near the bottom.

    On my third drift, the indicator twitched. I set the hook and felt immediate weight—no acrobatics, just a steady pull. A few minutes later, I landed a thick rainbow, chrome-bright and peppered with tiny spots. I kept the fish in the net, let it rest, and grabbed a few quick shots with my 24–70mm lens and a shallow depth of field to blur out the river behind.

    Photography on Big Water

    The Animas is perfect for dramatic shots. With high banks, old iron bridges, and light that shifts quickly with the clouds, it’s a river made for wide angles. I switched to a 16–35mm lens, shot low from the riverbank, and captured the first sunlight hitting the canyon walls with the water reflecting every shade of blue and green.

    I experimented with ND filters for long exposures, letting the current blur while boulders and logs stayed sharp. These kinds of photos tell the story of movement—how the river breathes and shifts around each bend.

    Wildlife Along the Banks

    Between casts, I kept my eyes open for more than just trout. I spotted a flicker of movement near a rock outcrop—just a blur of fur and a flicking tail. I crouched low and reached for my camera. There, nestled in a patch of wildflowers, a chipmunk was nibbling on a seed head, completely unaware of me. I dialed in my Canon R5 with the 70–200mm lens, adjusted for soft natural light, and waited. The frame came together perfectly: golden grass swaying in the breeze, the chipmunk centered in a moment of stillness. A quiet, unexpected portrait of mountain life, full of charm and detail.
    With my 70–200mm lens, I captured tight shots from a distance—one of the benefits of shooting early before the trail sees much foot traffic.

    I also grabbed some frames of the little things—dewdrops on wild grassclose-ups of river stonescaddis cases clinging to rocks—the quiet details that add depth to both fishing and photography.

    Urban Meets Wild

    Fishing the Animas in Durango is a unique experience. You can hear the occasional train whistle or morning jogger on the trail, yet still feel completely locked in with the river. It’s a good reminder that wild places don’t have to be far from home—they just have to be approached with the right mindset.

    With a few solid fish landed and a full memory card, I took a break under the old railroad bridge, watching the light shift across the river. That’s the magic of a morning on the Animas—you show up early, stay patient, and let the day unfold at its own pace.

    Tips for Fly Fishing and Photography on the Animas River

    Best Time: Early mornings for light, fewer people, and active fish

    Top Flies: Pat’s Rubber Legs, Flashback Pheasant Tails, Jigged Hare’s Ear Nymphs

    Gear: 5wt or 6wt rod, Sage Spectrum C reel, floating line with split shot

    Photography Musts: Wide-angle lens, polarizer, tripod for longer exposures

    Location Notes: Durango River Trail access is great, but hike downstream or upstream early for quieter water

    Fly fishing the Animas taught me how to adapt—heavier flies, bolder casts, and a willingness to pause the fishing for a perfect photo. It reminded me that the story isn’t just about the catch—it’s about the experience, the light, the sounds, and the stillness between the casts.

    Next up: Part 5 — Whisper Water — Solitude and Browns on the Dolores River

  • Planning My Fishing Trips: From Texas Marshes to Colorado’s Wild Trout Streams

    Planning My Fishing Trips: From Texas Marshes to Colorado’s Wild Trout Streams

    Every fishing trip I take starts with a map, a cup of coffee, and a little imagination. Whether I’m launching my kayak into the quiet marshes of Galveston Bay or loading up my fly rod for a week chasing trout in the mountains of southwest Colorado, I treat every trip like its own adventure.

    Over time, I’ve built a system that helps me find the right water, prepare for changing conditions, and capture moments along the way through fishing photography. It’s a mix of digital scouting, tide and river flow research, fly fishing strategy, and a lot of intuition.

    Here’s how I plan my trips—from coastal redfish missions to high-country fly fishing—along with the tools, tactics, and gear that help me get the most out of every cast.

    Step One: Finding the Right Water

    When I’m planning a coastal trip around Galveston, I start with Google Earth fishing maps. I zoom in on marsh drains, shell reefs, and grass flats, marking potential ambush points where redfish and speckled trout might be waiting for bait to push through with the tide.

    For trout fishing trips, I turn to the TroutRoutes app, especially when heading into places like the Dolores River, Pine River, Animas River, or Florida River in Colorado. TroutRoutes shows me public access points, fly fishing regulations, and real-time stream flows—all in one spot. It’s hands-down one of my favorite apps for planning fly fishing trips in Colorado.

    Screenshot trout fishing map of Dolores River using TroutRoutes
    Screenshot trout fishing map of Dolores River using Google Earth

    I also pull up local fly shop reports and check in with forums and social groups. A few minutes of reading recent trip reports can save me hours on the water later.

    Timing is Everything: Tides, River Flows & Weather

    Fishing success is all about timing and conditions.

    On the coast, I build my trips around tide charts, solunar tables, and wind forecasts. I want to be on the water as the tide’s moving—either pulling bait into the marsh or draining it out through cuts and creeks. That moving water gets everything active, especially when paired with stable pressure and clean water.

    For my Colorado trips, I pay close attention to USGS stream gauges. If flows are too high from runoff or summer storms, I might switch to a smaller tributary or hit a tailwater like the lower Dolores. Watching water temperature is equally important—trout get lethargic in warmer water, especially in late summer.

    “Success often comes down to 15 minutes of movement—when the tide shifts or the hatch explodes.”

    My Fishing Strategies: Flats to Freestones

    Inshore Fishing: Texas Marsh Tactics

    When I’m chasing redfish on the flats, I’m looking for signs of life—nervous bait, shrimp jumping, birds diving, or the golden back of a redfish pushing through grass. I love fishing with paddle tails, especially the JVS Custom Baits Rip Rap in Copper Penny or a 3.5” Speed Shrimp when fish are keyed in on crustaceans.

    If I’m fly fishing in the marsh, I keep it simple: crab and shrimp patterns, long leaders, and a quiet approach. Sight casting to tailing reds never gets old.

    Mountain Fly Fishing: Reading Water & Matching the Hatch

    In Colorado, fishing rivers like the Pine or Animas means constantly adjusting to what the water gives me. One bend might call for dry flies in pocket water, the next might demand nymphs under an indicator in a deep, slow pool.

    When the hatch is on—especially during a caddis or stonefly emergence—I’m in heaven. There’s something about watching a trout rise in fast water, especially when I’ve hiked in for miles with just a small pack and a fly box in my pocket.

    Safety First: Especially in the Backcountry

    Whether I’m kayaking a remote bay system or hiking into the upper Florida River, I take safety seriously.

    • I carry offline maps and GPS, especially when I’m deep in the mountains or out of cell range in a bay system.

    • I use a Personal Locator Beacon (PLB) for emergencies—peace of mind goes a long way.

    • In mountain country, I pack layers for changing weather, a water filter, and bear spray when needed.

    Knowing how to read the weather—and knowing when to pull the plug—has saved me more than once.

    Capturing the Experience: Fishing Photography in the Field

    Fishing is about more than just catching fish. For me, it’s also about the quiet moments between casts—the mist rising off a river at dawn, a redfish tail breaking the surface, or a trout slipping back into cold, clear water.

    That’s where photography comes in. I bring my Canon R5, along with a few key lenses: a Canon L-series for landscape shots, and a Sigma for tighter portraits of fish and wildlife.

    I use:

    • A K&F Concept tripod for stability when shooting long exposures

    Polarizing filters to cut glare and bring out the detail in water shots

    • A dry bag and padded camera insert to protect my gear in the kayak or backpack

    Some of my favorite moments are captured during the golden hour—sunset glowing off a canyon wall in the Animas, or first light over the saltgrass back home in Galveston.

    Final Thoughts: Why I Plan Fishing Trips This Way

    I fish for the thrill of the catch—but also for the quiet, the challenge, and the story. The time I spend planning my trips—researching tides, scouting rivers, organizing gear—is all part of the journey.

    Fishing the Dolores River one day and stalking redfish on the Texas coast the next keeps me connected to the water in totally different ways. Both require patience, curiosity, and a little humility.

    If you’re planning your own trip—whether it’s chasing tailing redfish or hiking into a hidden trout stream—take your time. Look at maps. Check the flows. Watch the weather. Bring a camera. And most importantly, enjoy the ride.

    Tight lines and clear skies—see you out there.

  • Kayak Fishing Dickinson Bayou

    Kayak Fishing Dickinson Bayou

    Dickinson Bayou is an underrated gem for Texas anglers, offering a rare mix of inshore and freshwater fishing opportunities. This winding waterway, stretching between Houston and Galveston, features both brackish and freshwater environments, making it one of the few places where you can catch redfish, speckled trout, flounder, and largemouth bass—all in the same trip. With easy kayak access, plenty of structure, and year-round fishing opportunities, it’s a must-visit for anglers looking to mix things up.

    Sunrise on Dickinson Bayou

    In this Beyond the Cast blog, we’ll break down the best launch points, seasonal patterns, and proven techniques for targeting both inshore and freshwater species in Dickinson Bayou.

    Why Kayak Fish Dickinson Bayou?

    Unlike open water areas like West Bay or Christmas Bay, Dickinson Bayou offers a controlled, protected environment with minimal wind and boat traffic, making it ideal for kayak anglers. The bayou features oyster beds, submerged structure, and marsh drains that hold inshore predators, while its upper sections provide excellent largemouth bass fishing around laydowns and submerged timber.

    The brackish water mix creates a unique opportunity where you can catch bass and redfish in the same stretch of water, depending on the salinity levels.

    Best Kayak Launch Points

    1. Paul Hopkins Park – A great starting point for bass fishing in the upper bayou. This area has more freshwater influence, submerged timber, and slower-moving water where largemouth bass thrive.

    2. Ray Holbrook Park – Provides access to both freshwater and brackish areas, making it a great spot to target multiple species in one trip.

    3. Dickinson Bayou Boat Ramp (Highway 146) – A prime launch for inshore species like speckled trout, redfish, and flounder, as the bayou transitions to saltier water.

    Target Species and Seasonal Patterns

    Inshore Species (Redfish, Trout, Flounder)

    Redfish
    Speckled Trout
    Flounder

    Redfish: Present year-round, redfish move between the shallow marsh edges and deeper bends of the bayou. Look for them near oyster beds or ambushing bait near structure.

    Speckled Trout: More common in the lower bayou where salinity is higher. They hold in deeper holes during winter and move toward bait schools in summer.

    Flounder: A spring and fall favorite, flounder stack up near drains and along drop-offs.

    Largemouth Bass

    Spring & Summer: Bass are highly active, staging near submerged trees, grass lines, and deeper pockets along the bank. Topwater frogs and spinnerbaits shine in the warmer months.

    Fall & Winter: Bass move deeper into holes and near structure, where slow-moving soft plastics and crankbaits are the go-to options.

    Best Lures for Dickinson Bayou

    Inshore Lures:

    H&H Paddle Tails and DOA Paddle Tails – Excellent for covering water, especially rigged on a light jighead and bounced off the bottom.

    JVS Custom Baits 3.2 Rip Rap in Cinnamon Gold – This lure mimics baitfish well in the stained waters of the bayou.

    JVS Speed Shrimp in White and Gold – Great for targeting speckled trout and redfish near deeper channels.

    Gulp! Shrimp or Mud Minnow on a Jighead – Deadly for flounder, especially near marsh drains.

    Largemouth Bass Lures:

    Bass caught on Dickinson Bayou

    H&H Paddle Tails (White or Chartreuse) – A great crossover lure for bass in brackish water, these work well on a light jighead or weighted swimbait hook. Slow-roll them near laydowns and grass lines for reaction bites.

    Texas-Rigged Soft Plastics (Creature Baits, Worms, Flukes) – Perfect for working submerged timber and drop-offs.

    Spinnerbaits (White or Chartreuse) – A great way to trigger reaction bites around structure.

    Frogs & Topwater Lures – In the summer, bass explode on frogs in the backwaters and grassy edges.

    Crankbaits & Jerkbaits – Ideal for cooler months when bass are holding deeper.

    Fishing Strategy and Tidal Influence

    Like most Texas waters, understanding tides plays a crucial role in Dickinson Bayou fishing.

    Outgoing Tide: Fish stage near marsh drains, creek mouths, and bends where baitfish get pulled out.

    Incoming Tide: Redfish push shallow to feed, while bass tend to stay near structure unaffected by tides.

    Slack Tide: Slower fishing for inshore species, but bass can still be caught by working deeper structure.

    Final Thoughts

    Dickinson Bayou is a fantastic spot for kayak anglers looking to mix inshore and freshwater fishing in one trip. Whether you’re tossing a paddle tail for speckled trout or slow-rolling an H&H Paddle Tail for largemouth bass along a submerged tree, this bayou offers a little bit of everything.

    Stay tuned to Beyond the Cast for more in-depth breakdowns of Texas inshore and freshwater fishing, and be sure to check out our YouTube channel for on-the-water footage of kayak fishing in Dickinson Bayou!

    Tight lines!

  • How to Read Tides for Better Kayak Fishing: Understanding Movement and Positioning

    How to Read Tides for Better Kayak Fishing: Understanding Movement and Positioning

    Kayak fishing is all about being in the right place at the right time, and nothing dictates fish movement more than the tide. Whether you’re chasing redfish pushing into the shallows or speckled trout staging near structure, understanding how water moves will help you position yourself for better catches.

    Unlike fishing from a boat, a kayak limits how far and fast you can move. That means planning around the tides isn’t just helpful—it’s essential. In this post, we’ll break down how tides work, where fish go during different stages, and how to position your kayak to take full advantage of tidal movement.

    The Basics of Tides: What You Need to Know

    Tides are the rise and fall of water levels caused by the gravitational pull of the moon and sun. Along the Texas coast, we generally experience a mix of:

    Two high tides and two low tides per day (semi-diurnal tides)

    One high tide and one low tide per day (diurnal tides)

    These patterns shift throughout the year, and understanding them helps you predict when and where fish will be actively feeding.

    Tides affect more than just water depth—they influence current strength, bait movement, and fish behavior. Let’s look at how different tidal stages impact fishing.

    How Each Tide Stage Affects Fish Movement

    Incoming Tide (Rising Water)

    What happens: Water pushes up onto the flats, flooding marshes and grass beds. Baitfish, shrimp, and crabs move into shallow areas, followed by hungry predators.

    Best fishing areas:

    • Grass flats and flooded marshes where redfish hunt for crustaceans.

    • Oyster bars and sand pockets where speckled trout ambush bait.

    • Creeks and drains where baitfish move inland with the rising water.

    Kayak positioning tip: Set up near marsh edges, grass flats, or points where water is moving in. Cast lures upcurrent and let them drift naturally toward the strike zone.

    High Tide (Peak Water Level)

    What happens: Water levels are at their highest, spreading bait over a larger area. Fish can be more scattered, making them harder to locate.

    Best fishing areas:

    • Shallow pockets where redfish are cruising, often tailing.

    • Deeper grass edges where speckled trout stage.

    • Channels and drop-offs where fish wait for the next tidal shift.

    Kayak positioning tip: Paddle quietly along flooded grass flats and look for signs of activity like wakes, tailing fish, or nervous bait. If fish are spread out, cover water with a paddle tail soft plastic or a topwater lure to draw attention.

    Outgoing Tide (Falling Water)

    What happens: Water drains from the flats, concentrating bait into deeper channels, cuts, and drop-offs. Predators position themselves to take advantage of the easy meals being pulled by the current.

    Best fishing areas:

    • Tidal drains and creek mouths where baitfish get funneled into deeper water.

    • The edges of oyster reefs where trout wait to ambush prey.

    • Wind-blown shorelines with structure that hold redfish.

    Kayak positioning tip: Anchor near a drain or channel mouth and work lures with the outgoing current. A popping cork with a shrimp imitation works great in these scenarios, as does a soft plastic jig bounced along the bottom.

    Low Tide (Lowest Water Level)

    What happens: Water is at its lowest, exposing oyster reefs, mud flats, and deeper potholes. Fish retreat to deeper water but still remain close to structure.

    Best fishing areas:

    • Deeper channels and holes where fish are concentrated.

    • Drop-offs near sandbars and reefs.

    • Shallow areas where fish may be “trapped” waiting for the next incoming tide.

    Kayak positioning tip: If the tide is really low, be cautious of getting stuck in shallow areas. Focus on deeper structure and work slower-moving baits like suspending twitch baits or soft plastics on a jig head.

    How to Use Tides to Plan Your Kayak Fishing Trip

    1. Check the Tide Charts Before You Launch

    Apps like Tides4FishingNOAA Tide Predictions, or Windy provide real-time tide data for your area. Look at when the tide will be rising or falling and plan your trip around those peak movement windows.

    2. Consider Wind Direction

    Wind can either help or hurt your fishing trip. A strong wind against the tide can slow water movement, while a wind pushing with the tide can accelerate it. Adjust your kayak positioning accordingly to take advantage of natural bait movement.

    3. Look for Areas That Funnel Water

    Anywhere water is forced through a smaller area—like a creek mouth, jetty, or channel—will create a natural ambush point for predators. These areas are excellent for targeting redfish and trout as the tide moves in or out.

    4. Use the Current to Your Advantage

    Instead of fighting the current, position your kayak so you can cast into it and retrieve your lure naturally with the flow. This mimics how baitfish move, making your presentation more effective.

    5. Stay Mobile, but Be Strategic

    Kayak fishing requires efficiency. Instead of paddling aimlessly, use the tide to drift through productive areas, covering more water with minimal effort. If the bite slows down, move to a new location where the current is stronger or weaker, depending on the stage of the tide.

    Final Thoughts

    Tides are one of the most important factors in inshore fishing, and learning to read them will significantly improve your success on the water. By understanding how water movement affects fish behavior and positioning your kayak accordingly, you’ll put yourself in the best possible spots to find actively feeding redfish and speckled trout.

    Next time you hit the water, take a few minutes to study the tide charts and plan your approach—you’ll be amazed at how much of a difference it makes.

    Stay Connected with Beyond the Cast

    Thanks for reading! If you enjoyed this post and want more fishing tips, trip reports, and on-the-water action, be sure to follow along.

    Subscribe to our YouTube channel for in-depth videos, gear breakdowns, and on-the-water adventures. Stay up to date by following us on Facebook, where we share fishing reports, trip updates, and connect with fellow anglers.

    Join the conversation, share your catches, and let’s keep exploring the water together.

    Tight lines, and see you Beyond the Cast!

    What’s your favorite tide stage to fish? Drop a comment below and share your experience!

    Let me know your thoughts in the comments below!

    Your email address will not be published. Required fields are marked *

  • Abu Garcia Black Max Rod and Reel Combo Review: A Budget-Friendly Workhorse for Fresh and Saltwater Fishing

    Abu Garcia Black Max Rod and Reel Combo Review: A Budget-Friendly Workhorse for Fresh and Saltwater Fishing

    When it comes to finding an affordable yet reliable baitcasting combo, the Abu Garcia Black Max Rod and Reel Combo consistently ranks among the best options for beginner and budget-conscious anglers. Designed primarily for freshwater fishing, I wanted to see how it would hold up in saltwater conditions, particularly for targeting redfish, speckled trout, and flounder along the Texas Gulf Coast.

    After testing this setup in both environments, I found that the Black Max combo delivers solid performance in a variety of fishing situations—but with some important considerations if you plan to use it in saltwater.

    First Impressions

    Right out of the box, the Abu Garcia Black Max combo has a sleek, aggressive design with a black and red color scheme. The reel is lightweight, and the rod has a good balance between sensitivity and power. While it’s marketed primarily as a bass fishing combo, I wanted to see how it performed against hard-fighting inshore species.

    Rod Features & Performance

    The 24-ton graphite rod is lightweight but strong, making it a solid choice for both freshwater and inshore saltwater fishing. Here’s what stands out:

    Medium Power, Fast Action – Offers great hook-setting power while maintaining enough sensitivity for finesse techniques.

    Decent Durability – The rod holds up well for light to medium saltwater fishing, but it’s not built for heavy-duty offshore applications.

    How It Performs in Saltwater

    I tested the Black Max rod with a variety of lures, including soft plastics, topwaters, and spoons. It casted well, handled redfish and speckled trout without issue, and provided enough flex to absorb strong runs. However, after extended saltwater use, I did notice some corrosion on the guides, so regular rinsing and maintenance are essential.

    Reel Features & Performance

    The Abu Garcia Black Max Baitcaster is one of the best entry-level reels on the market, offering smooth operation, decent casting distance, and a reliable drag system.

    Key Features:

    4+1 Ball Bearings – Provides smooth retrieval and casting.

    MagTrax Braking System – Helps prevent backlash, making it beginner-friendly.

    Smooth Drag System (18 lbs Max) – Strong enough for bass, redfish, and smaller saltwater species.

    Lightweight Graphite Frame – Durable for freshwater but requires extra care in saltwater.

    Casting & Drag Performance in Saltwater

    The Black Max reel performed surprisingly well in saltwater, handling slot-sized redfish and speckled trout without issue. The drag system is smooth and powerful, which is key when fighting fish that make long runs, like redfish in the marsh.

    However, the reel is not fully corrosion-resistant. After a few trips, I noticed some rust developing on the screws and internal components, even with proper rinsing. If you plan to use this reel regularly in saltwater, I recommend applying corrosion-resistant oil after each trip.

    Pros:

    Pros & Cons for Saltwater Fishing

    Affordable & Great Value – One of the best baitcasting combos for the price.

    Smooth Drag & Casting – Handles inshore species well.

    Versatile – Works for bass, redfish, trout, and even flounder.

    Not Fully Corrosion-Resistant – Requires extra care in saltwater.

    Lightweight & Comfortable – Easy to use for long fishing sessions.

    Cons:

    ❌ Line Guides Prone to Corrosion – Rinse and dry thoroughly after saltwater use.

    Tips for Using the Abu Garcia Black Max in Saltwater

    If you plan to use this combo in saltwater, here are a few key tips to extend its life and improve performance:

    1️⃣ Rinse thoroughly after every trip – Use freshwater to remove any salt deposits, especially from the reel, guides, and handle.

    2️⃣ Lubricate with corrosion-resistant oil – Apply a light coating of oil to the bearings, screws, and drag system after each saltwater trip to prevent rust.

    Comfortable EVA Handle – The grip is ergonomic and comfortable for all-day fishing.

    3️⃣ Use braided line with a fluorocarbon leader – 30-40 lb braid is a great mainline choice for strength and sensitivity in saltwater. Pair it with a 15-20 lb fluorocarbon leader for stealth, abrasion resistance, and better lure presentation when targeting redfish, speckled trout, and flounder.

    4️⃣ Consider upgrading to a saltwater-rated reel – If you fish in saltwater frequently, a reel like the Abu Garcia Revo X Inshore will offer better corrosion resistance and longevity.

    5️⃣ Check the line guides regularly – The rod’s guides can corrode over time, especially with salt buildup. Cleaning them after each trip will help maintain smooth casting and prevent damage to your line.

    By following these tips, you can maximize the lifespan and performance of your Abu Garcia Black Max combo, even in saltwater conditions!

    Q&A Section

    Q: Can the Abu Garcia Black Max be used in saltwater?

    A: Yes, but with proper maintenance. It’s designed for freshwater, so it’s not fully corrosion-resistant. Make sure to rinse and lubricate it after each saltwater trip.

    Q: How does it perform against saltwater fish like redfish and trout?

    A: It holds up well against slot-sized redfish, speckled trout, and flounder. However, for larger bull reds or stronger inshore species, you may need a heavier-duty combo.

    Q: What’s the best fishing line to use with the Black Max in saltwater?

    A: 15-20 fluorocarbon works great for saltwater fishing. It casts well and provides the strength needed for inshore fish.

    Q: How does the braking system handle windy conditions?

    A: The MagTrax braking system helps reduce backlash, but it’s not as adjustable as high-end baitcasters. In windy conditions, you may need to tighten the spool tension knob to prevent backlashes.

    Q: Would you recommend this combo for someone who primarily fishes saltwater?

    A: If you occasionally fish saltwater, yes—it’s a great budget-friendly option. However, if you fish saltwater frequently, I’d recommend upgrading to a saltwater-rated baitcaster like the Abu Garcia Revo X Inshore or Shimano SLX XT.

    Final Verdict: Is the Abu Garcia Black Max Worth It for Saltwater Fishing?

    For anglers who fish both freshwater and saltwater, the Abu Garcia Black Max combo is a fantastic budget-friendly option. It offers smooth casting, reliable drag, and decent power for inshore species like redfish, speckled trout, and flounder.

    However, since it’s not fully corrosion-resistant, proper maintenance is essential. If you’re looking for a low-cost baitcaster for occasional saltwater trips, the Black Max is a solid choice.

    Would I buy it again? Absolutely—for  a budget-friendly setup, the Abu Garcia Black Max delivers great value.

    Review of the Abu Garcia

    Stay Connected with Beyond the Cast

    Thanks for reading! If you enjoyed this post and want more fishing tips, trip reports, and on-the-water action, be sure to follow along.

    Subscribe to our YouTube channel for in-depth videos, gear breakdowns, and on-the-water adventures. Stay up to date by following us on Facebook, where we share fishing reports, trip updates, and connect with fellow anglers.

    Join the conversation, share your catches, and let’s keep exploring the water together.

    Tight lines, and see you Beyond the Cast!

  • In-Depth Spring Redfish Behavior in Freeport & Galveston

    In-Depth Spring Redfish Behavior in Freeport & Galveston

    Spring is an exciting time for inshore anglers targeting redfish along the Texas coast, especially in the Freeport and Galveston areas. As water temperatures rise, redfish transition from their winter haunts into the shallows, feeding aggressively on baitfish and crustaceans. To consistently find and catch redfish this season, it’s crucial to understand their movement patterns, feeding behavior, and how tides and weather influence their activity.

    In this post, we’ll break down spring redfish behavior and proven tactics for both the Freeport and Galveston areas so you can make the most of your time on the water.

    Seasonal Transition: How Spring Affects Redfish

    Redfish spend much of the winter in deeper channels, back lakes, and protected bayous, where they seek out stable water temperatures. As spring brings warmer weather, they begin pushing into shallow grass flats, marsh drains, and oyster beds, where food becomes more abundant.

    Recent Observations from the Water

    Last week, I noticed a significant increase in redfish moving into the shallows and grass flats. Both slot-sized reds and bull reds were cruising shorelines, especially in the marshy backwaters of Freeport and the grassy flats around Galveston’s West Bay. The warming trends throughout the day had these fish feeding aggressively, with multiple tailing reds in less than a foot of water.

    Key environmental changes driving redfish movement:

    Rising water temperatures (60°F-75°F) – Increases redfish activity and feeding.

    Bait migrations – Shrimp, mullet, and menhaden begin pushing into shallower estuaries.

    Tidal influences – Higher tides allow reds to move into newly flooded grass flats.

    Spring rains and freshwater flow – Can impact redfish locations, especially near river mouths and marsh drains.

    Redfish Movement Patterns in Freeport & Galveston

    Recent Trip Insights

    On my last trip, I noticed redfish moving into wind-protected flats and bayous as the day warmed up. In the morning, reds were still hanging around deeper drop-offs near bayous and channel edges. By late morning, they were actively feeding along shorelines and oyster reefs in Christmas Bay, Drum Bay, and the backwaters of Galveston’s West Bay.

    Key Areas to Target in Freeport & Galveston

    Freeport

    Bastrop Bay & Christmas Bay – Shallow grass flats, oyster reefs, and marsh drains hold plenty of reds during a rising tide.

    Drum Bay & Hoskins Bayou – Great for targeting redfish in marsh channels and deeper bayous during outgoing tides.

    Cold Pass & San Luis Pass Back Lakes – Clearer water and strong tidal flow make these areas prime for sight fishing.

    Galveston

    West Bay (North Deer Island & Greens Lake) – Excellent springtime spots for redfish hunting bait along grassy shorelines.

    Jones Bay & Chocolate Bay – Shallow mud and shell bottoms warm up quickly, attracting feeding reds.

    East Bay (Anahuac Pocket & Marsh Drains) – Productive on an outgoing tide as bait flushes from the marshes.

    Tides, Wind, and Feeding Behavior

    Tides & Best Feeding Windows

    On my last trip, the outgoing tide was the most productive, especially near marsh drains where redfish were stacked up waiting for bait to flush out. Slack tides were slow, but once the water started moving again, the bite picked up fast.

    Outgoing tides – Best for ambush feeding near marsh drains and cuts.

    Incoming tides – Reds push into newly flooded grass flats and shoreline pockets.

    Slack tide – Slower bite; good time to relocate or make adjustments.

    Wind & Its Effect on Redfish

    South winds help push warmer water into the bays, keeping reds more active.

    North winds after a front can slow things down, pushing fish into deeper areas.

    Slight chop vs. calm conditions

    • Slight chop makes redfish more aggressive.

    • Calm conditions make reds spookier, requiring long casts and stealthy approaches.

    4. Feeding Patterns & What Redfish Eat in Spring

    Primary Forage for Spring Redfish

    Shrimp – A top bait choice in early spring, especially around marsh drains.

    Mullet – Bigger mullet become a key food source as temperatures warm up.

    Crabs – Found in grassy shorelines and a favorite target of tailing reds.

    Menhaden & Pinfish – Common in open water and around reefs.

    Best Lures from My Last Trip

    JVS 3.5 Speed Shrimp (White & Gold) – Worked great on a slow retrieve along the flats.

    H&H Paddle Tail (Golden Bream) on a 1/8 oz Jighead – Perfect for bouncing near oyster beds.

    Gold Spoon (1/4 oz) – Great for covering water and triggering reaction bites.

    Adjusting to Changing Spring Conditions

    Cooler Mornings

    • Work slow-moving soft plastics near deeper bayou edges.

    • Look for mud-bottom areas that retain heat overnight.

    Warmer Afternoons

    • Target flats and grass shorelines, where reds become more active.

    • Throw paddle tails or topwaters near structure.

    Windy Days

    • Focus on wind-blown shorelines, where bait is being pushed.

    • Use louder lures like a popping cork with a shrimp imitation.

    Calm & Clear Days

    • Look for tailing reds in the shallows.

    • Scale down to lighter fluorocarbon leaders (12-15 lb) and more natural-colored baits.

    Interactive Map: Best Spring Redfish Locations

    Google earth screenshot
    Google earth screenshot

    For a better look at these key fishing spots in Freeport and Galveston, I recommend using Google Earth or interactive fishing maps. These tools can help identify:

    Oyster reefs and grass flats where redfish are feeding.

    Marsh drains and bayous that hold fish on moving tides.

    Depth changes and structure that redfish relate to in different conditions.

    Final Thoughts

    Spring is one of the best times to target redfish in Freeport and Galveston, with warming waters bringing fish into the shallows and increasing feeding activity. Whether you’re working marsh drains, grass flats, or oyster reefs, understanding how redfish move with the seasons and tides will give you an edge on the water.

    Every trip is a learning experience, so get out there, apply these strategies, and adjust to what the fish are telling you. Don’t forget to share your catches and experiences with us!

    Stay Connected with Beyond the Cast

    Subscribe to our YouTube channel for fishing videos, gear breakdowns, and on-the-water action. Stay up to date by following us on Facebook, where we share fishing reports, trip updates, and connect with fellow anglers.

    Join the conversation, share your catches, and let’s keep exploring the water together.

    Tight lines, and see you Beyond the Cast!

  • Mastering Inshore Saltwater Fishing in Galveston West Bay for Bigger and Better Catches

    Mastering Inshore Saltwater Fishing in Galveston West Bay for Bigger and Better Catches

    Grass flats Galveston West Bay

    Inshore saltwater fishing is an exciting challenge, especially when targeting prized species like redfish and speckled trout. Success in these waters requires more than just casting a line—you need to understand the right techniques, how fish behave with tidal movements, and where to find them. In this guide, we’ll break down essential strategies, including the use of maps to illustrate tidal flows and prime fishing spots, to help you land bigger and better catches.

    Understanding Tidal Movements and Fish Behavior

    Tides play a crucial role in inshore fishing, influencing how and where redfish and speckled trout feed. These species rely on moving water to bring food to them, so knowing when and where the tides are strongest can greatly increase your chances of success.

    Incoming Tide – As the tide rises, baitfish and shrimp move into marshes, grass flats, and estuaries. Redfish and trout follow, feeding aggressively in these areas.

    Outgoing Tide – As water drains out, bait is pulled through channels, cuts, and creek mouths. This creates prime ambush points for hungry fish.

    Slack Tide – Minimal water movement can slow down feeding activity, making it a less productive time to fish.

    Hotspot: Fishing Galveston West Bay

    Galveston West Bay is one of the top inshore fishing destinations on the Texas coast, offering a mix of shallow flats, oyster reefs, and deep channels that make it ideal for targeting redfish and speckled trout. Here are some key areas to focus on:

    North Shoreline – The marshy edges and grass flats along the north side of the bay are excellent for sight fishing redfish, especially on an incoming tide.

    Oyster Reefs (like Confederate Reef & Carancahua Reef) – These structures hold bait and attract both trout and redfish, making them great places to fish during moving tides.

    Cold Pass & Greens Lake – These areas serve as natural funnels for tidal movements, creating excellent ambush spots where fish congregate.

    Using maps to analyze these locations along with tidal patterns can help you plan your trips more effectively. 

    Seasonal Strategies for Galveston West Bay

    Winter Fishing Tactics

    During winter, water temperatures drop, pushing redfish and speckled trout into deeper, more stable areas. Key strategies include:

    Targeting Deep Channels & Holes – Areas like the ICW (Intracoastal Waterway), deeper sections of West Bay, and channels leading to the Gulf hold fish seeking warmer water.

    Slow-Presenting Soft Plastics – Using a slow retrieve with a soft plastic on a jig head mimics sluggish baitfish, making it a go-to technique for cold-water trout.

    Fishing Mud & Shell Bottoms – These areas retain heat better than sand, attracting fish looking for slightly warmer conditions.

    Summer Fishing Tactics

    As temperatures rise, fish patterns shift, and early mornings or late evenings become prime times to target them. Key strategies include:

    Topwater Action at Sunrise & Sunset – Speckled trout and redfish become aggressive in low-light conditions, making this the perfect time for walking-the-dog-style lures.

    Fishing the Marsh & Grass Flats – Higher water levels push redfish into shallow marshes and grassy shorelines, where they feed on shrimp and baitfish.

    Working Deeper Structure Midday – As the sun heats up, fish retreat to deeper reefs and channels. Using live bait or slow-sinking lures can be effective.

    By adjusting your approach based on the season and using maps to track tidal movements, you can maximize your success in Galveston West Bay year-round.

    Using Maps to Identify Prime Fishing Spots

    Google earth showing tidal movements

    To maximize success, I use existing maps with annotations to highlight key areas where tidal movements concentrate bait and fish. Some top locations include:

    Grass Flats & Oyster Bars – These areas hold bait and attract redfish, especially during higher tides.

    Creek Mouths & Drains – Outgoing tides pull bait through these pinch points, making them ideal ambush zones for trout and redfish.

    Drop-offs & Deep Holes – In colder months or during extreme heat, fish retreat to deeper areas where water temperatures are more stable.

    Maps help visualize these areas and understand how tides move water through them, improving your ability to predict fish activity.

    Techniques for Catching Redfish and Speckled Trout

    Looking at Redfish tailing on the edge of the banks

    Sight Fishing for Redfish

    When water clarity allows, look for redfish tailing in shallow flats or cruising along marsh edges. Using a weedless soft plastic or a live shrimp under a popping cork can be deadly in these situations.

    Jigging for Speckled Trout

    Trout are aggressive feeders, and a jig with a soft plastic (such as a paddle tail or shrimp imitation) bounced near the bottom often gets their attention. Target deeper drop-offs and areas with moving water.

    Topwater Action

    During low-light conditions—early morning or late evening—both species will strike topwater lures. Walk-the-dog style baits, like the Zara Spook, work well over shallow flats and near oyster beds.

    Bringing It All Together: Video and Visuals

    To better explain these techniques and locations, I include videos and pictures in my blog posts. This way, you can see real-life examples of these fishing strategies in action. The combination of on-the-water footage, maps with annotations, and detailed explanations ensures you have all the tools needed to improve your inshore fishing game.

    Final Thoughts

    Mastering inshore fishing for redfish and speckled trout isn’t just about luck—it’s about understanding how these fish move with the tides, using maps to pinpoint the best locations, and applying the right techniques. By combining these strategies with real-time conditions, you can dramatically increase your success on the water.

    Thanks for reading! If you enjoyed this post and want more fishing tips, trip reports, and on-the-water action, be sure to follow along.

    Subscribe to our YouTube channel for in-depth videos, gear breakdowns, and on-the-water adventures. Stay up to date by following us on Facebook, where we share fishing reports, trip updates, and connect with fellow anglers.

    Join the conversation, share your catches, and let’s keep exploring the water together.

    Tight lines, and see you Beyond the Cast!