Dry fly fishing is one of the most visual and rewarding ways to catch trout—but it’s also one of the most misunderstood. Many anglers obsess over exact fly patterns while overlooking the fundamentals that actually matter: presentation, observation, and reading the water.
In this post, we’ll break down the core principles that consistently lead to success with dry flies—without falling into the trap of endless fly changes. This approach builds confidence, saves time on the water, and helps you understand why a fly works instead of relying on luck.
Dry Fly Presentation: The Make-or-Break Factor
You can have the “perfect” fly and still never get a take if the presentation is off.
Trout see thousands of drifting insects every day. What they don’t see is insects dragging sideways, skating unnaturally, or moving at a different speed than the current.
Key presentation elements to focus on:
• Drag-free drift – The fly must move at the exact speed of the current it’s floating in.
• Line and leader control – Mends matter more than fly choice.
• Approach angle – Casting slightly upstream or across allows the fly to drift naturally into the fish’s window.
A mediocre fly with a perfect drift will outfish the “right” fly with a poor presentation almost every time.
Look Around First: Let the River Tell You What to Use
Before tying anything on, slow down and observe your surroundings.
Ask yourself:
• Are insects actively flying?
• Do you see bugs on rocks, grass, or logs near the river?
• Are fish rising consistently or sporadically?
You don’t need to identify every insect down to the species. Instead, focus on:
• Size
• Color
• General shape
Matching those three elements gets you 90% of the way there.
If you see small, dark mayflies hovering and fish rising gently, you already know more than someone blindly cycling through fly boxes.
Stop Pattern Chasing: Limit Your Time Searching for the “Perfect” Fly
One of the biggest mistakes anglers make is changing flies too often.
Constantly swapping patterns does three things:
1. Breaks your rhythm
2. Wastes fishing time
3. Masks the real problem—usually presentation
A better approach:
• Pick one confidence pattern
• Fish it thoroughly
• Adjust how you fish it before changing what you fish
If the fly drifts well and matches the general hatch profile, it deserves time in the water.
Reading the Water: Where Dry Flies Actually Get Eaten
Dry flies don’t get eaten everywhere—they get eaten in predictable places.
Focus on:
• Seams where fast and slow water meet
• Foam lines that collect drifting insects
• Inside bends with softer current
• Tailouts below riffles
These areas funnel food naturally and allow trout to feed efficiently. A perfect dry fly dropped into dead water with no feeding lanes is still a low-percentage cast.
Understanding water movement often matters more than matching the hatch.
Why One Fly Works Over Another (Even When They’re Similar)
Ever notice how two flies in the same pattern family produce completely different results?
That’s rarely coincidence.
Subtle differences matter:
• Silhouette – A fly that rides lower may look more natural
• Hackle density – Sparse vs bushy can change how a fly drifts
• Float posture – Upright vs flush in the film
• Visibility – Not just for you, but for the fish
Sometimes the “better” fly isn’t closer to the insect—it’s closer to how that insect behaves in the current.
Instead of asking “What fly should I use?” start asking:
“How is this fly interacting with the water?”
That mindset shift changes everything.
Choosing Flies With Intention, Not Guesswork
Confidence comes from understanding—not luck.
When choosing a dry fly:
1. Match size and profile first
2. Consider how the fly will float
3. Think about the water type you’re fishing
4. Commit to fishing it well
The goal isn’t to own more flies—it’s to understand the ones you already trust.
What’s Next: Going Deeper Into Dry Fly Strategy
This post lays the foundation, but there’s more to unpack.
In the upcoming follow-up series, we’ll dive deeper into:
• Specific dry fly patterns and when to use them
• Adjusting presentations for different water types
• When to switch from dries to emergers or streamers
• How weather and light affect dry fly success
• Reading subtle rise forms and feeding behavior
Dry fly fishing isn’t about perfection—it’s about awareness, patience, and understanding how trout interact with moving water.
And once you get that dialed in, the surface comes alive.
January in Broken Bow, Oklahoma, is one of those trips that tests your patience—and rewards it if you’re willing to adjust. Cold mornings, cold water, and plenty of anglers on the river. This trip was a perfect reminder that winter fly fishing is less about forcing a pattern and more about reading the water, adapting your tactics, and committing to what the conditions are telling you.
Winter Conditions on the Lower Mountain Fork River
Most days started with air temps in the 30–40° range, and water temps hovered in the low-to-mid 40s. Some days were overcast with that soft winter light that feels fishy all day long, while others were bright and clear, putting the fish on edge—especially with moderate to heavy fishing pressure.
These conditions made trout less willing to move far for a meal. They weren’t looking up much, and they definitely weren’t chasing flies across the river. Everything about the water screamed slow, deliberate, and close to structure.
Starting with Dry Flies in Winter Conditions
Like most trips, I started optimistic—throwing dries during the warmer parts of the day. While there were occasional looks and a few half-hearted rises, dry fly action was limited. Winter bugs were sparse, and any surface activity was short-lived.
That’s when the switch needed to happen.
Committing to Streamers:
Once I stopped fishing dries and committed to streamers, the entire trip changed.
The fly that consistently produced was a damsel green olive marabou streamer. Simple profile, tons of movement, and just enough flash to get noticed without spooking pressured fish.
Why It Worked
In cold water, trout don’t want to waste energy. That marabou breathed with the current, even on slow swings, making the fly look alive without aggressive stripping. The color matched winter forage well, and the subtle action triggered reaction strikes rather than feeding strikes.
Reading the Water: Finding Winter Trout on the Lower Mountain Fork
The key wasn’t just the fly—it was where and how it was fished.
Seams and Soft Edges
Most of the better fish came from seams, especially where faster water dumped into slower runs. I focused on:
• The inside edge of seams
• Transitions from riffles into deeper runs
• Water where fish could sit comfortably and let food come to them
Casting across the seam and allowing the fly to swing naturally through that transition zone was deadly.
Big Boulders and Structure
The Lower Mountain Fork has plenty of large boulders, and in winter, those rocks are prime holding water.
I targeted:
• The downstream side of boulders
• Slight depressions created by current wrapping around structure
• Soft pockets directly behind rocks where trout could rest
These spots consistently held bigger rainbows, especially when other anglers walked right past them.
The Streamer Swing: Keeping a Tight Line for Reaction Strikes
One of the biggest producers on this trip was keeping constant tension on the line.
Instead of stripping aggressively, I let the streamer swing under tension, rod tip slightly downstream. That tight line did two things:
1. It let the marabou pulse naturally in the current
2. It allowed me to feel subtle takes instantly
Most strikes happened mid-swing or right as the fly started to straighten out below me. Big rainbows would crush the fly with intent—it wasn’t subtle when it happened.
Beating Fishing Pressure on the Lower Mountain Fork River
Even on crowded days, this approach produced more bites and better fish than what I saw around me. While others were cycling flies or pounding the same obvious runs, slowing down and working structure paid off.
Winter trout aren’t everywhere—but when you find them, they’re usually grouped up and willing to eat if you present the fly correctly.
Final Takeaways from January Fly Fishing in Broken Bow, Oklahoma
This trip reinforced a few winter fly fishing truths:
• Cold water means less movement, not no movement
• Streamers shine when surface activity fades
• Structure and seams are non-negotiable in winter
• Keeping a tight line on the swing triggers reaction bites
Broken Bow in January isn’t about numbers—it’s about dialing in tactics and being patient enough to let the river show you where the fish live. When it all comes together, those cold-weather rainbows make every frozen finger worth it.
If you’re heading to Broken Bow this winter, don’t be afraid to put the dries away and let a streamer do the talking.
Every year, the mountains of northern New Mexico pull me back with the same quiet force—towering ridgelines, a few icy creeks, and the promise of cutthroat rising in thin air. This year’s trip was no different, though the mountains definitely made me earn every fish. Between unpredictable storms, sharp temperature drops, and long miles of backcountry hiking, it was a trip that blended solitude, struggle, and some of the best dry-fly eats I’ve had in a long time.
A Week in the High Country
I camped in a stretch of the mountains where cell service dies, the wind carries the sound of nothing but water and pines, and the cold comes quick the moment the sun drops behind the ridgeline. My setup was simple and reliable—my lightweight backpacking equipment and my tent staked on a soft bed of pine needles in my regular spot, my sleeping bag rated just warm enough for the 30° nights, and a small cooking kit for coffee at sunrise and meals at dusk.
The river ran close enough that I could fall asleep to it and wake up with steam rising off the riffles. There’s a certain kind of clarity that only comes from unzipping a tent at dawn, breath hanging in the air, knowing you have nothing to do except explore water and find trout.
The Weather That Tried to Turn Me Around
Northern New Mexico always throws curveballs, but this year felt personal.
One morning brought blue skies and 65°, the next hit with hail and wind that bent the aspens sideways. Storm cells crawled across the Sangre de Cristos like slow giants, and I had more than one afternoon of sprinting back to camp with thunder rolling behind me. The cutthroat didn’t seem to mind, though—they just shifted where they held, huddling deep under banks until the sun returned.
It made the fishing more of a puzzle than usual, which honestly only added to the satisfaction.
Dialing in the Dry Fly Game
The cutthroat were keyed in on big terrestrials this year, but sizing mattered more than anything. Early in the week, I started tossing size 8 hoppers—big enough to ride high but small enough not to spook fish in clear, low water.
The sweet spot:
Size 10–12 tan parachute hoppers with a slim profile.
The fish would swipe aggressively at anything too bulky but absolutely crushed the medium-sized bugs that matched the natural grasshoppers landing in the shallows. Most eats came on the edges of seams or right up against undercut banks where the creek grass hung over the water.
When the water got a little off-color from storms, I switched to a hopper-dropper with a small beadhead nymph and picked up a few extra fish hiding deep. But the real magic stayed on top.
Black & Purple Streamers That Saved the Afternoons
When the clouds stacked up and the temperature dropped, the surface bite shut down fast. That’s when the small black-and-purple streamers came alive.
Stripping a size 8–10 leech or thin-profile streamer through the deeper pools produced some of the biggest cutthroat of the trip. Something about the dark silhouette in that glacier-cold water gets these trout fired up, especially right before the storms rolled in.
A slow, twitch-pause retrieve was the ticket. Too fast, and they didn’t commit. Letting the fly hover in the current triggered the chase.
Photography in the Thin Air
This was another trip where the camera never left my pack for long. With the Canon R5 and my go-to lenses, I found moments everywhere: mist hanging over the river, sun shafts cutting through pines, and the kind of mountain light that only lasts a few minutes but transforms everything it touches.
Low-angle shots near the water made for the best compositions—cutthroat colors glowing in natural light, textured rock beds, and reflections off still pockets. I played with longer exposures on the tripod during the slower fishing hours, capturing the smooth flow of the river as the shadows stretched across the valley.
Even when the fish weren’t biting, the camera gave me another reason to slow down and appreciate the place.
Why These Trips Matter
Every year, the world feels louder and busier, which makes trips like this one even more important. Northern New Mexico gives you exactly what you need—not always what you want. Some days were cold and tough. Some casts were blown sideways by the wind. But every fish, every moment of quiet, and every sunrise over the ridges felt earned.
“A luxury I can’t live without? Conservation programs for trout and the watersheds they depend on. It might not be material, but clean, cold water and the ecosystems behind it are what fuel every one of my passions—from fly fishing and photography to writing and exploring remote rivers.”
For more information on this subject check out my in depth blog on conservation!
Trout are more than just a favorite target for anglers—they are the pulse of healthy river systems. Across the U.S., conservationists, biologists, and local communities are fighting to protect this iconic fish. From restoring native species to safeguarding bug life and clean water, trout conservation is a story of ecological revival.
The Big Picture: Why Trout Conservation Matters
Trout are indicator species—meaning their presence signals a healthy aquatic ecosystem. Cold, clean, oxygen-rich water is a requirement for their survival. As rivers face threats from drought, pollution, invasive species, and urbanization, trout populations have suffered.
Conservation isn’t just about saving fish. It’s about preserving entire ecosystems, protecting biodiversity, and ensuring future generations can experience wild waters and native trout.
State-by-State Tactics: Unique Approaches to Trout Conservation
Every state has its own climate, terrain, and trout populations, which means conservation looks different across the U.S. Here are some standout efforts:
State-by-State Tactics: Unique Approaches to Trout Conservation
Every state has its own climate, terrain, and trout populations, which means conservation looks different across the U.S. Here are some standout efforts:
New Mexico
• Focus: Native Rio Grande cutthroat trout.
• Tactics: Remote stream restoration, stream temperature monitoring, and translocation of native cutthroat to protected high-altitude waters.
Utah
• Focus: The Utah Cutthroat Slam.
• Tactics: A public-incentive conservation program that encourages anglers to fish for native strains while funding habitat restoration through registration fees.
Montana
• Focus: Wild trout management.
• Tactics: Minimal stocking, strict regulation on water withdrawals, and temperature-sensitive fishing closures to protect fish during droughts.
North Carolina
• Focus: Brook trout and Appalachian streams.
• Tactics: Reforestation around streams, culvert removal for fish passage, and robust hatchery-supported native stocking.
Tennessee
• Focus: Southern Appalachian brook trout.
• Tactics:
• Native Restoration: Tennessee has been working to restore the only native trout species in the state—the Southern Appalachian brook trout—in the Great Smoky Mountains and Cherokee National Forest.
• Genetic Protection: Biologists use genetic testing to identify and protect pure strains of native brook trout, which have been diluted by historic stocking of northern strains.
• Habitat Rehabilitation: Streams have been restructured by removing barriers like old logging roads and replacing culverts to reconnect fragmented habitats.
• Partnership Programs: Tennessee Wildlife Resources Agency (TWRA) works with the National Park Service and Trout Unlimited to monitor stream health, conduct temperature studies, and reintroduce brook trout into restored waters.
“Brook trout are more than just a native species—they’re a symbol of our mountain streams. We’re rebuilding those lost legacies one cold stream at a time.”
— Tennessee Wildlife Resources Agency
Water Conservation: The Root of Trout Survival
Water is the most critical resource for trout. Without cold, clean, well-oxygenated water, nothing else matters.
Key Tactics:
• Riparian Buffer Zones: Planting vegetation along stream banks to reduce runoff, lower water temperatures, and provide cover.
• Flow Management: Coordinated water releases from dams and reservoirs to mimic natural stream flow and reduce thermal stress.
• Agricultural Partnership Programs: Working with farmers to limit irrigation drawdowns, reduce pesticide runoff, and restore stream access.
The Importance of Bug Life: Mayflies, Caddis, and Stoneflies
Aquatic insects are a foundational part of trout ecosystems. These bugs aren’t just trout food—they indicate stream health and play key roles in nutrient cycling.
Conservation Gains:
• Increased macroinvertebrate diversity is a sign of success in restoration projects.
• Studies show stream habitat improvements often lead to a 30–60% increase in bug hatches within two years.
• Healthy hatches fuel trout growth and reproduction—especially during the spring and fall feeding windows.
Restoring Native Trout: Bringing Back the Originals
In many watersheds, native trout were lost due to overfishing, logging, mining, and the introduction of non-native species. Conservation efforts now aim to undo that damage.
Examples of Success:
• Greenback Cutthroat (Colorado): Once thought extinct, small remnant populations were found and used for native reintroduction efforts in the South Platte drainage.
• Apache Trout (Arizona): Federally protected, with recovery projects in high mountain streams and strong community involvement.
• Lahontan Cutthroat (Nevada & California): Massive scale-up of reintroduction projects into Pyramid Lake and nearby alpine waters.
How Trout Are Raised: Inside Hatcheries and Wild Stocking Programs
Raising trout plays a key role in both conservation and sportfishing. But not all hatchery programs are created equal.
Modern Hatchery Practices:
• Genetic Integrity: Breeding programs now focus on maintaining native genetics rather than just producing numbers.
• Disease Control: UV filtration, oxygen monitoring, and isolation units prevent outbreaks.
• Stream-Ready Conditioning: Juvenile trout are raised in stream-simulation tanks with natural flow and live prey to prepare them for the wild.
How You Can Help: Small Steps, Big Impact
1. Practice Catch and Release: Use barbless hooks and handle fish with wet hands.
2. Volunteer with Trout Unlimited or Local Stream Projects.
3. Support Native Reintroduction Programs: Donate, advocate, or join citizen science efforts.
4. Fish Responsibly: Avoid fishing during warm-water conditions or low-flow events.
Conclusion: Conservation Is a Collective Story
Trout conservation is a powerful blend of science, tradition, and community. Whether you’re a fly angler hiking into a remote canyon or a weekend bait fisherman on a stocked lake, your actions matter. Together, we can ensure that cold, clean trout streams continue to flow wild and full of life.
While out fishing in my kayak this week, I heard a familiar sound drifting through the trees — the classic call of a barred owl echoing from the same stretch of shoreline where I’ve heard it many times before. I instinctively put my fishing rod down, grabbed my camera from the dry box, and quietly let my kayak drift.
Perched in the dense canopy was the owl, exactly where I hoped it would be. Its deep, rhythmic call — “Who cooks for you? Who cooks for you-all?” — had led me right to it. These birds have a way of disappearing into the background, but experience teaches you where to look. Sure enough, there it was — steady, alert, and perfectly camouflaged against the mottled bark.
I slowly raised my camera and fired off a few frames as the owl turned its head, locking eyes with the lens. The light filtering through the trees added a soft, natural glow to its feathers, and I knew I had something special. I managed several shots before it glided silently deeper into the woods.
Barred owls are year-round residents along wooded creeks and bayous, and this particular one feels like a quiet companion on many of my fishing trips. There’s something timeless about that moment — kayak drifting, rod set aside, camera in hand, and nature doing what it does best.
Scroll down to see a few of my favorite photos from the encounter. Minimal editing — just a little contrast and clarity in Lightroom to bring out the mood of the moment.
Camera: Canon R5 | Lens: Canon L series 400
Tripod: K&F Concept (left in the kayak this time) | Edited on iPad Pro using Lightroom
Ever spot a barred owl while on the water or hiking near creeks? Drop a comment — I’d love to hear your stories.
After a few peaceful days of fly fishing in the cool, clear waters of Beavers Bend State Park, I’m back home on the Texas coast. The trip was a perfect spring escape—misty mornings on the Lower Mountain Fork River, sight-casting to rising trout, and evenings by the fire with the sound of the river nearby. It’s hard to beat the mountain air and those deep pools filled with willing browns and rainbows.
But as great as the Oklahoma waters were, there’s nothing quite like home. The salt air, the sound of mullet flipping in the back marsh, and that first tailing redfish on a still morning—it all draws me right back in. With water temperatures rising and tides shifting into summer patterns, it’s time to return to chasing reds, speckled trout, and maybe even a few flounder on the fly.
I’ll be back out on the Galveston flats this week, rod in hand and camera packed, ready for what the tides bring in. Stay tuned for some coastal fly action—there’s plenty more coming.
Stay tuned for the full blog on Beavers Bend trip!
When is the last time you took a risk? How did it work out?
The last real risk I took wasn’t about money, career, or anything you could measure in numbers. It was a gamble on a hunch, a blue line on a topo map and a feeling that maybe—just maybe—that little remote stream tucked into the backcountry might be worth it.
It wasn’t easy to get to. No real trail, just a vague path of game trails and overgrown brush, with a few miles of elevation gain thrown in for fun. I packed light, but still had my fly gear, camera, tripod, and just enough food and water to make it through a long day (and maybe a rough night, if needed). I didn’t know if the stream would even hold fish—or be accessible for good photos—but I was all in.
What I found was better than expected.
The stream wound through a quiet alpine meadow, untouched and crystal clear, bordered by wildflowers and soft light that made the whole place glow. Brook trout darted in and out of the current, and cutthroat rose to dry flies like they hadn’t seen a human in years—maybe they hadn’t. I got some of my favorite shots of the entire trip that day. Reflections, action shots, and one perfect capture of a brookie suspended mid-release, framed by golden hour light.
That little risk—trusting the map, the instinct, and being willing to explore—paid off big. Not just in fish caught or photos taken, but in the feeling of discovering something wild and real. Those are the risks I live for.
After a long, demanding day, I find peace in the simplest moments—flipping through a good book, hiking a quiet trail, casting a fly into a still pool, or just watching the light shift through the trees. Whether it’s photography that helps me slow down and focus on the little details, or a walk through the woods to reset my perspective, nature is my go-to reset button. These moments remind me to breathe deeper, move slower, and live more intentionally.
Photography in the outdoors isn’t just about clicking the shutter—it’s about reading the light, finding intentional angles, and understanding how timing transforms a scene. Whether I’m hiking through wildflowers, waiting quietly in a bird blind, or navigating city streets with a wide lens, I’m always chasing the moment that tells the story best.
Timing the Wild: Bald Eagle at Golden Hour
This bald eagle shot captures more than a bird—it captures focus, patience, and light. I waited for the golden hour to gently highlight the eagle’s feathers and profile, shooting through a natural frame of blurred branches to keep attention on the intensity of its gaze.
Close-up of a bald eagle staring intensely with sharp yellow eyes, showcasing its powerful beak and detailed feathers against a blurred natural background
Outdoor bird photography tip: Use natural framing and soft backlight for dramatic wildlife portraits.
Gear: Canon R5 with canon 400mm L series lens. Edited in Lightroom for natural contrast and feather detail.
Path to the Sun: Framing With Leading Lines
This image of a wooden boardwalk leading toward the glowing sunset was all about golden hour beach photography and using strong leading lines. The reflection of sunlight on the wet boards gave the image texture and warmth, making it feel like you’re stepping straight into the light.
Photography tip: Position yourself at a low angle to exaggerate reflections and symmetry, especially when shooting at sunrise or sunset.
Gear: iPhone capture, edited in Lightroom Mobile to adjust warmth, contrast, and highlights.
Low and Wild: Bluebonnets and Cabins
Spring in Texas brings with it a flood of color—especially bluebonnets. This low-angle wildflower shot was taken by lying on the ground to let the flowers dominate the foreground. The rustic cabin in the background gives a sense of place and scale, inviting the viewer to imagine stepping into that clearing.
Texas Hill Country cabin with bluebonnets in full bloom, low-angle photography capturing rustic charm and wildflowers in spring
Photography tip: Don’t be afraid to get dirty—some of the best shots come from the ground level.
Fog and Structure: Lighthouse in the Mist
Fog can strip away distractions and emphasize mood. This shot of a lighthouse barely emerging through the coastal fog was taken early in the morning. The structure becomes a silhouette, and the lack of color enhances the sense of solitude.
Mist drapes the Hudson River Lighthouse in a soft veil of fog, capturing a quiet, ethereal moment on the water
Photography tip: Switch to monochrome or embrace fog’s desaturation in post to focus attention on contrast and composition.
Moments in Motion: Washington, D.C. Street Perspective
In this street photo of two people walking through Washington, D.C., I focused on symmetry and timing. Lining up the trees and path allowed the subjects to become part of the environment rather than the center of attention—storytelling through subtlety.
In black and white, two figures walk the National Mall in Washington, D.C., their shadows stretching across the sidewalk as the fading light of evening adds a touch of nostalgia to the scene
Gear: Canon 24–70mm lens.
Urban Giants: Low Angle in Cincinnati
Standing at the base of a towering building in Cincinnati, I wanted to emphasize the size and geometry of the architecture. Shooting from a low angle with a wide lens, I caught clean lines pulling skyward while the morning light cast soft shadows down the building’s face. The cloudy sky above added contrast to the structure’s strong verticals.
An old stone building, rich with history and character, stands as a testament to timeless craftsmanship and enduring architectural beauty
Architecture photography tip: Use a wide-angle lens and crouch low to create a sense of scale and grandeur. Overcast skies can be great for soft, even light.
Gear: Canon 16–35mm f/4L lens. Slight Lightroom correction for vertical distortion and contrast.
Echoes of Time: Plantation Home Beneath a Century-Old Oak
There’s something timeless about black and white photography—especially when the subject already carries a hundred years of history in its bones.
This image features a historical plantation home framed beneath the sprawling arms of a live oak tree that’s likely been standing for over a century. Shot in monochrome, every crack in the bark and weathered board on the home tells its own story. The absence of color lets the textures do the talking—the gnarled branches, the sharp contrast between shadow and light, the sun casting a soft glow on the edge of the roofline.
historic plantation home stands behind a century-old oak tree, its majestic branches creating a serene backdrop for the timeless architecture
What drew me to this shot wasn’t just the structure, but the relationship between the house and the tree. The oak doesn’t just stand in front of the house—it presides over it. Its limbs stretch wide like protective arms, yet its roots run just as deep into the same soil that built the home.
Photography tip: When capturing historic architecture in black and white, shoot during late afternoon or early morning when shadows stretch longer. Let contrast tell the story—light becomes your narrator.
Gear: Canon R5, 24–105mm L lens. Converted to monochrome in Lightroom, with emphasis on clarity and shadow depth.
Final Thoughts: Walk Farther, Wait Longer
Every photo tells a story, but it’s the search for that story—the walking, waiting, watching—that makes the capture worth it. Whether it’s chasing golden hour on a boardwalk in the Cozumel, crouching low to frame a Cincinnati building just right, or catching the fog wrap around a lighthouse like a secret, it’s all about finding the angle that speaks.
Some moments, like the soft silhouette of two people walking a path in D.C., are subtle. Others—like the commanding presence of a black-and-white plantation home beneath a 100-year-old oak—are loud in their stillness. They remind us that time, light, and history are always working together in the frame.
Behind the lens and out in the wild, whether I’m on the flats chasing redfish or tucked beneath a canopy of trees chasing light, my goal is always the same: tell a story worth pausing for. Through my blog, I share not just images, but the journey it took to get them—gear tips, camera setups, editing workflows, and the terrain beneath my boots.
Keep exploring, keep shooting, and always chase the light.
If the Animas River is a bold, rushing conversation, the Dolores River speaks in whispers. Tucked between the slopes and canyons of Southwest Colorado, this river winds through rugged terrain, shifting between dense forest, rocky cliffs, and sage-covered meadows. It’s a place of stillness, where every bend feels like it belongs to you—and the browns that live here feel like a gift you earn, not a prize you chase.
The Approach: Getting to the River
The upper Dolores is more remote than it looks on the map. Depending on where you go—above McPhee Reservoir or toward the West Fork—you’ll wind down forest service roads, sometimes dodging rockfall or puddles from last night’s rain. I pulled off just before sunrise at a bend that looked promising. No signs, no crowds, no footprints in the sand.
I geared up quickly: 9’ 4wt rod, Sage Spectrum C reel, floating line with a long 5x leader. I grabbed my K&F Concept camera pack, Canon R5, and my Sigma 24–70mm lens to start, knowing the early light would be soft and perfect for river compositions.
Quiet Water and the First Cast
The Dolores at this stretch was gentle—glasslike pools framed by golden willows, with the occasional riffle tumbling over polished rocks. I rigged a single dry: a #16 tan Elk Hair Caddis, and started casting upstream into the seams. The fish here weren’t picky, but they were spooky. Long leaders and slow movements were the name of the game.
The first brown came from under an overhang, perfectly camouflaged against the river bottom. I crouched low, played it gently, and then paused to shoot—kneeling at water level to capture its golden flanks against the mirror-like pool behind it.
Photographing Solitude
Photography here wasn’t about action—it was about silence. I slowed down and started looking for compositions that told a story: a pool framed by sunlit pine branches, reflections of clouds in still water, the gentle curve of the river disappearing into cottonwood shade.
Using a circular polarizer, I cut glare from the surface and exposed the rocks and movement underneath. I stopped often to shoot macro shots—moss on river stones, fresh caddis cases on logs, wildflowers just beginning to bloom along the bank. The Canon R5 let me switch between stills and slow-motion video, capturing the way wind moved through the reeds like a painter’s brush.
Fly Selection and Brown Trout Behavior
As the sun climbed higher, the trout moved deeper. I switched to a dry-dropper setup: a #14 Stimulator on top with a #18 Zebra Midge below. The browns in the Dolores aren’t huge, but they’re aggressive and feisty, especially when your drift is clean and natural.
I targeted small plunge pools below boulder-strewn riffles and deeper pockets shaded by cliff overhangs. Most takes were subtle—a twitch or a swirl rather than a splash. The largest of the day came from a tight seam below a fallen pine: a buttery brown with red spots vivid against olive flanks. I wet my hands, admired him in the net for a moment, then let him go.
Weather Watching and Midday Reset
As with most Colorado rivers, the Dolores plays by mountain rules—sunny one minute, storm clouds the next. By noon, dark clouds were building behind the ridges. I took the cue to rest, retreating to a patch of grass above the river, checking radar, and reviewing my shots on my iPad Pro. I backed up files, edited a few images in Lightroom using preset adjustments for contrast and warmth, and ate lunch while a soft rain moved through.
Evening Glow and Last Light
By late afternoon, the rain cleared, and the golden hour was beginning. I hiked upstream a little farther to a stretch with higher canyon walls and a series of gentle cascades. The light lit up the canyon like fire—red rocks glowing, the water catching flecks of sun, and the air thick with golden reflections.
This was my favorite photography session of the trip—shooting handheld with my 70–200mm lens, I caught reflections of cottonwoods in the river, crisp landscapes framed with long shadows, and one last brown trout rising in the golden light.
Why the Dolores Stays With You
Some rivers give you a lot right away. The Dolores gives slowly. It rewards patience, attentiveness, and a photographer’s eye. You may not land a dozen fish, but each one feels earned. And the scenes—the ones you only find by walking, waiting, and watching—make it unforgettable.
Fly Fishing Dolores River Essentials
• Best Flies: Elk Hair Caddis, Parachute Adams, Zebra Midges, Stimulators, Streamers in fast water
• Rod Setup: 4wt or 5wt rod, long leaders, floating line
• Tips: Stay low, fish slow, take your time to photograph the river between casts
• Safety Note: Watch afternoon storms; bring a small first-aid kit and map (no service in remote stretches) Insure you have downloaded all your offline maps
The Dolores River isn’t about action—it’s about appreciation. It asks you to slow down, to watch the way light plays on water, and to cast not just for fish, but for the memory of that perfect, quiet moment in the canyon.
Next Up: Part 6 — Full Circle: Reflections, Routines, and What the Backcountry Teaches Us
Some rivers don’t give up their secrets easily. The Pine River, also known as Los Pinos, is one of them. Tucked deep in the Weminuche Wilderness of Southwest Colorado, it requires effort, patience, and a willingness to hike into solitude. But if you’re after wild trout in clear mountain water—and the kind of light that makes your photos glow—there are few places more rewarding.
The Trailhead to Solitude
The journey starts at the Pine River Trailhead near Vallecito Reservoir. It’s a dusty parking lot, a worn wooden sign, and a reminder that you’re on the edge of something vast—the largest wilderness area in Colorado.
The trail runs along private land for the first few miles, so fishing and camping are off limits early on. But once you cross into the national forest boundary, the river opens up, wild and remote. The elevation gain is steady but forgiving, and the views just keep getting better. Towering peaks peek through pines, and wildflowers bloom along the trail like a postcard from July.
With my Canon R5, K&F Concept backpack, and 5wt rod, I hit the trail just after sunrise. The air was crisp, golden light filtered through the lodgepoles, and the river sparkled below.
Early Light and River Mist
I stopped just past the wilderness boundary where the river flattened into a lazy bend. The mist rose off the water like breath, and I dropped my pack to capture the moment. Using my 70–200mm lens, I focused on the layers—backlit pine branches, the soft swirl of fog, and the glint of sun hitting the waterline.
For long exposures, I mounted my tripod, dialed in a low ISO, and let the shutter run. These are the kinds of images I live for—where the emotion of the place shines through the frame.
Setting Up the Rig
The Pine River demands versatility. I rigged up a dry-dropper setup: a #14 Parachute Adams up top and a #16 Hare’s Ear Nymph trailing below. These fish are educated and spooky, especially in slow pools. I used long, fine tippet and cast from behind boulders, keeping my shadow off the water.
The first fish came from a seam near a fallen log—a small but healthy brown. I paused to photograph the catch, using my hand and net for scale, carefully positioning the fish with the sun behind me to avoid harsh glare. A few quick shots, then back in the water.
Fishing and Shooting in Rhythm
Backcountry fly fishing is about finding rhythm—between casts, between hikes, between light and shadow. I alternated between fishing pocket water and photographing the surroundings. A high ridge caught my eye, so I swapped out lenses and shot wide to capture the dramatic sweep of the river carving its way through the forested canyon.
I kept my camera settings flexible, using aperture priority mode to adapt quickly between moving trout and landscape shots. My K&F Concept backpack made transitions easy, with side access panels for grabbing a lens mid-hike or stashing a fly box fast.
Wild Trout and Wild Moments
The further I hiked, the wilder the water became. Cutthroat started showing up—small, brilliantly colored, and lightning quick. I switched flies to a #12 Yellow Humpy with a CDC midge dropper, and it paid off. Several fish rose in tight, riffled corners that required tricky casts and precise drifts.
I kneeled in cold, mossy shallows, capturing tight macro shots of wildflowers along the riverbanks—bluebells, Indian paintbrush, and buttercups reflected in the water’s surface. These images tell just as much of the story as the fish themselves.
Storms and Staying Safe
Mid-afternoon, the familiar rumble of thunder rolled through the canyon. I packed up fast, knowing that weather in the high country turns fast. The trail turned slick, and I was glad I had lightweight rain gear and a waterproof pack.
Back at camp, I dried off and reviewed photos on my iPad Pro, backed up my files, and journaled the day. A deep sense of satisfaction settled in—the kind you only get after chasing trout and light deep into the wilderness.
• Fishing Tip: Approach low, cast upstream, and let your dry fly lead the way
This stretch of the Pine River is what I chase—trout in untouched waters, scenes only your boots can reach, and photos you can’t take from the side of the road.
Up Next: Part 4 – Animas Mornings: Big Water and Bigger Scenes
There’s something about hiking into trout water that changes the whole rhythm of a trip. You leave behind the road noise, the cell signal, the crowded pull-offs—and start tuning into the sound of the wind through lodgepoles and the hush of a river just over the next rise. That’s what drew me to the La Plata River, tucked into a quiet stretch of high country in Southwest Colorado. Part fishing trip, part photo expedition—this was a day I won’t forget.
Starting the Hike: Pines, Shade, and Altitude
The La Plata River trailhead isn’t flashy. It starts modestly with a dirt pull-off and quickly dips into shady pine groves. The trail follows the contour of the valley with occasional glimpses of the river down below. What makes this hike special isn’t just the destination, but the quiet, ever-changing terrain: groves of aspen, mossy boulders, and alpine meadows dotted with summer wildflowers.
With my K&F Concept camera backpack strapped tight and a 4wt fly rod rigged up and ready to go, I eased into a slow pace, letting my eyes adjust to the light and scanning the trail for photo moments—a glint of water through the trees, a mule deer in the brush, shafts of light through pine needles.
Wildflowers and Wildlife: Photography on the Move
Early summer in this part of Colorado is a photographer’s dream. Bright orange Indian paintbrush, purple columbines, and patches of lupine lit up the trail edges. I switched to my 24–70mm lens, using a low angle to capture the pop of color against the green pines.
Light is everything here. I used a circular polarizer to punch up the color and reduce glare when shooting near water. My Canon R5 handled the dynamic light shifts like a champ—especially when a young mule deer stepped out into a clearing, perfectly backlit, right as I crested a ridge.
First Glimpse of the River
About two miles in, I heard it before I saw it. The La Plata winds through tight canyons and then flattens into glassy, slow runs bordered by grassy banks. I dropped my pack, switched into my wading shoes, and tied on a #14 Yellow Stimulator with a Beadhead Pheasant Tail dropper.
The water was crystal clear—trout country through and through.
Stealth and Strategy: Small Water Fly Fishing
Fishing the La Plata is a finesse game. These are wild fish, likely never hooked, and they spook at shadows. I crouched low, casting upstream into shady runs and behind midstream boulders. Several small browns darted for the fly but refused last second. On a good drift, the dropper disappeared and I brought in my first fish of the trip—a buttery brown trout with fire-orange spots. I paused for a quick photo with the fish hovering just above the net, backlit by the sun.
I love these moments—the stillness, the soft light, the ripple of success after a quiet approach. The fish here aren’t big, but they’re beautiful and strong.
The Midday Light Shift
By midday, the lighting got harsh—tougher for photos, but perfect for exploring. I shot reflections along a wide bend of the river, switching to a 70–200mm lens to compress layers of pine ridges and storm clouds moving in.
Back at a mossy boulder overlooking a slow pool, I set up my tripod for a long exposure of the water sliding through rocks. These are the frames I love—where fly fishing meets fine art photography.
Safety First in the Backcountry
Clouds started to build, as they often do in Colorado’s high country. I kept my eye on the sky, wrapping up fishing and heading back toward the trailhead before the afternoon storms rolled in. That’s one lesson I’ve learned: no fish is worth getting caught in a lightning storm above 9,000 feet.
On the hike out, I paused one last time to shoot the fading light over the valley, grateful for a day that felt more like a retreat than a mission.
Tips for Fishing & Photographing the La Plata River
• Start early: For soft light and calm water, hit the trail before sunrise.
• Use a dry-dropper rig: Small dries like Stimulators or Elk Hair Caddis paired with beadhead nymphs are deadly.
• Pack light, but smart: The K&F backpack let me carry camera gear, fly gear, food, and a rain shell without overload.
• Bring a polarizer: It transforms mid-day shots and makes colors pop.
• Shoot with purpose: Capture the fish, but also the landscape, light, and journey—it tells the full story.
This hike into the La Plata River reminded me why I chase these moments—where the line between fishing and photography disappears. The sound of moving water, a trout rising to a dry, and the snap of the shutter are all part of the same rhythm.
Up Next: Part 3 — Chasing Trout and Light on the Pine River Trail
Planning a backcountry fly fishing and photography trip is a lot like tying the perfect fly—you’ve got to think ahead, match conditions, and be ready to adapt. In this first part of my Colorado series, I want to share how I planned my multi-river adventure into the high country, blending two of my favorite things: fly fishing for wild trout and capturing the wild beauty of the mountains through a camera lens.
This trip took me deep into Southwest Colorado, targeting remote stretches of the La Plata River, Pine River, Dolores, Animas, and Florida River. Each river offered its own challenges, scenic backdrops, and trout behaviors—making the planning stage even more important.
Mapping the Adventure
I started with tools like Google Earth, Gaia GPS, and the TroutRoutes app to scout access points, trailheads, and water that looked fishy from above. Topo maps helped me estimate mileage and elevation gain for hikes, and I cross-checked each section with known public lands or wilderness boundaries.
The Pine River Trail and the La Plata River hikes stood out for their mix of beauty, remoteness, and good trout habitat. I marked down potential campsites along the trail and noted river crossings or sections that might become hazardous with runoff.
Timing the Trip
Late summer (late July through early September) is prime time for Colorado backcountry fly fishing. Snowmelt has usually slowed, making rivers more accessible, while hatches are still consistent. Wildflowers peak during this window, and the weather (though unpredictable) is often stable enough for longer treks.
I kept a close eye on weather reports, snowpack data, and monsoon activity, especially since lightning and flash floods are real dangers in the high country. I packed accordingly—with quick-dry layers, a solid rain jacket, and a waterproof K&F Concept camera backpack to keep my gear safe.
Fly Fishing Gear Considerations
I packed a 9’ 5wt rod for open water and a 7.5’ 4wt for tighter streams. I went with my trusty Sage Spectrum C reel and a variety of floating lines, knowing I’d fish mostly dries and light droppers. My fly box included a carefully curated selection:
• Parachute Adams (#14–18)
• Elk Hair Caddis (#14)
• Yellow Stimulators (#12–14)
• Beadhead Pheasant Tails (#16)
• CDC Midges (#20)
• Black Woolly Buggers (#8)
• Hoppers and flying ants (for summer action)
This wasn’t just a fishing trip—I had to think like a backpacker and a photographer, which made my packing even more dialed in.
Photography Planning
When it comes to fly fishing photography, weight and protection are huge. I brought my Canon R5, a 24–70mm f/2.8 lens for landscapes and action, and a 70–200mm f/2.8 for compression shots and wildlife. My K&F Concept carbon tripod gave me a lightweight but stable base for long exposures and evening light.
I also packed:
• Circular polarizer to reduce water glare
• ND filter for waterfalls and river movement
• Lens cloths, extra batteries, and SD cards
• Lightroom Mobile on my iPad Pro for quick edits in camp
When planning photography in the backcountry, it helps to scout shot locations beforehand using satellite images or even previous trip photos. I created a loose shot list: mist rising over pools, trout in hand with glowing light, macro shots of wildflowers, and long exposures of rivers at sunset.
Safety & Self-Sufficiency
One of the most critical parts of a backcountry fishing trip is safety. I carried a Garmin inReach Mini for emergencies and communication, plus a first-aid kit, headlamp, multitool, and bear spray (just in case). I let family know my plan, printed a trail map, and downloaded offline GPS maps.
Keeping camera gear dry was also a safety issue—because nothing ruins a trip faster than soaking your camera in a surprise storm or river dunk. The K&F camera backpack’s waterproof bottom and removable insert gave me peace of mind, even while wading or crossing creeks.
Building Flexibility Into the Plan
No matter how dialed in your route is, backcountry travel in Colorado demands flexibility. Storms can shut down trails. Rivers can blow out overnight. You can get to a perfect pool and find it unfishable due to runoff or debris.
So I planned several alternate camps and marked backup spots with easier access. I also packed extra food in case a day ran long, and my fly box had both attractors and match-the-hatch options.
Final Thoughts Before Hitting the Trail
Planning is half the fun of a trip like this—imagining where the fish might be, where the light will hit the canyon walls, and how to tell the story when it’s all over. I hope this series helps inspire your own adventures, and if you’re dreaming about chasing wild trout in wild places, stay tuned. Part 2 takes us into the forest along the La Plata River, where the trail narrows, the river gets clear, and every cast counts.
Up Next:Part 2 – Into the Pines: Hiking to the La Plata River with a Fly Rod and a Camera
Every fishing trip I take starts with a map, a cup of coffee, and a little imagination. Whether I’m launching my kayak into the quiet marshes of Galveston Bay or loading up my fly rod for a week chasing trout in the mountains of southwest Colorado, I treat every trip like its own adventure.
Over time, I’ve built a system that helps me find the right water, prepare for changing conditions, and capture moments along the way through fishing photography. It’s a mix of digital scouting, tide and river flow research, fly fishing strategy, and a lot of intuition.
Here’s how I plan my trips—from coastal redfish missions to high-country fly fishing—along with the tools, tactics, and gear that help me get the most out of every cast.
Step One: Finding the Right Water
When I’m planning a coastal trip around Galveston, I start with Google Earth fishing maps. I zoom in on marsh drains, shell reefs, and grass flats, marking potential ambush points where redfish and speckled trout might be waiting for bait to push through with the tide.
For trout fishing trips, I turn to the TroutRoutes app, especially when heading into places like the Dolores River, Pine River, Animas River, or Florida River in Colorado. TroutRoutes shows me public access points, fly fishing regulations, and real-time stream flows—all in one spot. It’s hands-down one of my favorite apps for planning fly fishing trips in Colorado.
Screenshot trout fishing map of Dolores River using TroutRoutes
Screenshot trout fishing map of Dolores River using Google Earth
I also pull up local fly shop reports and check in with forums and social groups. A few minutes of reading recent trip reports can save me hours on the water later.
Timing is Everything: Tides, River Flows & Weather
Fishing success is all about timing and conditions.
On the coast, I build my trips around tide charts, solunar tables, and wind forecasts. I want to be on the water as the tide’s moving—either pulling bait into the marsh or draining it out through cuts and creeks. That moving water gets everything active, especially when paired with stable pressure and clean water.
For my Colorado trips, I pay close attention to USGS stream gauges. If flows are too high from runoff or summer storms, I might switch to a smaller tributary or hit a tailwater like the lower Dolores. Watching water temperature is equally important—trout get lethargic in warmer water, especially in late summer.
“Success often comes down to 15 minutes of movement—when the tide shifts or the hatch explodes.”
My Fishing Strategies: Flats to Freestones
Inshore Fishing: Texas Marsh Tactics
When I’m chasing redfish on the flats, I’m looking for signs of life—nervous bait, shrimp jumping, birds diving, or the golden back of a redfish pushing through grass. I love fishing with paddle tails, especially the JVS Custom Baits Rip Rap in Copper Penny or a 3.5” Speed Shrimp when fish are keyed in on crustaceans.
If I’m fly fishing in the marsh, I keep it simple: crab and shrimp patterns, long leaders, and a quiet approach. Sight casting to tailing reds never gets old.
Mountain Fly Fishing: Reading Water & Matching the Hatch
In Colorado, fishing rivers like the Pine or Animas means constantly adjusting to what the water gives me. One bend might call for dry flies in pocket water, the next might demand nymphs under an indicator in a deep, slow pool.
When the hatch is on—especially during a caddis or stonefly emergence—I’m in heaven. There’s something about watching a trout rise in fast water, especially when I’ve hiked in for miles with just a small pack and a fly box in my pocket.
Safety First: Especially in the Backcountry
Whether I’m kayaking a remote bay system or hiking into the upper Florida River, I take safety seriously.
• I carry offline maps and GPS, especially when I’m deep in the mountains or out of cell range in a bay system.
• I use a Personal Locator Beacon (PLB) for emergencies—peace of mind goes a long way.
• In mountain country, I pack layers for changing weather, a water filter, and bear spray when needed.
Knowing how to read the weather—and knowing when to pull the plug—has saved me more than once.
Capturing the Experience: Fishing Photography in the Field
Fishing is about more than just catching fish. For me, it’s also about the quiet moments between casts—the mist rising off a river at dawn, a redfish tail breaking the surface, or a trout slipping back into cold, clear water.
That’s where photography comes in. I bring my Canon R5, along with a few key lenses: a Canon L-series for landscape shots, and a Sigma for tighter portraits of fish and wildlife.
I use:
• A K&F Concept tripod for stability when shooting long exposures
• Polarizing filters to cut glare and bring out the detail in water shots
• A dry bag and padded camera insert to protect my gear in the kayak or backpack
Some of my favorite moments are captured during the golden hour—sunset glowing off a canyon wall in the Animas, or first light over the saltgrass back home in Galveston.
Final Thoughts: Why I Plan Fishing Trips This Way
I fish for the thrill of the catch—but also for the quiet, the challenge, and the story. The time I spend planning my trips—researching tides, scouting rivers, organizing gear—is all part of the journey.
Fishing the Dolores River one day and stalking redfish on the Texas coast the next keeps me connected to the water in totally different ways. Both require patience, curiosity, and a little humility.
If you’re planning your own trip—whether it’s chasing tailing redfish or hiking into a hidden trout stream—take your time. Look at maps. Check the flows. Watch the weather. Bring a camera. And most importantly, enjoy the ride.
Galveston’s coastal marshes, beaches, and tidal flats serve as critical stopover points for migratory birds along the Central Flyway. For bird photographers, this region offers a dynamic blend of year-round residents and seasonal migrants, each presenting unique opportunities to capture stunning images.
Spending time on the water fishing, hiking through coastal trails, or wading the back bays gives me a front-row seat to this natural phenomenon. In this blog, I’ll explore the best locations for birdwatching in Galveston, break down the camera gear and settings that work best for bird photography, share editing tips, and discuss how angles and composition can elevate your shots.
Best Locations for Bird Photography in Galveston
Finding the right location is key to capturing great bird photographs. Galveston and the surrounding areas provide a variety of habitats, from salt marshes to coastal woodlands, attracting different species. Here are some of the best spots:
1. Bolivar Flats Shorebird Sanctuary
Great Egret
• One of the best spots for photographing shorebirds, pelicans, and wading birds.
• Low tide reveals expansive sandbars and mudflats, which attract feeding birds.
• Ideal for capturing birds in flight, reflections on wet sand, and birds interacting in flocks.
• Best time: Early morning and late afternoon for softer light and active bird behavior.
2. Galveston Island State Park
White Ibis in Galveston State Park
• A mix of beachfront, salt marshes, and coastal prairie draws a diverse range of species.
• Great location for spotting roseate spoonbills, ospreys, and herons.
• The marsh boardwalk offers close-up views without disturbing birds.
• Best time: Sunrise and sunset for golden light and fewer crowds.
3. San Luis Pass
• Excellent for capturing birds in action, such as pelicans diving or ospreys hunting.
Osprey with a freshly caught fish
• Strong currents and sandbars make this a hotspot for terns, gulls, and waders.
• The dramatic landscape adds depth to compositions.
• Best time: Morning, when birds are actively foraging.
4. Lafitte’s Cove Nature Preserve
• A wooded sanctuary perfect for warblers, buntings, and other migratory songbirds.
• A great place to practice close-up photography with perched birds.
• Best time: Spring and fall migration, when small songbirds stop to rest after crossing the Gulf.
5. Freeport Marshes & Christmas Bay
• These shallow waters attract egrets, herons, spoonbills, and ibis.
• Best explored by kayak to get low-angle shots and access hard-to-reach spots.
• Best time: Mid-morning when the sun is high enough to illuminate the birds.
Spoonbill
Camera Equipment for Bird Photography
1. Camera Body Recommendations
Bird photography requires fast autofocus, high resolution, and good low-light performance. My go-to camera is the Canon R5, which offers:
• 45MP resolution for capturing fine feather details.
• Animal Eye Autofocus to track birds in motion.
• Fast burst shooting (up to 20 FPS) for action shots.
Other great options include the Sony A1, Nikon Z9, or Canon R7 (for a budget-friendly APS-C choice).
2. Best Lenses for Bird Photography
A telephoto lens is essential for getting close to birds without disturbing them. My favorites:
• Canon RF 100-500mm f/4.5-7.1 L IS USM – Versatile for both perched and flying birds.
• Sigma 150-600mm f/5-6.3 DG OS HSM – Budget-friendly but sharp.
• Canon RF 600mm f/11 IS STM – Lightweight for handheld shooting.
A 1.4x or 2x teleconverter can extend reach but may reduce autofocus speed.
3. Ideal Camera Settings
• Shutter speed: 1/1000s or faster to freeze motion.
• Aperture: f/5.6–f/8 for sharpness and depth of field.
• ISO: 100–800 in good light, 1600+ in low light (with noise reduction in post).
• Focus mode: Continuous autofocus (AI Servo/AF-C) for moving birds.
Angles & Composition for Better Bird Photography
1. Eye-Level Shots
• Birds appear more engaging and natural when photographed at their eye level.
• How to do it: Shoot from a low position—kneel, lie down, or use a kayak.
• Example: A close-up of a sandpiper walking through shallow water, with a blurred background.
2. Backlit Silhouettes
• Creates dramatic, artistic images, especially at sunrise or sunset.
• How to do it: Position the bird between you and the sun for a glowing outline.
• Example: A heron standing in the marsh at dawn, surrounded by golden light.
Tricolored Heron in West Bay Galveston
3. Action Shots
• Captures birds hunting, taking off, or interacting.
• How to do it: Use fast burst mode and pre-focus on the area where the action is likely to happen.
• Example: An osprey diving for fish with wings fully extended.
4. Reflections & Water Scenes
• Water can add a symmetrical, serene effect to photos.
• How to do it: Shoot when the water is calm and position the bird where the reflection is clearest.
• Example: A pelican gliding over glassy water with a perfect mirror image below.
Pelican
Editing Techniques in Lightroom & Photoshop
1. Adjusting Exposure & Contrast
• Increase contrast to define feathers.
• Adjust highlights and shadows to recover details.
2. Enhancing Colors Naturally
• Use the HSL panel to fine-tune individual colors without oversaturation.
• Warm up images slightly for morning/evening shots.
3. Noise Reduction for High ISO Shots
• Use Lightroom’s Noise Reduction slider to smooth out grainy images.
• Apply selectively—too much can remove fine details.
4. Cropping for Composition
• Use the rule of thirds to position the bird in a natural frame.
• Leave space in front of the bird for a sense of movement.
Conclusion
Bird photography in Galveston offers a perfect blend of challenge and reward. Whether you’re tracking a flock of migrating shorebirds, watching a spoonbill feed in the marsh, or capturing an osprey mid-dive, each moment tells a unique story.
By knowing the best locations, using the right camera gear, mastering angles, and refining editing techniques, you can create images that truly showcase the beauty of the birds along the Central Flyway.
What’s your favorite birding spot in Galveston? Let me know in the comments!
Dickinson Bayou is an underrated gem for Texas anglers, offering a rare mix of inshore and freshwater fishing opportunities. This winding waterway, stretching between Houston and Galveston, features both brackish and freshwater environments, making it one of the few places where you can catch redfish, speckled trout, flounder, and largemouth bass—all in the same trip. With easy kayak access, plenty of structure, and year-round fishing opportunities, it’s a must-visit for anglers looking to mix things up.
Sunrise on Dickinson Bayou
In this Beyond the Cast blog, we’ll break down the best launch points, seasonal patterns, and proven techniques for targeting both inshore and freshwater species in Dickinson Bayou.
Why Kayak Fish Dickinson Bayou?
Unlike open water areas like West Bay or Christmas Bay, Dickinson Bayou offers a controlled, protected environment with minimal wind and boat traffic, making it ideal for kayak anglers. The bayou features oyster beds, submerged structure, and marsh drains that hold inshore predators, while its upper sections provide excellent largemouth bass fishing around laydowns and submerged timber.
The brackish water mix creates a unique opportunity where you can catch bass and redfish in the same stretch of water, depending on the salinity levels.
Best Kayak Launch Points
1. Paul Hopkins Park – A great starting point for bass fishing in the upper bayou. This area has more freshwater influence, submerged timber, and slower-moving water where largemouth bass thrive.
2. Ray Holbrook Park – Provides access to both freshwater and brackish areas, making it a great spot to target multiple species in one trip.
3. Dickinson Bayou Boat Ramp (Highway 146) – A prime launch for inshore species like speckled trout, redfish, and flounder, as the bayou transitions to saltier water.
Target Species and Seasonal Patterns
Inshore Species (Redfish, Trout, Flounder)
Redfish
Speckled Trout
Flounder
• Redfish: Present year-round, redfish move between the shallow marsh edges and deeper bends of the bayou. Look for them near oyster beds or ambushing bait near structure.
• Speckled Trout: More common in the lower bayou where salinity is higher. They hold in deeper holes during winter and move toward bait schools in summer.
• Flounder: A spring and fall favorite, flounder stack up near drains and along drop-offs.
Largemouth Bass
• Spring & Summer: Bass are highly active, staging near submerged trees, grass lines, and deeper pockets along the bank. Topwater frogs and spinnerbaits shine in the warmer months.
• Fall & Winter: Bass move deeper into holes and near structure, where slow-moving soft plastics and crankbaits are the go-to options.
Best Lures for Dickinson Bayou
Inshore Lures:
• H&H Paddle Tails and DOA Paddle Tails – Excellent for covering water, especially rigged on a light jighead and bounced off the bottom.
• JVS Custom Baits 3.2 Rip Rap in Cinnamon Gold – This lure mimics baitfish well in the stained waters of the bayou.
• JVS Speed Shrimp in White and Gold – Great for targeting speckled trout and redfish near deeper channels.
• Gulp! Shrimp or Mud Minnow on a Jighead – Deadly for flounder, especially near marsh drains.
Largemouth Bass Lures:
Bass caught on Dickinson Bayou
• H&H Paddle Tails (White or Chartreuse) – A great crossover lure for bass in brackish water, these work well on a light jighead or weighted swimbait hook. Slow-roll them near laydowns and grass lines for reaction bites.
• Texas-Rigged Soft Plastics (Creature Baits, Worms, Flukes) – Perfect for working submerged timber and drop-offs.
• Spinnerbaits (White or Chartreuse) – A great way to trigger reaction bites around structure.
• Frogs & Topwater Lures – In the summer, bass explode on frogs in the backwaters and grassy edges.
• Crankbaits & Jerkbaits – Ideal for cooler months when bass are holding deeper.
Fishing Strategy and Tidal Influence
Like most Texas waters, understanding tides plays a crucial role in Dickinson Bayou fishing.
• Outgoing Tide: Fish stage near marsh drains, creek mouths, and bends where baitfish get pulled out.
• Incoming Tide: Redfish push shallow to feed, while bass tend to stay near structure unaffected by tides.
• Slack Tide: Slower fishing for inshore species, but bass can still be caught by working deeper structure.
Final Thoughts
Dickinson Bayou is a fantastic spot for kayak anglers looking to mix inshore and freshwater fishing in one trip. Whether you’re tossing a paddle tail for speckled trout or slow-rolling an H&H Paddle Tail for largemouth bass along a submerged tree, this bayou offers a little bit of everything.
Stay tuned to Beyond the Cast for more in-depth breakdowns of Texas inshore and freshwater fishing, and be sure to check out our YouTube channel for on-the-water footage of kayak fishing in Dickinson Bayou!
Photography is more than just capturing an image—it’s about telling a story, finding the perfect composition, and adjusting to ever-changing outdoor conditions. Whether I’m fishing in Texas, hiking through the mountains, or capturing the night sky, my approach to photography combines technical knowledge with an artistic eye.
On my recent trip to New Mexico, as I pursued the Trout Grand Slam, I found myself surrounded by some of the most breathtaking landscapes I’ve ever photographed. The Rio Grande Gorge, Red River, and Rio Costilla offered not only incredible fishing but also endless opportunities for photography.
My Gear Setup
Camera and Lenses
I shoot with the Canon R5, a powerhouse mirrorless camera with outstanding image quality and dynamic range. To adapt to different shooting conditions, I rely on a mix of Sigma series lenses and Canon L series lenses, which offer sharp optics and great performance in low light.
For landscapes, my go-to is a wide-angle lens, such as the Canon RF 15-35mm f/2.8L, which allows me to capture vast mountain vistas and sweeping coastal scenes. When shooting astrophotography, I use fast prime lenses, like the Sigma 14mm f/1.8 ART, which excels at gathering light for crisp, detailed shots of the night sky.
Accessories for Outdoor Photography
• K&F Concept Backpack – A durable and spacious pack that safely holds my camera gear, extra batteries, and filters.
• K&F Concept Tripod – A sturdy, lightweight tripod is essential for long exposures, low-light photography, and astrophotography.
• ND and Polarizing Filters – Useful for managing reflections, enhancing colors, and allowing for longer exposures in daylight.
Mastering Exposure: ISO, Shutter Speed, and Aperture
One of the keys to great photography is understanding the exposure triangle: ISO, shutter speed, and aperture. Since conditions can change rapidly outdoors, I keep a cheat sheet handy for quick reference:
• ISO – Keep it low (100-400) for bright conditions to avoid noise. Increase it in low light but balance it with shutter speed.
• Shutter Speed – Fast (1/1000s or higher) for action shots, slower (1/10s to several seconds) for landscapes, and long (15s+ for astrophotography).
• Aperture (f-stop) – Wide (f/1.8–f/2.8) for night shots, mid-range (f/8–f/11) for landscapes, and narrow (f/16+) for deep depth of field.
Composition and the Art of Photography
A great photo isn’t just about sharpness—it’s about composition and storytelling. I look for leading lines, balance, and unique angles to create compelling images. Shooting from different perspectives—such as low to the ground for foreground depth or high vantage points for expansive views—makes a huge difference.
Protecting Gear in Harsh Conditions
Since I shoot in rugged environments—mountains, rivers, and coastal areas—protecting my gear is crucial. I always bring:
• Weather-sealed camera covers to protect against rain and dust.
• Microfiber cloths for wiping lenses.
• Silica gel packs in my bag to prevent moisture buildup.
• Lens hoods to reduce glare and shield against elements.
Editing on the Go: Lightroom & iPad Pro
Once I’ve captured my shots, I refine them in Adobe Lightroom, often using my iPad Pro for quick field edits. This allows me to adjust exposure, contrast, and color balance on-site without waiting to get back to my desktop.
Key Lightroom Techniques:
• Photo Stacking – Merging multiple shots for sharper images.
• Graduated Filters – Enhancing skies and landscapes selectively.
• Noise Reduction – Crucial for high-ISO astrophotography.
Before and After
Astrophotography: Lenses & Techniques
Astrophotography is one of my favorite challenges. Fast prime lenses like the Sigma 14mm f/1.8 ARTor the Canon RF 24mm f/1.4L allow for more light intake, creating sharp, vibrant night sky images. Using a tripod and remote shutter release, I capture long exposures (15-30 seconds) at a high ISO (3200-6400).
Astrophotography in the Mountains
There’s nothing like seeing the Milky Way stretch over a remote mountain range. Shooting astrophotography at high altitudes reduces light pollution and enhances clarity.
Final Thoughts
Photography is an art that blends technical skills with creativity. Whether I’m shooting sunrises on the coast, rugged mountain landscapes, or the Milky Way, every photo tells a story. With the right gear, knowledge, and post-processing techniques, I can capture the world the way I see it—one shot at a time.
Stay Connected with Beyond the Cast
Thanks for reading! If you enjoyed this post and want more fishing tips, photography tips, trip reports, and on-the-water action, be sure to follow along.
Subscribe to our YouTube channel for in-depth videos, gear breakdowns, and on-the-water adventures. Stay up to date by following us on Facebook, where we share fishing reports, trip updates, and connect with fellow anglers.
Join the conversation, share your catches, tips, photos and let’s keep exploring the water and outdoors together.
New Mexico, often celebrated for its stunning desert landscapes and rich cultural heritage, is also a hidden gem for fly fishing enthusiasts. The state’s diverse geography offers a unique blend of fishing experiences, from high-mountain lakes to flowing rivers nestled in canyons. Whether you’re a seasoned angler or a beginner looking to explore new waters, New Mexico has something to offer. In this blog, we’ll take a look at some of the top fly fishing destinations across the state and share valuable tips to help you make the most of your time on the water. So grab your rod, pack your flies, and get ready to cast your line in the Land of Enchantment.
1. The Rio Grande
Rio Grande Gorge
The Rio Grande River flows through some of the most scenic parts of New Mexico, offering great opportunities for fly anglers. This river is home to native Rio Grande cutthroat trout, as well as brown and rainbow trout. It’s ideal for both beginner and experienced fly fishers, with sections that are perfect for dry fly fishing and nymphing.
Best Fishing Seasons:
• Spring & Fall: These are the prime times for fishing the Rio Grande, with trout being more active in cooler temperatures.
Fly Patterns & Techniques:
• Dry Flies: Rio Grande cutthroats are often attracted to dry flies. Use patterns like Parachute Adams, Elk Hair Caddis, or a smaller, light-colored Stimulator.
• Nymphs: For deeper holes, go with nymph patterns such as Pheasant Tails, Zebra Midges, or a San Juan Worm.
• Techniques: When nymphing, focus on pockets near rocks or deeper runs. Dry fly fishing is best during hatch periods, so watch for rising fish and match your fly to the hatch.
2. The San Juan River
Known for its world-class tailwater fishing, the San Juan River is one of New Mexico’s premier destinations for anglers. Flowing below Navajo Dam, the river is rich with trophy-sized rainbow and brown trout. The clear waters and consistent flows make it a favorite among fly fishers.
Best Fishing Seasons:
• Winter & Spring: The San Juan is a year-round fishery, but the best time to catch big fish is in the colder months when the fish are more concentrated.
Fly Patterns & Techniques:
• Nymphs: Patterns like the Zebra Midge, Hare’s Ear, and Egg Patterns are effective in the deeper runs of the San Juan.
Hare’s Ear
• Dry Flies: The San Juan also offers hatch periods with mayflies and caddisflies. Patterns like the Blue-Winged Olive, Griffith’s Gnat, and PMDs are great for dry fly action.
• Techniques: Focus on dead drifting your nymphs along the riverbed, especially in the deeper, slower-moving sections. During hatches, look for fish rising and cast your dry flies to them.
3. Chama River
The Chama River offers both challenging and rewarding fly fishing. Located in northern New Mexico, this river runs through the Chama Valley, where anglers can find wild brown trout, rainbow trout, and cutthroats. The river is divided into sections that are suited to different fishing techniques.
Best Fishing Seasons:
• Spring & Fall: These seasons offer good fishing conditions as the water is cool and the fish are active.
Fly Patterns & Techniques:
• Streamers: Large streamers like Woolly Buggers, Clouser Minnows, and Sculpin patterns are great for targeting larger trout.
• Nymphs: Go with patterns like Copper Johns or Prince Nymphs to target fish feeding on the bottom.
• Dry Flies: Use smaller patterns like Elk Hair Caddis or Griffith’s Gnat when fish are rising to the surface.
• Techniques: When using streamers, focus on casting across the current and stripping them back. For nymphing, look for the deeper holes and fish your nymphs near the bottom.
4. Pecos River
The Pecos River, located in the Sangre de Cristo Mountains, is a pristine spot for fly fishing. The river has crystal-clear waters and is filled with brown trout, rainbow trout, and the occasional brook trout. It’s a great place to hike to, with a wilderness feel and little development.
Best Fishing Seasons:
• Summer & Fall: During these seasons, the Pecos River is perfect for fishing due to warmer water and increased fish activity.
Fly Patterns & Techniques:
• Dry Flies: The Pecos is ideal for dry fly fishing. Patterns like the Elk Hair Caddis, Adams, and Parachute Adams work great during hatches.
• Nymphs: Patterns like Hare’s Ear, Pheasant Tail, and Zebra Midges are ideal for the deeper runs.
• Techniques: Dry fly fishing is most productive during hatch periods when fish are actively feeding on insects. For nymphing, try the classic upstream drift technique, especially in slower sections.
5. High Country Lakes and Streams
For those seeking more solitude and high-altitude adventure, New Mexico’s high-mountain lakes and streams offer great fly fishing. Places like Santa Fe National Forest and Wheeler Peak Wilderness Area boast pristine alpine waters, teeming with native cutthroat and rainbow trout.
Best Fishing Seasons:
• Summer: High-altitude lakes are accessible during the warmer months and offer a peaceful, scenic fishing experience.
Fly Patterns & Techniques:
• Dry Flies: Small patterns like Parachute Adams, Griffith’s Gnat, and small attractors like the Royal Wulff are effective in alpine lakes.
• Streamers: Woolly Buggers, Matuka, and Zonkers are good options for larger trout in the deeper parts of these lakes.
Olive streamer size 10 3xl
• Techniques: Cast near the shorelines and retrieve streamers slowly through the deeper areas. For dry fly fishing, look for rising fish and match the hatch.
Essential Gear for Your Fly Fishing Trip to New Mexico
To ensure your fly fishing adventure in New Mexico is a success, packing the right gear is crucial. Here’s a list of essentials for your trip:
• Fly Rod: A 4- to 6-weight rod is versatile for most New Mexico waters. If fishing in high-altitude lakes, a lighter rod (3 to 5 weight) is ideal for smaller fish, while a 5- to 6-weight rod is great for larger rivers like the Rio Grande and San Juan.
Fly rod and reel
• Fly Reel: A quality reel with a smooth drag system is key, especially for larger trout. Make sure the reel is matched to your rod and has a good line capacity.
• Fly Fishing Line: Weight-forward floating lines are ideal for most situations, especially in rivers and lakes. For deeper nymphing, a sink-tip line or full sinking line may be needed for some sections.
• Leader and Tippet: 9 to 12-foot leaders are typical, with 5X to 6X tippet being common for clear water and smaller fish. For larger fish, go with 4X or 3X.
• Flies: Carry a variety of dry flies, nymphs, and streamers. Some of the top patterns for New Mexico include:
• Dry Flies: Parachute Adams, Elk Hair Caddis, Stimulator, and Royal Wulff.
• Streamers: Woolly Bugger, Clouser Minnow, Zonker, and Matuka.
• Fly Box: A durable, waterproof fly box to keep your flies organized and safe.
• Waders: For rivers, especially in the spring and fall, a good pair of breathable or neoprene waders is essential. Don’t forget wading boots with felt or rubber soles for traction.
• Casting Tools: Don’t forget a high-quality fly fishing net, nippers, forceps, and a fly tying kit if you want to customize your flies on the go.
• Sun Protection: A wide-brimmed hat, polarized sunglasses, and sunscreen are essential for fishing in New Mexico’s sunny climate.
• Backpack: A small, durable backpack will help carry all your gear, snacks, and water, especially if you’re venturing into remote areas.
Tips for Fly Fishing in New Mexico:
• Respect the Regulations: New Mexico has various fishing regulations, including specific season dates and restricted areas. Always check the latest regulations from the New Mexico Department of Game and Fish before heading out.
Special Trout Waters (Catch and Release)
Many rivers and streams in New Mexico have areas designated as “special trout waters,” where only catch-and-release fishing is allowed. In these areas:
• No fish may be kept – all trout must be released back into the water immediately.
• Artificial flies and lures only – in some areas, only flies or lures may be used, and live bait is prohibited.
• Barbless hooks – some waters may require barbless hooks to reduce injury to fish during release.
• Altitude Matters: Many of New Mexico’s best fishing locations are in high-altitude areas. Be prepared for the thinner air, especially if you’re planning on fishing in the mountains.
• Watch for Hatch Times: New Mexico has some great hatch opportunities, but they vary by location. Know the types of hatches that occur in your fishing spot to choose the right fly patterns.
• Stay Safe in Remote Areas: Many of New Mexico’s best fishing spots are in remote areas. Always carry enough water, a first-aid kit, and a map or GPS device.
Conclusion:
Fly fishing in New Mexico offers a wide variety of landscapes, fish species, and fishing techniques. Whether you’re seeking a quiet mountain stream, a big river, or a remote lake, there’s a spot for you. The state’s unique waters, coupled with the opportunity to catch wild and native trout, make it a must-visit destination for any fly fishing enthusiast. So grab your rod, pack your flies, and head to the Land of Enchantment for an unforgettable fishing adventure.
Stay Connected with Beyond the Cast
Thanks for reading! If you enjoyed this post and want more fishing tips, trip reports, and on-the-water action, be sure to follow along.
Subscribe to our YouTube channel for in-depth videos, gear breakdowns, and on-the-water adventures. Stay up to date by following us on Facebook, where we share fishing reports, trip updates, and connect with fellow anglers.
Join the conversation, share your catches, and let’s keep exploring the water together.
Every time I hit the water, I have to make a choice—fluorocarbon or monofilament for my leader? It might seem like a small detail, but over the years, I’ve learned that the right leader can make all the difference in whether I land fish or leave frustrated.
This debate has played out for me countless times on the Texas flats, whether I’m sight fishing for tailing reds or working a cut on an outgoing tide. I’ve used both, and while I lean heavily toward fluorocarbon, I still keep mono in my tackle bag for specific situations.
Fluorocarbon: My Go-To for Most Situations
Most days, I’m running 15 lb Seaguar Red Label Fluorocarbon on my Black Max reel, and I do it for a few key reasons. First, it’s nearly invisible underwater, which makes a huge difference when I’m fishing clear, shallow flats and reds are being picky. I’ve watched redfish spook off a lure before they even get close to it, and I have no doubt it was because my leader was too visible.
Fluoro is also tough—which is exactly what I need when I’m fishing near oyster beds and rocky shorelines. I’ve had reds take me into structure, rubbing my line against shells, and fluorocarbon has saved me from heartbreak more than once.
Then there’s the sensitivity. When I’m throwing a H&H paddle tail and working it slowly through a drain, I want to feel everything—every tap, every bump, and the moment a red inhales my lure. Fluorocarbon has less stretch than mono, which helps me react faster and set the hook with confidence.
When I Switch to Mono
That being said, I still use monofilament, mainly when I’m throwing topwater lures like a Spook Jr. or a Rapala Skitter Walk. I learned this lesson the hard way—one morning, I was working a topwater over a shallow grass flat, and I noticed the lure wasn’t “walking” as well as it should. Turns out, my fluorocarbon leader was sinking just enough to mess with the action.
Mono, on the other hand, floats, keeping my topwater lures running properly. It also has more stretch, which helps absorb the impact of aggressive topwater blow-ups and prevents me from pulling the hook too soon.
Another reason I might use mono is cost. Fluorocarbon isn’t cheap, and when I’m fishing in murky or off-colored water where visibility isn’t a concern, I sometimes opt for mono just to save a few bucks.
Real-World Example: Choosing the Right Leader on the Flats
A few weeks back, I launched early in the morning, kayak in tow, targeting redfish on the flats. The water was clear, and as soon as the sun got up, I spotted reds tailing in the shallows. I tied on my usual fluorocarbon leader and threw a H&H paddle tail in cock of the walk right in front of a fish. It didn’t hesitate—it inhaled the lure, and after a solid fight, I had a slot red in the kayak.
Later in the morning, I switched to a topwater Spook Jr. to see if I could pull a few more fish out of the grass. The first few casts didn’t feel right, and I realized my fluoro leader was sinking and affecting the lure’s movement. I quickly cut off the fluoro and tied on 15 lb mono, and within minutes, I had another red explode on my lure. That one simple change made all the difference.
Final Thoughts: Which One Should You Use?
If you fish inshore like I do, fluorocarbon is my top choice for most situations, especially when throwing soft plastics or working subsurface lures. But monofilament has its place, mainly when using topwater lures or fishing in murky water where stealth isn’t as critical.
Here’s a quick rundown of when I use each:
Situation
Leader Choice
Why?
Sight fishing for reds in clear water
Fluorocarbon
Less visible to fish
Fishing near oyster beds & structure
Fluorocarbon
More abrasion-resistant
Throwing soft plastics on an outgoing tide
Fluorocarbon
Sinks & provides better sensitivity
Working topwater lures
Monofilament
Floats & allows natural lure action
Fishing in murky water
Monofilament
Visibility isn’t a concern, saves money
Wanting more stretch for shock absorption
Monofilament
Helps prevent pulled hooks
At the end of the day, both leader types have their strengths, and knowing when to use each will help you put more fish in the kayak.
What’s your go-to leader for inshore fishing? Let me know in the comments—I’m always up for a good fishing debate!
Stay Connected with Beyond the Cast
Thanks for reading! If you enjoyed this post and want more fishing tips, trip reports, and on-the-water action, be sure to follow along.
Subscribe to our YouTube channel for in-depth videos, gear breakdowns, and on-the-water adventures. Stay up to date by following us on Facebook, where we share fishing reports, trip updates, and connect with fellow anglers.
Join the conversation, share your catches, and let’s keep exploring the water together.
There’s something about being out in nature that awakens the creative side of me. Whether I’m fishing in the still waters of a misty morning or hiking through rugged mountain trails, my Canon R5 is always by my side, ready to capture the beauty that unfolds around me. Photography, much like fishing, is a pursuit of patience and precision—waiting for the right moment, the perfect light, and the ideal composition to bring a scene to life.
The Art of Seeing While Fishing
Fishing has always been about more than just the catch for me. It’s about the experience—the rhythm of the water, the way the sky shifts in color as the day progresses, and the subtle interactions of nature happening all around. When I’m on the water, I’m not just scanning for signs of fish; I’m searching for those fleeting, beautiful moments that make fishing such an immersive experience.
The golden hour, when the first light of dawn touches the water or when the sun dips low in the evening, offers some of the most magical photography opportunities. The reflections on the water, the soft hues blending across the horizon, the silhouette of a wading bird patiently stalking its prey—all of these moments tell a story. I often find myself pausing mid-cast just to take it all in, knowing that sometimes the most rewarding part of the trip isn’t reeling in a fish but capturing the essence of the moment through my lens.
The challenge of photographing on the water lies in movement—both mine and my surroundings. Kayak fishing, in particular, adds an extra layer of difficulty. The water shifts, the wind pushes, and my subject rarely stays still. But that’s part of the excitement. It forces me to be deliberate in my composition, to anticipate the perfect frame before I even lift my camera. The Canon R5’s fast autofocus and incredible dynamic range allow me to capture fine details, from the scales of a freshly caught redfish glistening in the sun to the intricate ripples left behind by a leaping mullet.
Beyond the technical aspects, photography while fishing is a way of documenting the journey. It’s about freezing those perfect, untamed moments—like the way the early morning mist clings to the water’s surface or how a storm front builds over the horizon, creating a dramatic contrast against the calm bay. These are the images that bring back the feeling of the trip long after I’ve left the water.
Finding Beauty in the Mountains
When I’m not on the water, I often find myself drawn to the mountains. Hiking is an entirely different experience, but one that feeds my love for both adventure and photography. Unlike fishing, where I’m often stationary for long stretches, hiking presents an ever-changing landscape, each bend in the trail revealing new opportunities to frame a shot.
The mountains have a way of humbling you. Standing at the base of a towering peak or gazing out over a valley stretching endlessly into the horizon, you realize how small you are in comparison to the vastness of nature. Capturing that feeling in a photograph is both a challenge and a joy. Composition plays a crucial role—finding the right foreground elements to give a sense of depth, using leading lines to draw the eye toward a distant summit, or waiting for the clouds to break just enough to let a dramatic ray of light cascade down the slopes.
I love the contrast between grand landscapes and small details. While a panoramic shot of mountain ridges bathed in morning light can be breathtaking, sometimes it’s the little things that tell the most powerful stories—the gnarled roots of an ancient tree gripping the rocky soil, a single wildflower blooming defiantly at the edge of a cliff, or the way frost patterns form on a high-altitude lake at dawn. My Canon R5 excels at capturing both extremes, allowing me to shoot sweeping landscapes and intricate macro shots with equal clarity.
One of my favorite aspects of mountain photography is how the environment constantly changes. Weather in the mountains is unpredictable, and that unpredictability creates some of the most striking images. A sudden break in the clouds after a storm can flood the valley with golden light, turning an otherwise ordinary scene into something spectacular. The play of shadows as the sun moves across jagged peaks can create dramatic contrasts that make the landscape come alive. It’s all about being in the right place at the right time—another parallel between photography and fishing.
Blending Adventure with Artistry
What I love most about photography, whether on the water or in the mountains, is how it forces me to slow down and truly see the world around me. It’s easy to rush through a fishing trip focused only on the next cast or to hike with a mindset of simply reaching the summit. But photography encourages me to be present—to notice the light filtering through the trees, the patterns in the waves, the way nature composes itself in perfect harmony if you take the time to see it.
Fishing and hiking both offer a sense of escape, a break from the noise of everyday life. Photography allows me to take a piece of that escape with me, to relive those moments through images that hold not just the visuals, but the emotions of the experience. It’s about more than just snapping a picture; it’s about telling a story—one of adventure, of solitude, of the raw beauty that exists in the natural world.
With every trip, I come home with a collection of images, each one a reminder of where I’ve been and what I’ve seen. Some of them end up shared, printed, or framed, while others remain personal, tucked away as snapshots of my journey. But all of them serve the same purpose: they capture the moments that make being out in nature so meaningful. And as long as I have a fishing rod in one hand and my Canon R5 in the other, I know there will always be more moments waiting to be captured.
Stay Connected with Beyond the Cast
Subscribe to our YouTube channel for fishing videos, gear breakdowns, and on-the-water action. Stay up to date by following us on Facebook, where we share fishing reports, trip updates, and connect with fellow anglers.
Join the conversation, share your catches, and let’s keep exploring the water together.
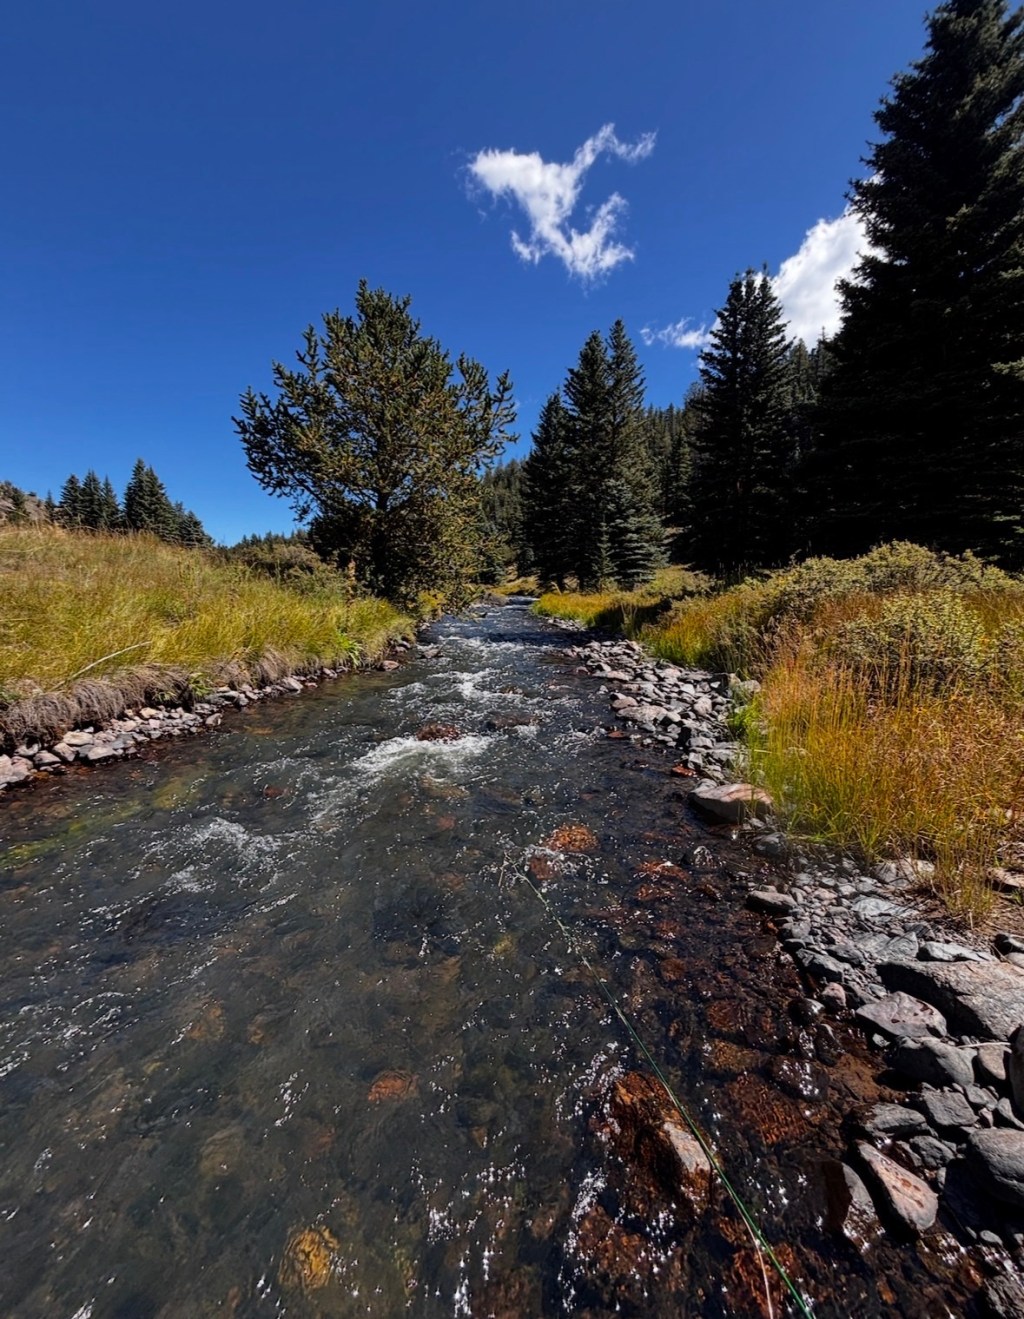
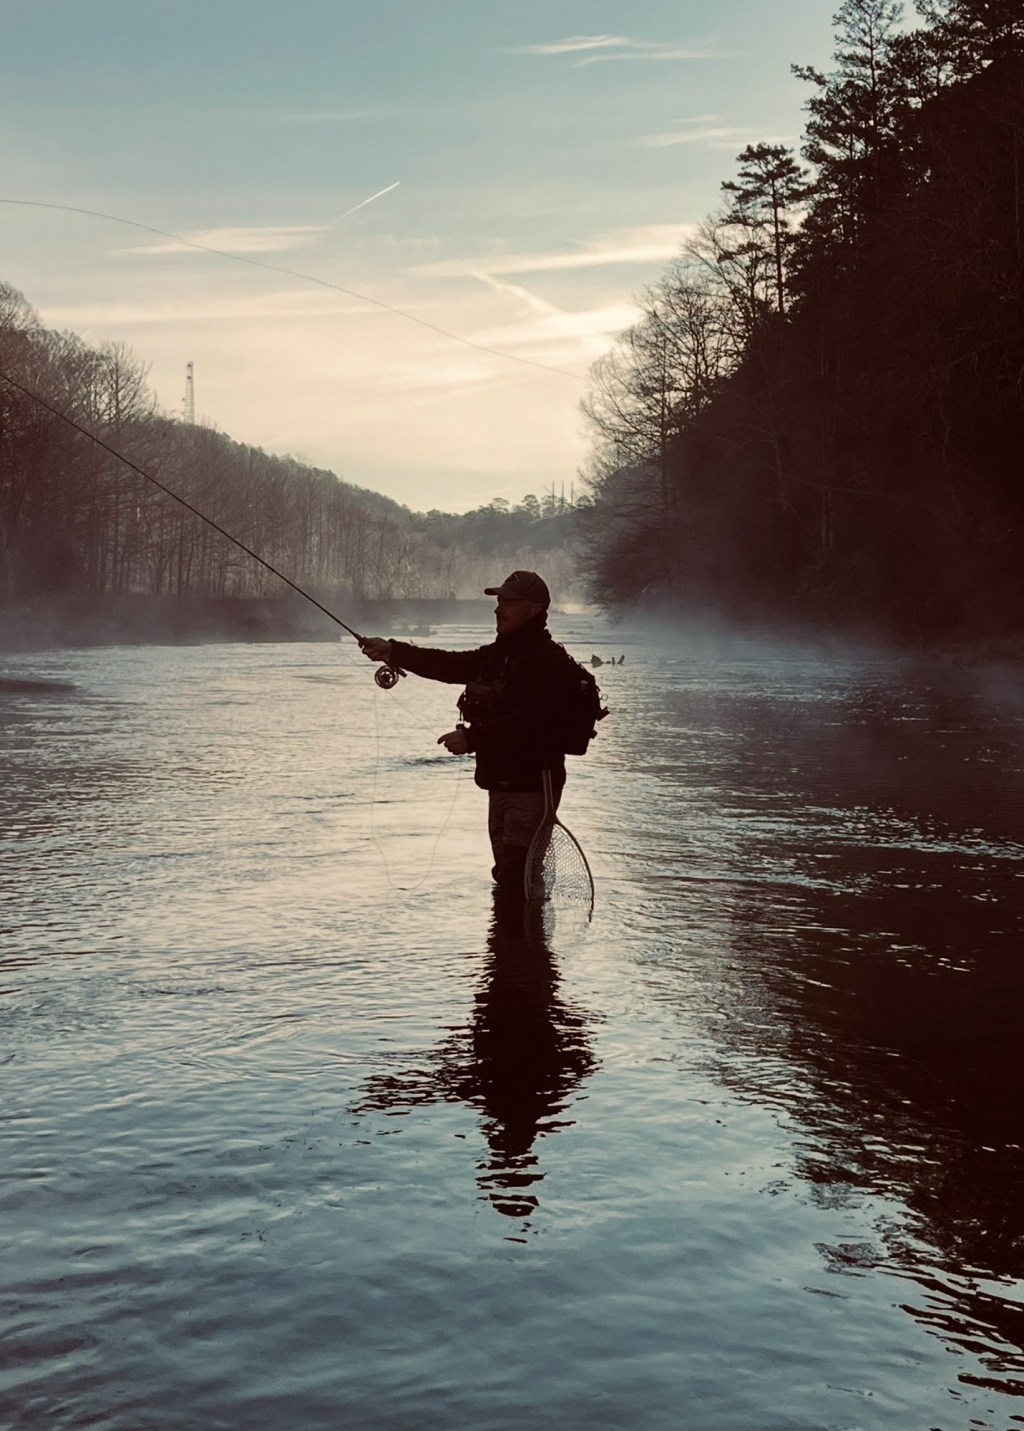
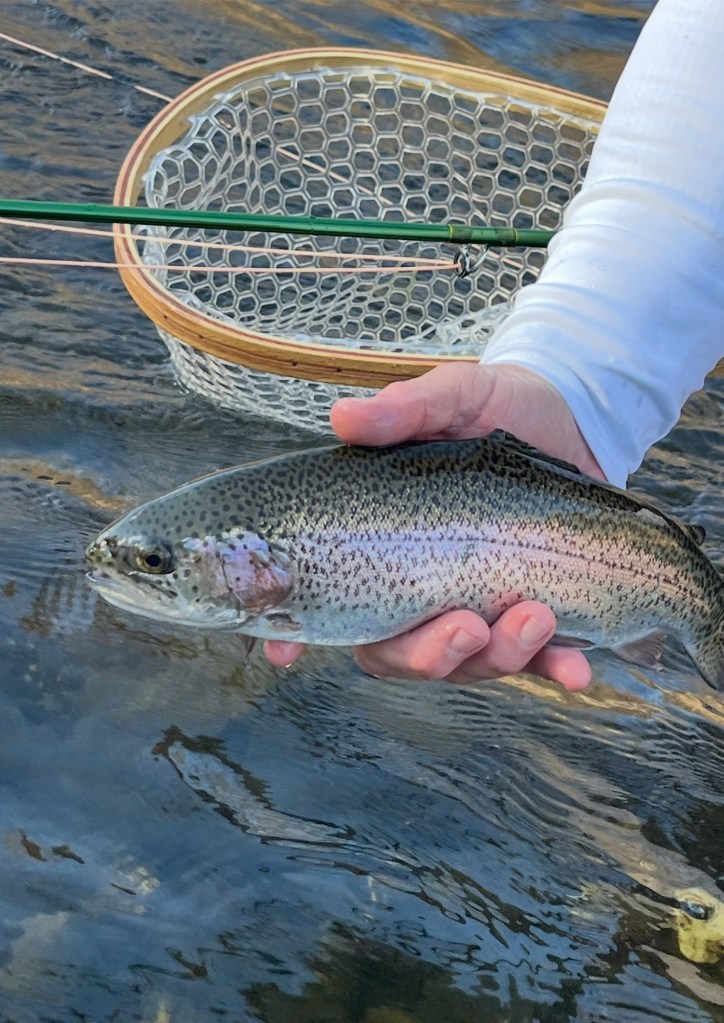

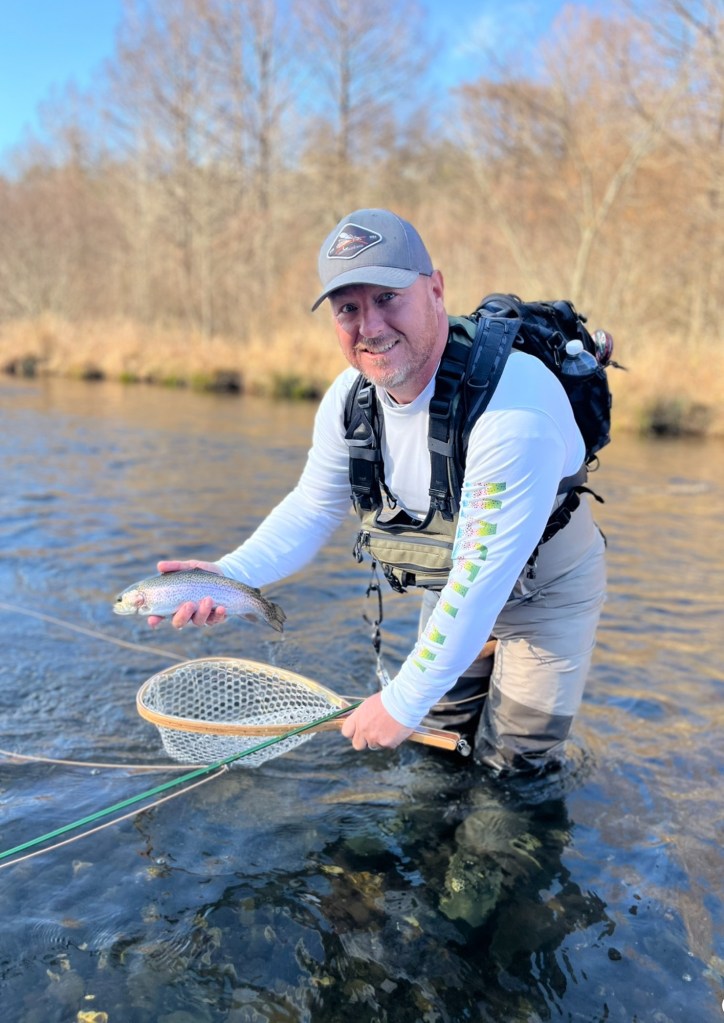
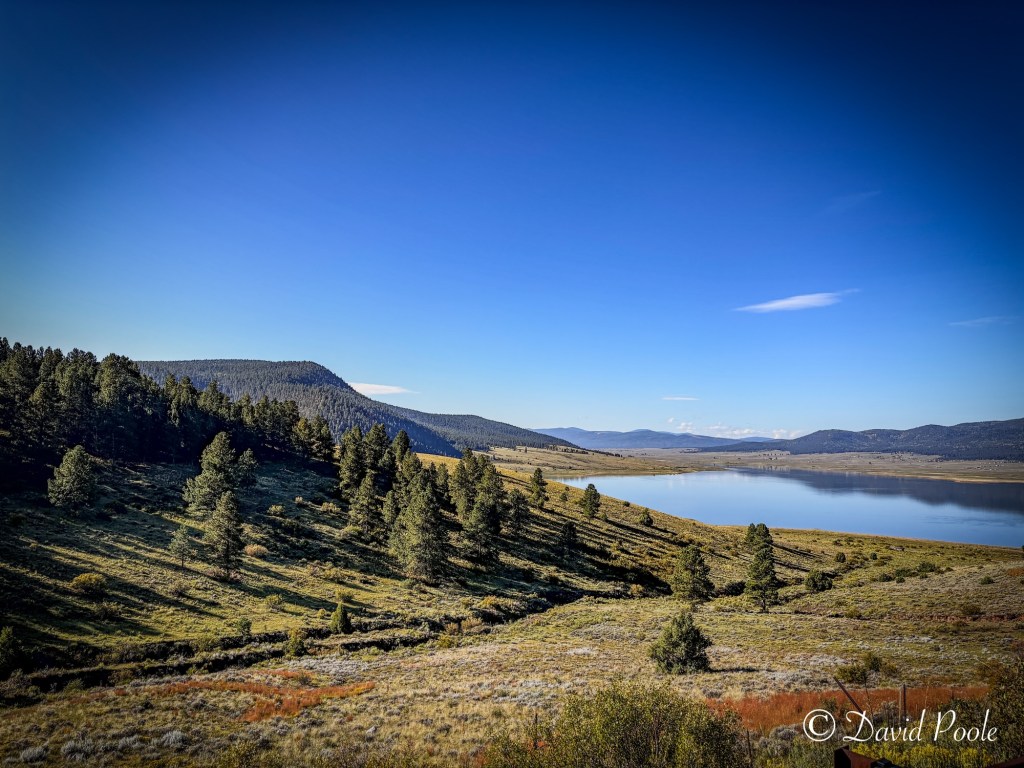
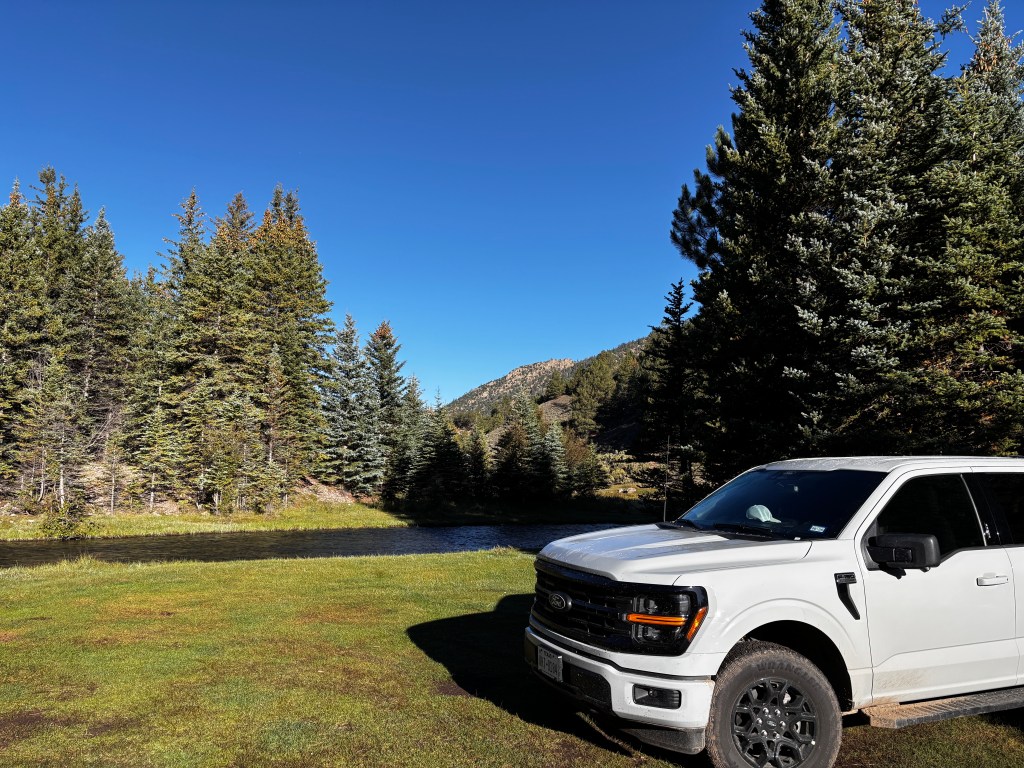

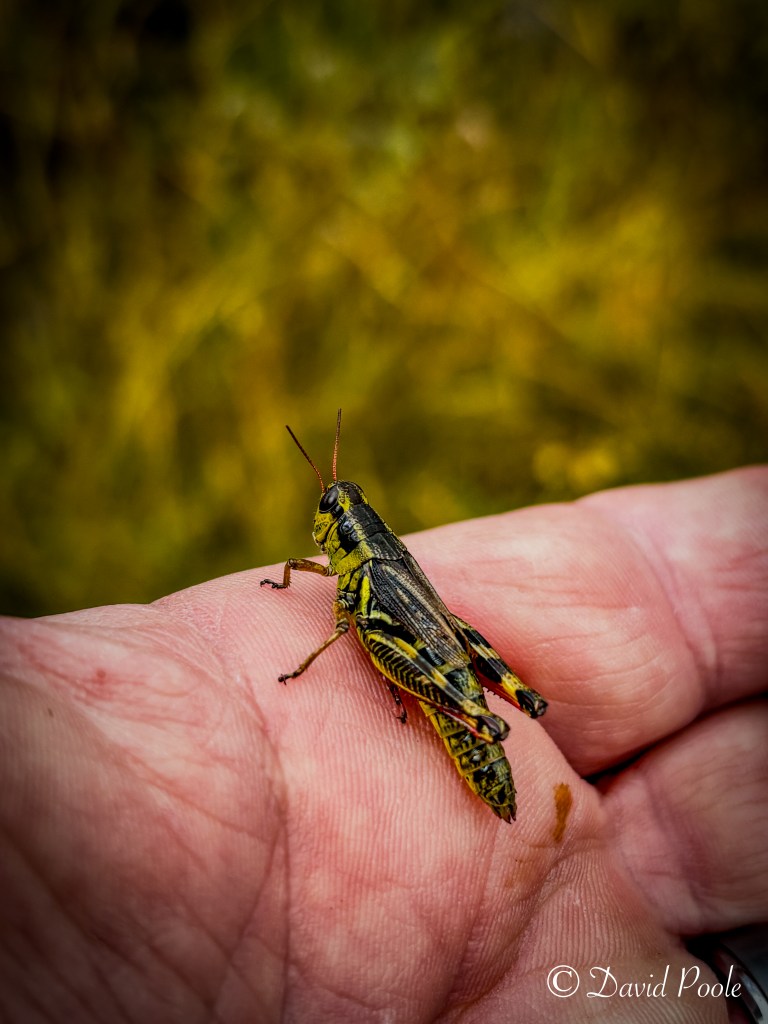
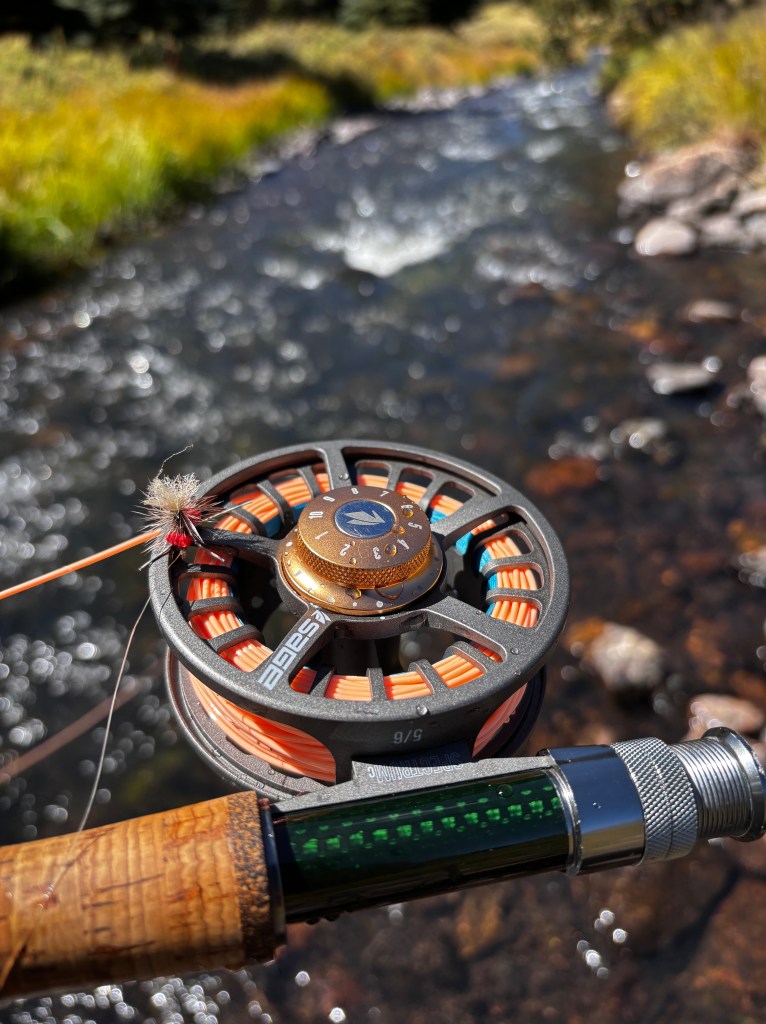

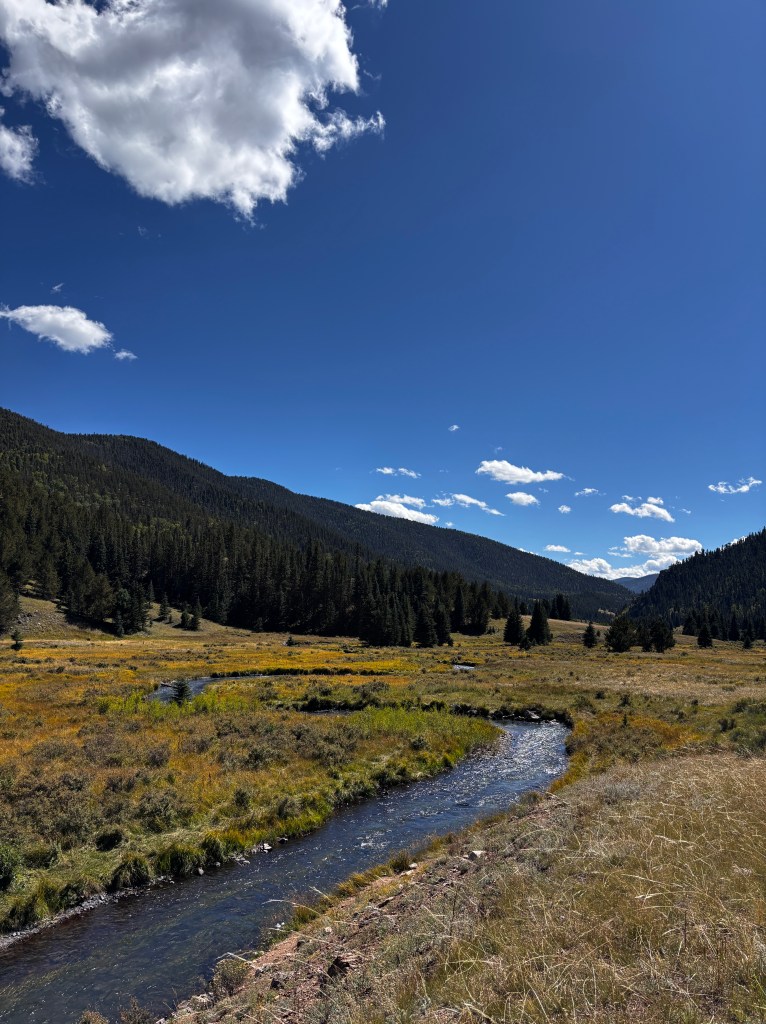


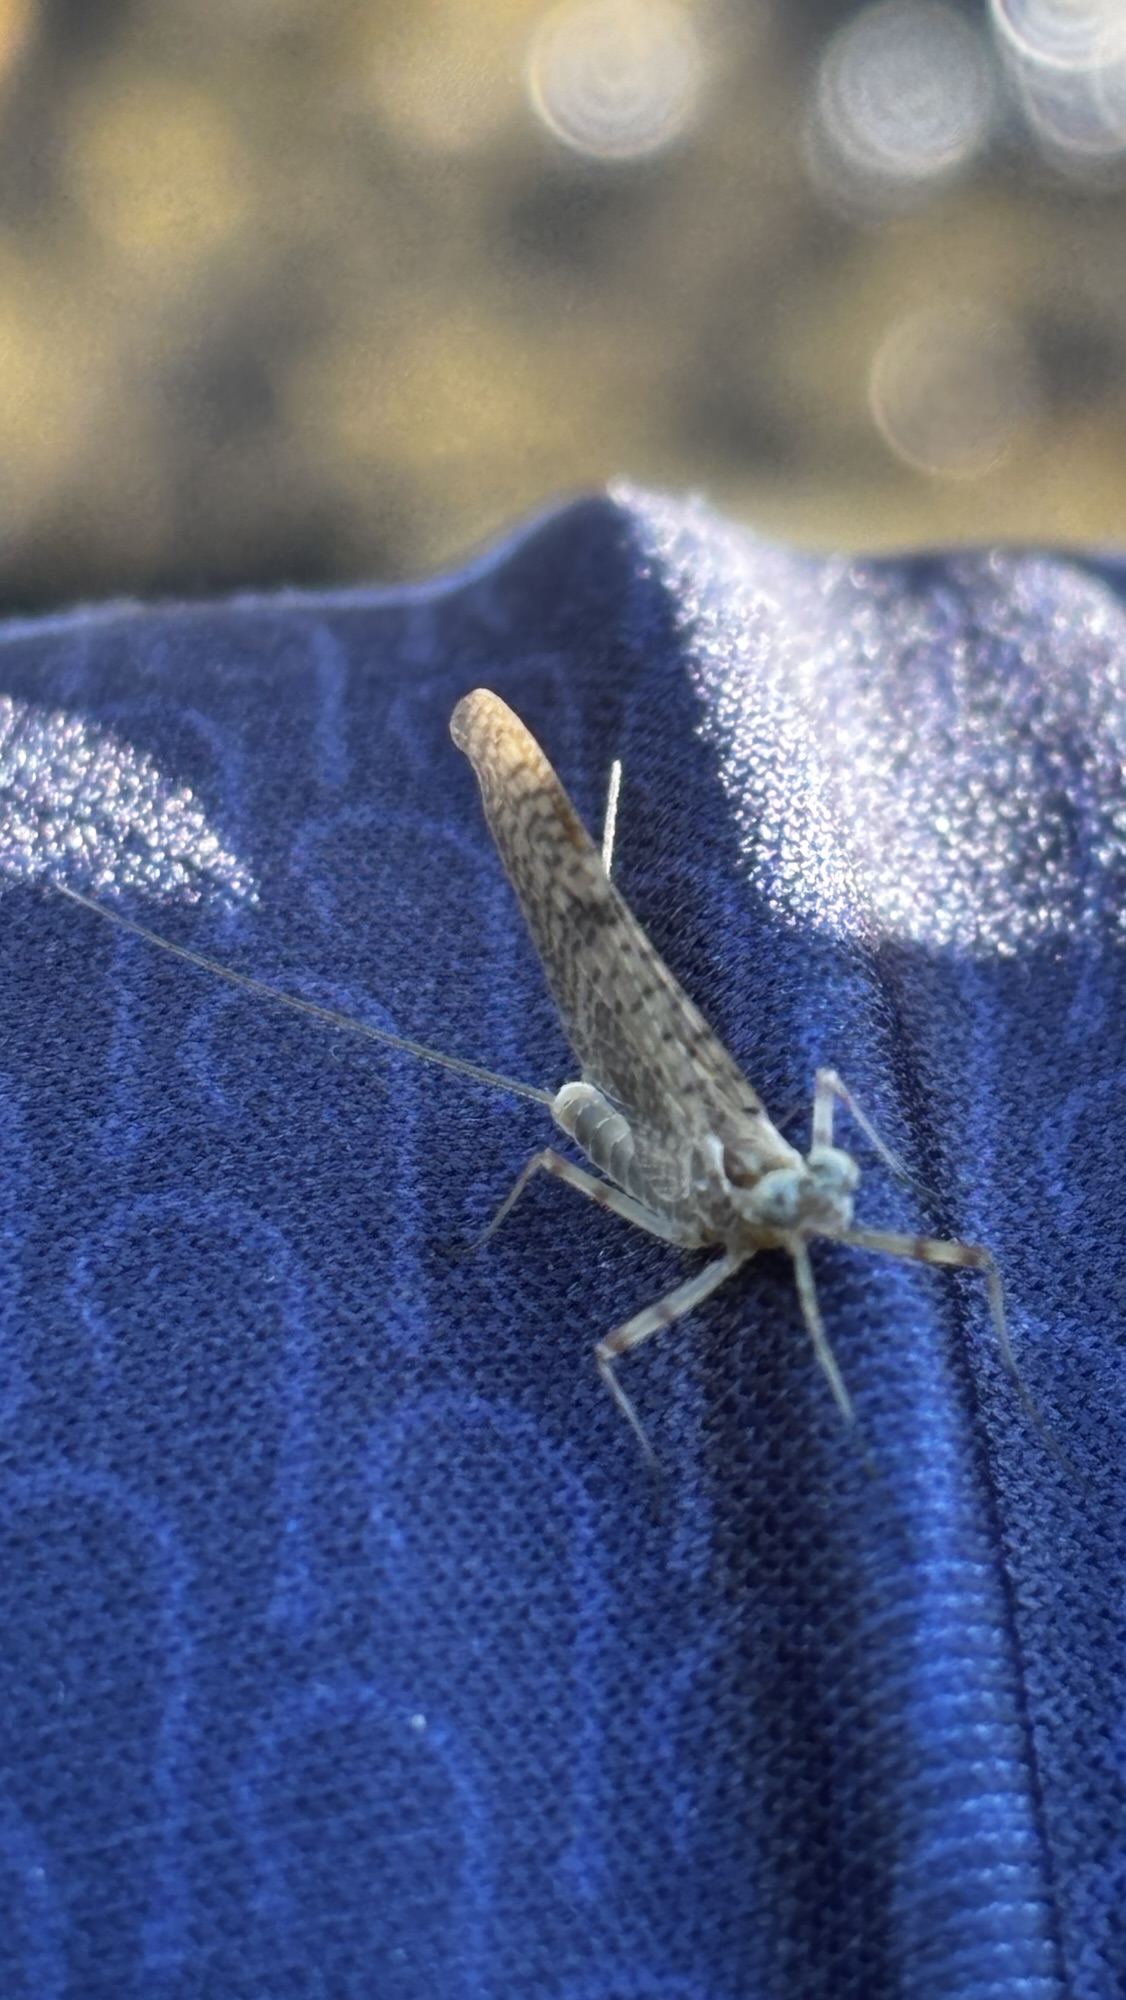

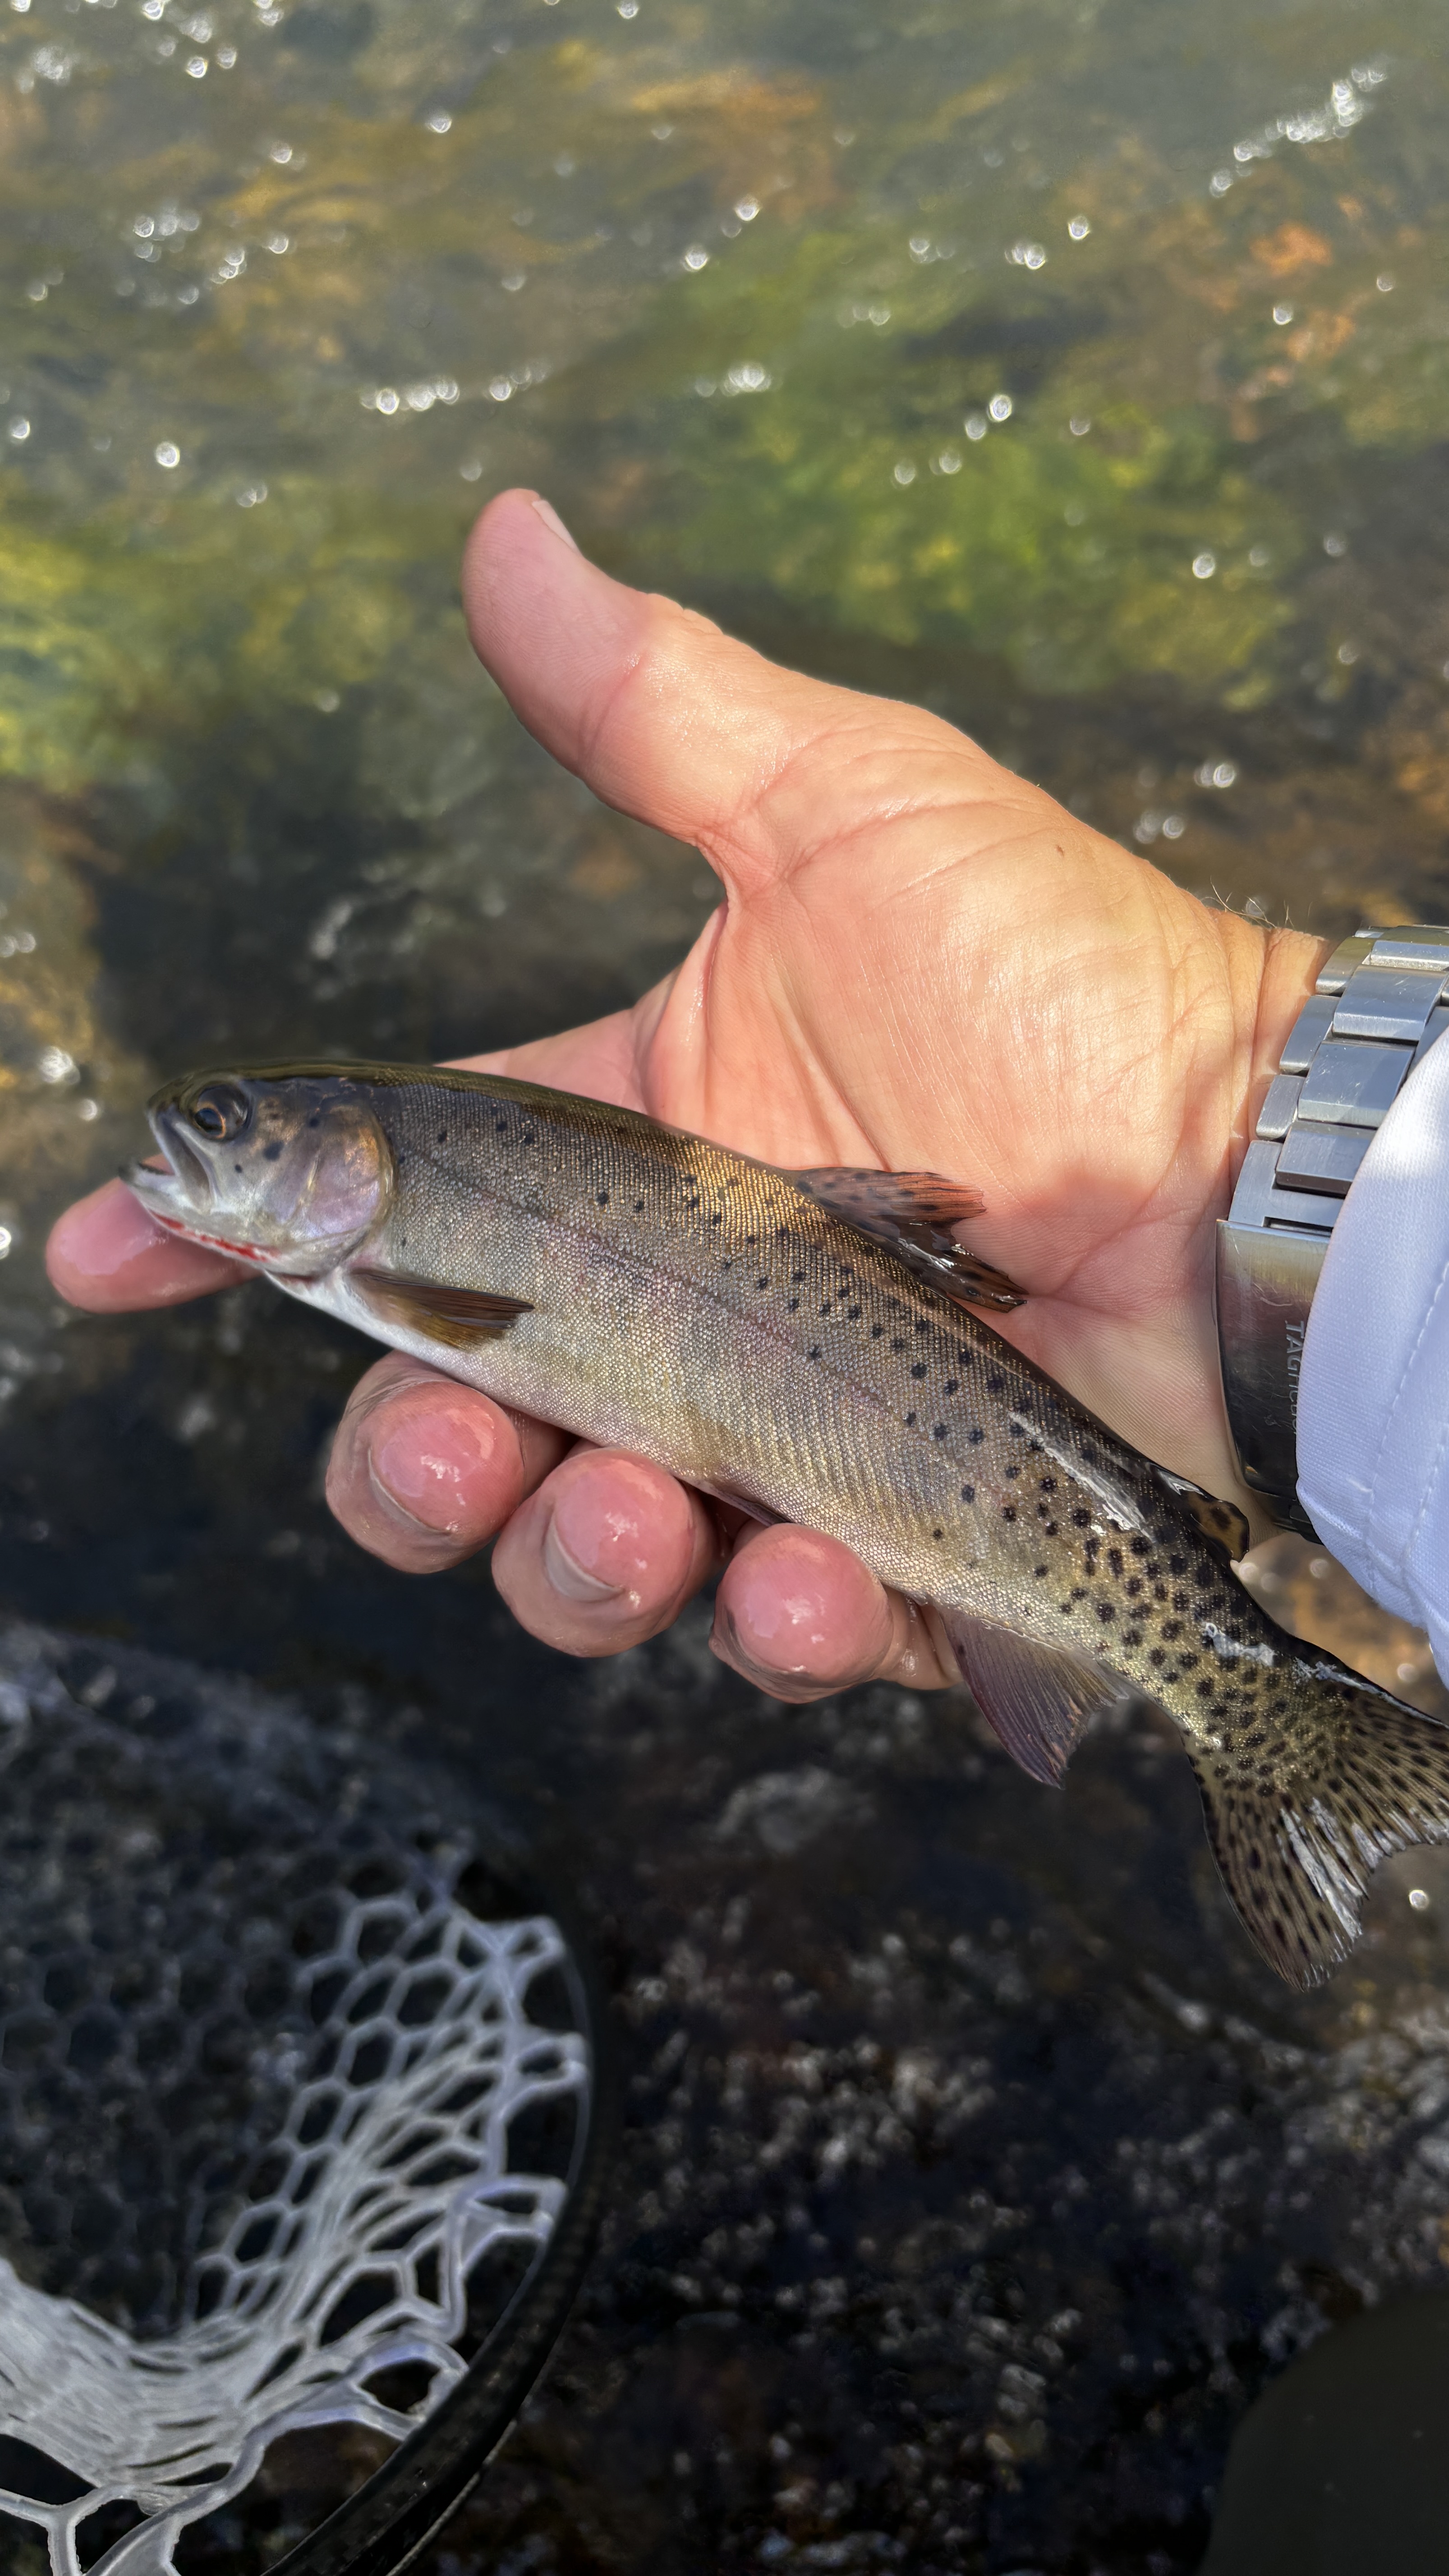

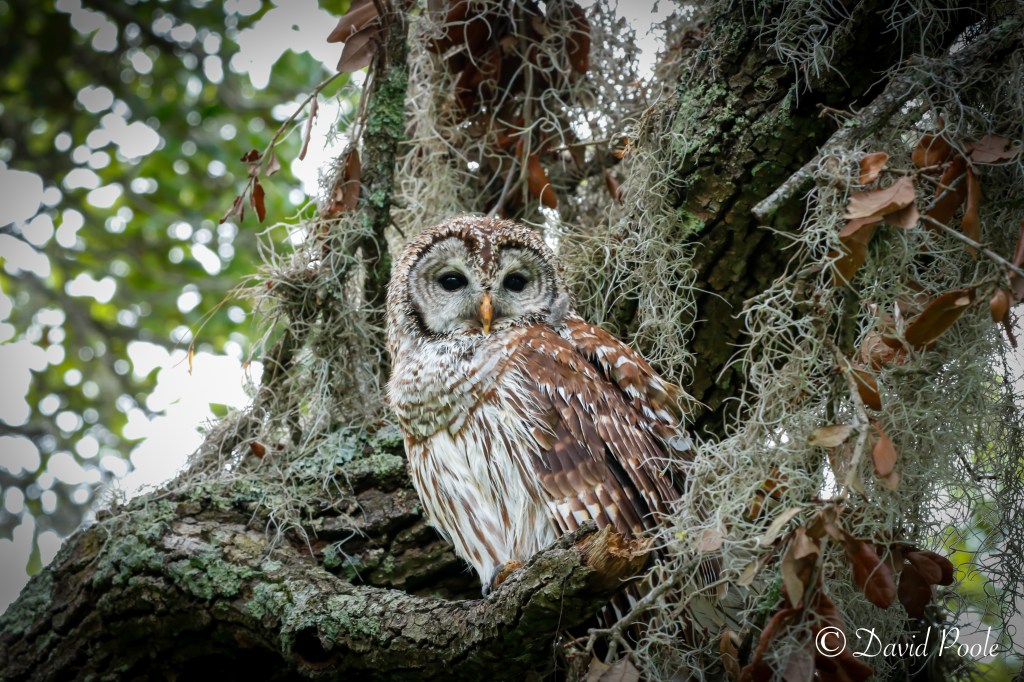

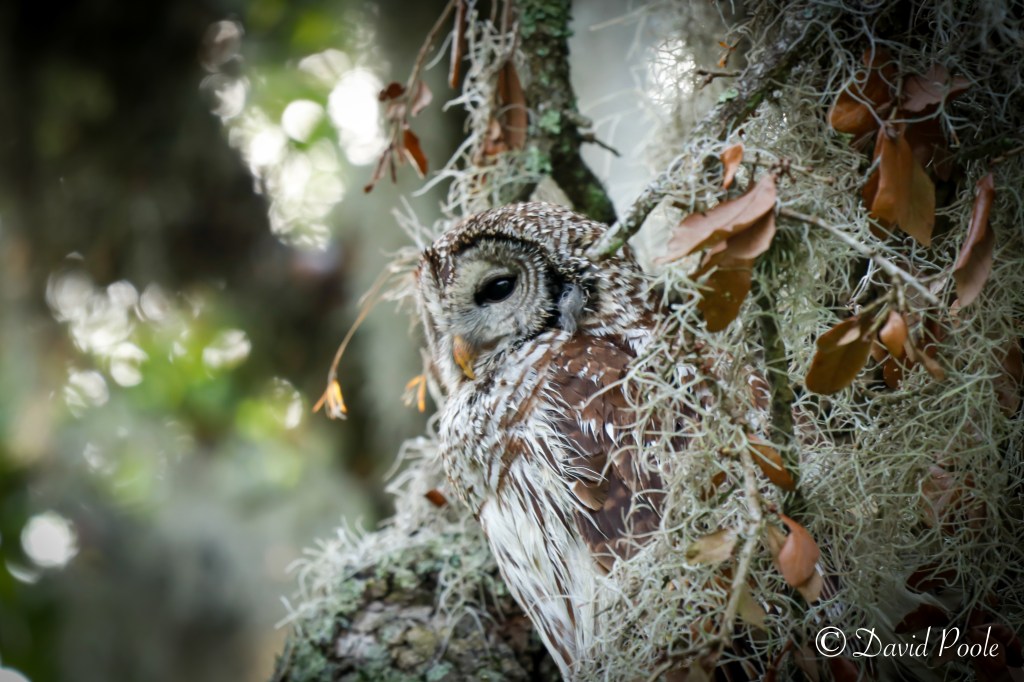


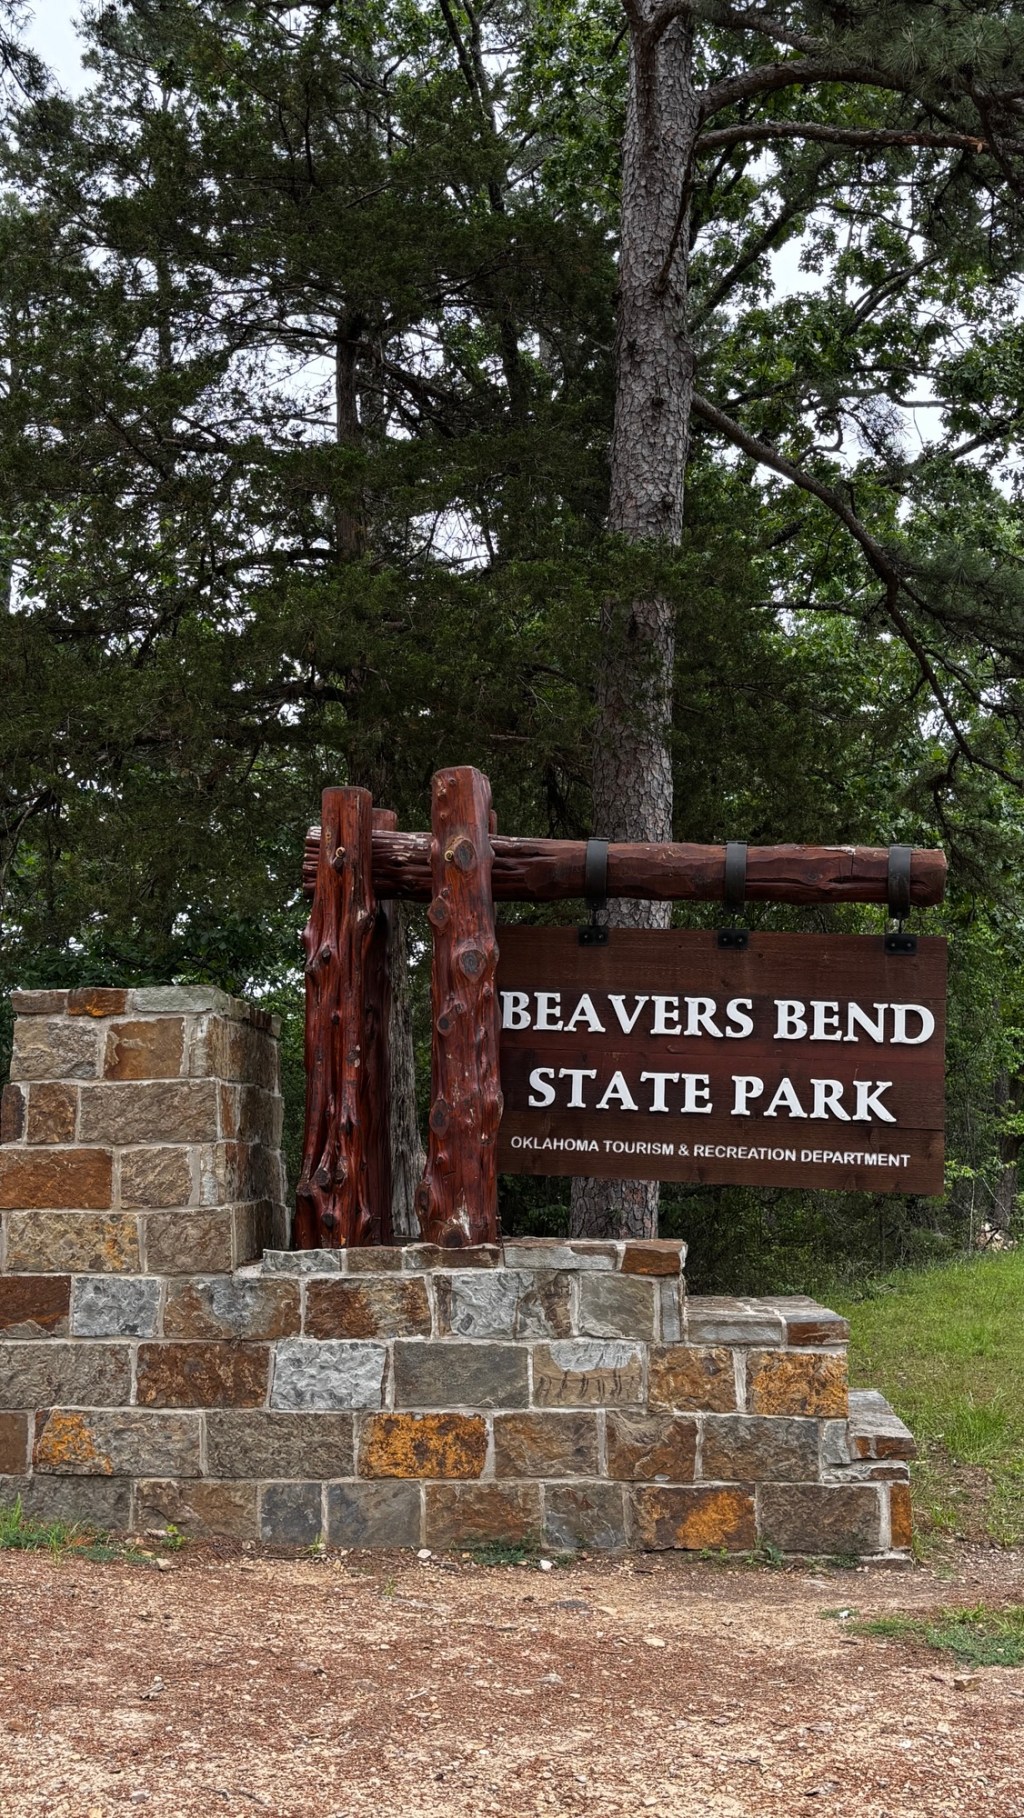
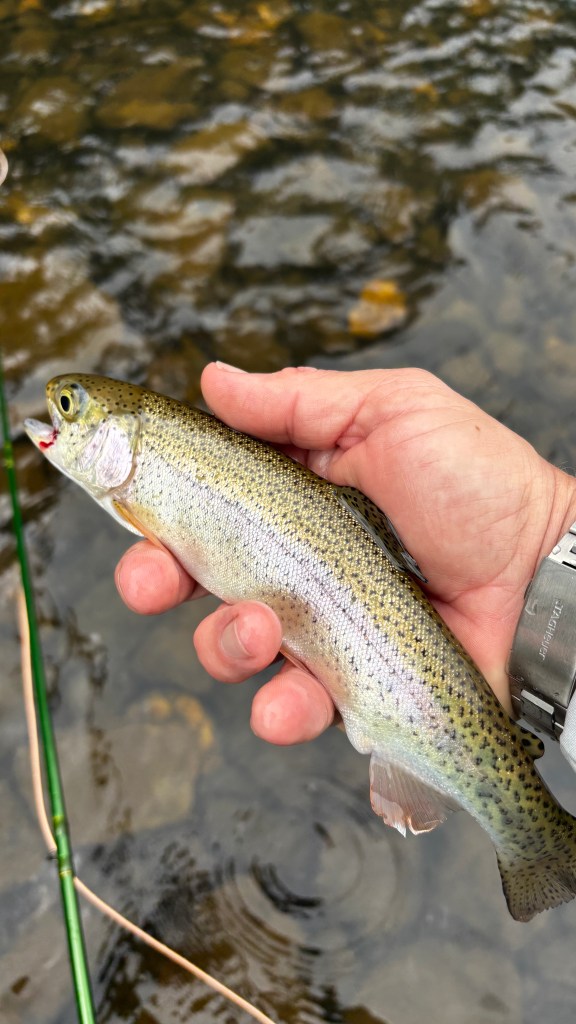
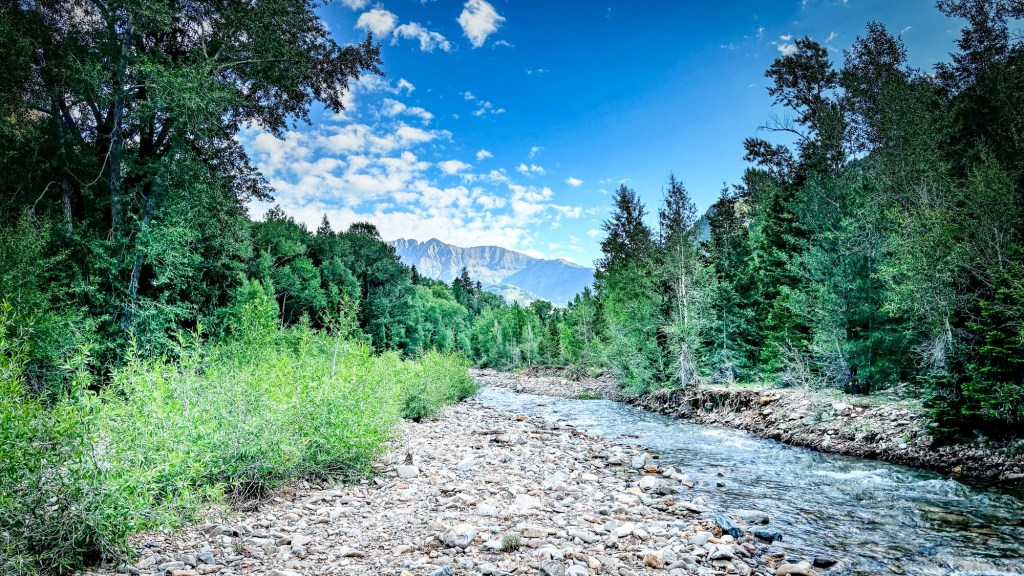

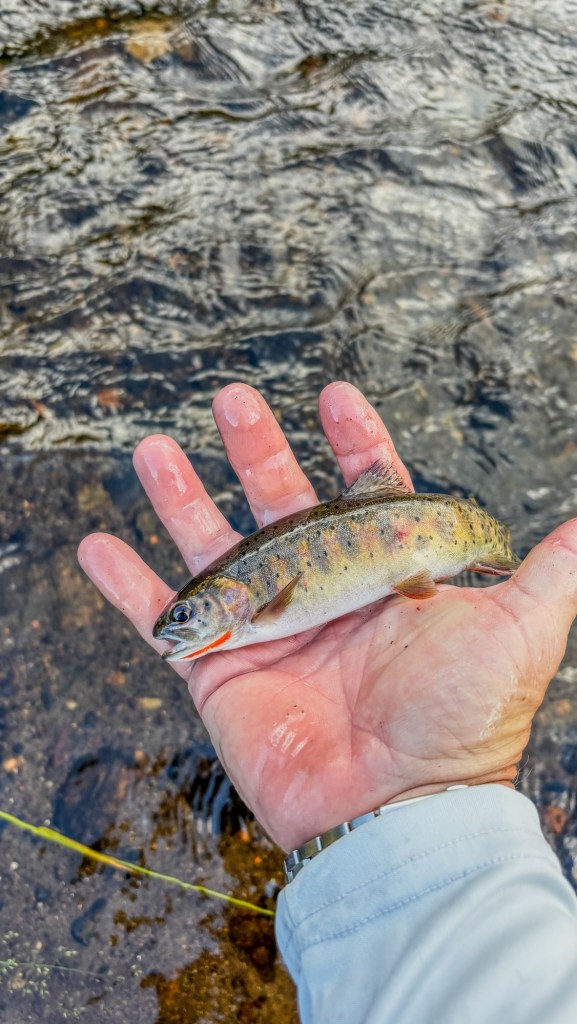
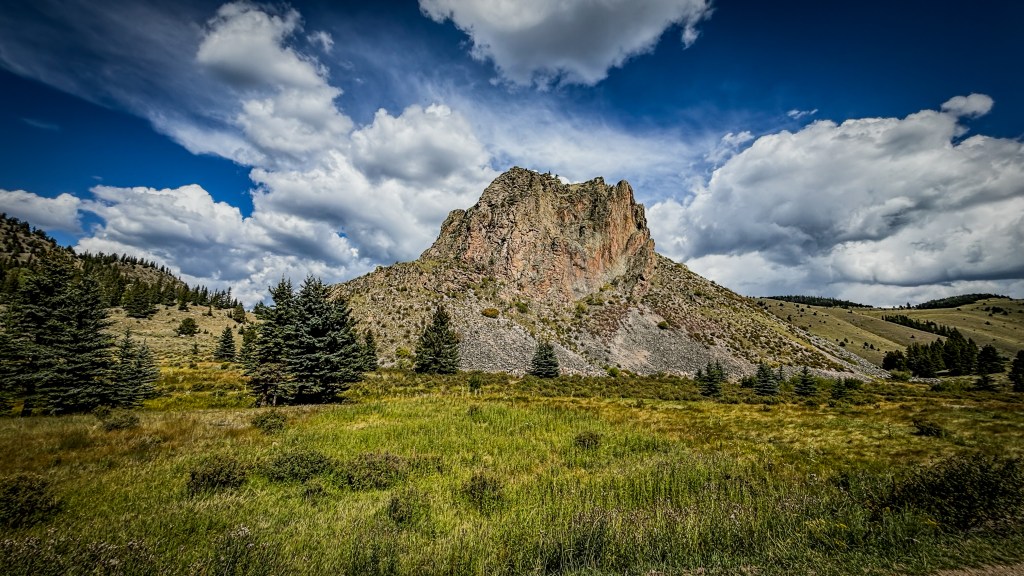


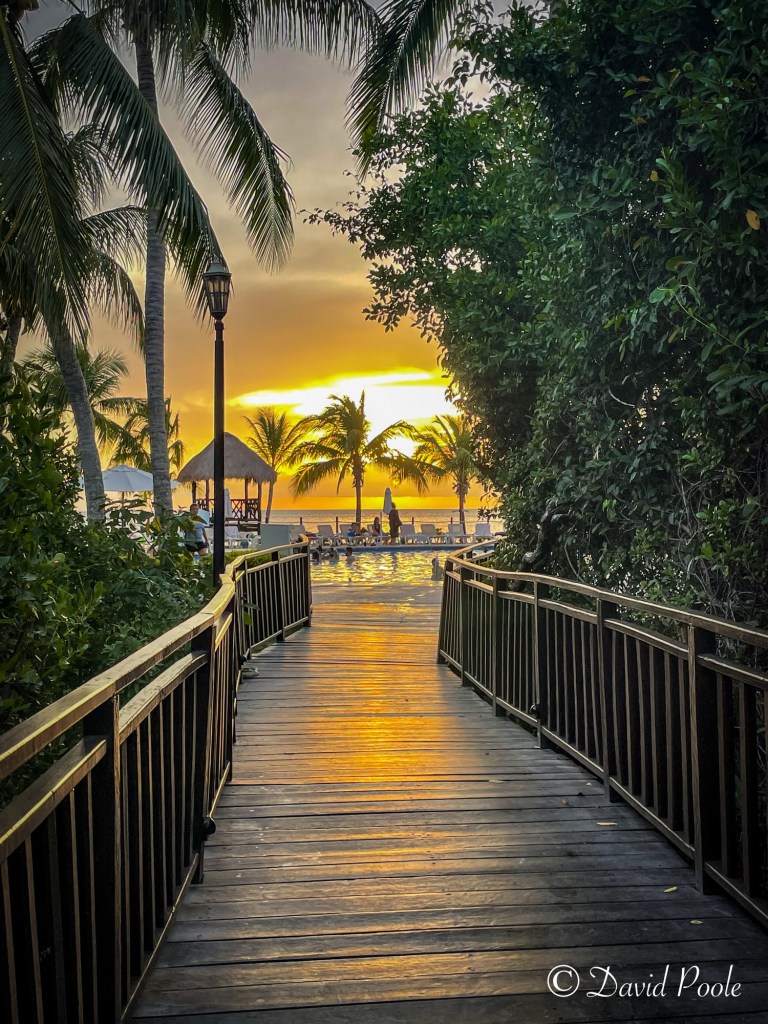
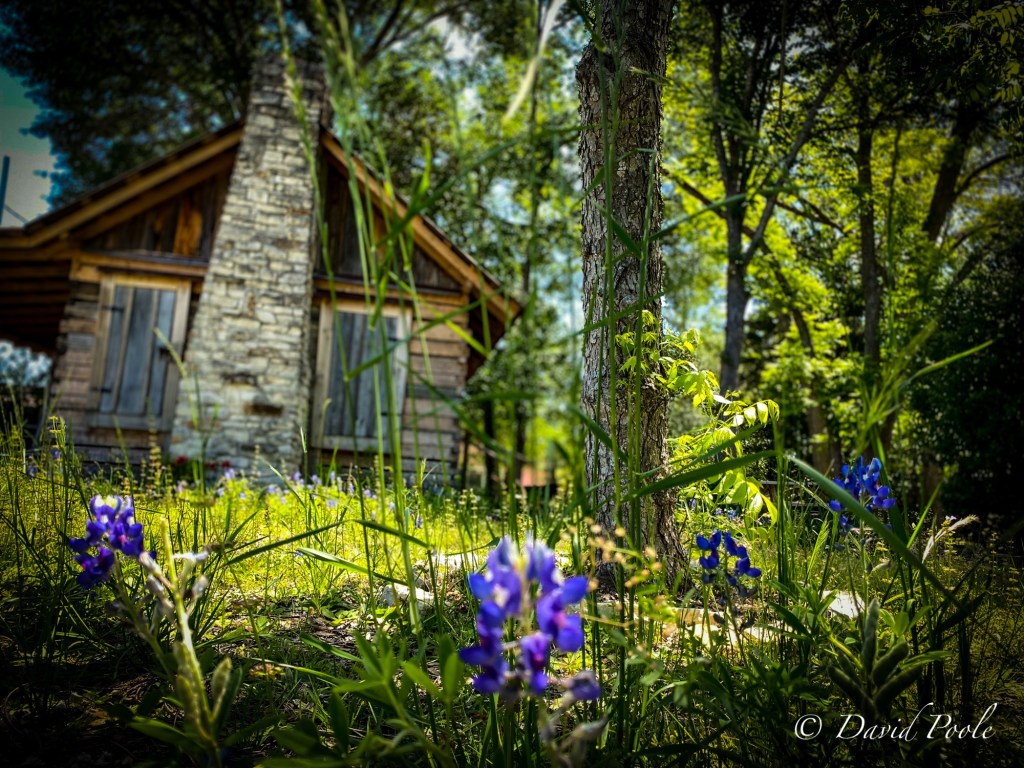
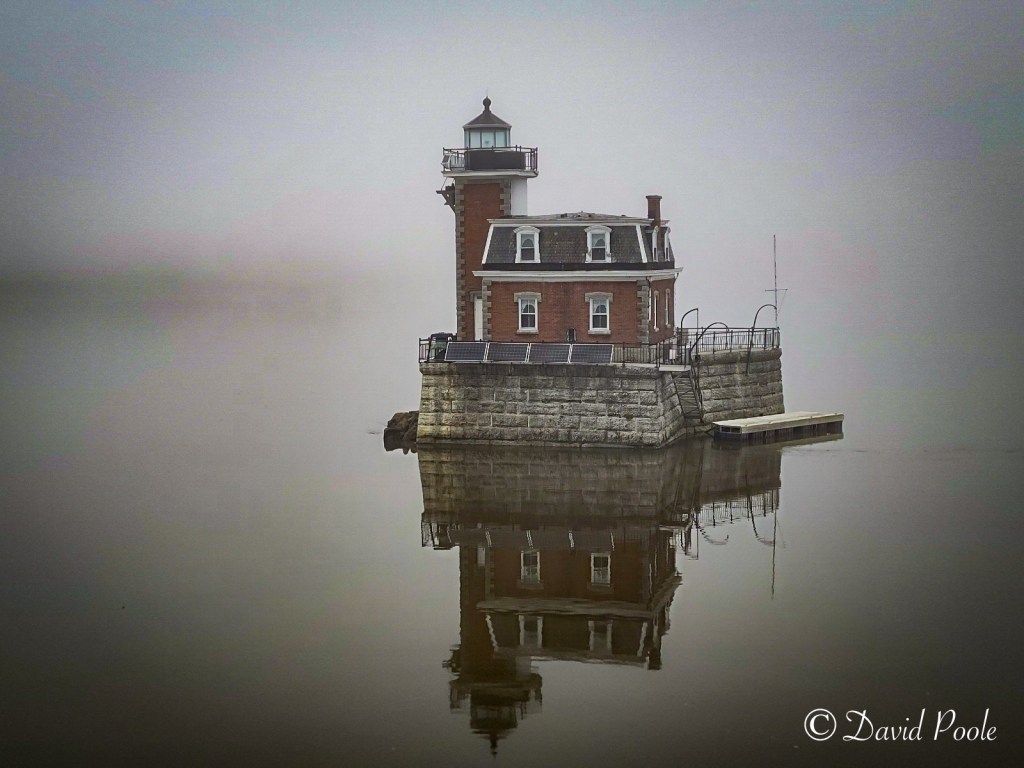


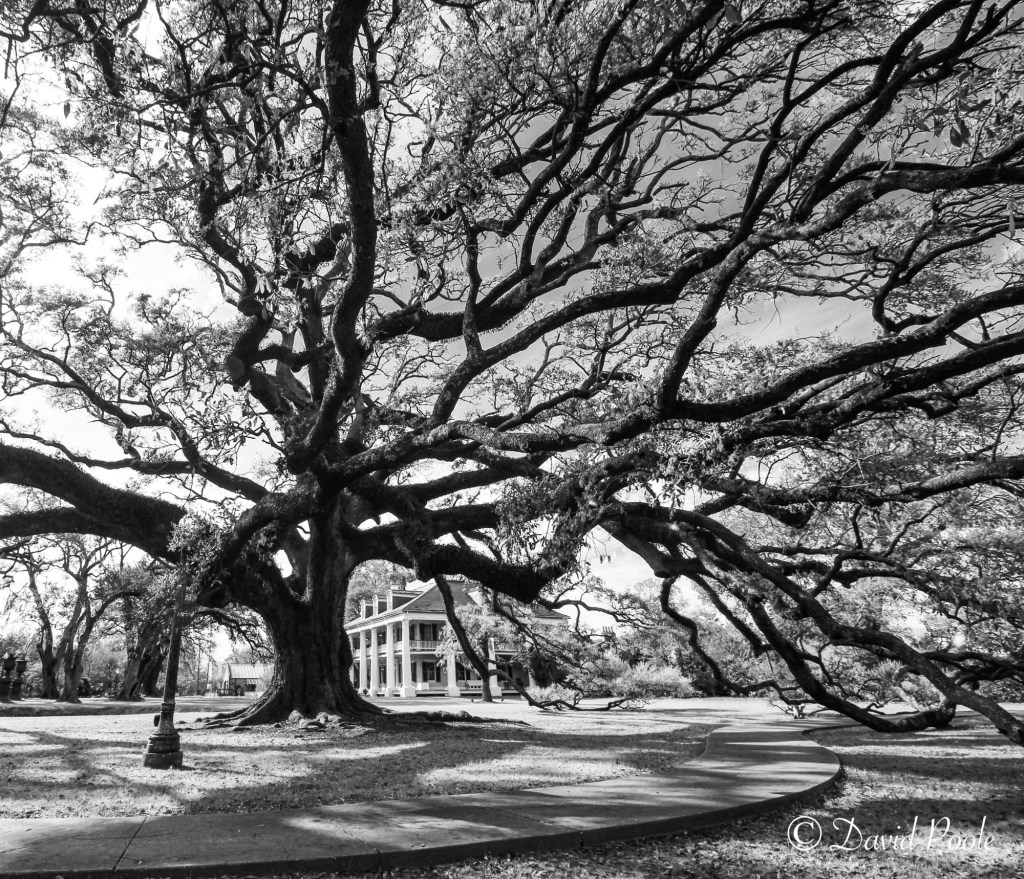

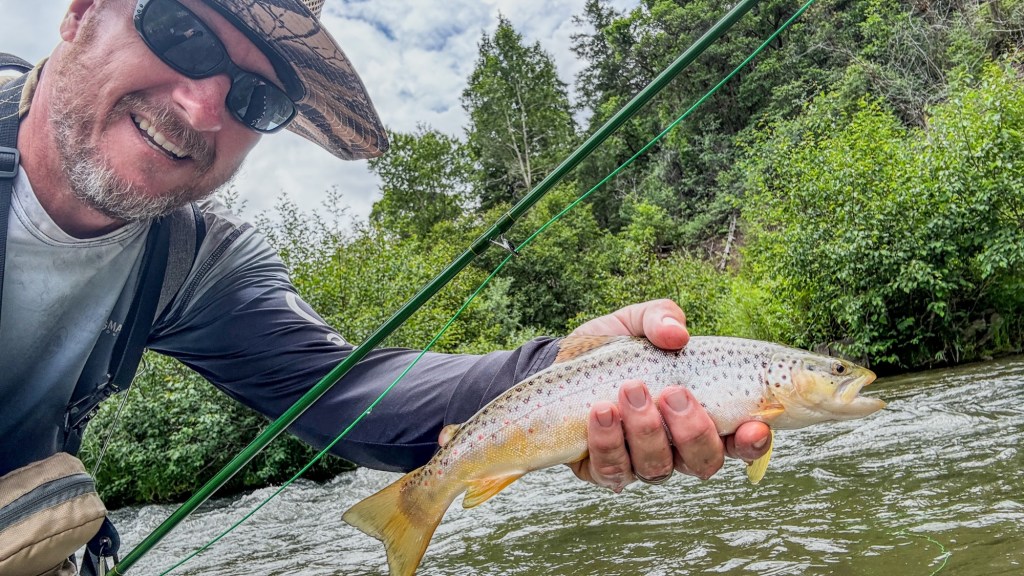


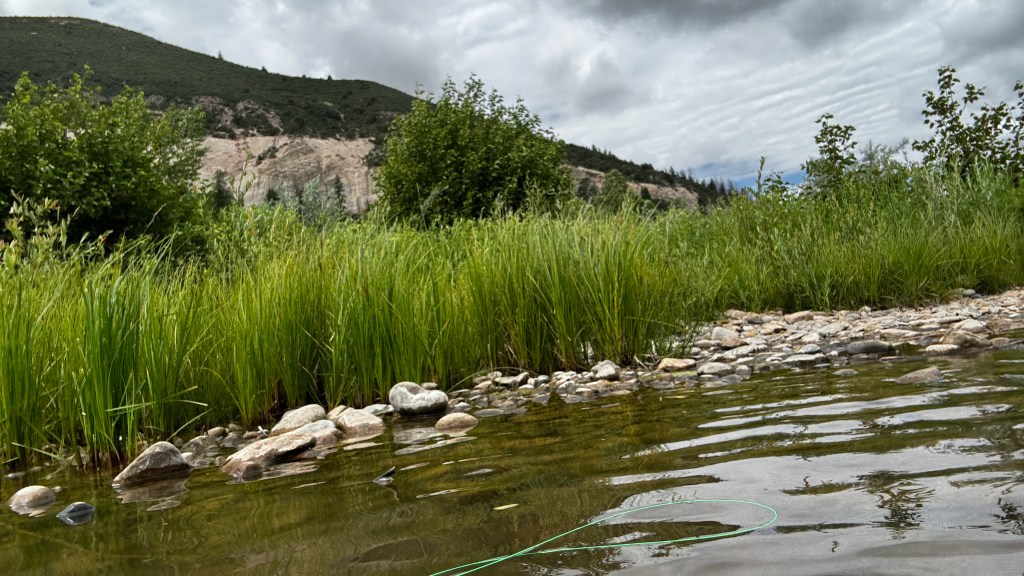
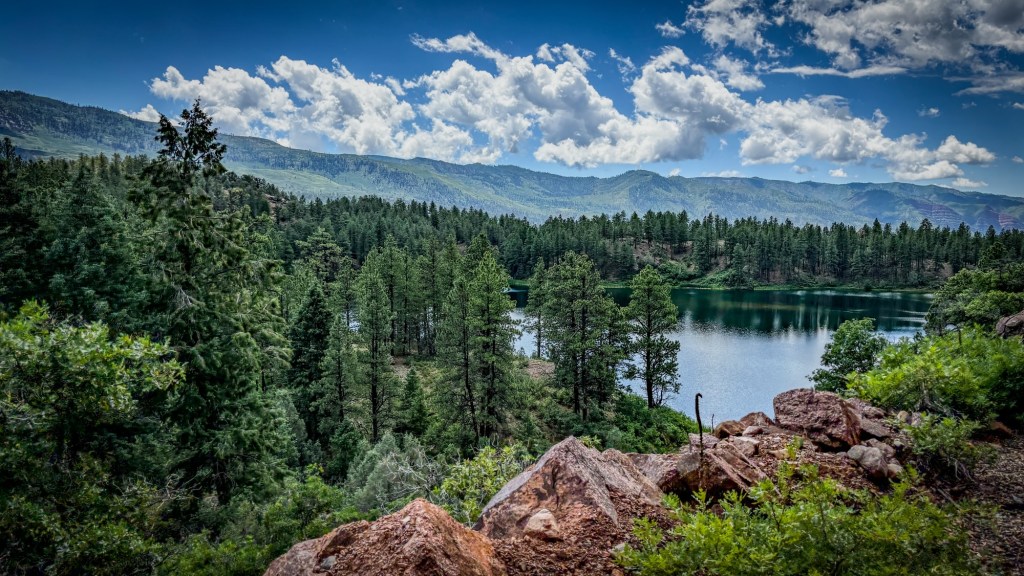


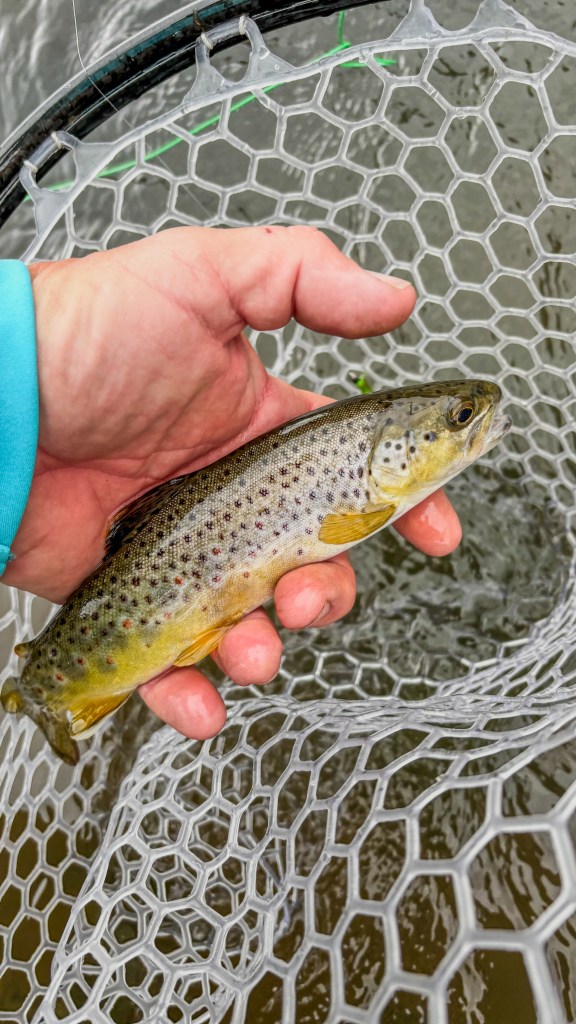
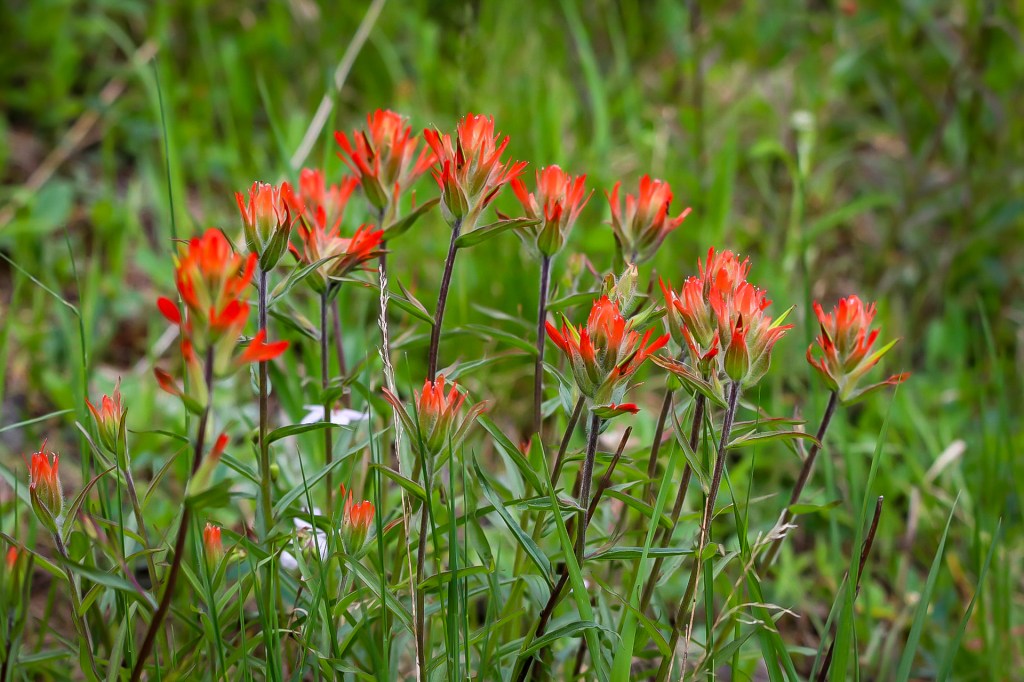
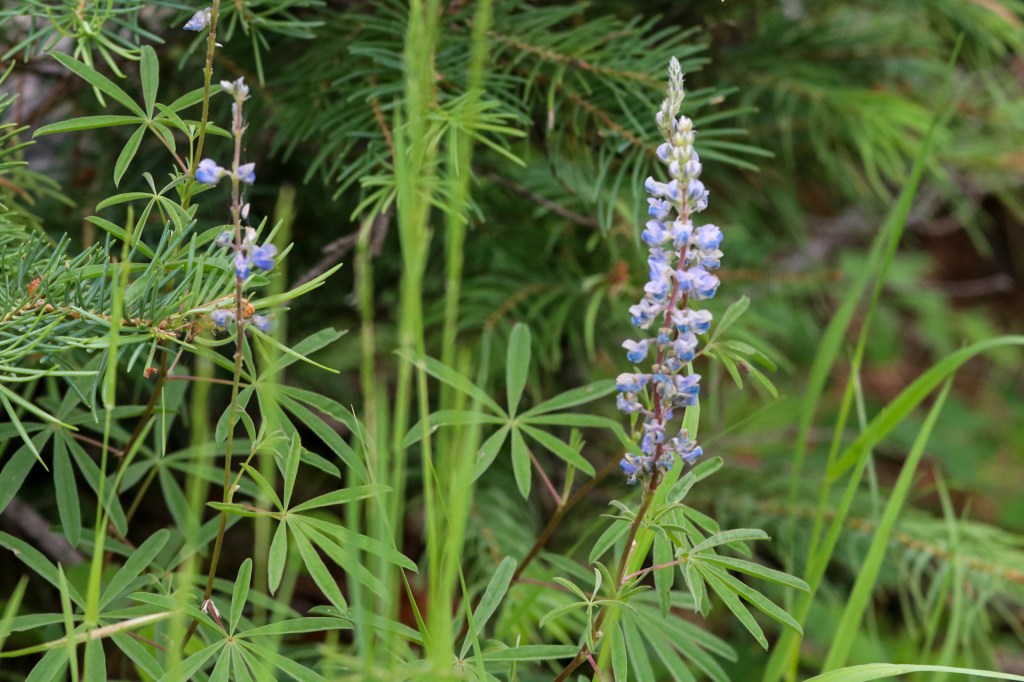
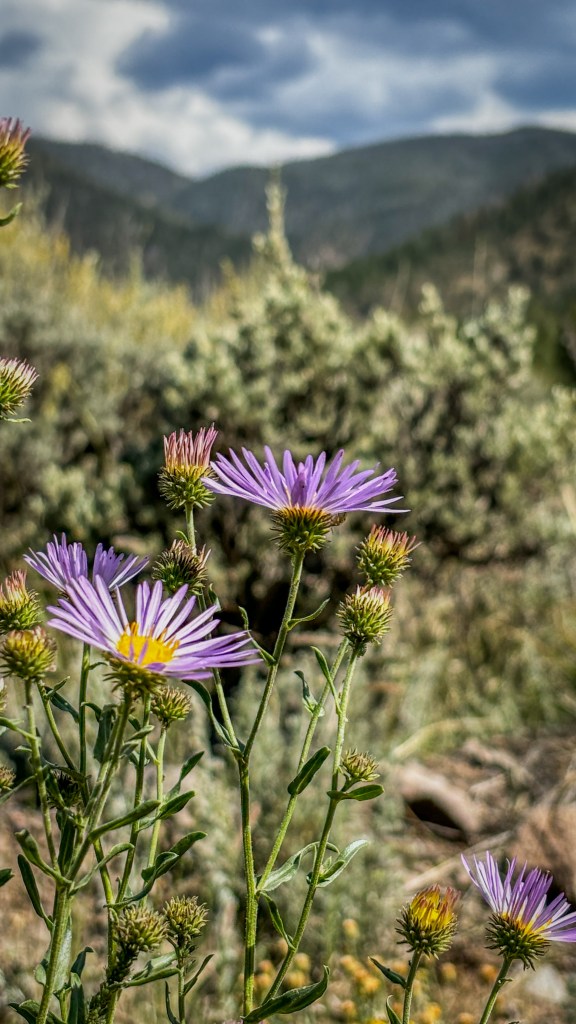

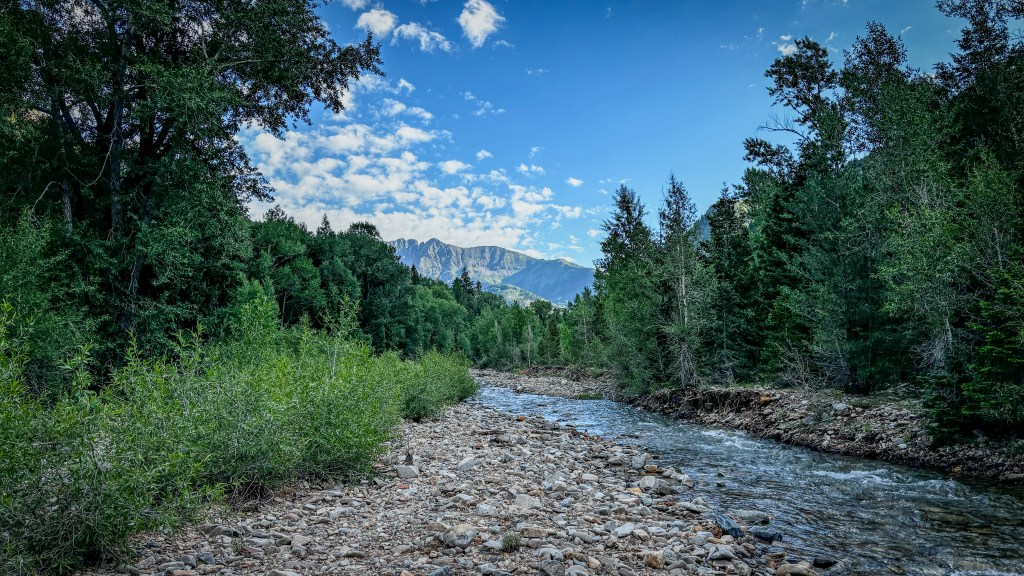
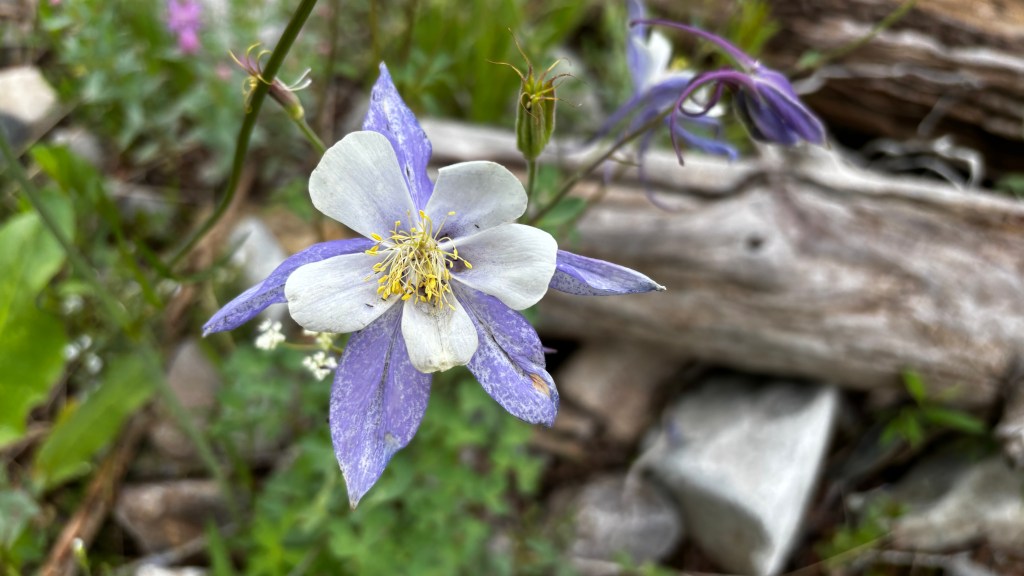

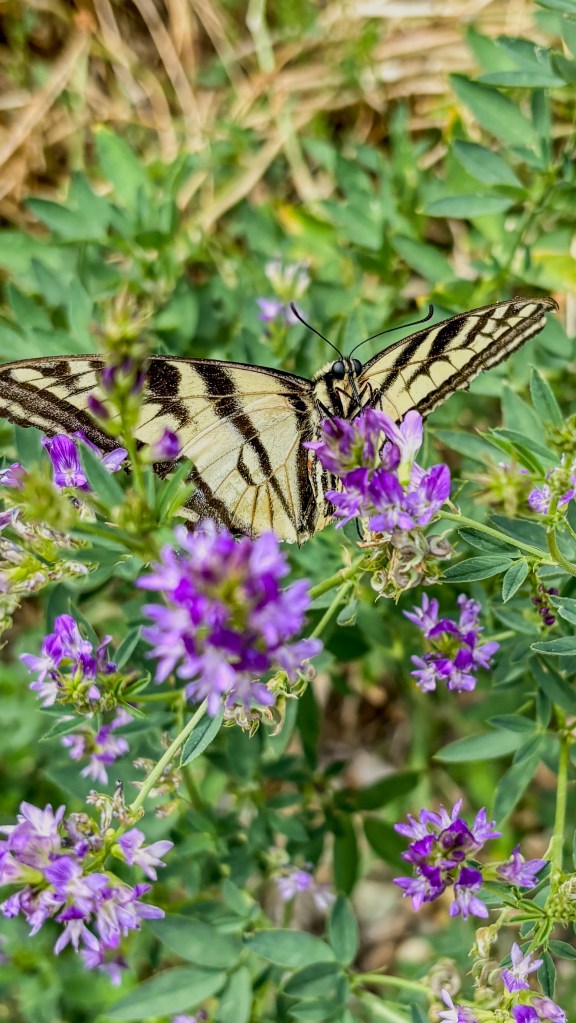

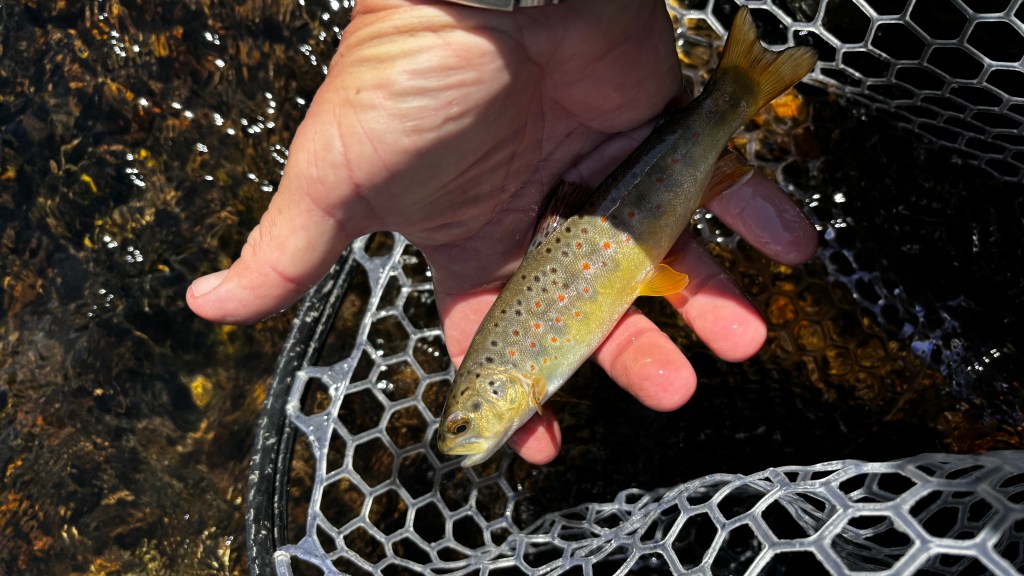


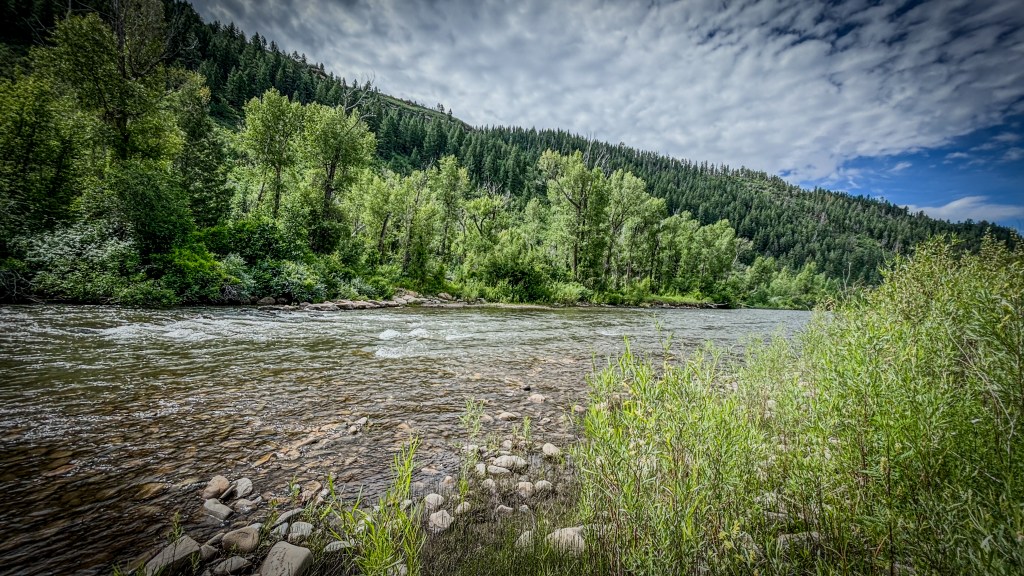
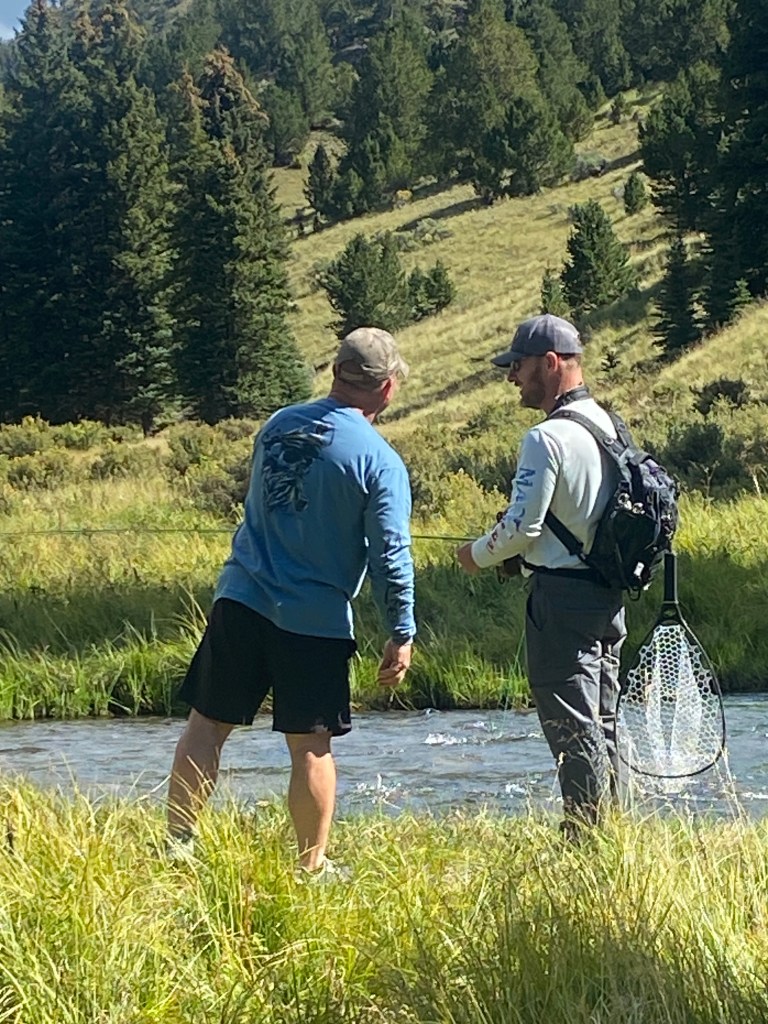


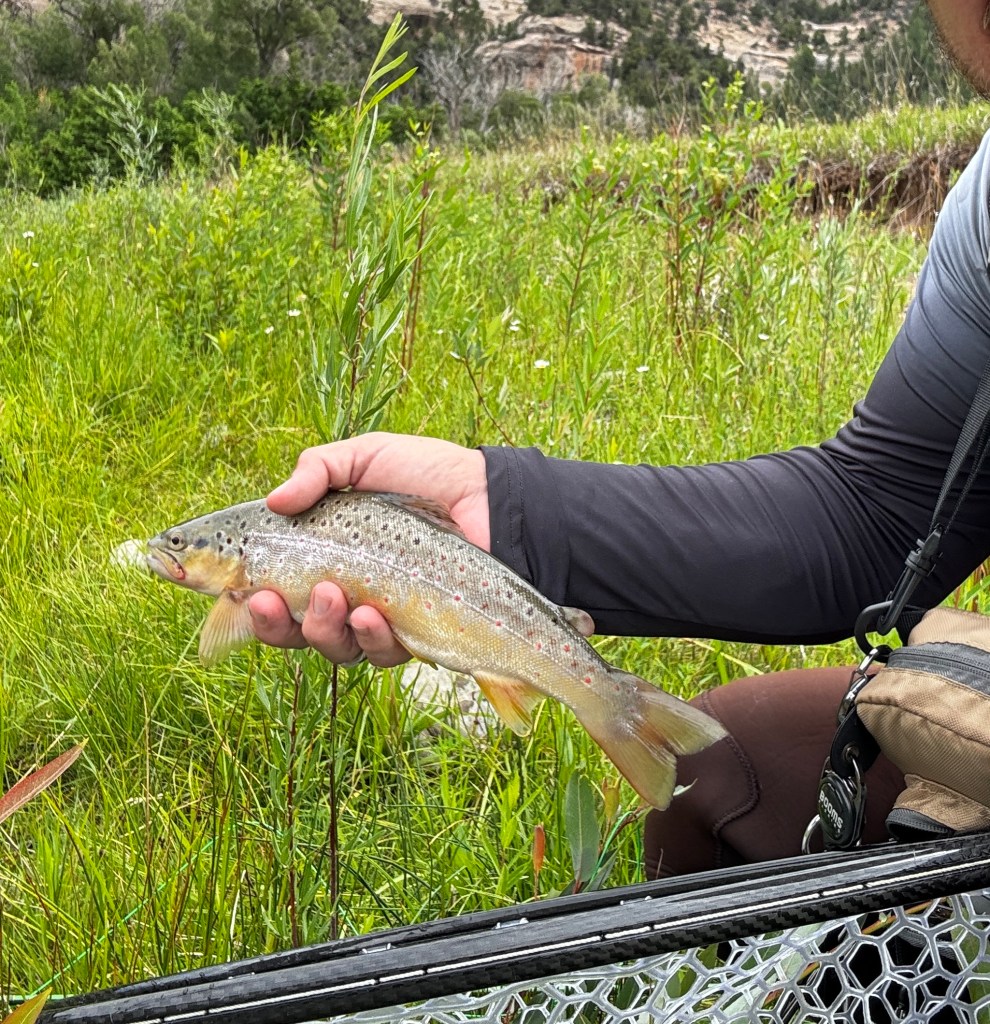
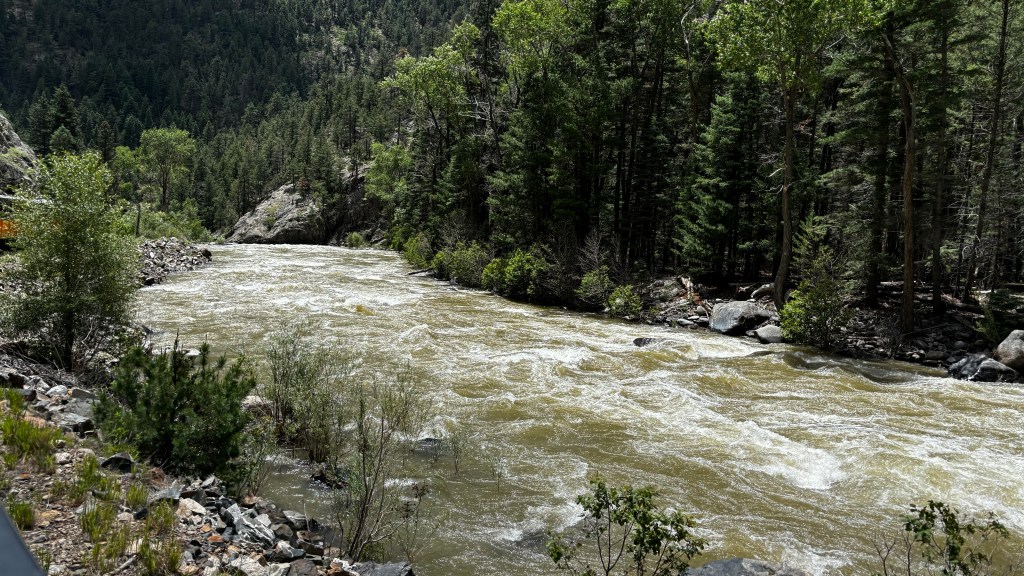
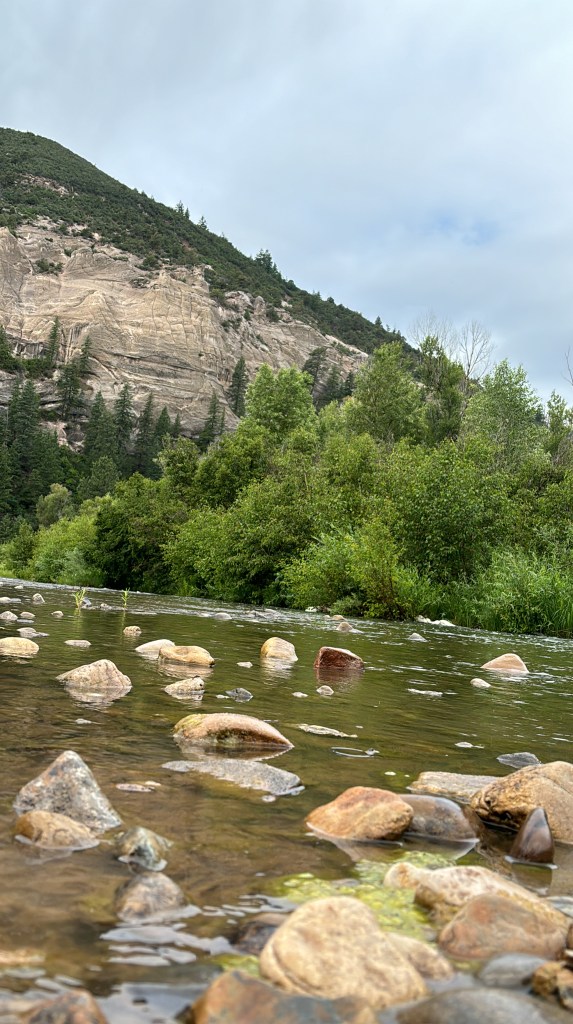
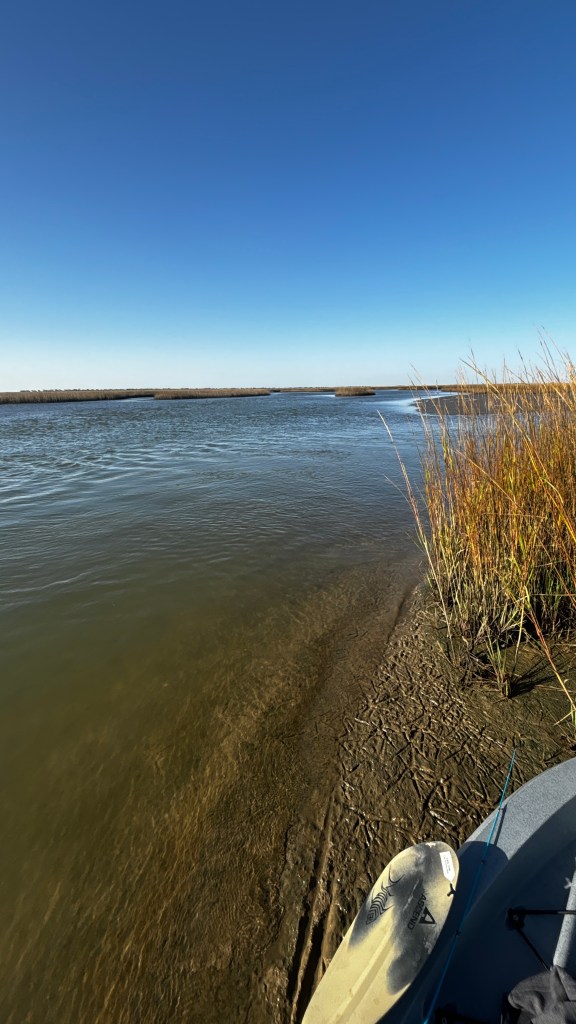


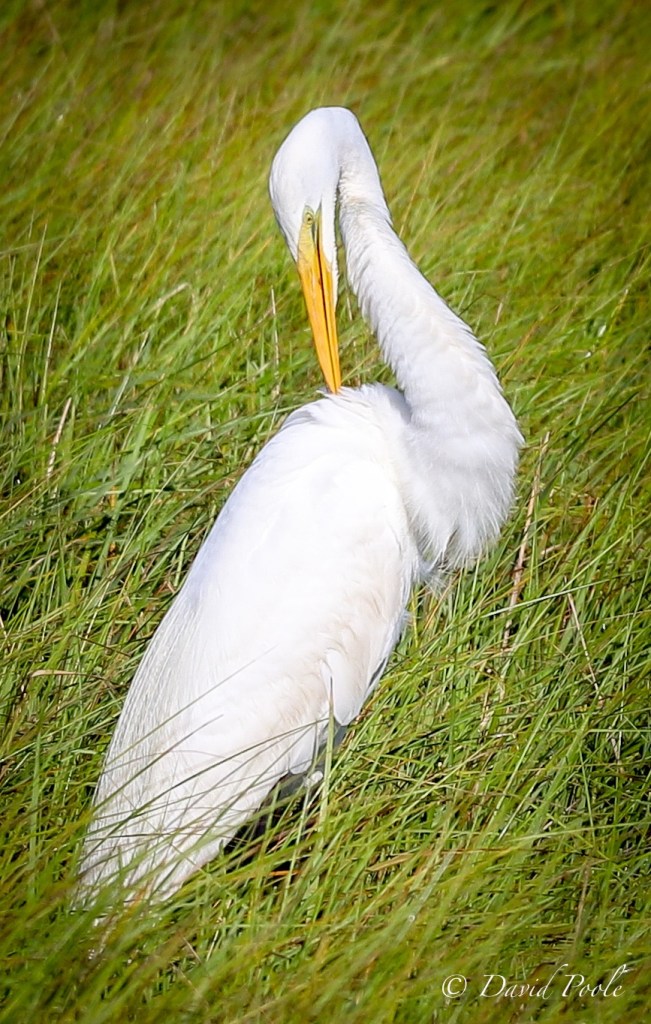
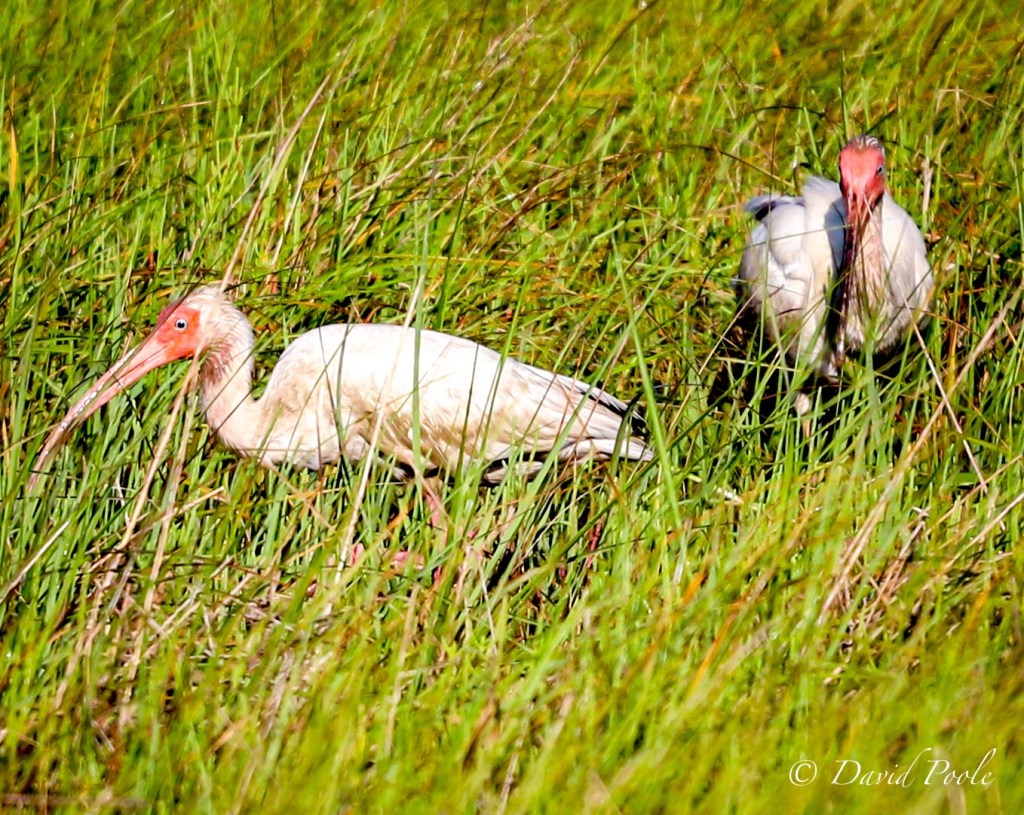
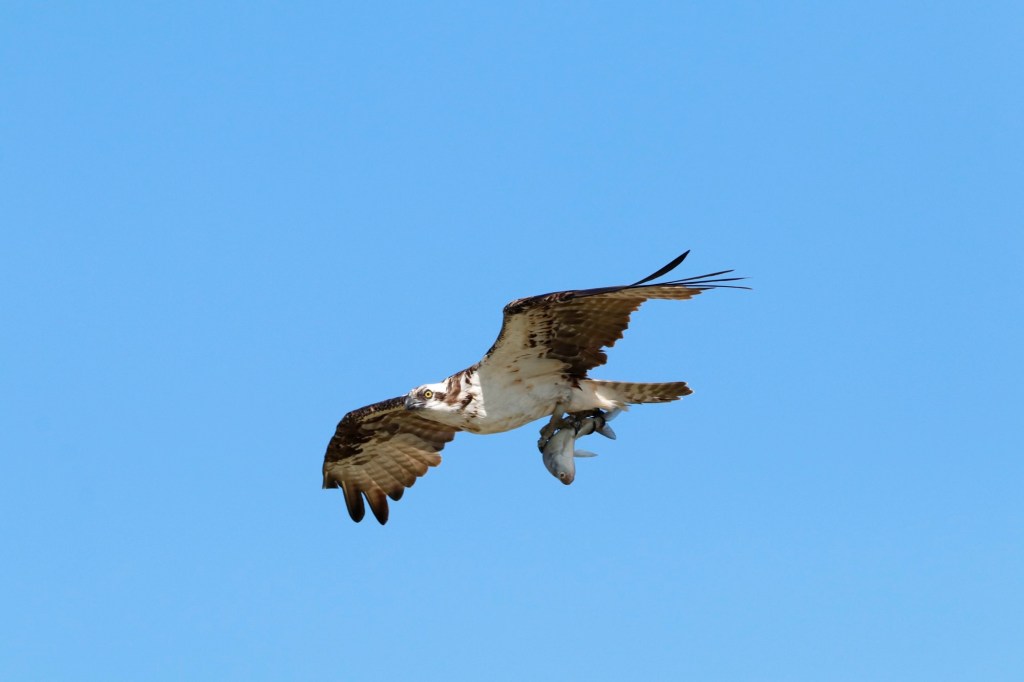

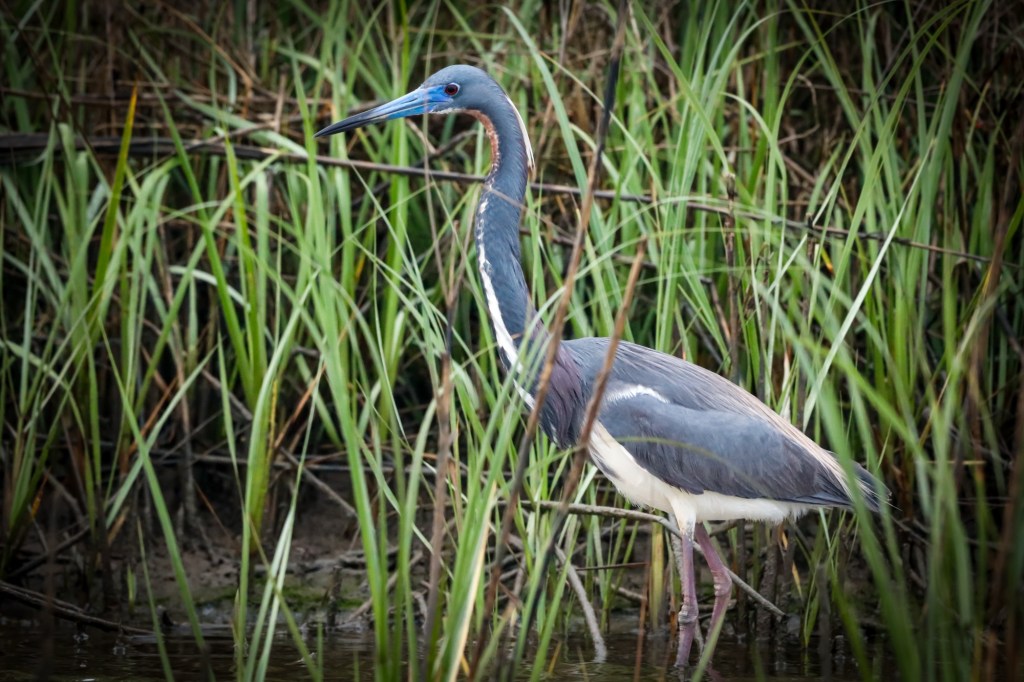

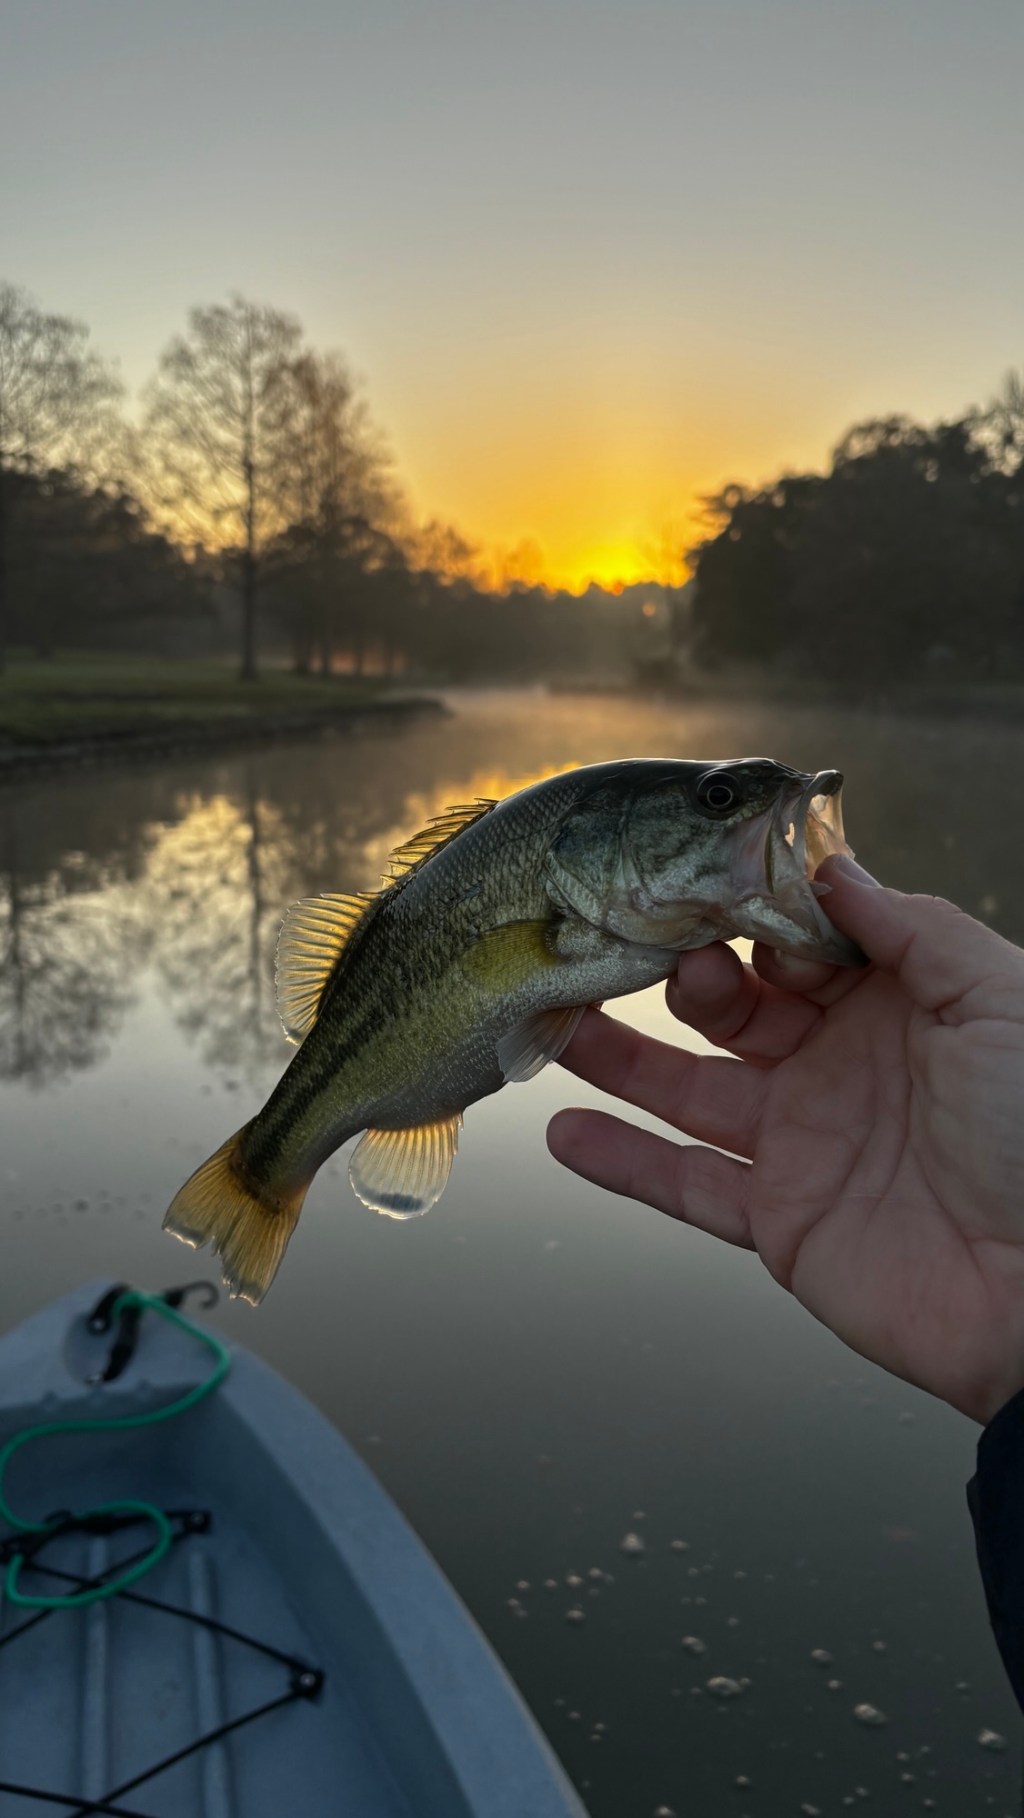
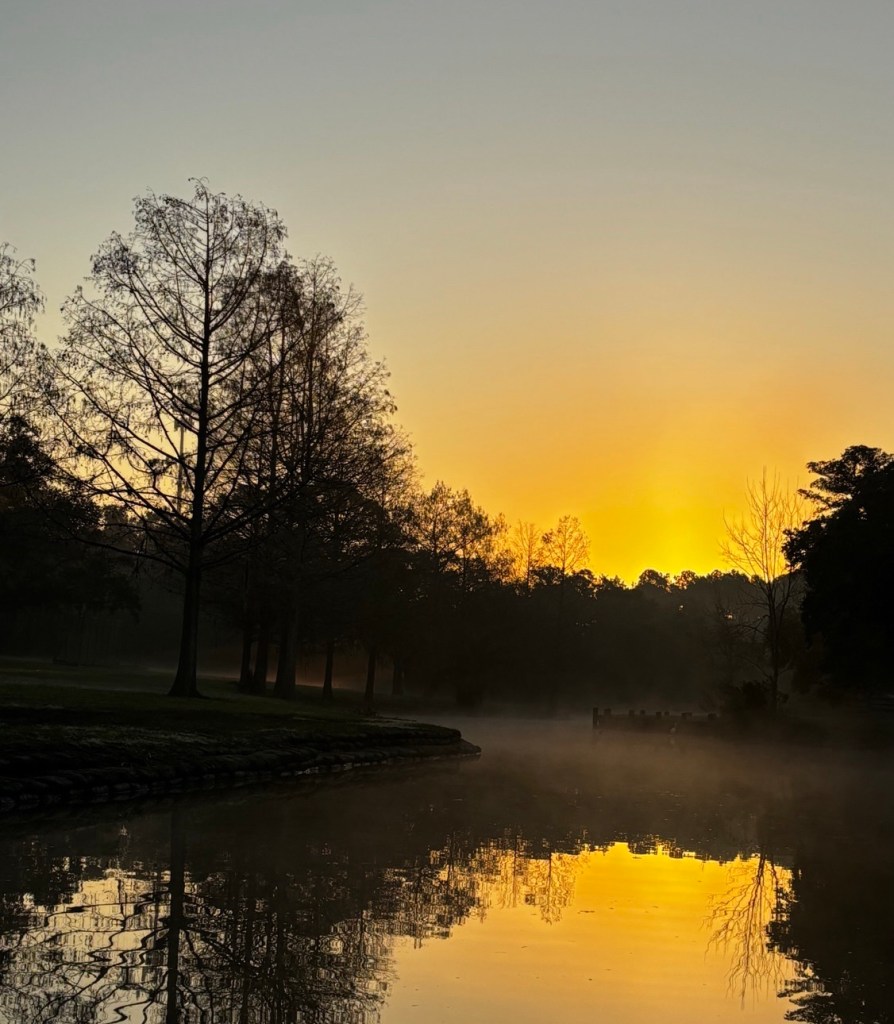


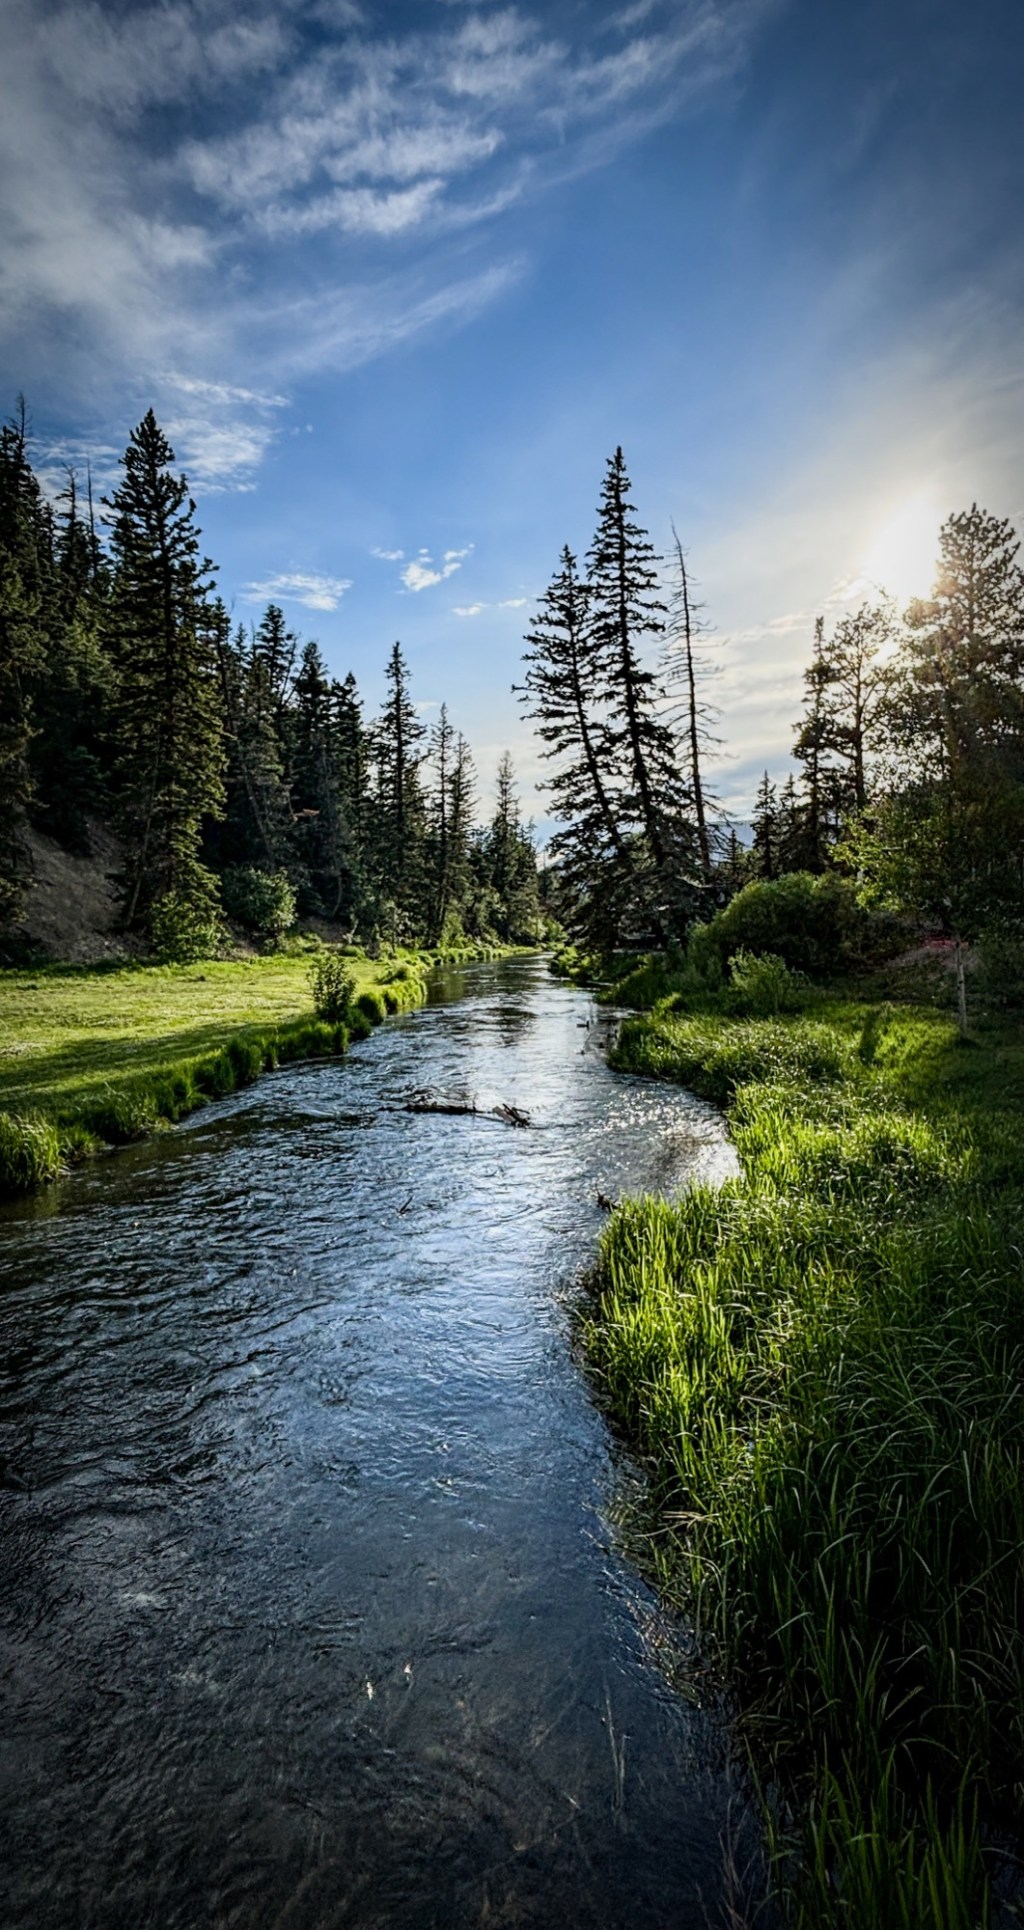
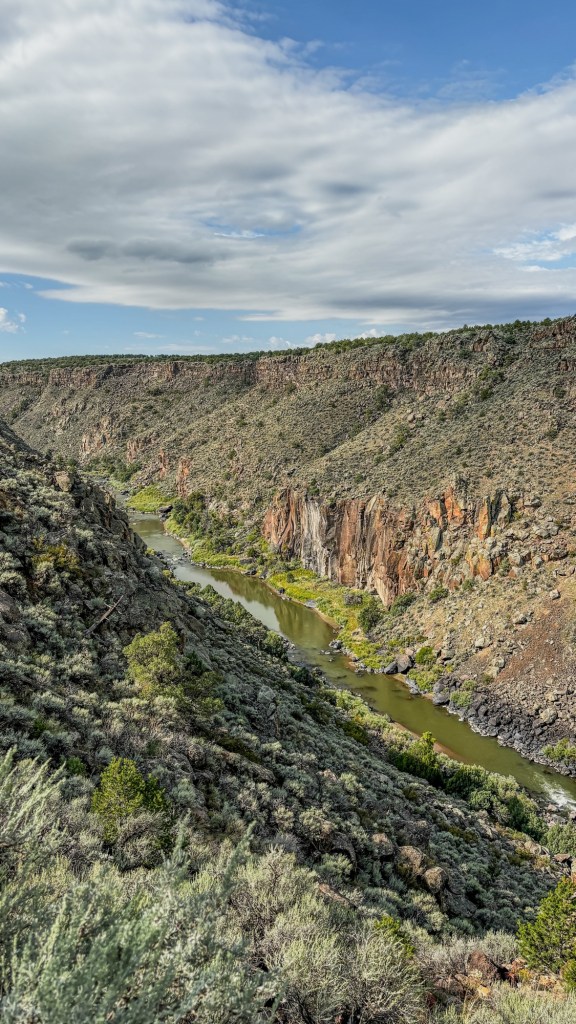
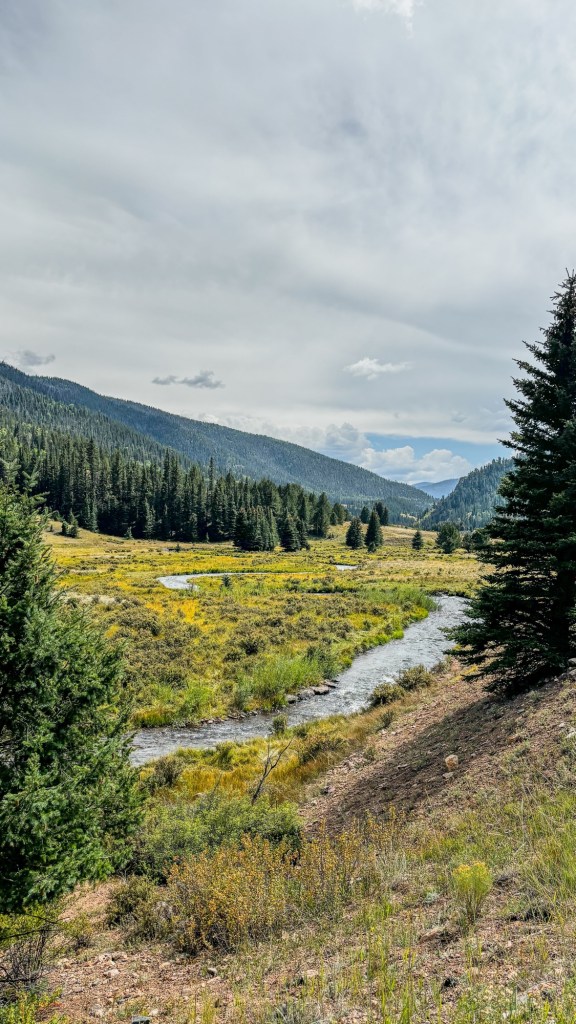
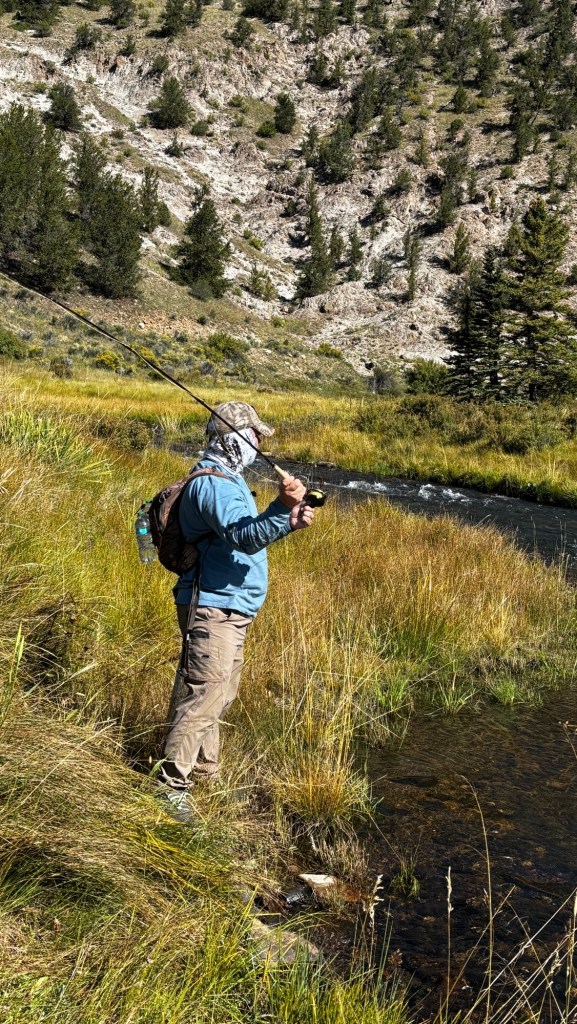
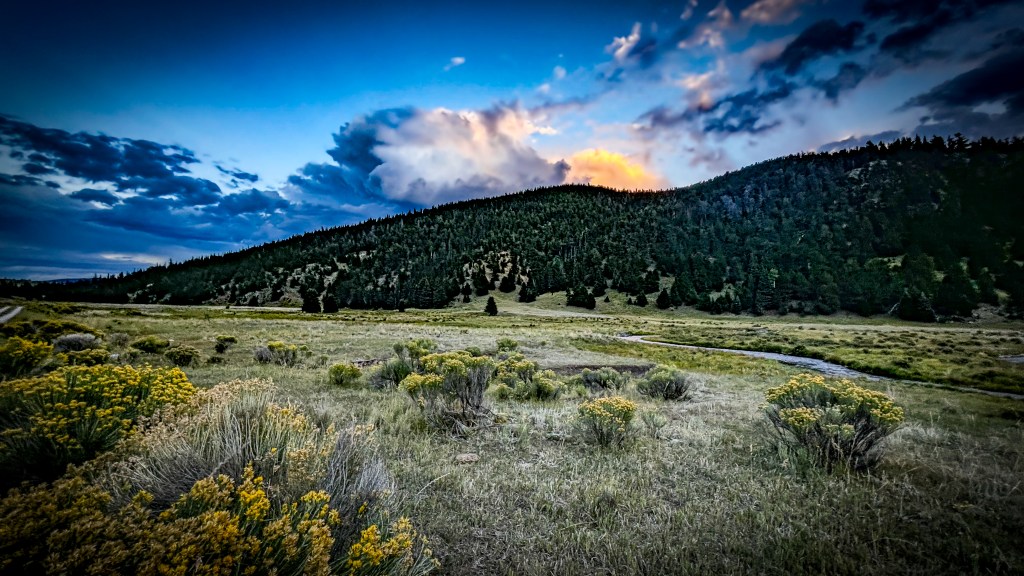
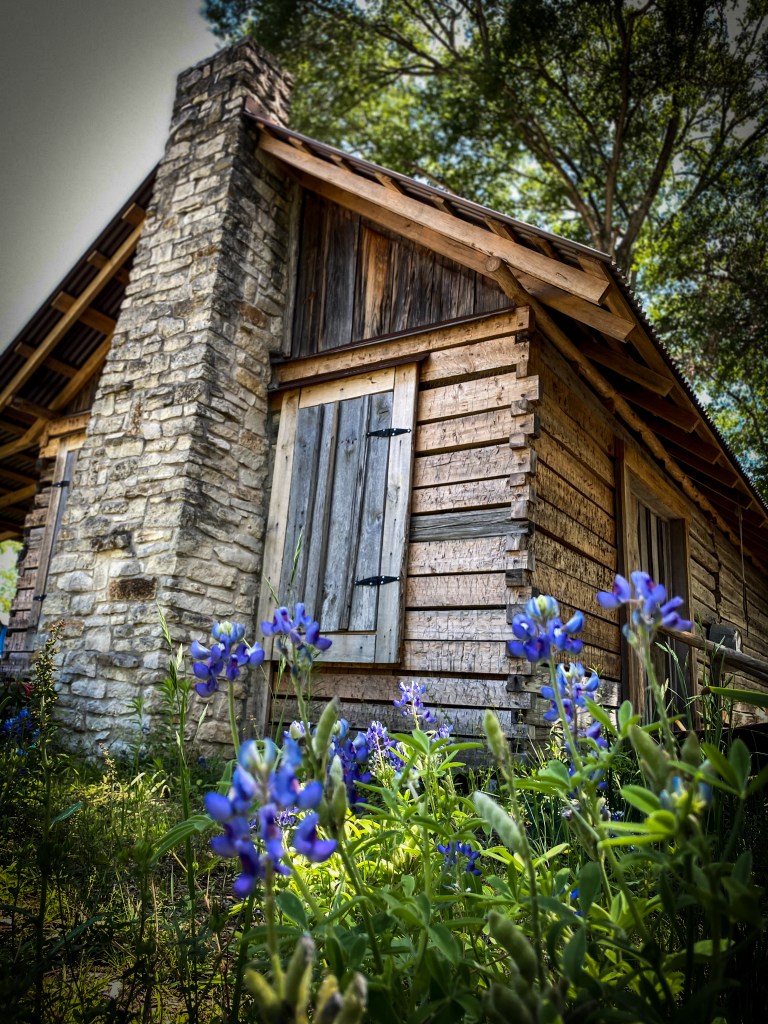


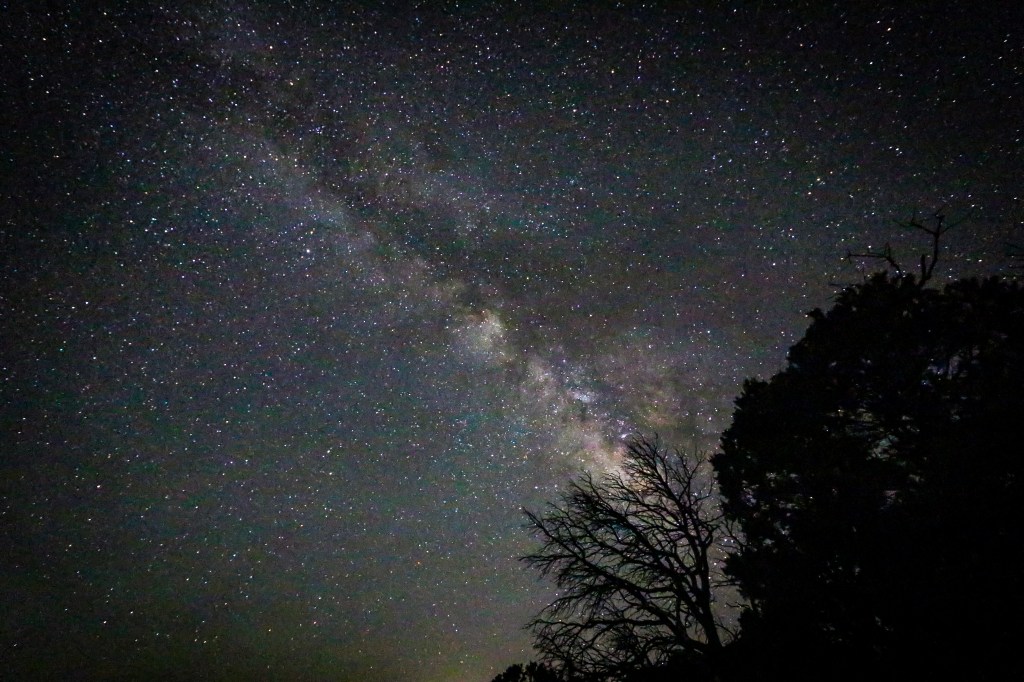

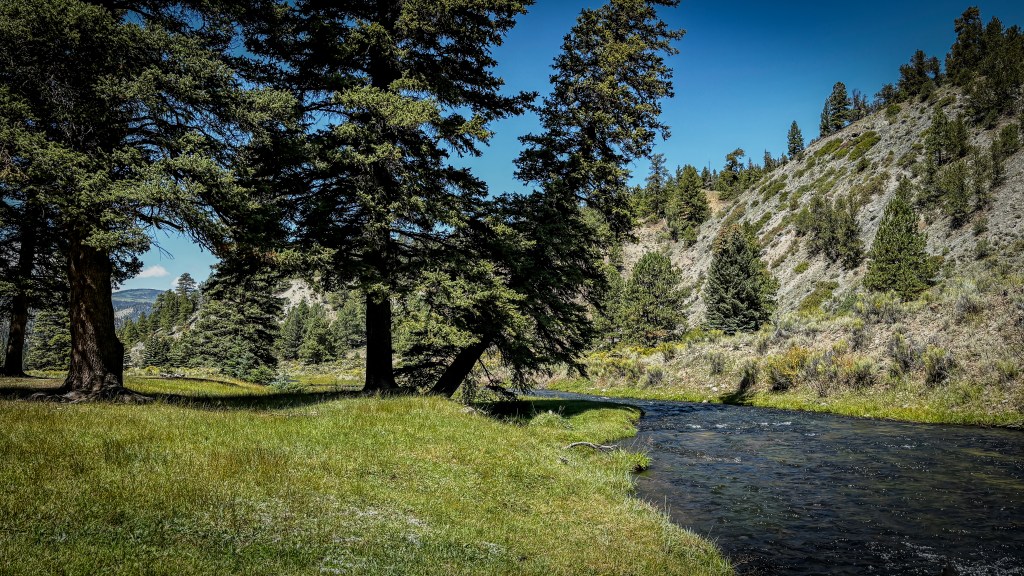

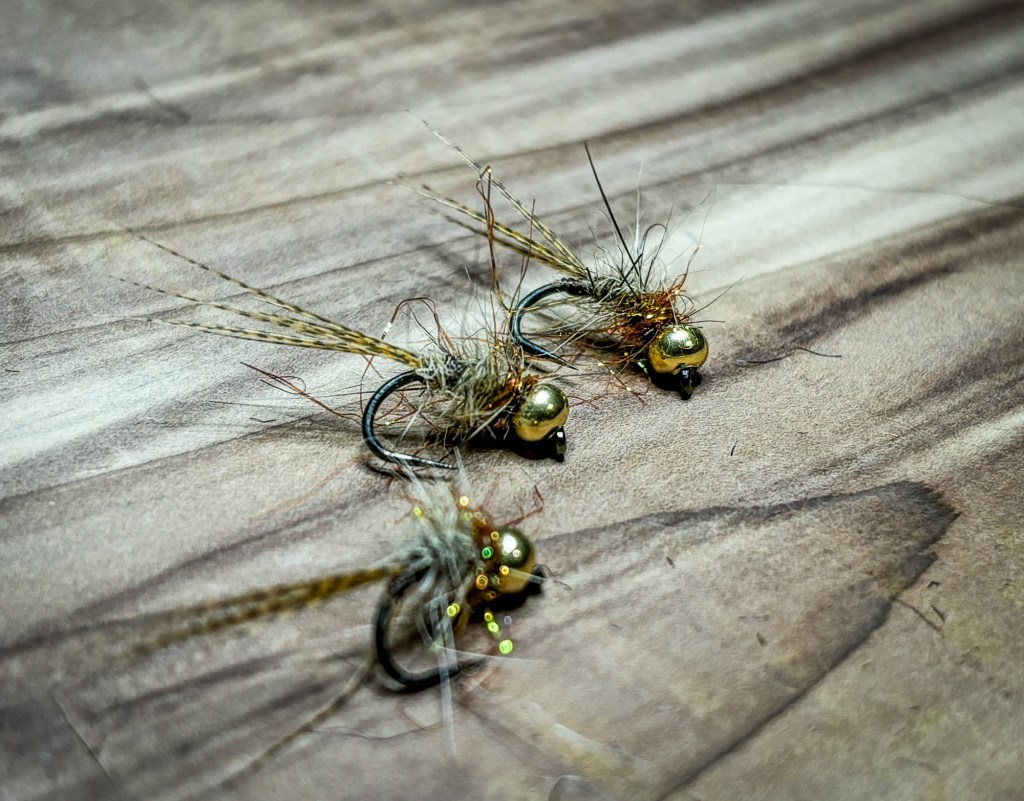

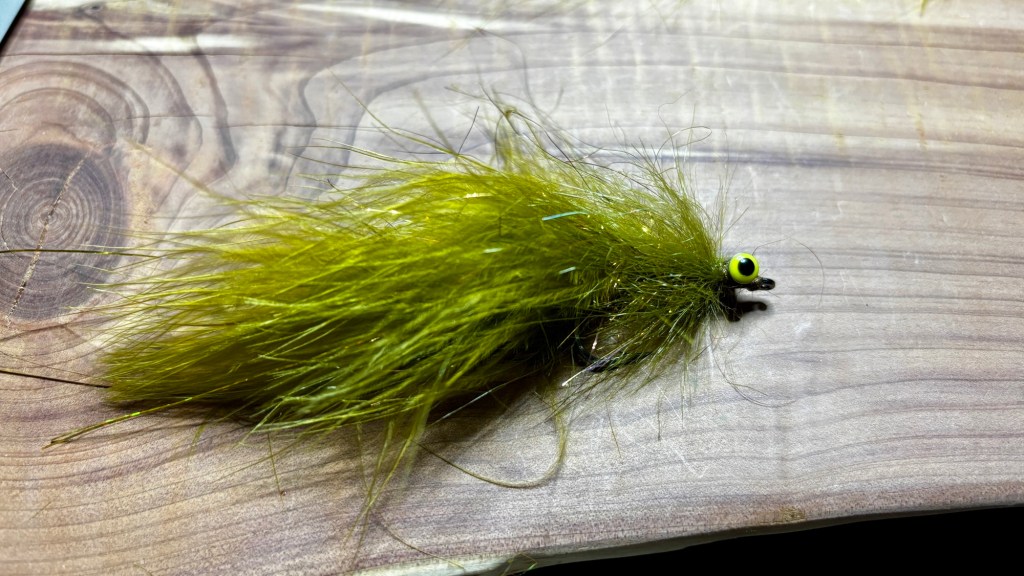
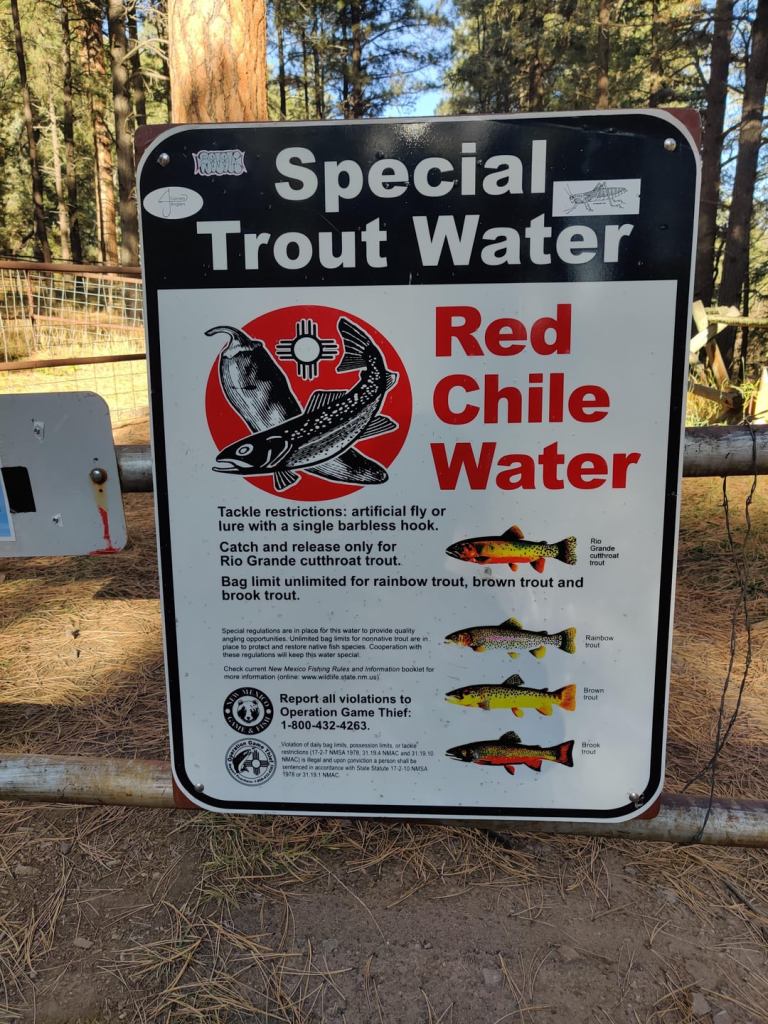
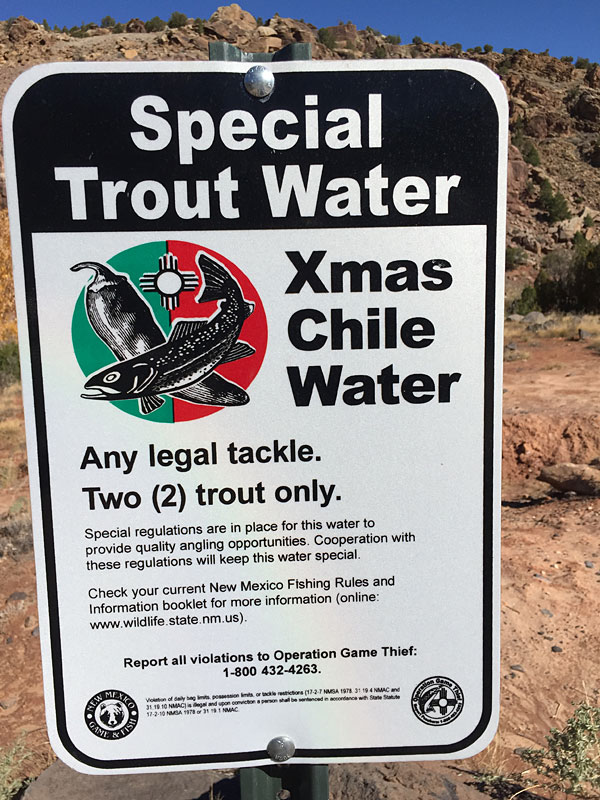

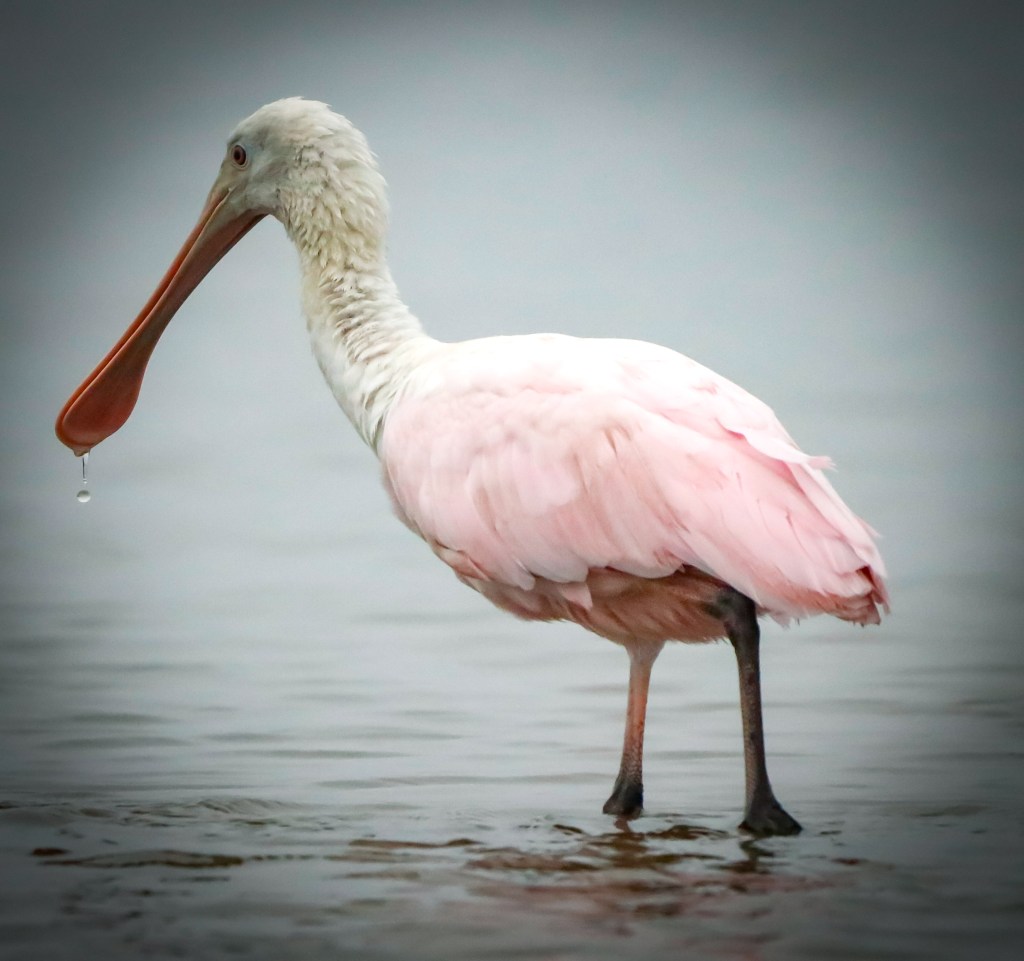

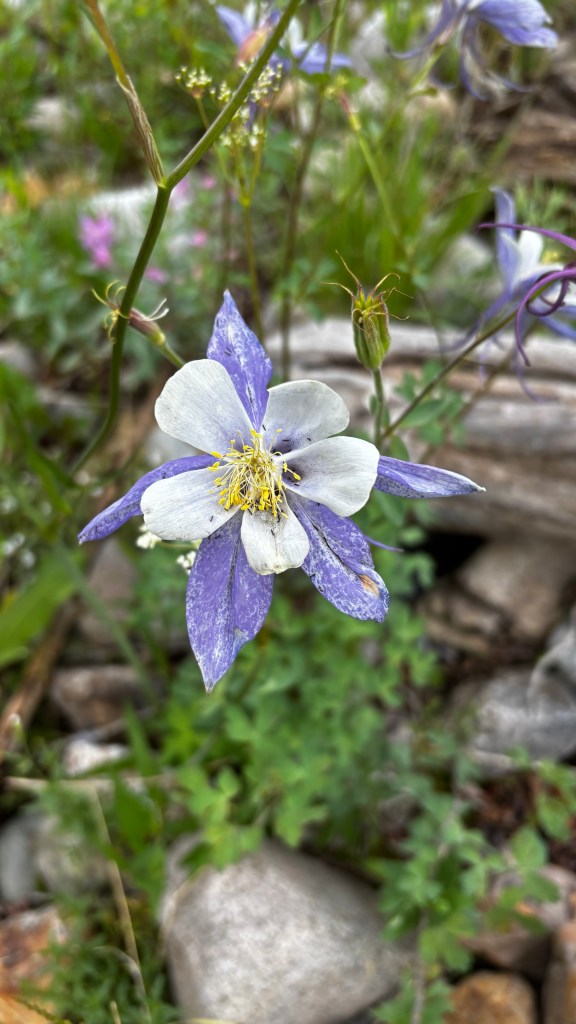
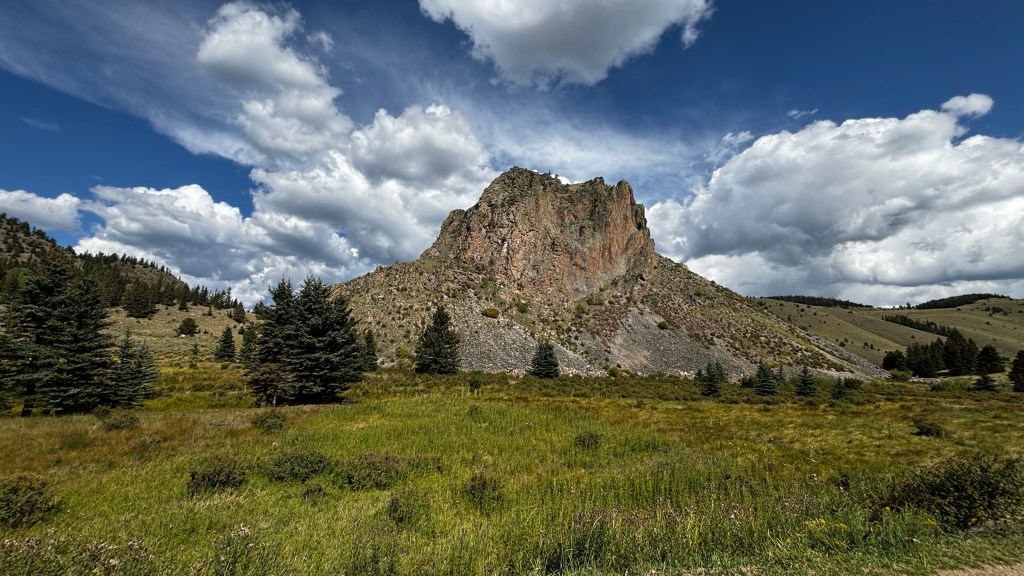


Let me know your thoughts in the comments below!