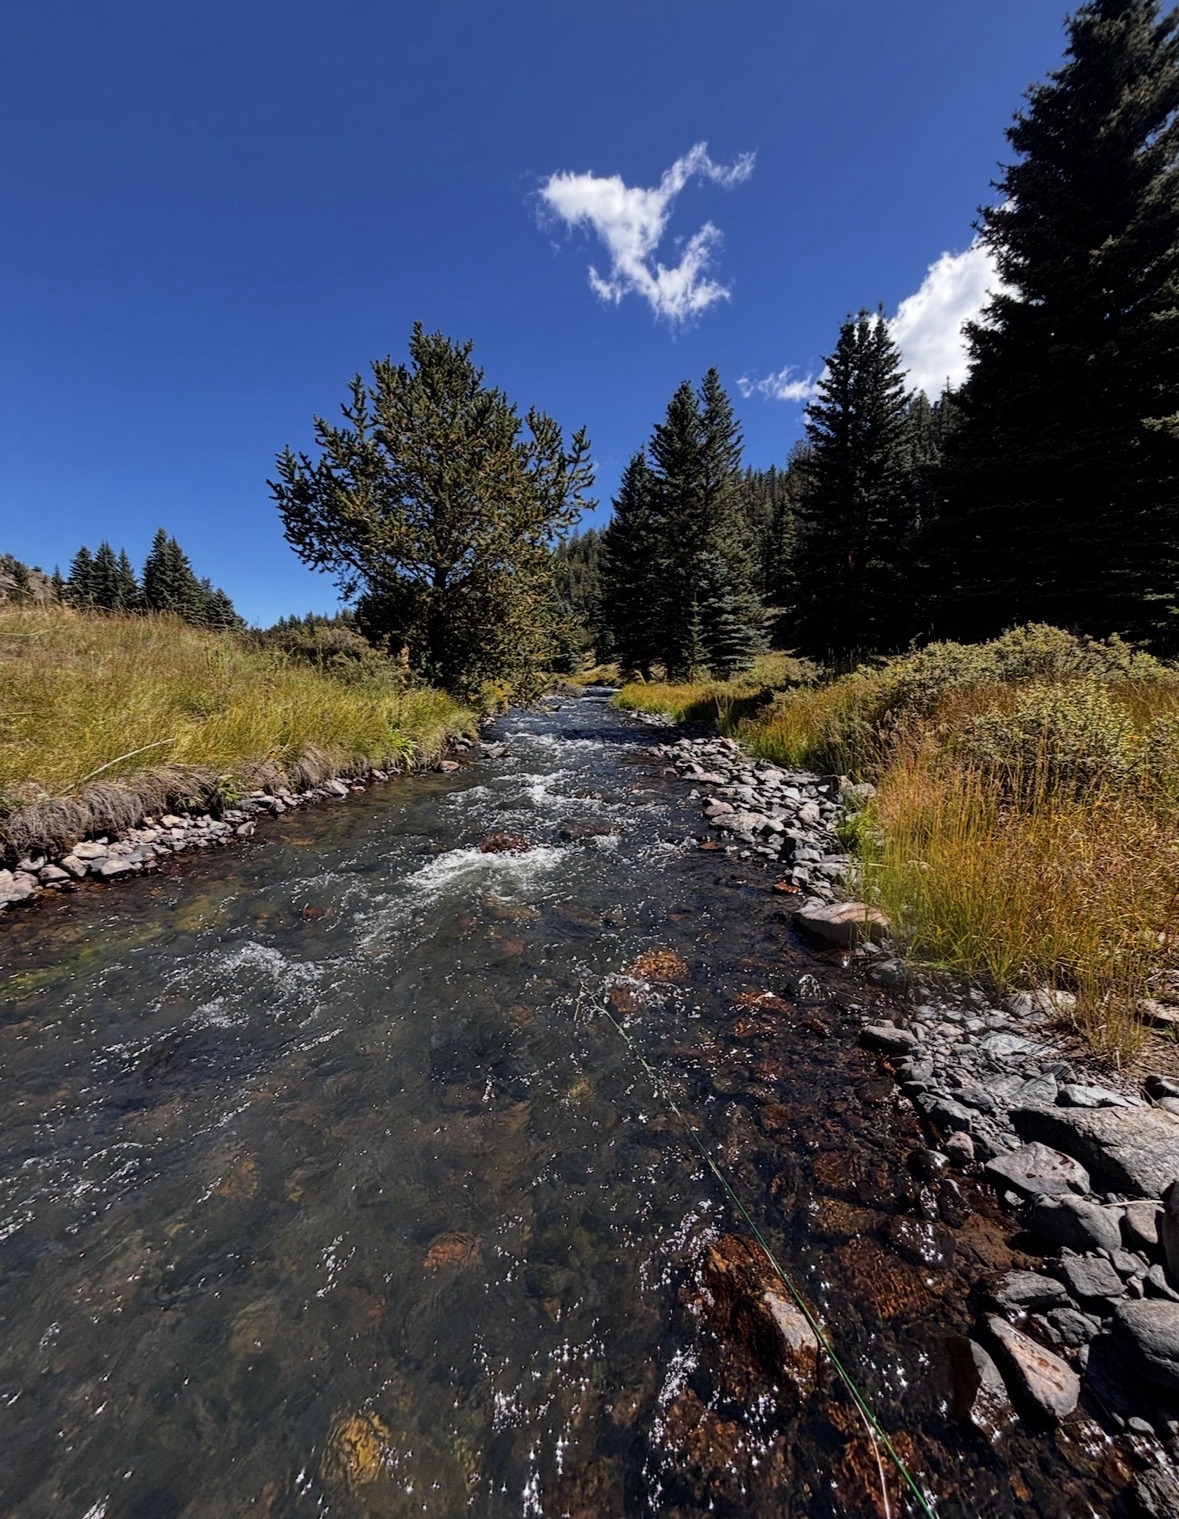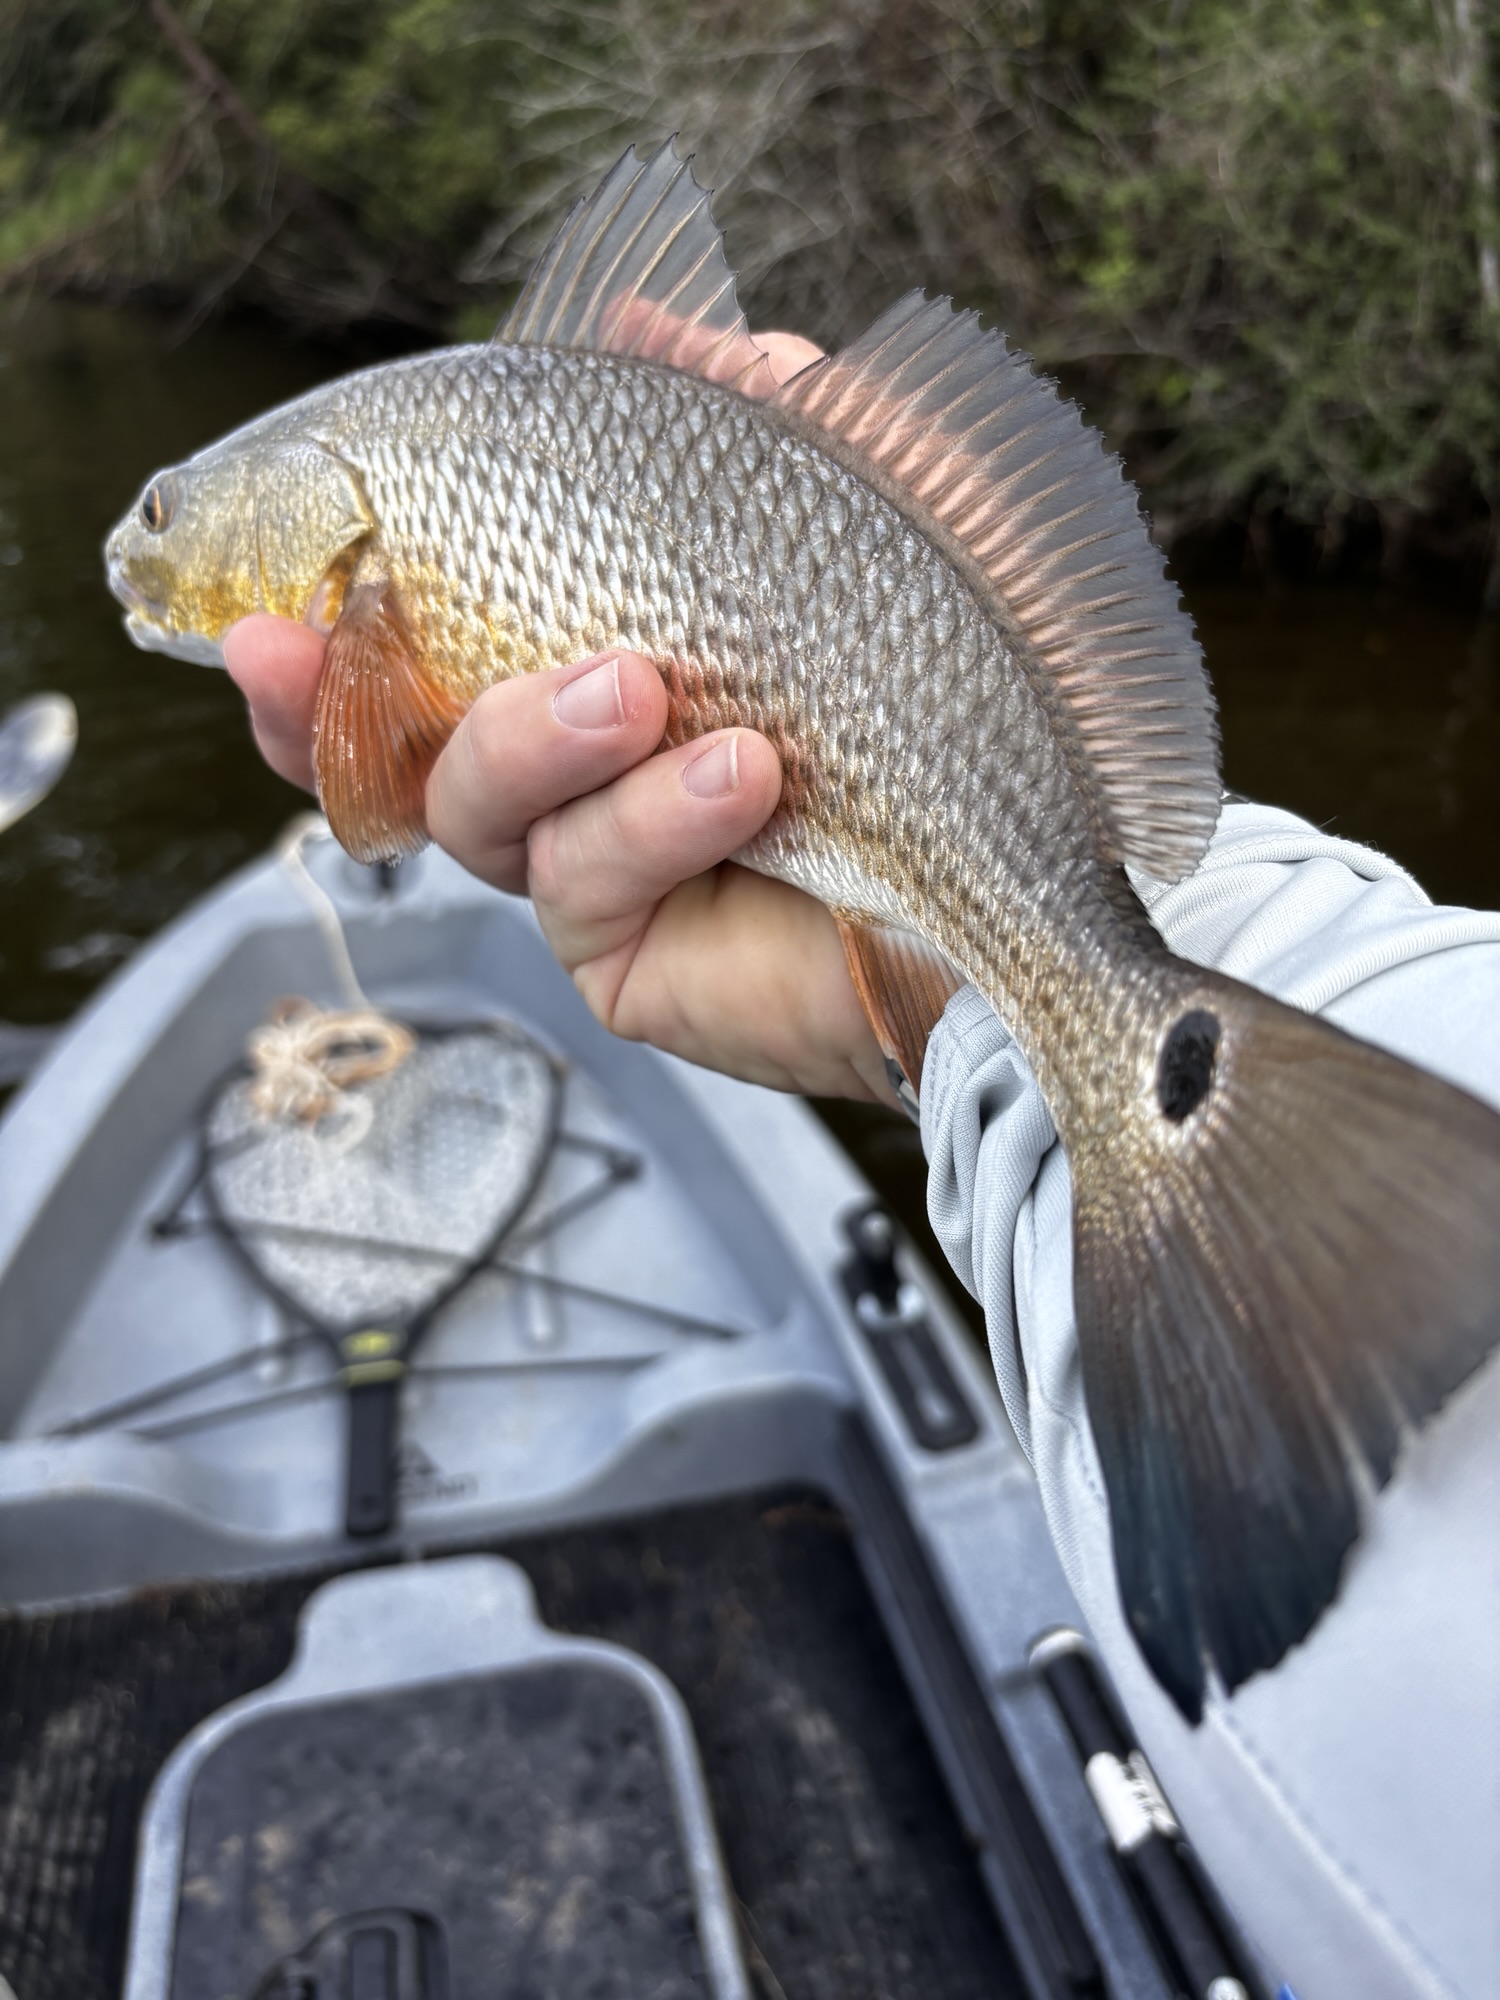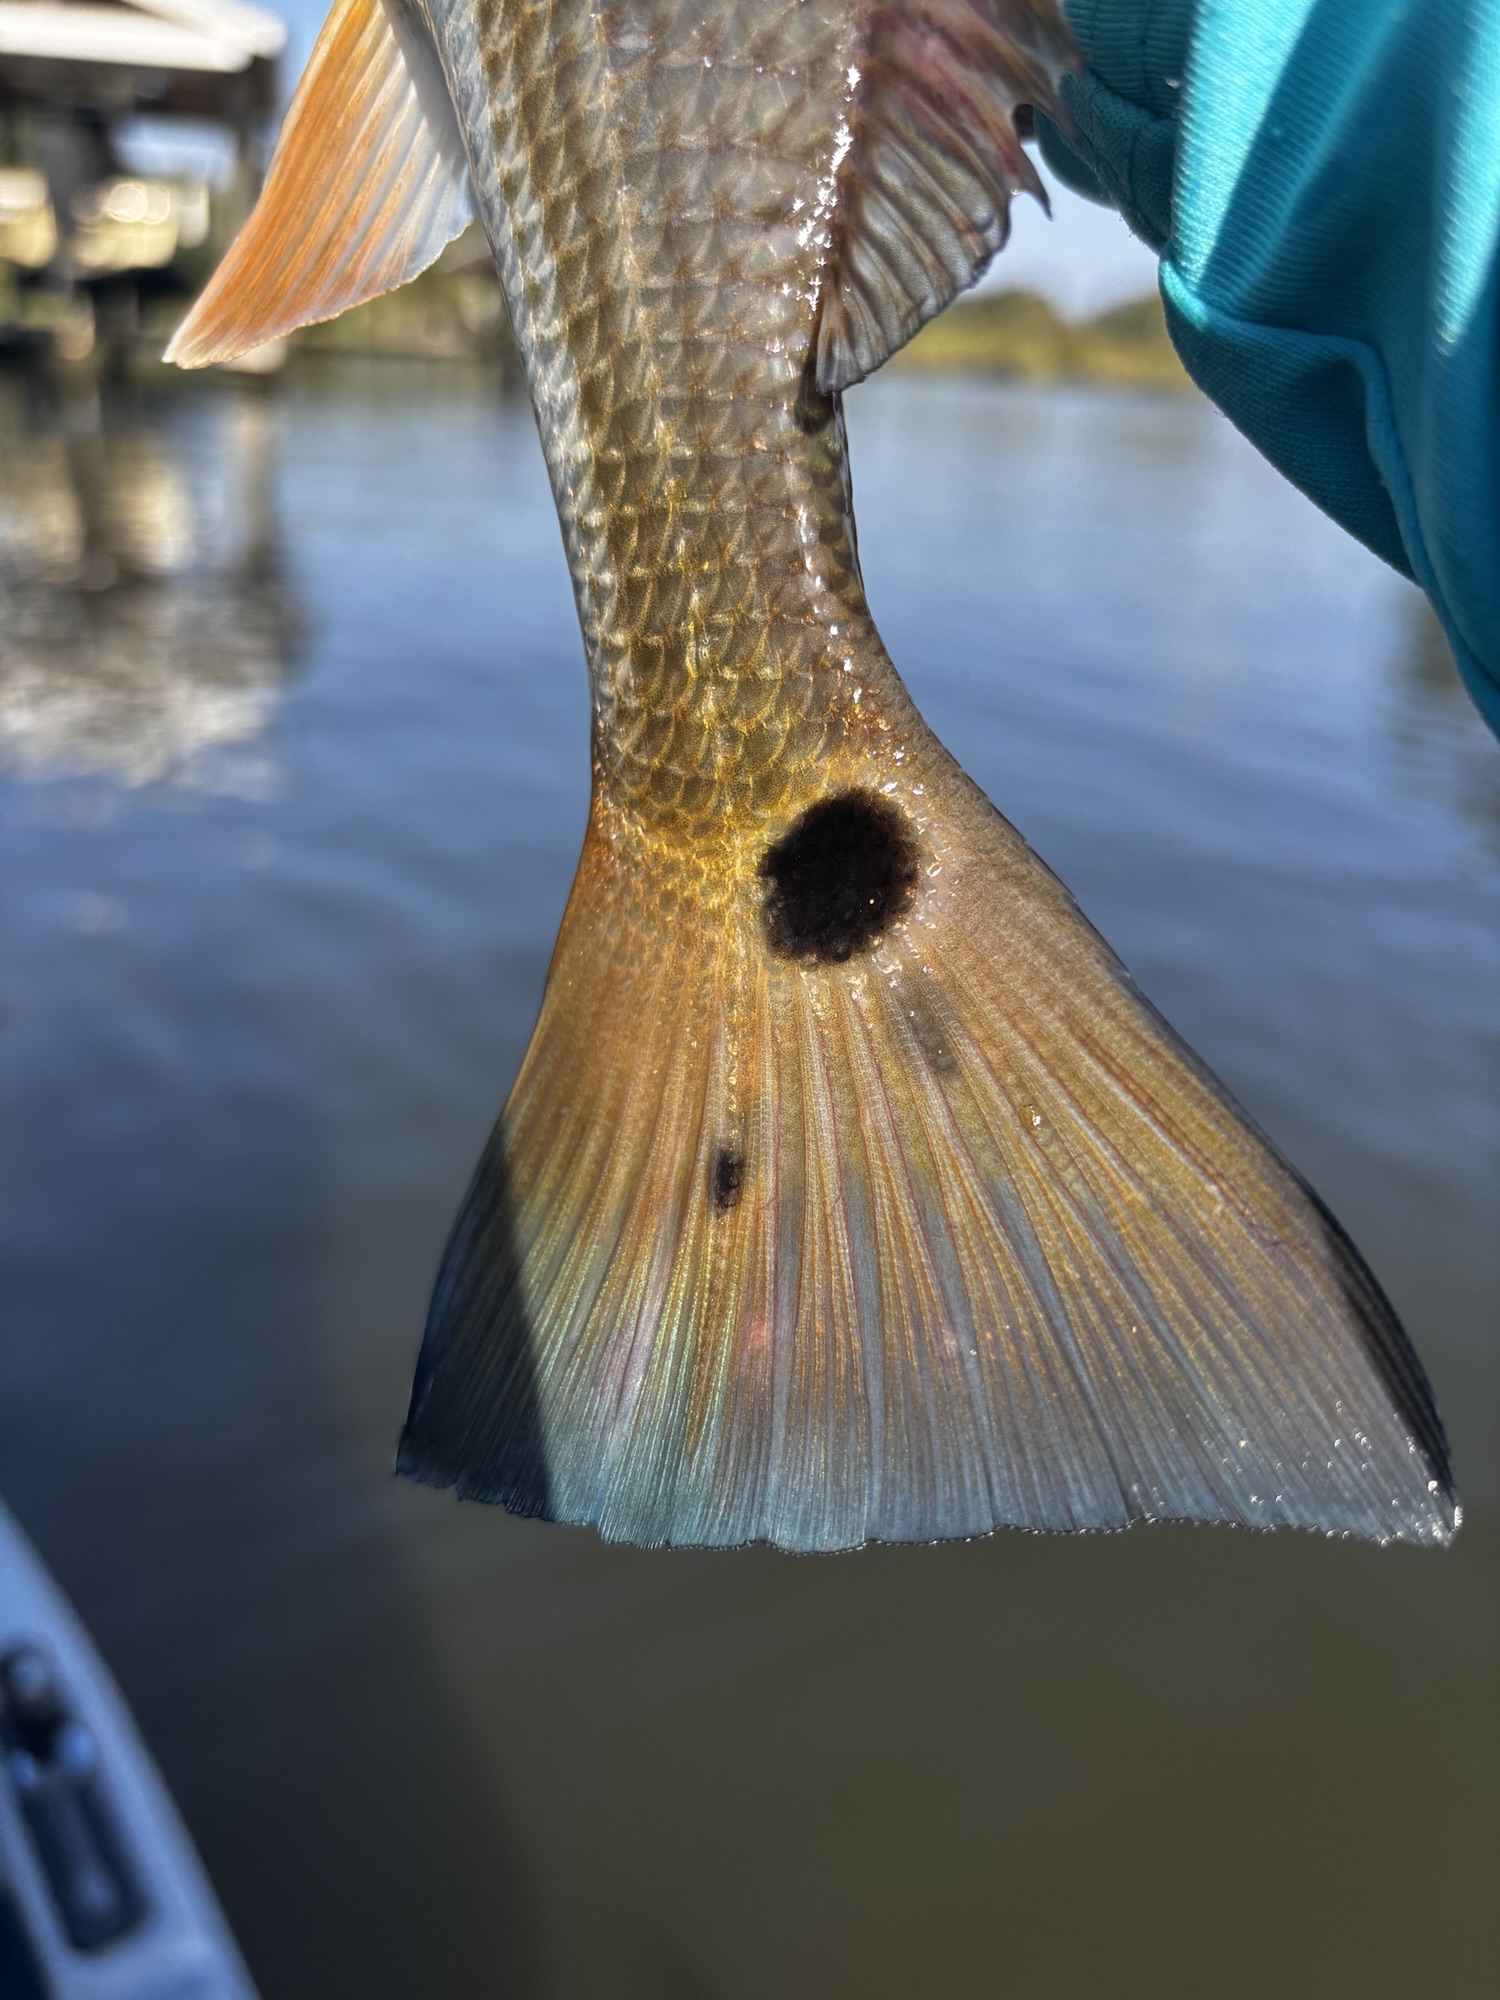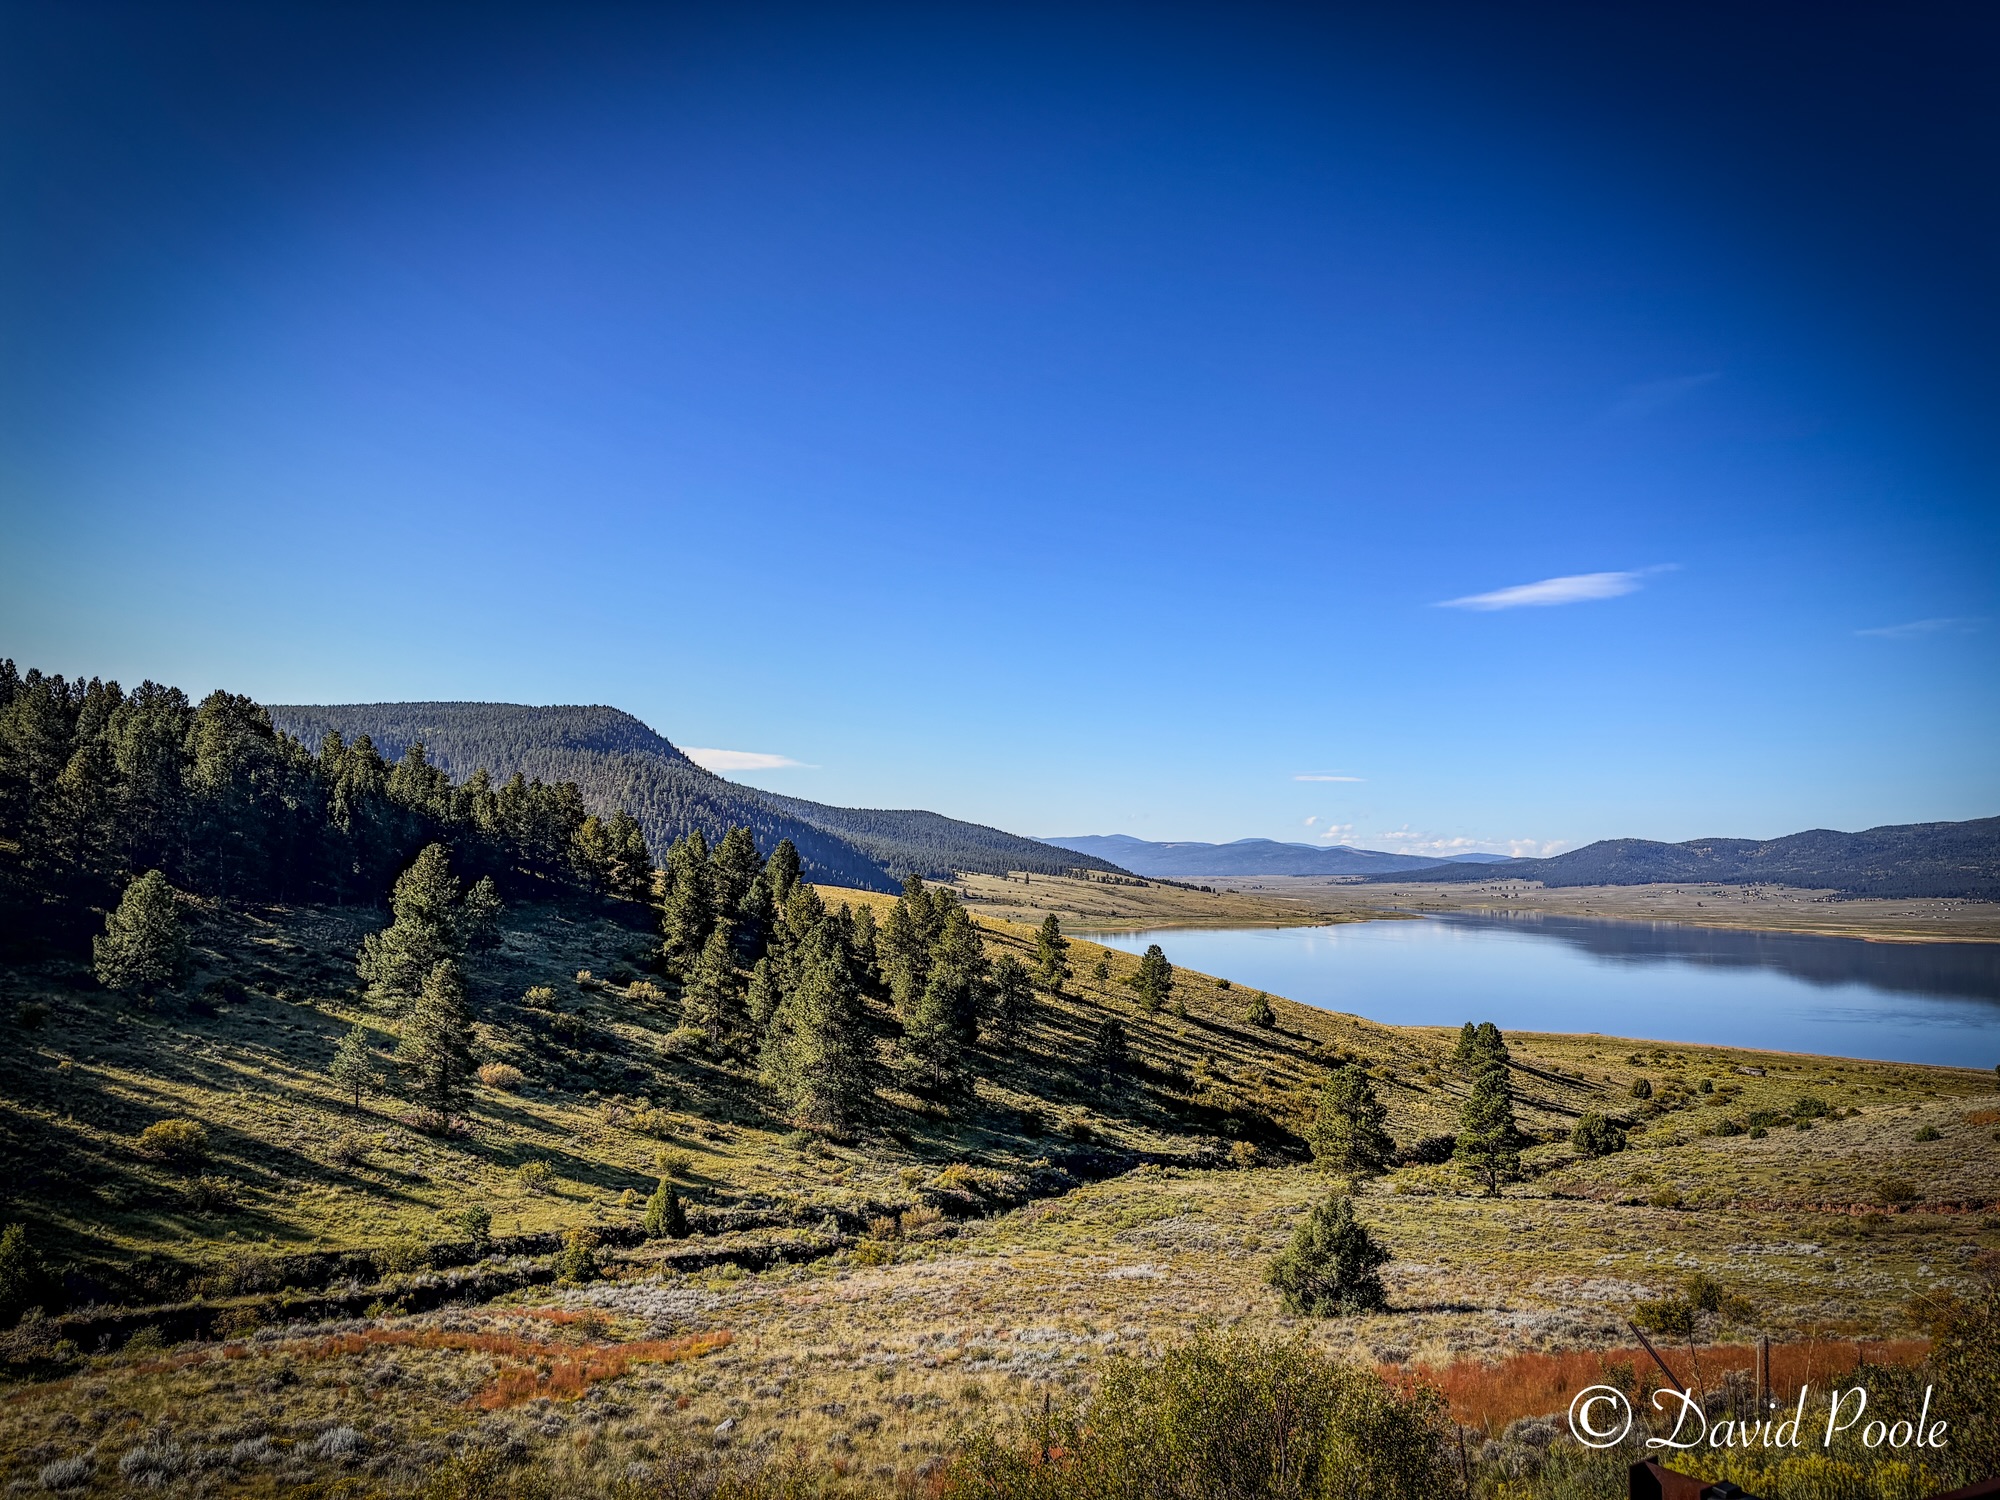
Author: David Poole

  • My Fly Reel & Line Lineup Reviewed: Orvis Mirage, Hydros, and the Cortland 444 Series

    My Fly Reel & Line Lineup Reviewed: Orvis Mirage, Hydros, and the Cortland 444 Series

    Category: Fly Fishing | Beyond the Cast — Tactics Built on Time. Not Theory.


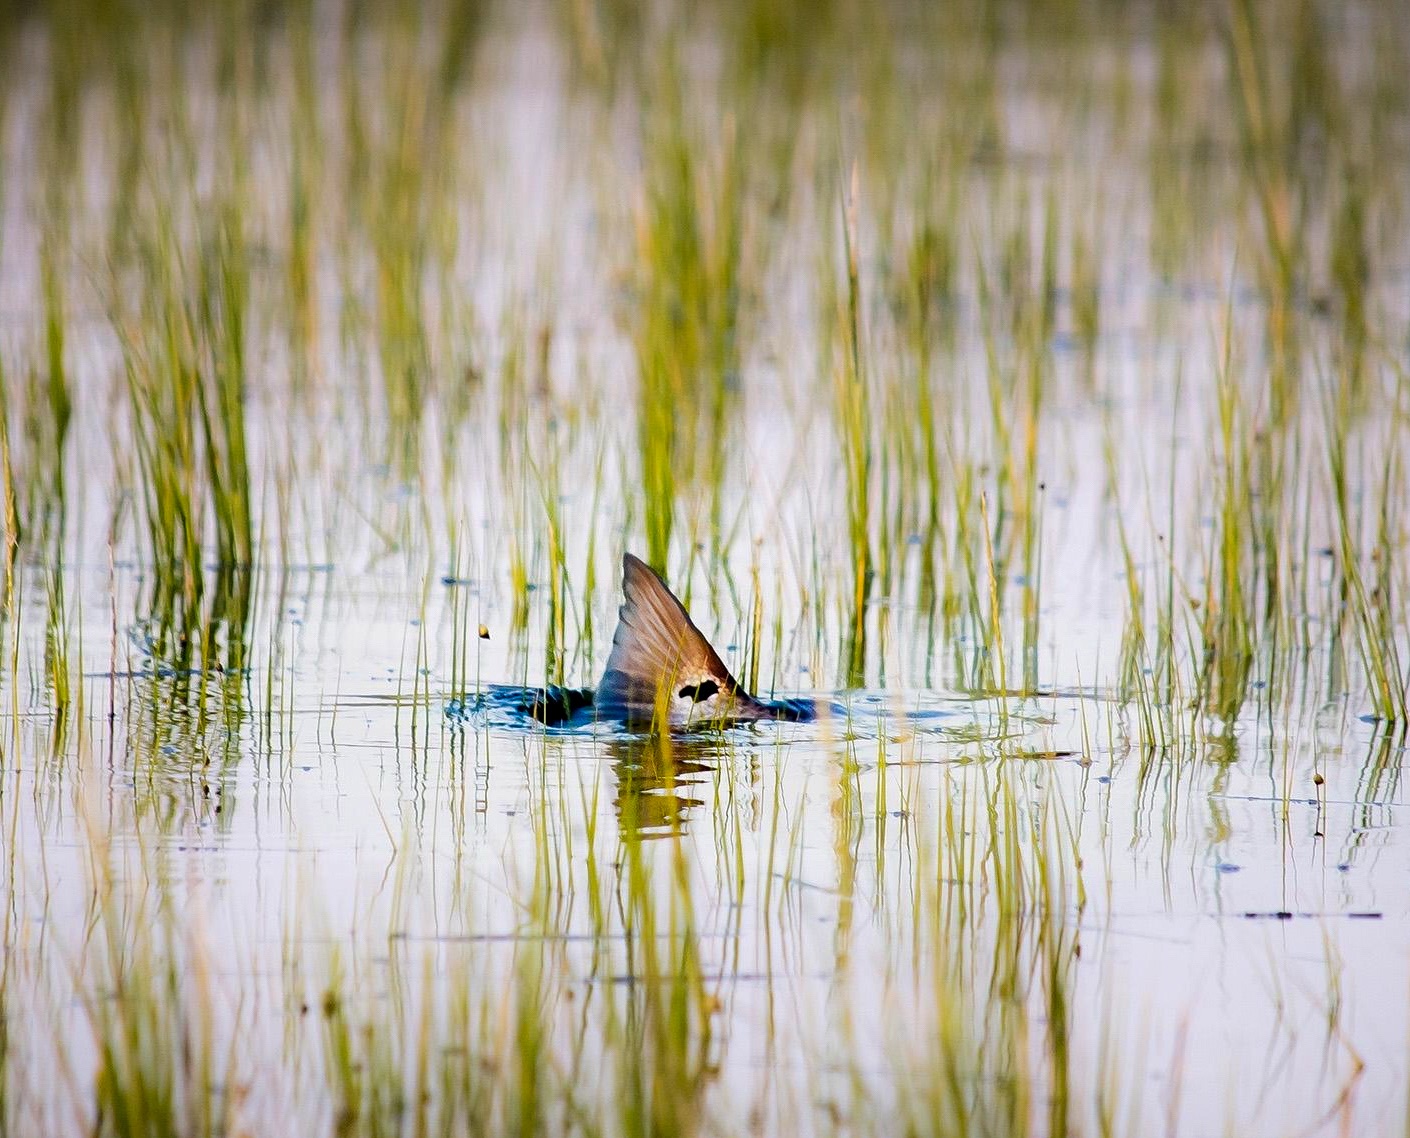
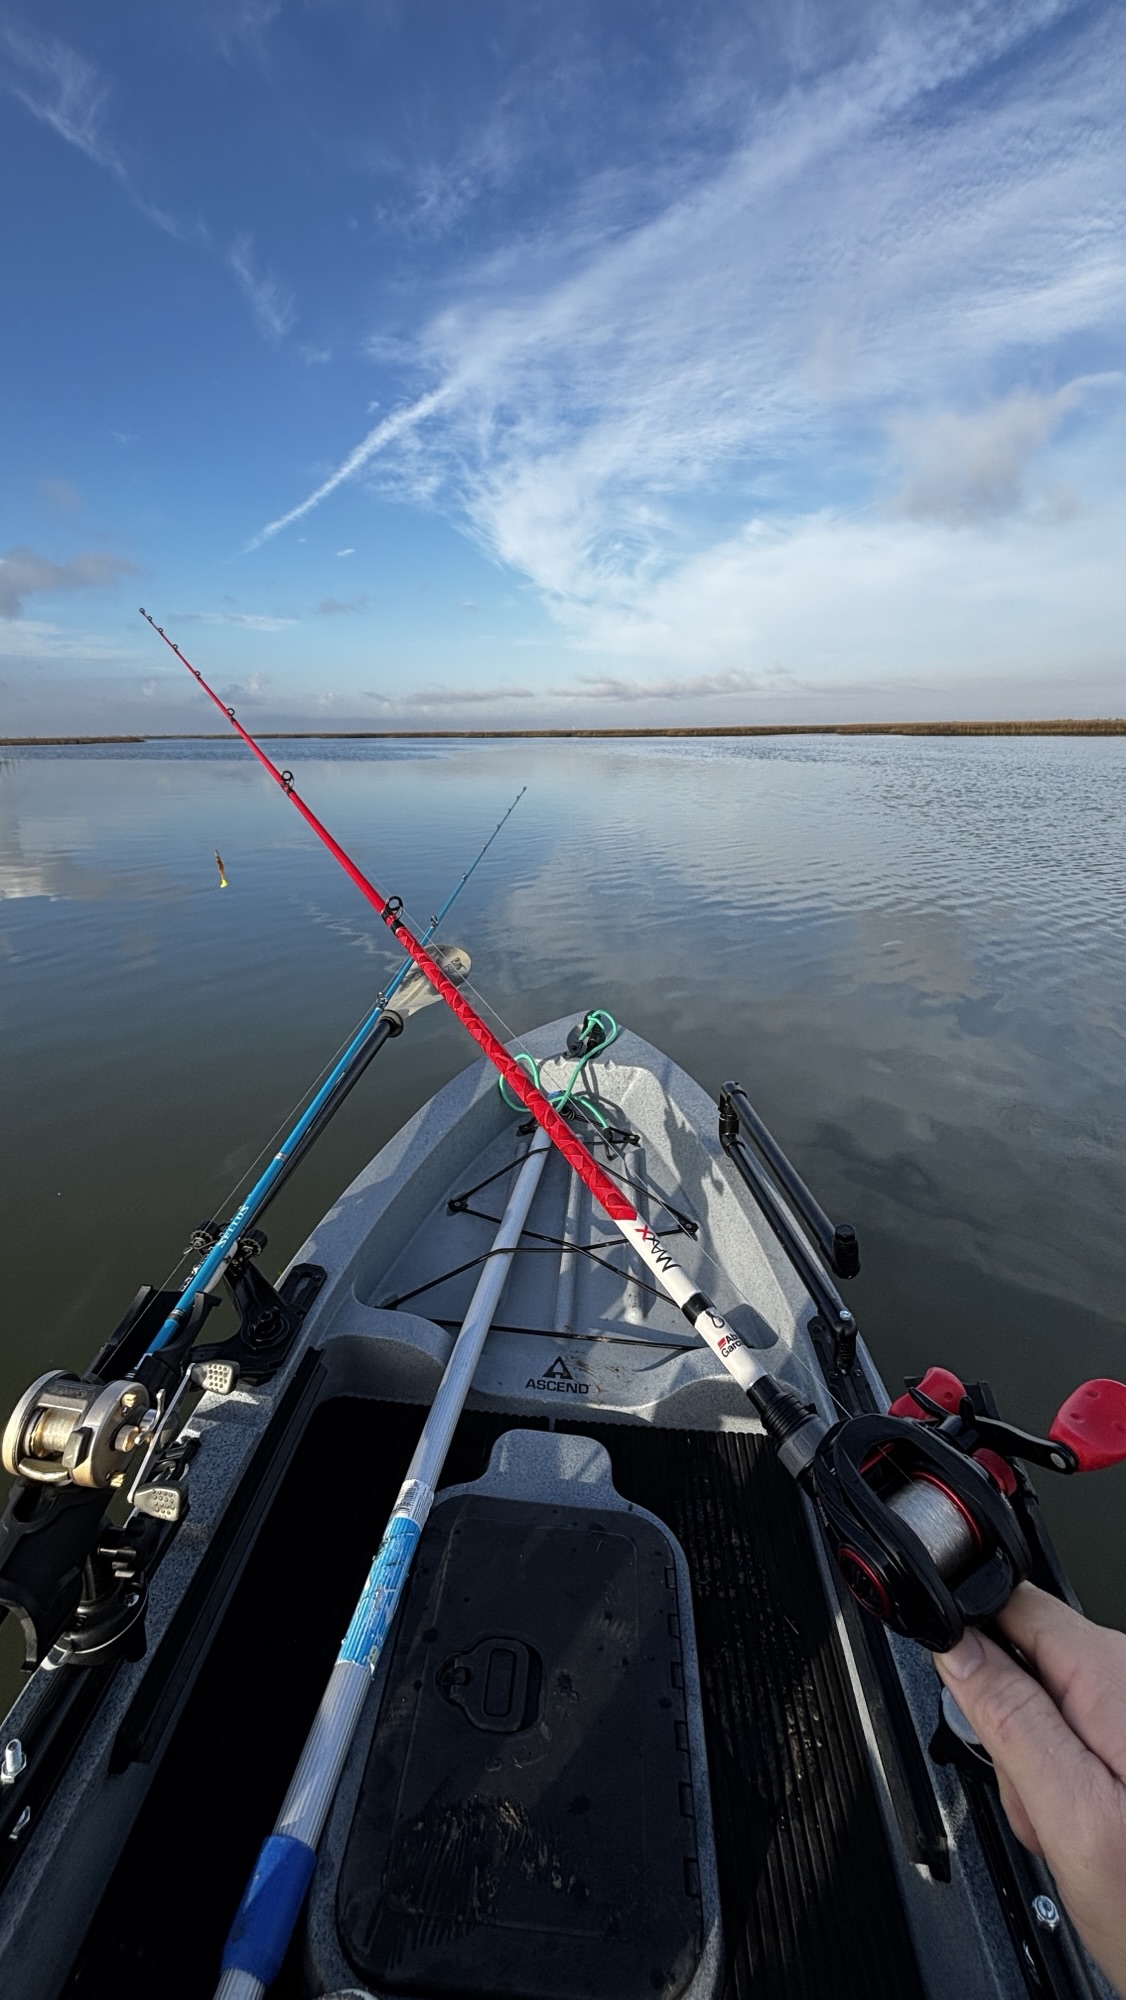
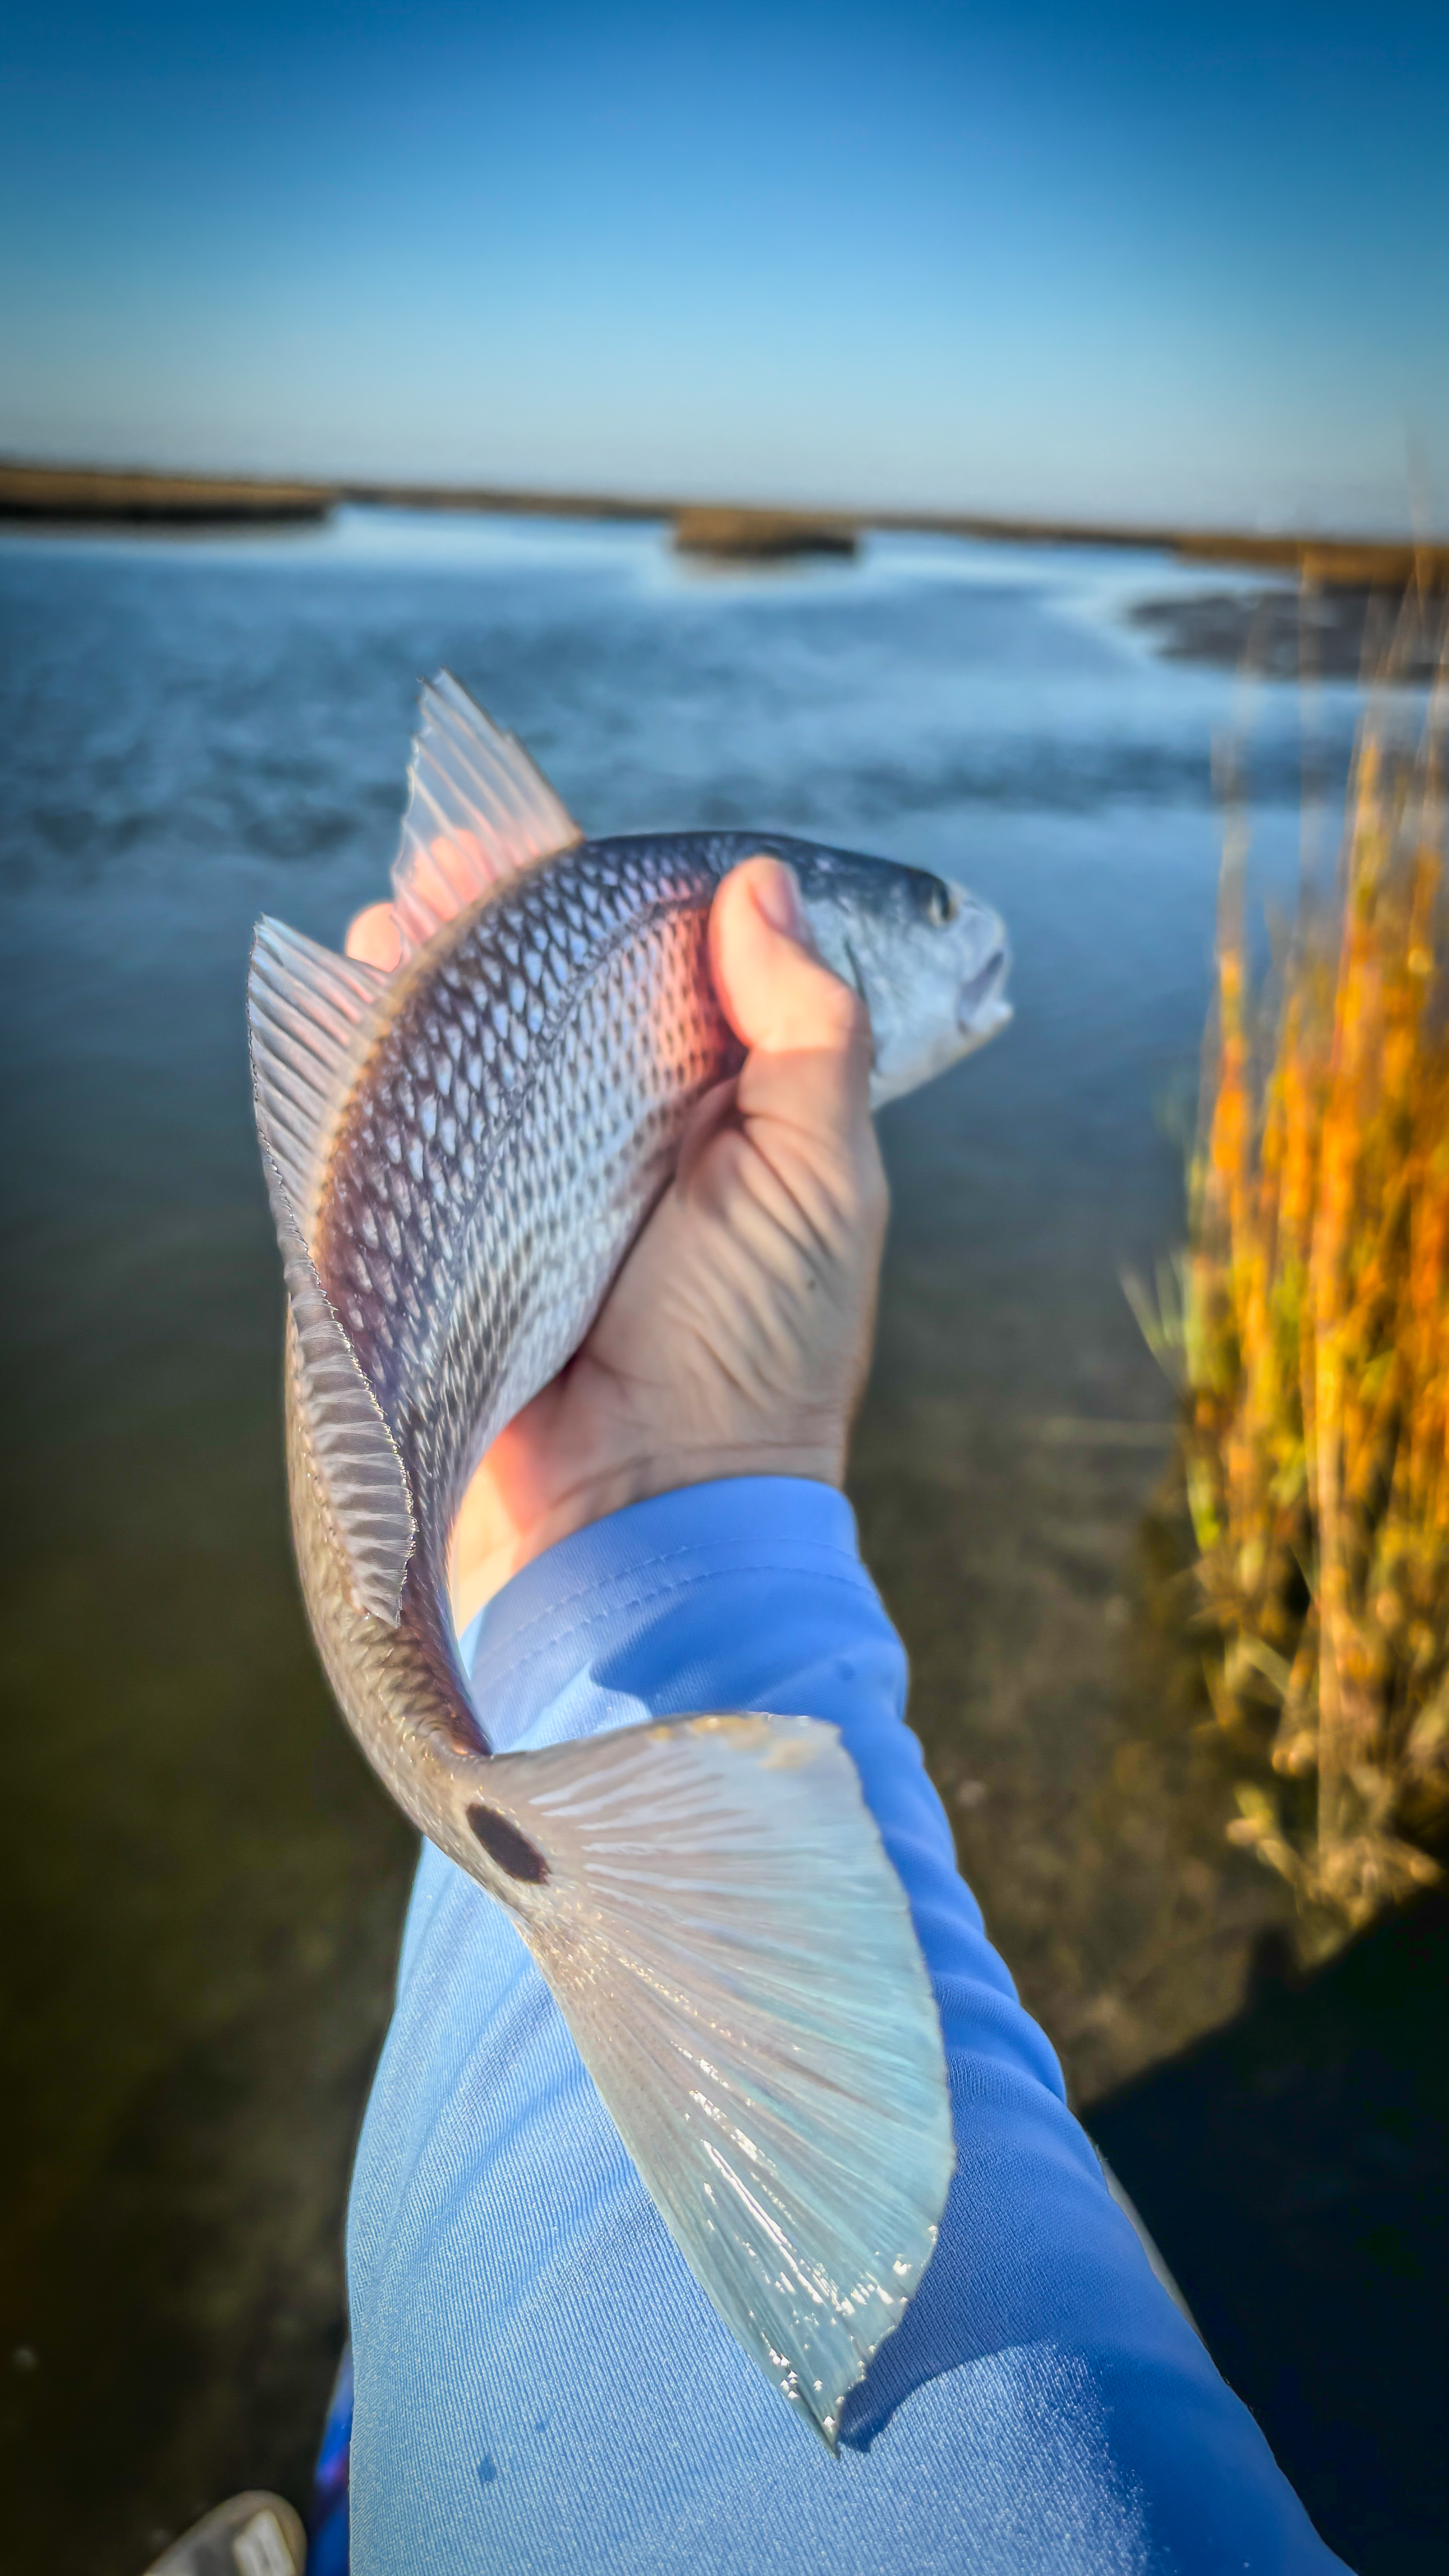
    The rod was still in my hand when the redfish surged left, then hard toward the mangroves. In a single heartbeat I needed my drag to be right — not close, not almost there — right. The Orvis Mirage didn’t flinch. The line peeled clean, the carbon drag engaged without a hiccup, and thirty seconds later the fish was in my palm.

    That moment is the whole reason I’m writing this. After 35 years on the water, chasing everything from mountain trout to Texas inshore reds, I’ve learned that fly reels and lines are not afterthoughts. They are the difference between connecting and losing, between a clean cast over nervous fish and a pile of coiled line that spooks the flat. Over the past several seasons I’ve built a two-reel, three-line system around the Orvis Mirage 8/9, the Orvis Hydros III 5–7wt, and three very different Cortland 444 lines: the WF9 Guide Taper, the 444 Peach 6-weight, and the 444 Clear Camo Intermediate. Here’s an honest, on-the-water breakdown of all five — including how I run that 8/9 setup across two completely different fisheries.


    The Orvis Mirage 8/9 — Built for Salt, Deadly on Bass

    If I had to build a single-reel fly system and never look back, this would be it.

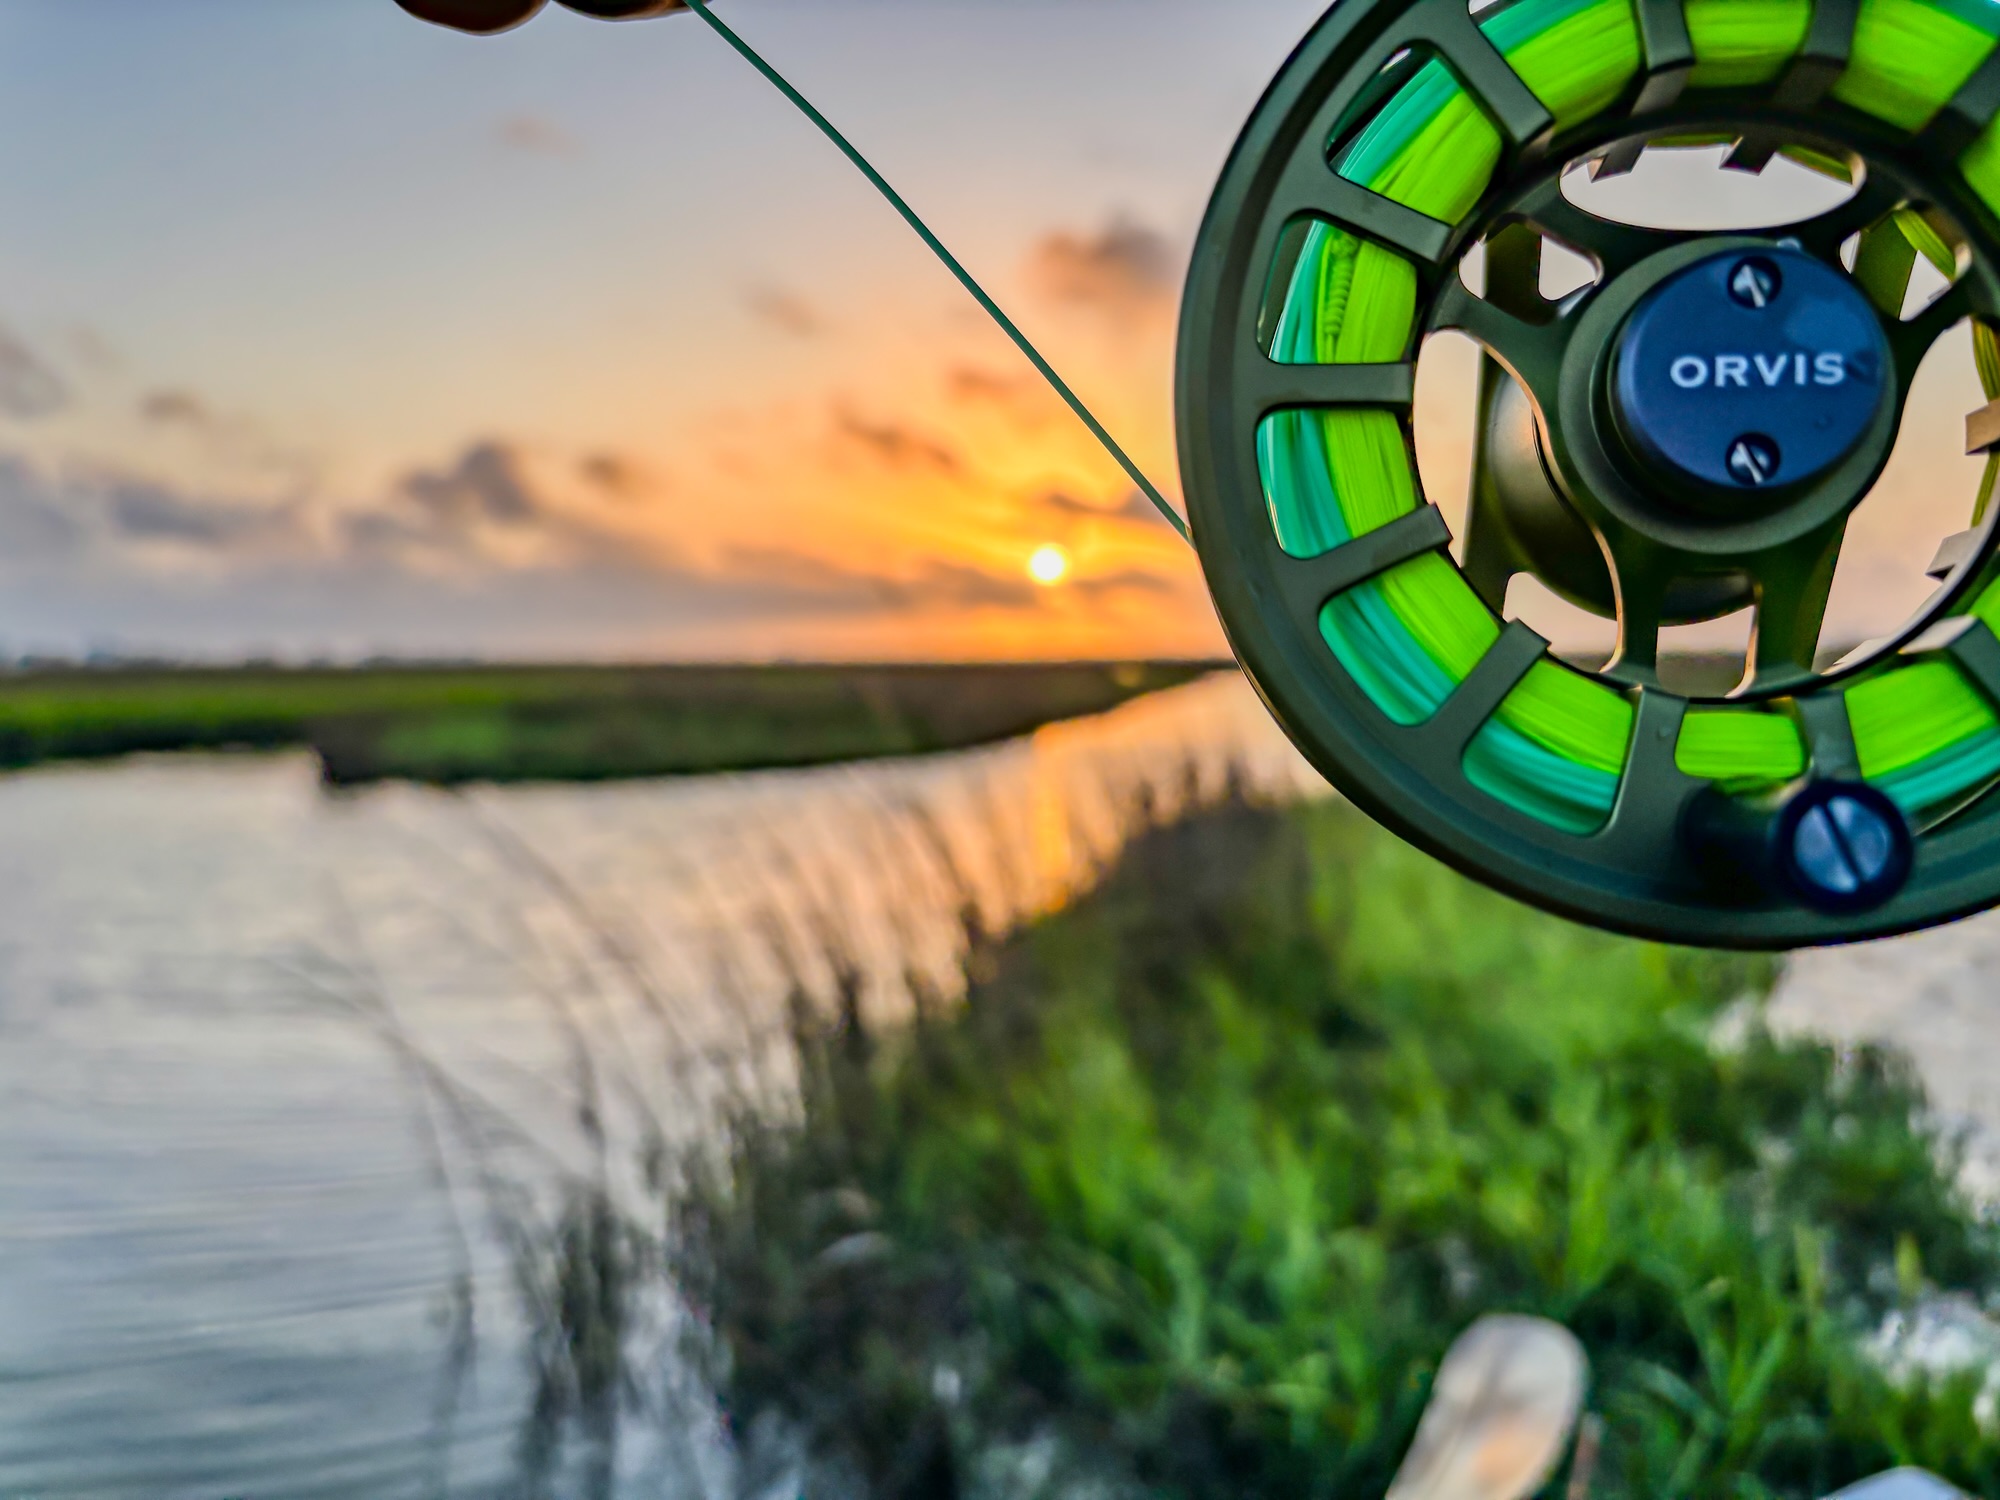
    The Mirage (size IV, rated for 7–9 weight lines) is machined from aerospace-grade 6061-T6 aluminum bar stock and is made in Vermont. At 8.9 ounces it’s mid-pack for the class, but the weight lands in the right places — the balance on an 8-weight rod is immediately noticeable when you pick it up. The drag system is sealed with carbon fiber and stainless steel disc components and goes from zero to full drag in a single rotation of the knurled knob. That single-turn design sounds like a drawback on paper — and I’ve heard the debate — but in practice it means I can make a precise drag adjustment mid-fight without overthinking. When a big redfish is burning line toward an oyster bar and the clock is running, I don’t want five full rotations standing between me and more pressure.

    The sealed drag offers approximately 10 to 12 pounds of stopping power in the 8-weight version, with virtually zero startup inertia. The drag engages instantly, without any perceptible hitch or stutter that could introduce slack and cost you the fish. That zero-inertia quality is everything when a speckled trout or redfish makes a sudden direction change at close range.

    The retrieve rate lands at nearly 10 inches per turn — top tier for the class. On the flats, when a redfish turns and burns back toward you, picking up slack fast is survival. The Mirage handles it without drama.

    What I love on the water: The finish has held up to two full seasons of Texas inshore abuse — oyster shell drops, saltwater, boat deck grit. The Type III hard-coat anodizing is extremely durable against abrasion and corrosion. I rinse it after every salt trip and that’s genuinely the only maintenance I’ve performed. Orvis backs it with a lifetime guarantee against defects in materials and workmanship. For a reel at this investment level, that warranty matters.

    One honest critique: The drag click is subdued. If you want an aggressive, loud click when a fish strips line, the Mirage will feel quieter than you’d expect. It doesn’t bother me — I care more about what the drag does than what it sounds like — but it’s worth knowing going in.


    How I Run the 8/9 Setup Across Two Very Different Fisheries

    Most fly anglers think of an 8 or 9 weight as a saltwater-only tool. I don’t. Over the years I’ve learned that the same setup — Orvis Mirage loaded with the right Cortland line — translates directly from Texas inshore flats to largemouth bass in heavy cover and smallmouth in current. The key is understanding which line to spool for which situation, and why.

    Redfish and Speckled Trout on the Flats

    This is where the Mirage 8/9 was built to live. When I’m wading a Texas marsh or standing on the bow scanning for tailing reds, I run the Cortland WF9 Guide Taper. The aggressive weight-forward head loads the rod in one or two strokes — because on the flats, you rarely get a third. A redfish at 45 feet in skinny water doesn’t wait for you to find your casting rhythm.

    The Guide Taper turns over large, air-resistant patterns — clousers, crab flies, big deceivers — into a coastal wind without falling apart at the loop. That matters more than almost any other line characteristic when you’re fishing open water with a steady Gulf breeze pushing against you.

    For speckled trout, especially when they’re holding just under the surface film in clear water or under bright midday light, I switch to the Cortland 444 Clear Camo Intermediate. That 1.5 to 2 inch-per-second sink rate gets the fly into the strike zone without ripping it through on the retrieve. The clear camo profile virtually disappears in the water column — trout that blow up on a floating line in pressured or clear conditions will often eat the same fly without hesitation on an intermediate. The line is built on a monofilament core with a supple coating that stays flexible even in cooler water, and the welded front loop makes leader changes fast when conditions shift.

    The Mirage’s sealed drag earns its keep in both scenarios. Redfish are unpredictable — they’ll peel toward an oyster bar before you can process what’s happening — and the instant drag engagement with zero startup inertia means you’re applying real pressure from the first inch of that run.

    Largemouth and Smallmouth Bass

    This is where experienced fly anglers raise an eyebrow, and where I tell them to cast it before they judge it.

    An 8-weight is genuinely ideal for largemouth in heavy cover. Big poppers, double-haul clousers, weighted woolhead patterns — these are not 5-weight flies. The 8/9 Mirage setup throws them accurately and with enough authority to cut through wind that would collapse a lighter rod. When I’m working largemouth tight to vegetation or dock structure, I stay on the WF9 Guide Taper. I need to punch a fly into a tight window and turn it over cleanly on a short, efficient stroke. The Guide Taper does exactly that — no wasted energy, no soft loop that dies short of the target.

    For smallmouth in rivers and current, I make the switch to the Clear Camo Intermediate. Smallmouth in moving water hold in the mid-column — not on the bottom, not busting the surface — and a slow, steady swing through a seam at 1.5 to 2 inches per second puts the fly right where they’re feeding. A floating line in current creates belly and drag that pulls the fly unnaturally through the drift. The intermediate cuts through that, stays in direct contact with the fly, and gives you a feel that translates to cleaner, more decisive hook sets.

    The Mirage handles bass just as confidently as it handles reds. The large arbor picks up slack fast when a smallmouth charges the bank and reverses — a moment where slower-retrieving reels cost you the fish before the fight even starts.

    The Line-Switching Discipline

    The real skill in running one reel across two fisheries is knowing when to swap lines. I keep a spare spool loaded with the Clear Camo Intermediate so I can make that change on the water without tearing down the whole setup. Salt in the morning, bass in the afternoon — the Mirage doesn’t care. Give it the right line and it delivers every time.


    The Orvis Hydros III 5–7wt — Sealed Drag, Serious Performance at a Honest Price

    There’s a version of this review where I call the Hydros III a “budget alternative” to the Mirage and move on. That version would be wrong, and it would undersell what this reel actually does on the water.

    The Hydros III (rated for 5–7 weight lines) weighs in at 5.5 ounces and measures 3.7 inches in diameter — a genuinely well-balanced fit on a 6-weight rod, light enough to fish all day without the fatigue that heavier reels introduce over a long session on moving water. Orvis machined it from bar-stock aluminum, narrowed the spool to minimize line stacking, and radiused the reel foot — the same feature on the Mirage — to protect the leader from kinking at the connection point. That’s a detail that separates thoughtfully engineered reels from ones that are just assembled.

    What separates the Hydros from the competition at its price point is the drag. The sealed carbon and stainless steel disc system delivers zero startup inertia — the same hallmark of the Mirage — with up to 12 pounds of stopping power when backed off slightly from full. That is a number that competes with reels costing significantly more. The drag knob is larger and more ergonomically accessible than previous Hydros versions, which matters when you’re fighting a fish and need to make a quick adjustment with wet hands. The large-arbor design drives retrieve rates of over 10 inches per turn, reducing line coil and keeping the fight efficient.

    I run the Hydros III on my freshwater setups and on lighter inshore days — trout rivers, smallmouth in current, bass when I want a more finesse-oriented presentation, and calmer inshore days targeting specks in cleaner water. The sealed drag means I don’t have to panic about a light salt exposure the way I would with a basic unsealed reel — but I still rinse it thoroughly after any inshore use, because seals are only as good as the maintenance behind them.

    The Hydros is backed by Orvis’s lifetime guarantee against defects in materials and workmanship — the same unconditional coverage that comes with the Mirage. At its price point, that warranty commitment is significant.

    What I love on the water: The Hydros III is light, balanced, and precise. On a 6-weight trout or smallmouth setup, it disappears on the rod and lets the casting do the talking. The drag is smooth and linear enough that I can protect light tippet against a hard-running trout without overcorrecting. For lighter inshore work — specks in calm bay water, smaller reds in clear conditions — it holds up better than most anglers expect from a reel in this class.

    Where it earns its keep most: Freshwater trout rivers, smallmouth and largemouth in cleaner water, and lighter inshore presentations when conditions don’t demand the stopping power of the Mirage. It also serves as my dedicated backup on any trip — if something happens to the Mirage, the Hydros steps in and doesn’t cost me the fish.

    Honest reality check: The Hydros III is rated through 7 weight and handles that range well. Don’t push it into sustained heavy inshore salt conditions without diligent rinsing and maintenance. Its sealed drag is a genuine asset, but the Mirage’s Type III hard-coat and heavier construction were built specifically for that punishment. Use the right reel for the environment you’re actually fishing.


    The Cortland WF9 Guide Taper — Load Fast, Deliver Hard

    A guide taper is engineered for one thing: getting your fly delivered accurately under real-world conditions, not ideal ones. Wind, pressure, distance, one shot at a moving fish — a guide taper handles all of it.

    The Cortland WF9 Guide Taper is my default load on the Mirage when I’m heading to the Texas coast or throwing big flies for bass. The aggressive weight-forward head loads the rod immediately — critical when you’re sight-fishing redfish and have a single window before the fish moves out of range. There’s no soft loading period, no wasted false cast. The head transfers energy directly and turns the fly over hard, which matters when you’re throwing a large clouser or crab pattern into a sustained coastal wind.

    Key real-world application: When I’m on the bow of a skiff and the guide calls the fish at 50 feet, 11 o’clock, moving left — I need two false casts maximum and a fly that lands where I’m looking. The WF9 Guide Taper makes that possible because the head is loaded and transferring energy from the first stroke. Presentation lines with long, delicate tapers simply don’t load that fast, and on the flats, time is always the variable you can’t control.


    The Cortland 444 Peach 6-Weight — A Classic That Earns Every Compliment

    There’s a reason the 444 Peach has been in production for over 50 years and still commands one of the most loyal followings in freshwater fly fishing. It’s not nostalgia — it’s a line that keeps proving itself trip after trip.

    The 444 Peach is built around a long front taper that produces subtle turnover and feather-light presentations, ideal for dry fly work where finesse is the whole game. The body and rear taper provide the stability needed for longer roll casts and clean mending, which matters on technical trout water where drag-free drift is everything. It’s manufactured in Cortland, New York, and the century-plus of fly line craftsmanship behind that name is something you actually feel in the hand.

    I run the 6-weight version on my Hydros III for trout and lighter bass work. The coating is supple in a way that budget lines simply don’t replicate — low memory, clean shooting, and durable enough to handle extended use without the cracking and stiffness that plagues cheaper options. It works equally well for wets, dries, nymphs, and smaller streamers, which makes it genuinely versatile across a full fishing day rather than locked into one technique.

    What I love on the water: In clear, low conditions where presentation is the difference between strikes and refusals, the Peach delivers the kind of soft, precise turnover that gives you a fighting chance. It’s not a power line — don’t try to muscle big flies with it — but for what it was designed to do, it remains one of the best values in fly fishing.


    The Cortland 444 Clear Camo Intermediate — The Line Most Anglers Should Be Fishing More

    The Clear Camo Intermediate is the most underutilized line type in the average fly angler’s bag, and one I reach for more often than most people expect.

    The line sinks at a consistent 1.5 to 2 inches per second across its full length, built on a monofilament core with a supple coating that stays flexible in cold water and resists the coil memory that makes cheaper intermediate lines a frustration to fish. The clear camo color profile disappears against a wide range of water backgrounds — it’s not a gimmick. In clear conditions, line visibility to the fish is a real factor, and this line addresses it directly.

    I run it on both setups depending on conditions: on the Hydros III for trout and light bass subsurface work, and on the Mirage for speckled trout and smallmouth when I need the fly in the mid-column. The monofilament core also means direct contact with the fly throughout the drift or retrieve — something floating lines with tip sag simply can’t match. That contact improves strike detection noticeably, especially on subtle takes from trout holding in slow current.

    Key real-world application: The Clear Camo excels in the 1 to 10-foot range of the water column. By counting down after the cast — knowing the line sinks roughly 1.5 to 2 inches per second — you can dial in a specific depth and fish it systematically. Start shallow, work deeper until you find fish. It removes the guesswork from subsurface fly fishing and replaces it with a repeatable process.


    Pro Tips — What Most Anglers Overlook with This Setup

    Don’t skip the spare spool. The ability to switch from the WF9 Guide Taper to the Clear Camo Intermediate in seconds — without re-rigging from scratch — changes how you fish. Conditions shift. Fish move in the column. Having that second line loaded and ready is not a luxury, it’s a functional advantage that costs you nothing once you’re on the water.

    Match the line to the conditions, not just the species. I’ve taken reds on the Clear Camo Intermediate and bass on the Guide Taper. The line choice is about where the fish are holding and what the conditions demand — not a hard species-to-line assignment that never changes.

    Rinse both reels after any inshore exposure. The Mirage’s Type III anodizing is built for punishment, but a rinse after every salt trip is still non-negotiable. The Hydros III’s sealed drag is a genuine asset in light inshore conditions, but no seal lasts indefinitely without basic maintenance. Build the rinse into your routine and both reels will outlast your patience to replace them.

    Set your drag before you’re on the fish. The Mirage’s single-turn knob allows fast adjustment mid-fight, but your baseline drag should be dialed in before the first cast. Set it on the dock or the bank. Not on the bow with a fish already moving.


    Mistakes to Avoid

    Running the Hydros III into heavy sustained inshore salt is the most common misstep anglers make with this two-reel system. The sealed drag handles light exposure well, but repeated hard inshore sessions without diligent rinsing will wear it faster than the Mirage’s more heavily armored construction. Know which reel belongs in which environment.

    Using the 444 Peach for bass and inshore work is the second. It’s exceptional for what it was designed to do — delicate freshwater presentations — but it was not engineered to turn over a 3/0 clouser into a coastal headwind. Reach for the Guide Taper when the fly gets heavy and the conditions get real.

    Ignoring line memory on the intermediate is the third. Even the Clear Camo — one of the more supple intermediates available — benefits from a slow hand-stretch before the first cast of the day. Pull 30 feet off the reel and work it gently by hand. The line will shoot and cast noticeably better from the first presentation forward.

    Finally, don’t neglect backing capacity. Confirm your yardage on the Mirage before the trip, not during it. A redfish that finds a run of clean shallow water is going to take line fast and far. Know your system before the fish reveals what you didn’t.


    Capturing the Moment — Photography Notes

    Fly fishing gear is a compelling visual subject, and both the Mirage and the Hydros have the kind of machined detail that rewards a close lens. When I want to document gear on the water, I reach for the Canon R5 with the RF 100mm macro lens — the texture of the drag knob, the porting pattern on the spool, the reel foot seated in a cork grip. These details tell the story of gear built with real intention, and they read immediately in a strong image.

    For action photography — the cast loop unrolling over a Texas flat, the bend in a rod with a redfish on the other end — the RF 70-200mm f/2.8 at a wide aperture isolates the angler against the marsh background with the compression that makes a coastal image feel cinematic. The golden hour window, roughly 30 to 45 minutes after sunrise, is when inshore water turns colors that no other time of day replicates. That’s the window I want for both the fish and the frame.

    For still gear shots on the water, overcast light is your friend. It eliminates harsh reflections off anodized aluminum and gives you accurate, even color across the reel’s finish. A natural background — wet grass on the bank, a weathered boat gunnel, tailing water — grounds the image in the environment rather than making it feel like a product catalog.


    Final Thought

    Gear doesn’t replace skill, time on the water, or the ability to read a flat and know where the fish are before you see them. But the right gear stops being something you think about mid-fight. After two seasons running this exact system — Mirage on the salt and heavy freshwater, Hydros III on the lighter freshwater and inshore end, Cortland lines matched to the conditions and the column — I’ve stopped thinking about the gear entirely.

    I think only about the fish.

    That’s the point.


    For more fly fishing tactics, inshore strategy, and on-the-water gear reviews built on real experience, visit Beyond the Cast — and follow us on Facebook for updates from the water.
  • When Bass Call the Shots: Reading the Day and Switching Tactics Between Baitcaster and Fly Rod

    When Bass Call the Shots: Reading the Day and Switching Tactics Between Baitcaster and Fly Rod


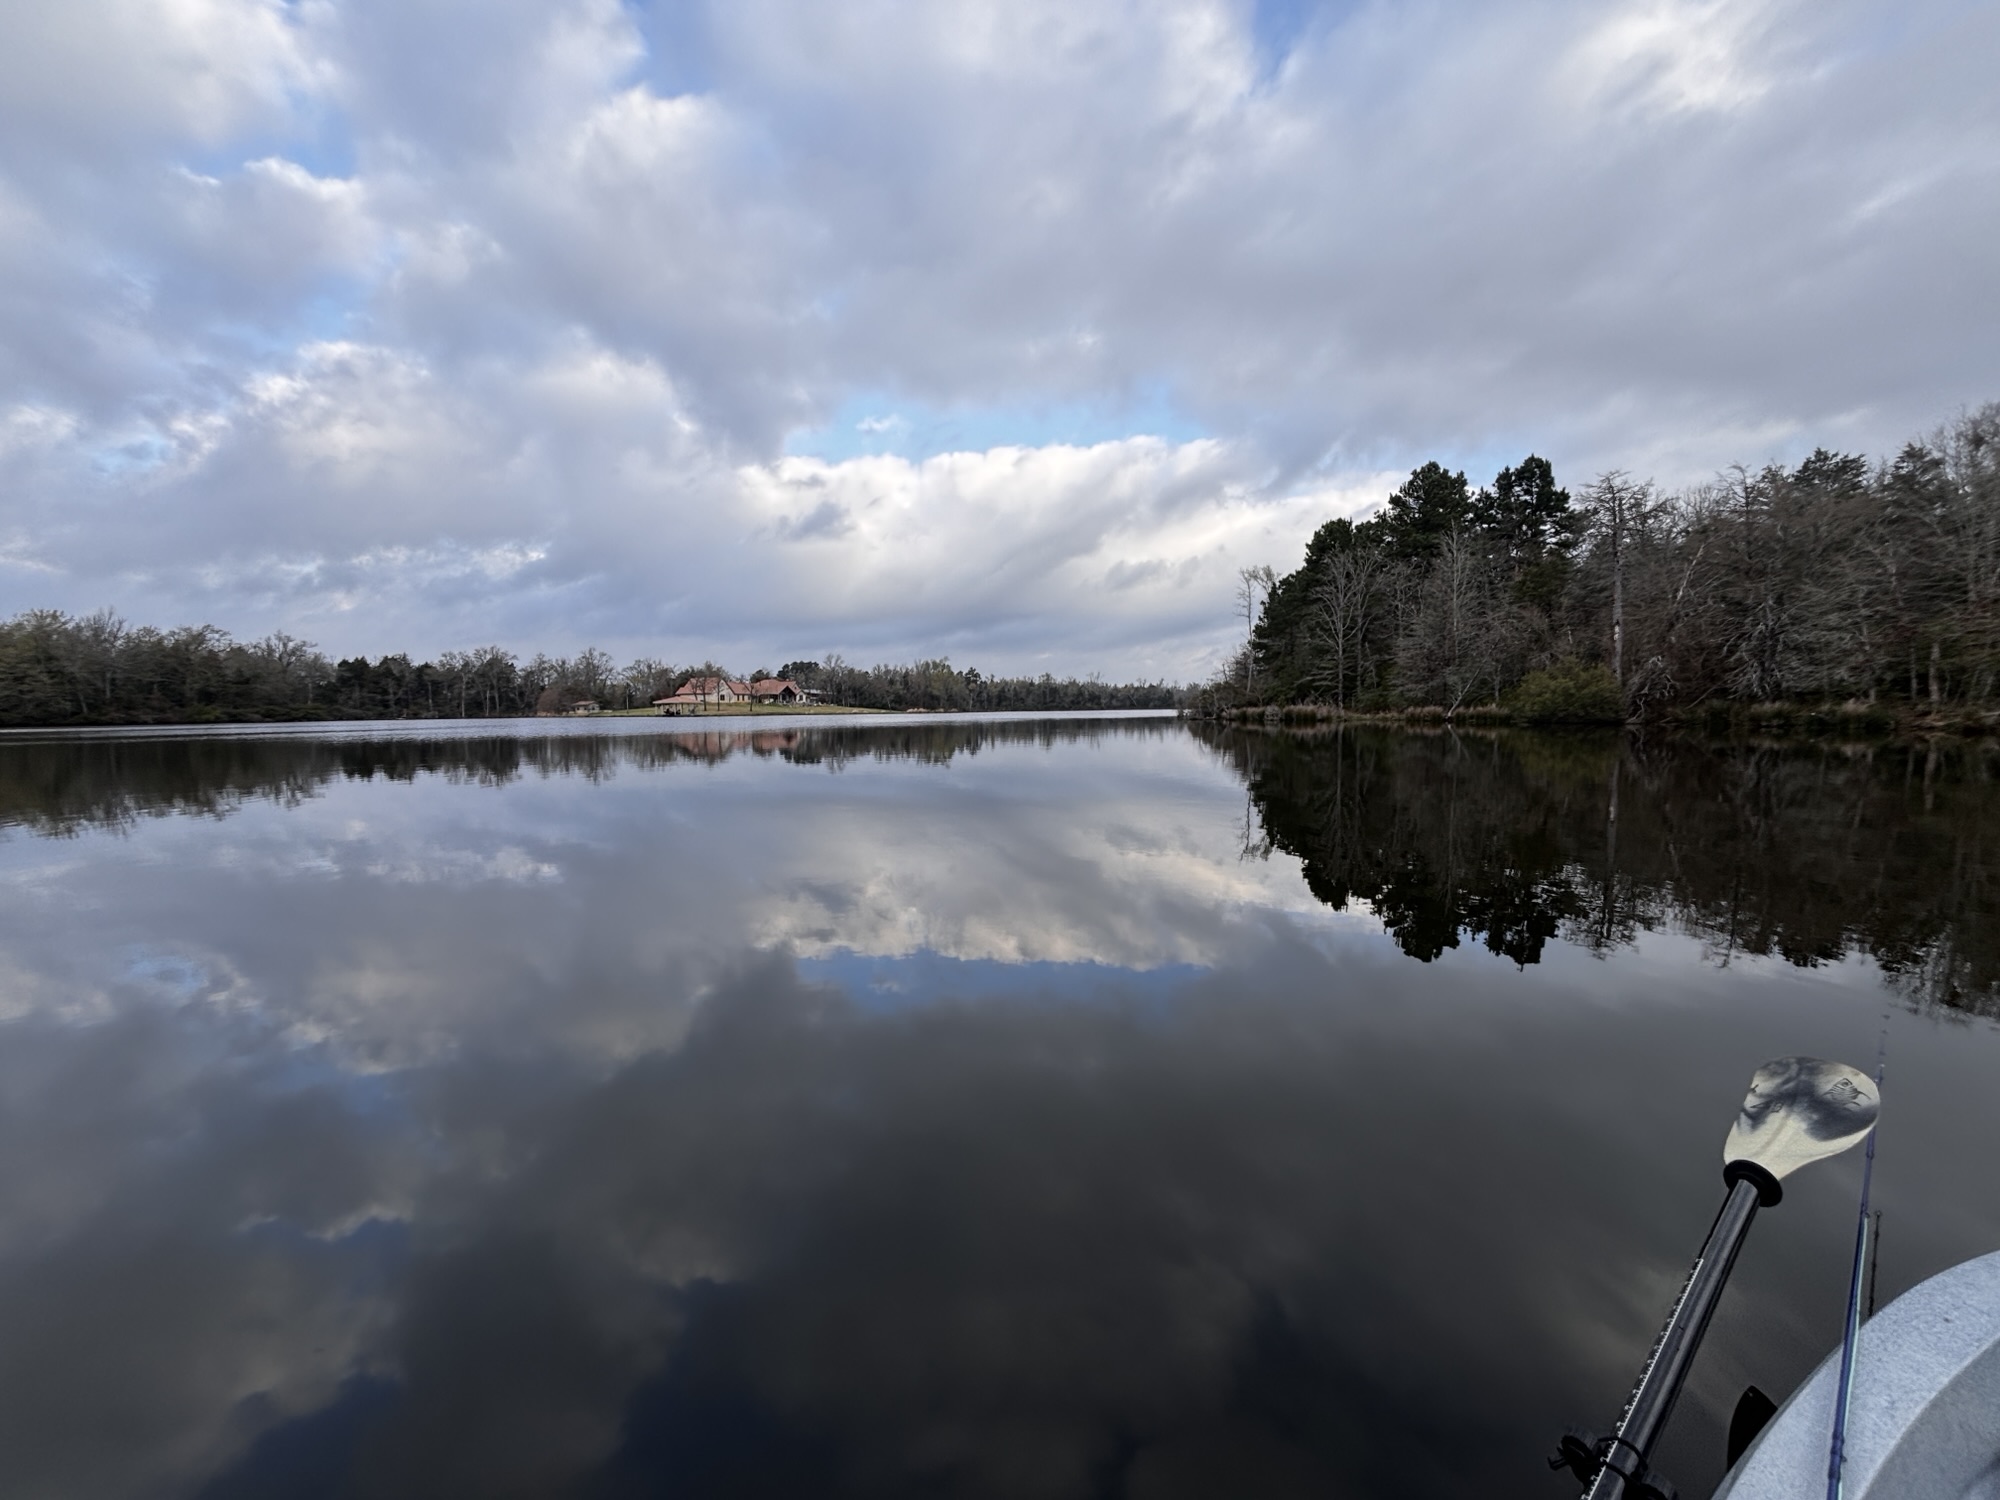
    There are days on the water that remind you why experience matters more than gear. Two consecutive mornings. Same lake. Same overcast sky. And two completely different outcomes — depending entirely on whether you were willing to adapt.

    Bass fishing with bait — whether that’s a hand-tied streamer at the end of a fly line or a soft plastic worm rigged behind a baitcaster — is never a fixed equation. The fish write the rules. The best anglers on the water learn how to read the language being spoken and respond in kind. That’s exactly what a recent two-day stretch taught me again, 35 years into doing this.

    Double barrel frog popper

    Day one was magic. Day two required a conversation.

    This post is about both days — the read, the adjustment, and the tactics that put fish in the net when the bite slowed. Whether you’re throwing a baitcaster or casting a 9-weight fly rod, these principles will sharpen how you approach your next bass outing.


    Day One: Overcast, Topwater Bite, and Fish Holding Tight to Structure

    We launched under a low, flat ceiling — the kind of partly cloudy sky that diffuses light evenly across the water and kills the harsh glare that pushes bass deep and slow. No direct sun. No harsh shadows. Just soft ambient light and a mild chop on the surface from a light breeze.

    The bass were aggressive from the jump.

    Fish were holding on structure — submerged laydowns, lily pads, points — and they were actively feeding 20 to 30 yards off the bank. That mid-range distance is a key observation. When bass push away from the bank in low-light conditions but remain in open, shallow-to-mid water, they’re hunting. That’s a different posture than fish buried under a laydown waiting for something to drop in front of them.

    On the fly rod, my double barrel poppers were producing explosions. These are tied on a size 0 hook — a larger profile that pushes water and puts out a serious sound signature. The recipe is deliberate: olive green and damsel green marabou feathers for the body, giving the fly a lifelike breathing action on the pause. The legs are a mixture of yellow, green barred, and orange rubber legs — that color combination reads like a wounded bluegill or a panicked frog. I use green chartreuse Hareline hackle tied in behind the foam head to add even more leg movement and push additional water on each strip.

    Bass on the top water action

    The key on day one was presentation cadence. Long cast, two sharp strips to pop the head, then a dead stop. Let the legs quiver. That pause is where the eat happens. If you’re stripping topwater poppers without building in a real stop — two to three full seconds minimum — you’re leaving bites in the water.
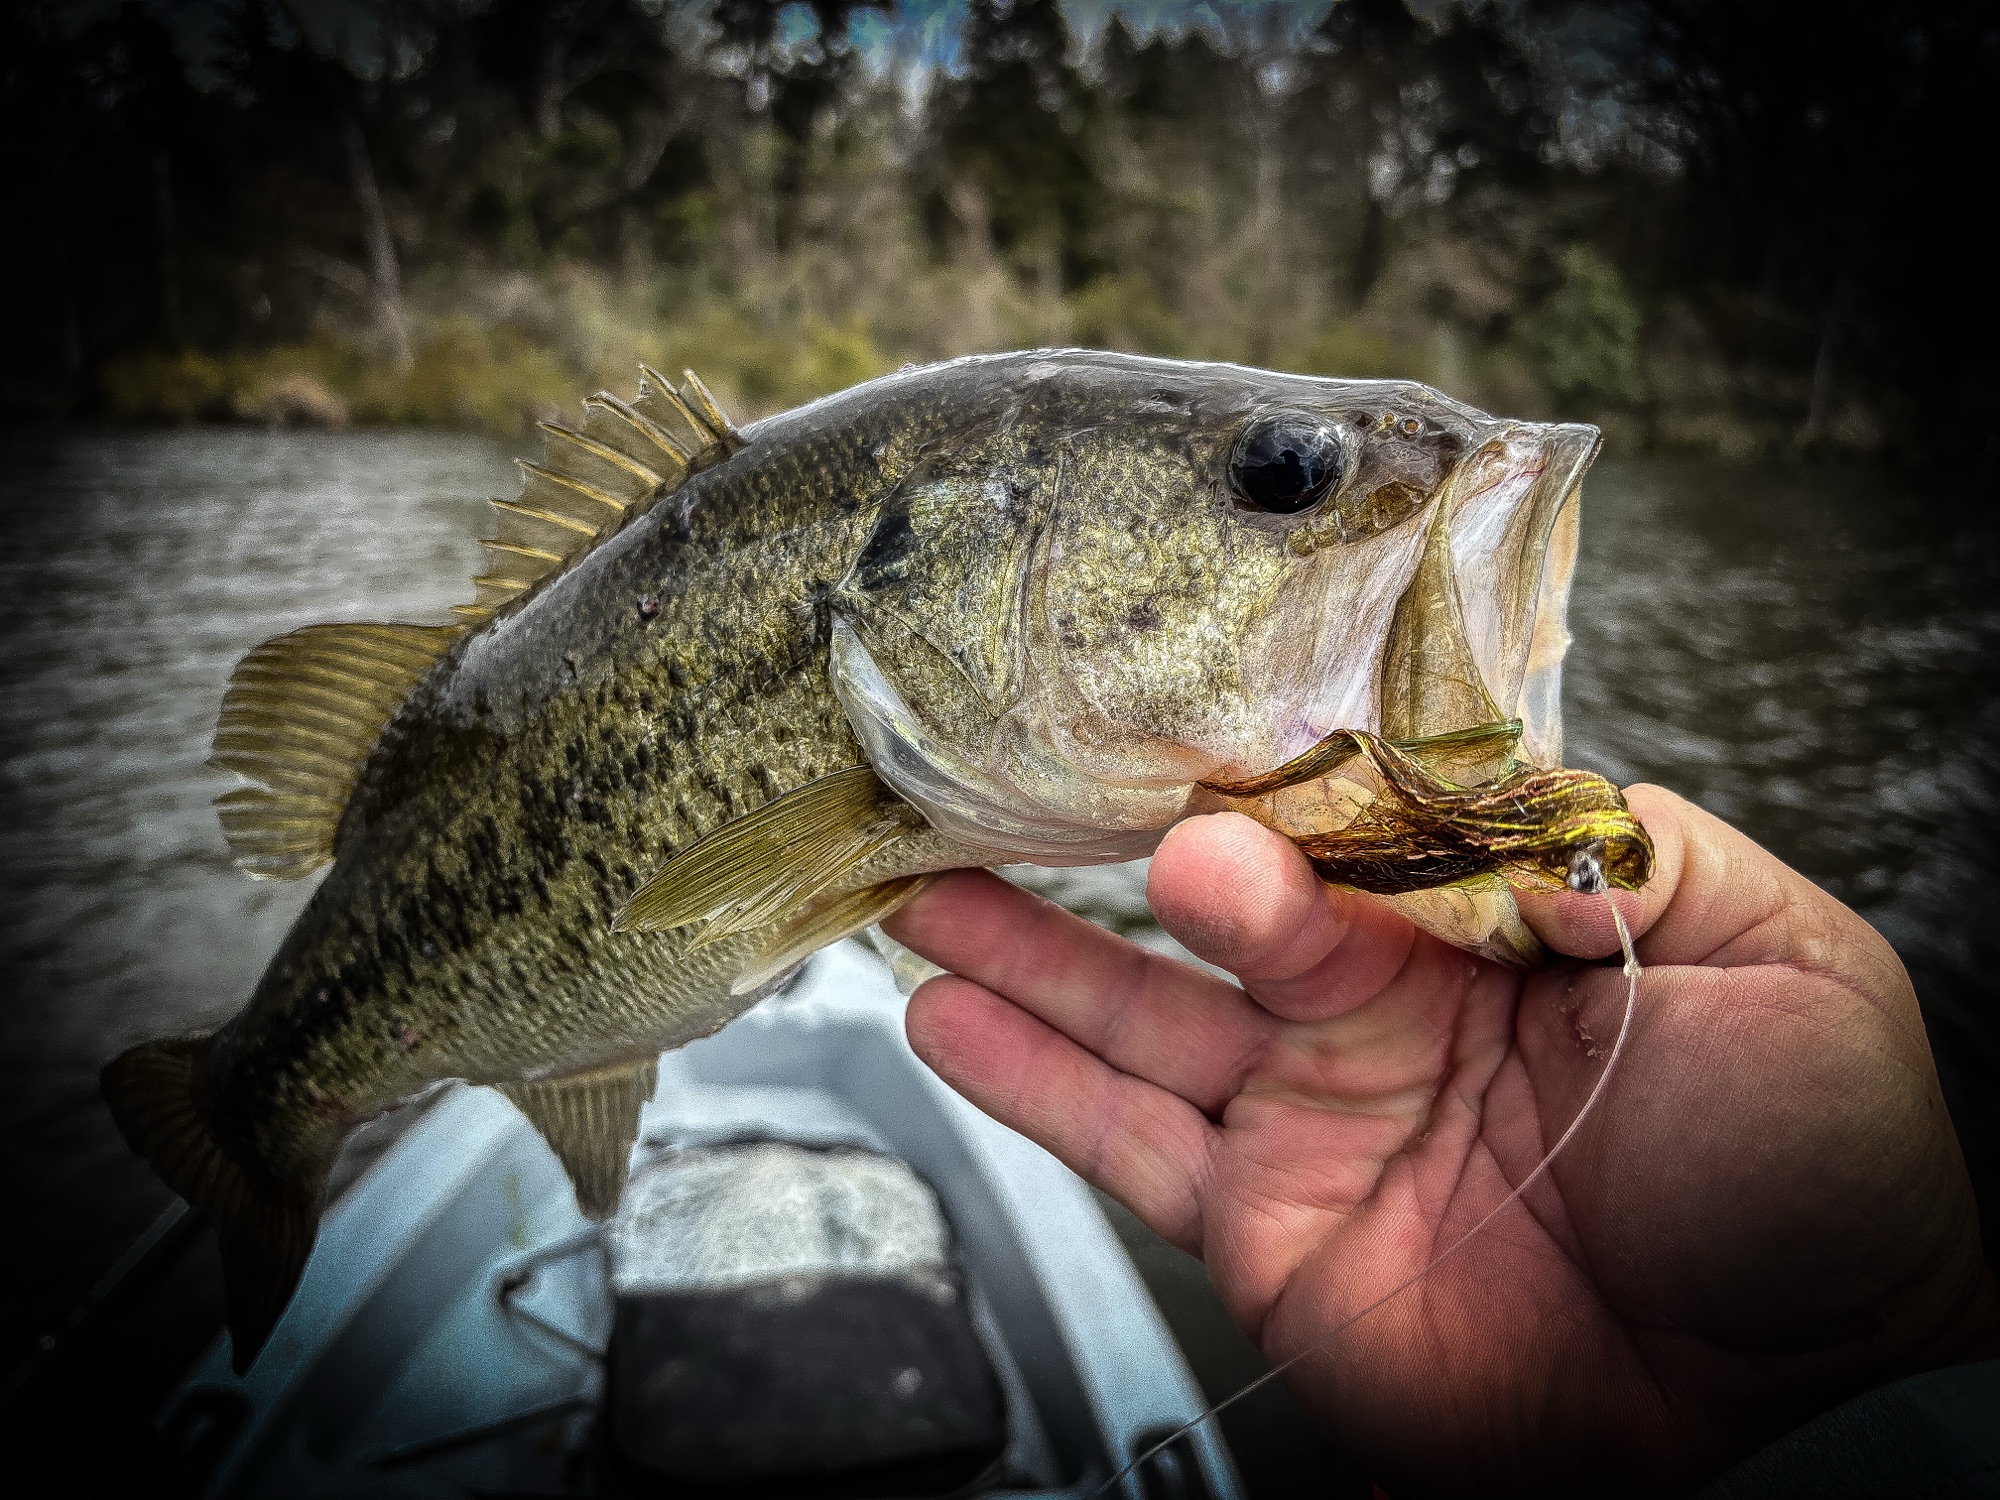
    Bass with the double barrel popper

    On the baitcaster, the approach mirrored the fly rod strategy but with different tools. Walking baits and prop baits in shad or chartreuse patterns were producing when worked over the same mid-range structure zones. A H2O Mag Top Water Popper in Bone color or a Rebel Magnum Pop R 3’’ running at a controlled cadence over those open water zones was drawing strikes from fish actively cruising and chasing. The rule is the same regardless of the tool: match the retrieve to the mood, and let the bait do the work on the pause.

    My brother with another bass on the top water

    By mid-afternoon, both methods were still producing. The overcast sky kept the fish comfortable and in feeding mode all day. Day one ended with numbers and solid fish. We packed up thinking we’d cracked the code.


    Day Two: Same Sky, New Playbook

    We were back on the water before first light on day two. Conditions looked nearly identical — same partly cloudy cover, similar light wind. We started right where we’d left off.

    For the first two hours, the topwater bite was right there. Fish were still responding. I was working my double barrel popper over the same zones, throwing the same cadence, and the fly rod was eating it up.

    Then, somewhere around 8 a.m., the bite just stopped.

    Not slowed. Stopped. Three casts over a zone that had produced a fish every pass the day before. Nothing. The water surface was unchanged. The weather hadn’t shifted. But the fish had.

    This is the moment most anglers lose. They keep doing what worked yesterday and wonder where the fish went. The answer isn’t mystery — it’s depth.


    The Shift: Reading When to Go Below the Surface

    When topwater dies mid-morning under consistent weather, bass have usually transitioned vertically. They’re still in the same general area, but they’ve moved down. On day two, by 8 a.m., that’s exactly what happened.

    On the fly rod, I made the call to drop down to my olive streamer — one of my most reliable bass producers. This fly is built on a size 1 hook, with an olive base blended with chartreuse angel hair flash for lateral line flash that mimics a baitfish in the water column. The large yellow dumbbell eyes serve double duty: they sink the fly and create an up-and-down jigging action on the strip that drives bass wild. The jigging motion you get from heavy dumbbells isn’t just aesthetics — it directly replicates the erratic movement of an injured baitfish trying to stay level.

    The retrieve changed from the topwater cadence. Short, sharp strips — strip, pause, strip, pause — letting the eyes bounce the fly off the bottom or hover it just above structure. Within the first few casts near the same point with submerged timber we’d worked on topwater, the bite was back. Fish were sitting tight to structure, maybe three to five feet down, and they wanted something they didn’t have to chase to the surface.

    On the baitcaster, the answer was in the box too. I made the transition to a 7- inch shad color worm on a standard worm hook with brass cone weight— a slow, subtle presentation that appeals to the same post-topwater mindset in bass. The brass cone weight keeps the worm nose-down with the tail breathing upward, perfectly imitating a crawfish or baitfish in distress near the bottom. Work it with small wrist shakes rather than big rod sweeps, and keep it glued to structure. Texas-rigged soft plastics are equally effective here — especially darker, natural tones when the water clarifies slightly as the morning matures.

    Spinnerbaits are another strong mid-morning option when fish are sitting in that 3–8 foot zone. A tandem willow-leaf in white or chartreuse gives you flash and vibration without burning the presentation past suspended fish.


    Midday Deep: The 10-Foot Move

    By noon on day two, even the near-structure bite had cooled. Bass had pushed again — this time out to about 10 yards from the bank, suspending in 8 to 12 feet of water. This is where a lot of anglers give up and head in. This is actually where the quality fish live.

    On the fly rod, I switched to my second go-to streamer pattern: the same base construction but tied with Hareline orangutan blended with root beer angel hair flash. That darker, warmer color profile — burnt orange against a root beer shimmer — reads differently in deeper water. At 8 to 12 feet, color perception shifts. Natural, earthy tones trigger predatory instinct where bright chartreuse might look unnatural. I run this on a size 2 hook when I want a slightly smaller profile for fish that are keying on smaller bait in deeper zones.

    Bass caught on the fly rod with a streamer

    The sink tip on the fly line becomes critical here. Get the fly down before you work it. Count the fly down — six to eight seconds minimum before beginning your retrieve. Then slow, methodical strips with long pauses. Deep bass aren’t chasing. Make the bait look hurt and easy.

    On the baitcaster, a deep-diving crankbait in a shad or crawfish pattern allowed me to reach those 8 to 12 foot suspended fish efficiently. A medium-diving squarebill gets you to 6–8 feet, while a long bill crankbait reaches the 10–12 foot zone. Vary your retrieve until you feel bottom contact, then back off. That tick-tick-tick of the bait’s lip dragging structure is what triggers suspended fish.

    Carolina rigs with a watermelon red finesse worm are another lethal midday option. The leader lets the worm float up off the bottom while the weight stays in contact — irresistible to fish holding just above the substrate.


    Pro Tips: What Most Anglers Miss

    Fly angler tip — carry two streamer colors, not four. Decision fatigue on the water kills your focus. Two streamers in contrasting palettes — an olive/chartreuse build and an orangutan/root beer build — cover 90% of conditions. Know when to use each rather than cycling through a full box.

    Baitcaster tip — slow down your power phase. Most anglers burn topwater and crankbaits too fast when fish are neutral. Cut your retrieve speed by 30% the moment the bite slows. The fish are still there; your bait is just running past the strike window.

    Match hook size to mood. On fire bites, size 0 and 1 streamers move more water and get crushed. On pressured or slow fish, dropping to a size 2 with a more subtle profile can be the difference. The same logic applies on conventional tackle — downsize your profile when fish are post-frontal or under light pressure.

    Log your depth shifts. After every slow period, note the depth where the next bite comes. Over time, you’ll see patterns in how fish shift throughout the day under similar conditions on your home water.


    Mistakes to Avoid

    Abandoning topwater too early. Most anglers pull off surface presentations at the first sign of a slowdown. Give it fifteen minutes. Sometimes fish go quiet for a window and come back. Day two’s early topwater bite lasted two full hours — patience produced fish before the inevitable transition.

    Not counting down your fly. If you’re not getting your streamer to depth, you’re not fishing where the fish are. Use a full-sink or sink-tip line and count every cast down before your first strip.

    Matching yesterday’s retrieve. Conditions change by the hour. If what worked at 7 a.m. isn’t working at 9 a.m., stop, observe, and adjust. The retrieve that produced yesterday is the exact thing that will make you fishless today if you don’t adapt.

    Ignoring the vertical dimension. Most anglers think about where fish are on the X/Y plane — by this dock, near that point. The Z-axis — depth — is where the real adjustment happens. Bass move vertically throughout the day in response to light, pressure, and bait position.


    Capturing It All: Photography on the Water

    A two-day bass outing under consistent overcast skies is a photographer’s gift. The flat, diffused light of a partly cloudy day eliminates the blown-out highlights and deep shadows that make fish photography difficult under direct sun.

    Morning sessions are prime time for capture with the Canon R5. The soft warm light from the east — even through clouds — still carries a directional quality in the first 90 minutes after sunrise. Position the fish toward that light source for natural color rendering on the bass’s lateral stripe and the iridescent green of their flank.

    Topwater strikes are among the most dramatic moments in freshwater fishing and almost impossible to capture in the act with a DSLR. Instead of chasing the explosion, set up for the lift — the moment the angler comes tight and the fish breaks the surface for the first time. Anticipate the fight, pre-focus on the rod tip, and shoot bursts at 20fps in electronic shutter mode. The R5’s eye-tracking performs well even on a moving fish in low-contrast water.

    Streamer releases in deeper water often happen boat-side. Position yourself so the water behind the fish shows depth — darker tones — rather than the boat hull or a flat sky. A 70–200mm at f/4 gives you enough separation to isolate the fish against that deeper background, creating images that feel like they were taken at depth rather than in six inches of water beside the gunwale.

    Fly rod compositions benefit from showing line tension — the slight curve of the rod, the water droplets falling from the fly line on the forward cast, the visual story of the retrieve. These are the images that separate a fishing photo from a fishing trophy shot.

    For more on outdoor and fishing photography, visit Beyond the Cast.


    The Lesson That Never Gets Old

    Two days. Same lake. Same sky. Completely different fish.

    The difference between a good day and a blank is almost never about luck. It’s about willingness to observe without ego — to look at the data the water gives you and make a decision that contradicts what worked an hour ago.

    Whether you’re reaching for a baitcaster and loading a Carolina rig or picking up the fly rod and switching from a double barrel popper to an olive streamer with dumbbell eyes, the principle is identical: the fish set the agenda, and your job is to keep up.

    That’s the kind of fishing that 35 years on the water teaches you. Not just how to cast, or what knot to tie — but how to listen.

    If this post helped you think differently about your next bass outing, drop by Beyond the Cast for more tactics built on time — not theory.

    And if you want to see the flies, the footage, and the behind-the-scenes of trips like this one, follow Beyond the Cast on Facebook and join the conversation with anglers who take this stuff as seriously as you do.

    The fish are out there. Go find them.


    Written by Beyond the Cast | Tactics Built on Time. Not Theory.
    Category: Bass Fishing
    Internal links: Beyond the Cast | Photography + Fishing

  • Florida River Fly Fishing Near Durango: Tight Water Tactics for Wild Trout

    Florida River Fly Fishing Near Durango: Tight Water Tactics for Wild Trout

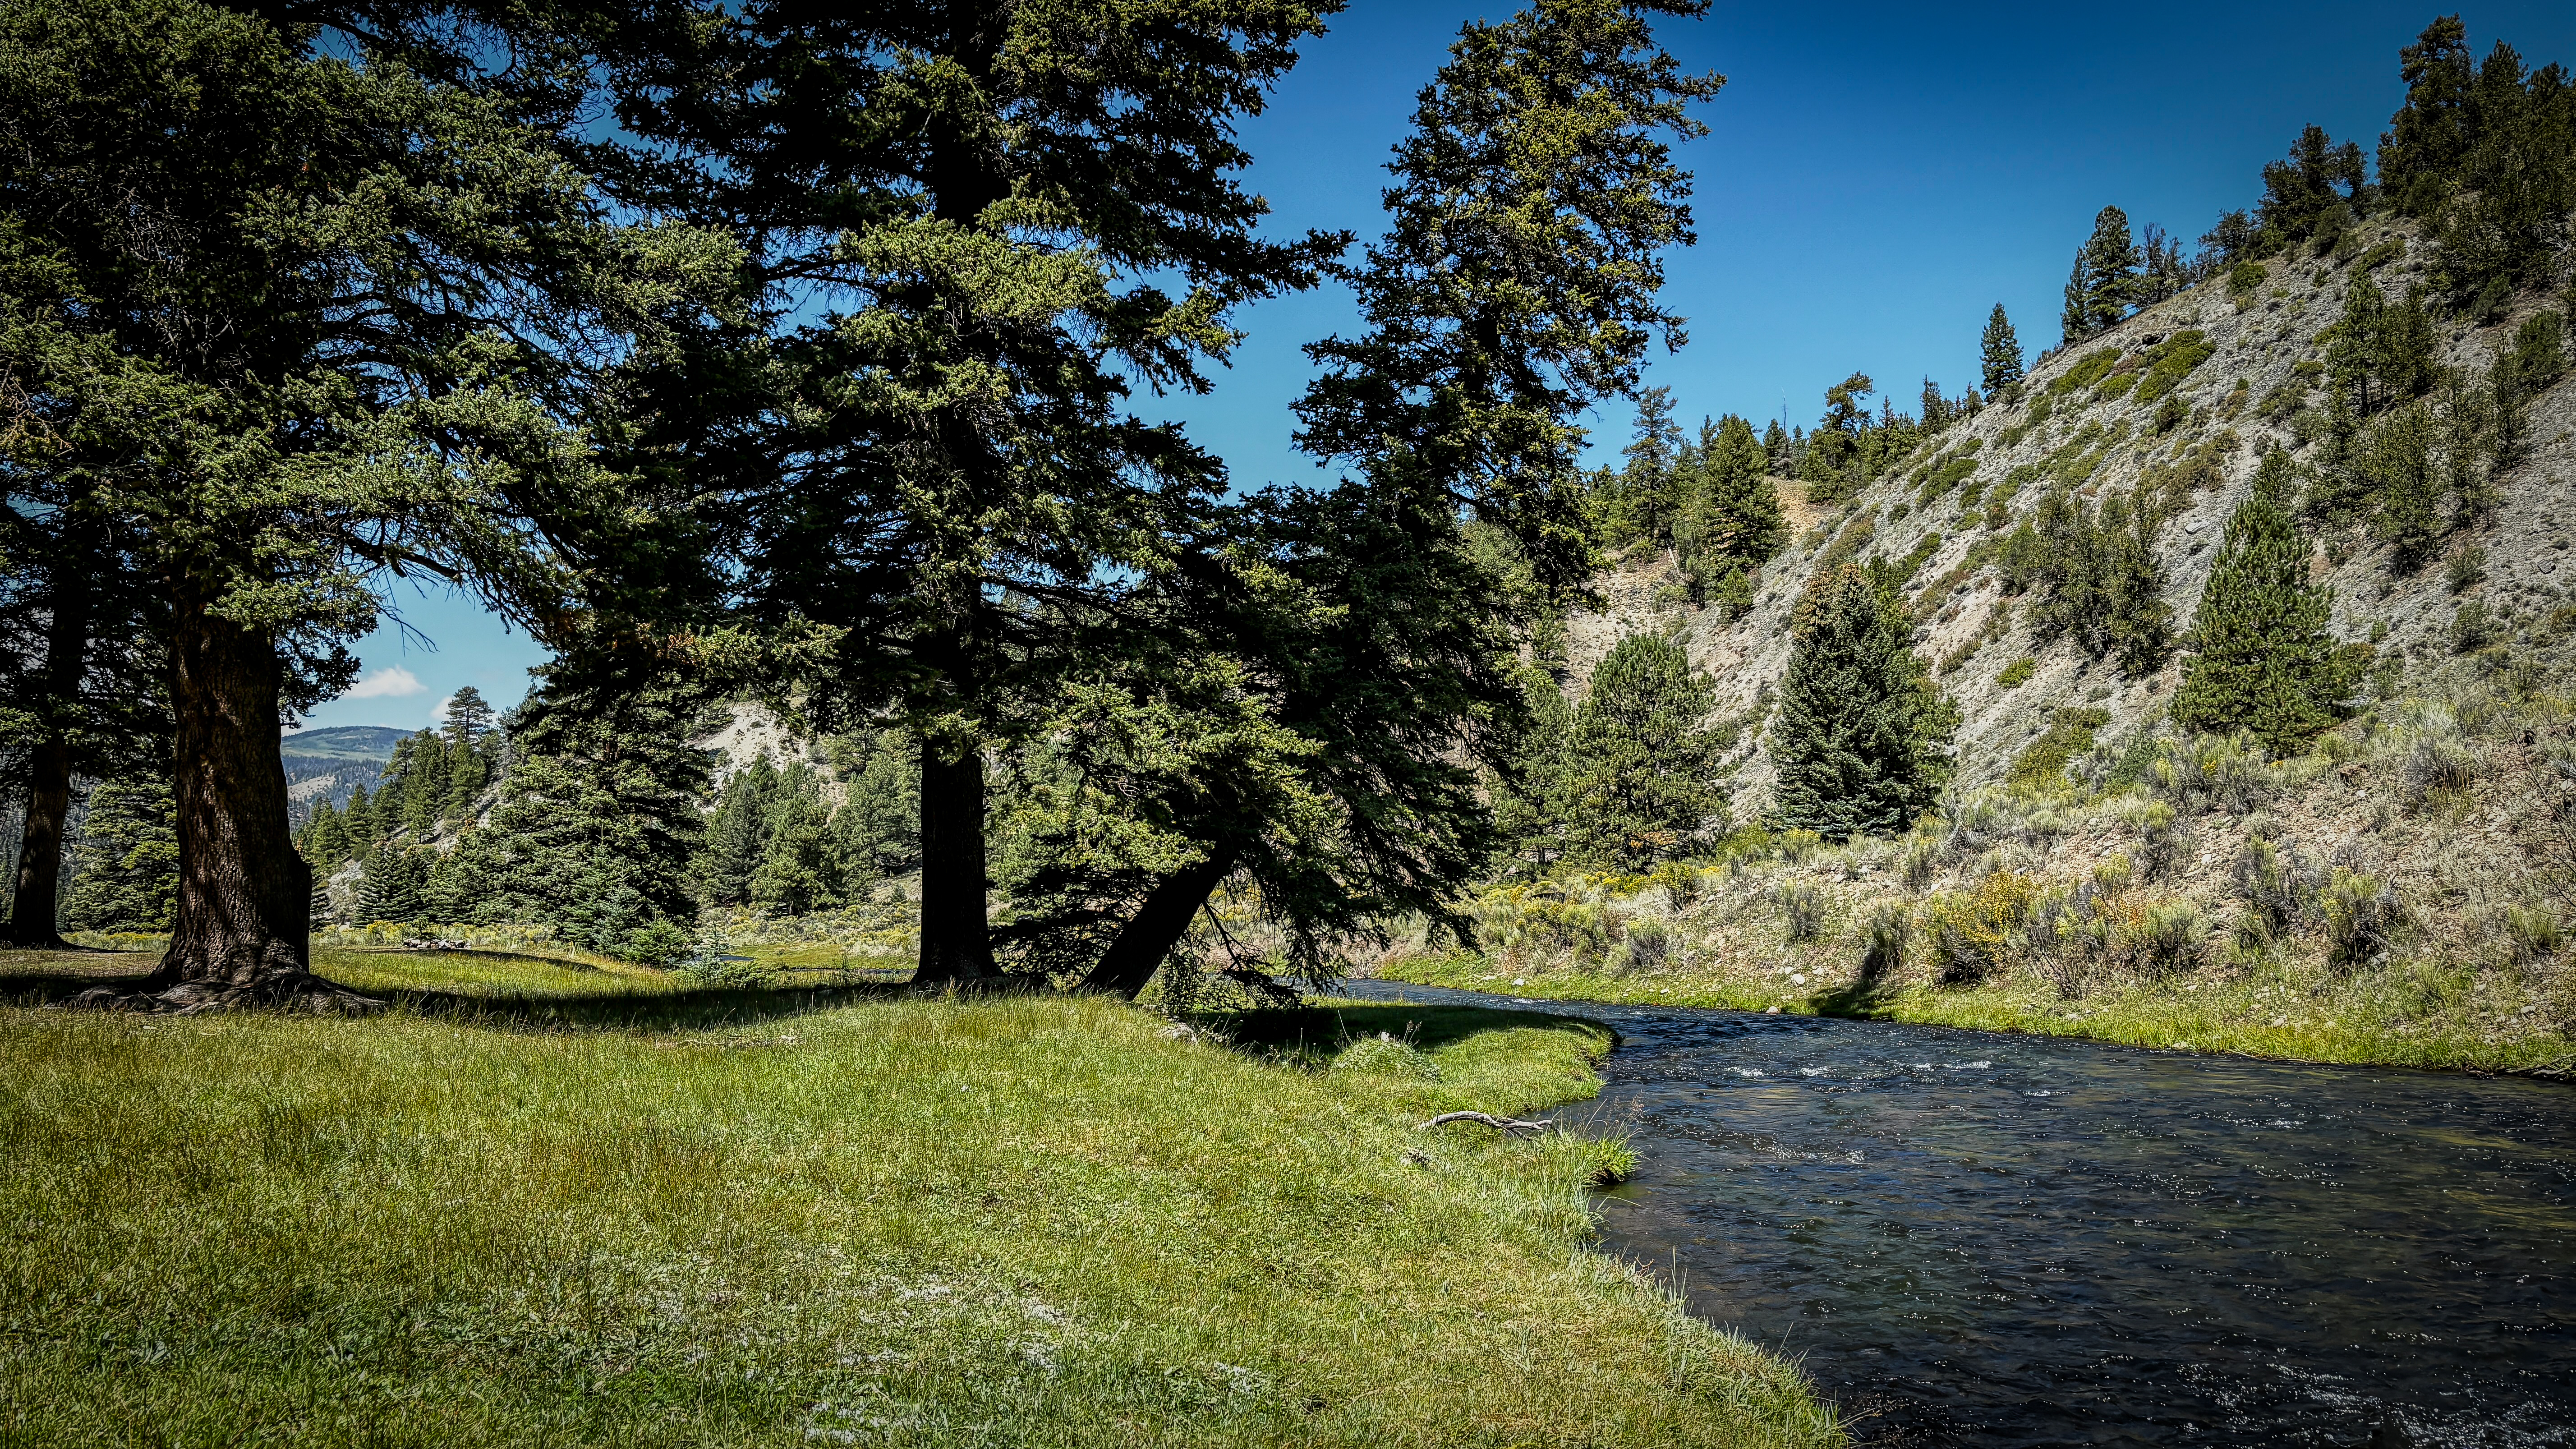
    The brown was holding in a slot no wider than a doorframe, tucked tight against an undercut bank with maybe two feet of clearance overhead. I’d already blown two casts into the canopy. Third attempt — bow-and-arrow load, soft release — and the fly landed six inches upstream of his nose. He didn’t chase it. He just tipped up and ate it like he’d been waiting.

    That’s Florida River fly fishing near Durango. It doesn’t reward your best cast. It demands your most precise one.

    This river sits in the shadow of more famous water — the Animas, the San Juan — and most anglers drive right past it. That’s their loss and your opportunity. What the Florida offers is a technical, intimate fishery of wild brown and rainbow trout in clear, cold water that will expose every weakness in your game and sharpen everything that isn’t.

    This post is built from real time on this water. Here’s exactly how to fish it right.

    Finding Local Knowledge: A Stop at The San Juan Angler in Durango

    There’s a kind of intelligence you can’t find on YouTube or in a forum thread — the kind that lives behind the counter of a good fly shop. Before heading out to the water, I made a stop at The San Juan Angler in Durango, and it was one of the better decisions of the trip.

    The shop’s fly tying material selection was impressive — not just stocked, but thoughtfully curated for the region. If you’re someone who prefers to tie your own patterns rather than pull pre-packaged flies off a peg board, this is your kind of place. I picked up materials to tie a few patterns I had in mind for the browns and rainbows, and the selection gave me options I hadn’t anticipated.

    What made the visit genuinely valuable, though, was the conversation. The staff didn’t just point me toward the most popular stretch and send me on my way. They talked through the Animas River running right through town, the Dolores River to the west, the Florida River tucked further out, and gave honest perspective on each. Water conditions, where fish were holding, what had been producing — the kind of river-specific intel that takes years of local time to accumulate.

    That conversation changed how I approached the trip. The San Juan River down in New Mexico was already on my list, but the context they provided on timing and conditions helped me prioritize where to put my boots in the water first. Good local shops don’t just sell gear — they compress your learning curve and keep you from burning a day on water that isn’t fishing well.

    If you’re planning a fly fishing trip through southwest Colorado, make The San Juan Angler one of your first stops. Walk in with questions. Leave with flies, materials, and a plan that’s actually grounded in what’s happening on the water right now.

    Reading the Florida River Before You Ever Rig Up

    Most anglers are rigged and in the water within five minutes of arriving. On the Florida, that’s five minutes of spooking fish you’ll never see.

    Stop. Watch. The river will tell you what it’s holding and where — but only if you give it time to show you.

    What to look for from the bank:

    • Substrate color changes — dark bottom means depth and slower water, light sandy bottom means current pushing over a feeding shelf

    • Foam lines collecting in the inside of bends — that’s where surface food concentrates

    • Any subtle wakes, flashes, or movement tight to undercut banks

    • Overhead canopy gaps — these determine where you can actually deliver a fly

    The tailwater section below Lemon Dam runs 44–56°F most of the year. That cold, consistent temperature keeps fish active through midday when most freestone rivers go quiet — but it also makes these fish sharp-eyed and deliberate. They’ve seen pressure. They hold in the tightest, most protected lies available.

    You’re not looking for open water. You’re looking for the least fishable-looking spot that has current bringing food to it.

    Check USGS gauge data before every trip. This river changes with dam releases, and a small bump in flow repositions fish more than most anglers realize.

    Tight Water Casting: The Four Presentations That Actually Work Here

    A 9-foot five-weight is the wrong tool on the Florida. You need a 7.5- to 8-foot four-weight — short enough to maneuver under canopy, light enough to feel a 5X tippet load on a 13-inch brown that has no intention of cooperating.

    Most anglers trained on big western water arrive here with habits that work against them. Distance isn’t the goal. Accuracy in a three-foot window is.

    The bow-and-arrow cast is your go-to when canopy closes overhead. Pull the fly back toward you, load the rod tip, release. Effective within 15 feet. Practice it at home before you need it on the water.

    The pile cast dumps slack line upstream of the fly deliberately. On the Florida’s variable seams — where current speed changes within inches — this is how you buy a drag-free drift that a standard cast cannot achieve.

    The upstream roll cast is for when you’re below the fish with obstacles behind you. Anchor loads, forward sweep, high-trajectory finish into the feeding lane. Cleaner than it sounds once the muscle memory is there.

    The reach mend extends your drift on any open section. Cast, then arc the rod tip upstream before the line touches water. Those extra seconds of drag-free float are often the difference between a look and an eat.

    The Florida doesn’t care how far you can cast. It only cares where the fly lands relative to where the fish already is.

    What These Fish Are Eating — and the Window When It Matters

    Midges run the menu year-round. Sizes 20–24 in olive, black, and red — Zebra Midges, Mercury Midges, RS2s — are the baseline. Keep them in every box, every trip.

    In summer, pale morning duns and caddis create genuine surface activity in the early morning and last hour of light. Don’t overlook the caddis pupa transition — a size 16 Partridge & Orange soft hackle swung through the tailout of a run is one of the most underused presentations on this entire river.

    Late July through September on the freestone water above the reservoir, run a hopper-dropper. Size 10–12 foam hopper, beadhead Hare’s Ear or Pheasant Tail trailer. Fish that haven’t seen that presentation all season will eat it aggressively.

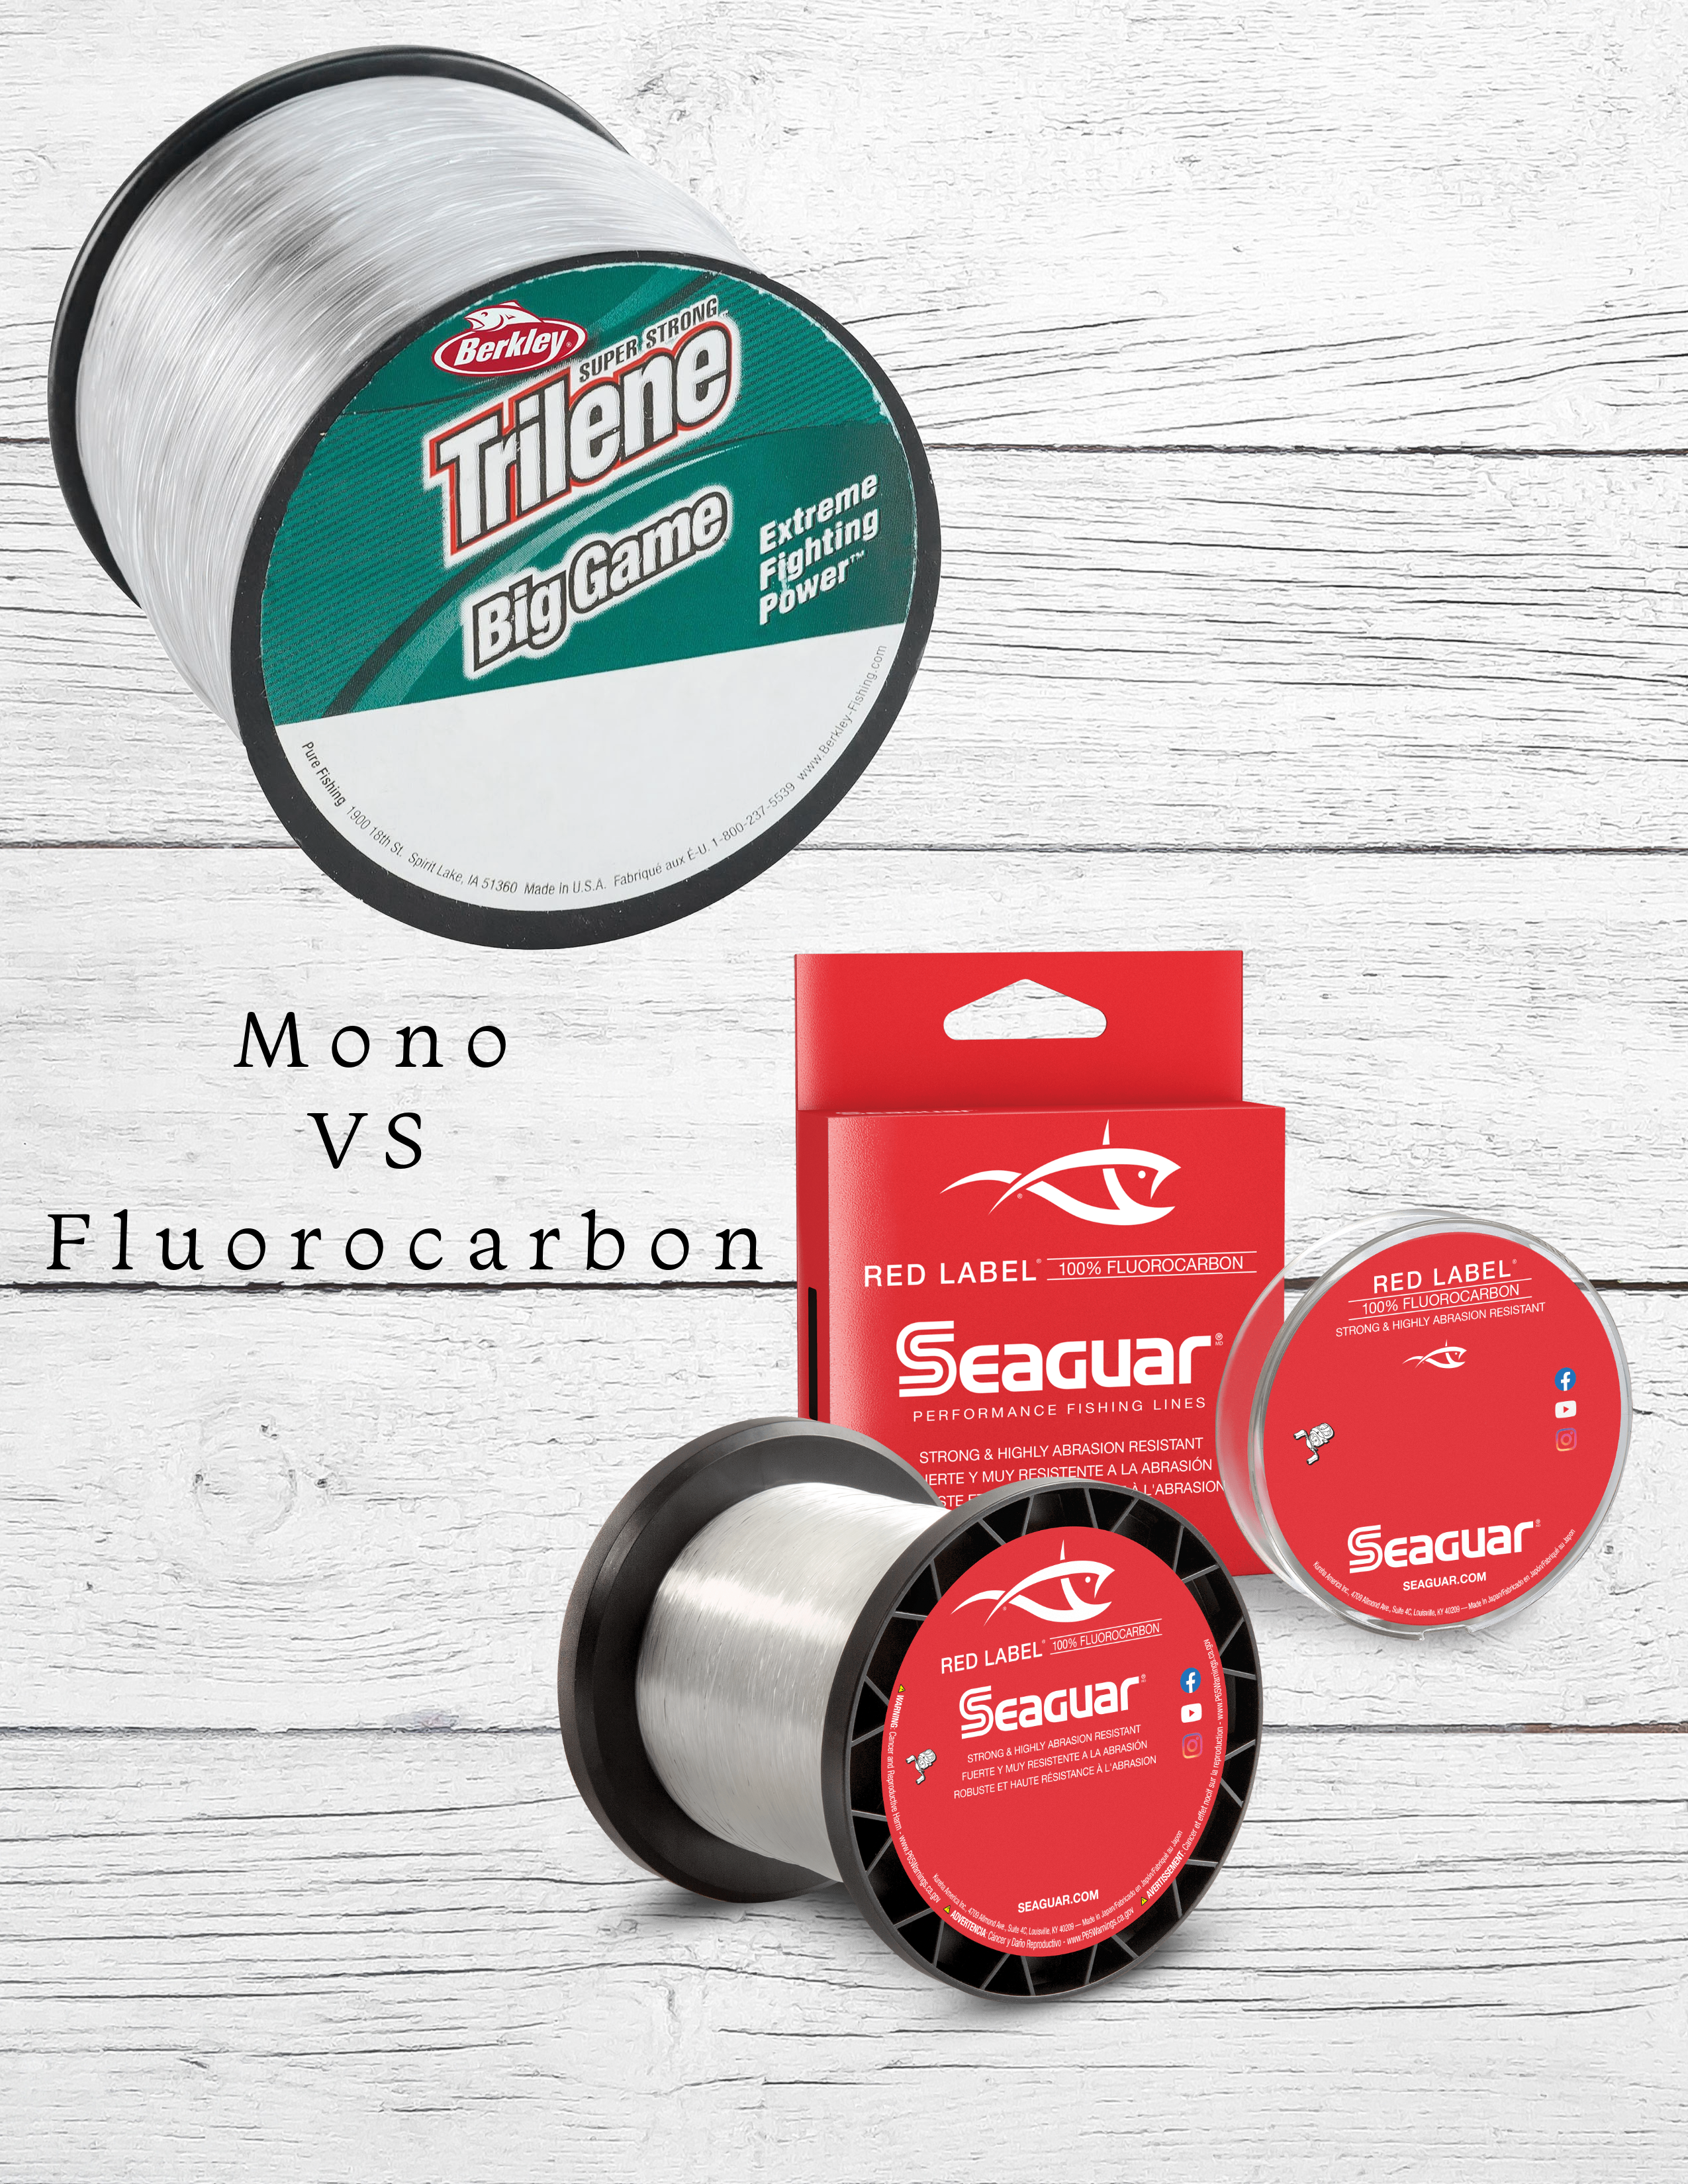
    Leader setup that works: 9-foot tapered leader to 5X fluorocarbon as baseline. On calm, clear days in the tailwater — especially when you can see fish — drop to 6X. Accept the occasional break-off. The alternative is refusals.

    Pro Tips: What Most Anglers Miss on the Florida

    Fish the margins, never the middle.

    The biggest fish on this river hold where predators can’t approach from multiple angles — undercut banks, root tangles, the inside edge of brush that’s hanging two feet over the water. Wade to the center and cast toward the edges. Most anglers do the opposite.

    Slow down between pools — more than you think you need to.

    A rushed wade-through between holding lies pushes a pressure wave that spooks every fish within 30 feet. One step, pause, look. The fish you’re hunting is often visible if you move slowly enough to actually see it before it sees you.

    Temperature is a better clock than time of day.

    Carry a thermometer. Below 45°F, switch to the slowest possible nymph presentation tight to the bottom — trout metabolism drops and they won’t chase. Above 65°F, move to shaded sections only or fish the tailwater. The feeding window tracks water temp more reliably than the hour on your watch.

    The riffle is not empty.

    Fast, broken riffle water looks wrong for trout. It isn’t. In low-light conditions — first and last 30 minutes of the day — browns and rainbows slide into riffles to feed aggressively on drifting nymphs. A weighted soft hackle swung through at last light produces fish that nothing else touches.

    ⚠️ Mistakes That Will Cost You Fish on the Florida River

    Overcasting your target.

    The most common error on tight water. Thirty feet feels conservative — on a 12-foot-wide run it blows the presentation before the fish ever sees the fly. Train yourself to be uncomfortably close. It works.

    Line sag between rod tip and surface.

    Any excess fly line drooping in variable current drags immediately, even before the fly reaches the fish. High-stick nymphing hold, line off the water. Six inches of sag is enough to kill a drift in broken current.

    Fishing too much water too fast.

    A spooked fish on the Florida will return to its holding lie within 15–20 minutes if you stop pressuring the water. Rest the pool. Move downstream, come back. This discipline is rare and it’s exactly why it works — almost nobody does it.

    Treating the Florida like the Dolores.

    Coming off bigger tailwater, anglers try to cover distance and target open seams. The Florida rewards the opposite — shorter casts, tighter targets, slower movement. If you fished the Dolores on this same trip, reset your mindset completely before you make a cast here. (If you haven’t read the Dolores tailwater breakdown, that post covers the canyon system in full.)

    Photography on the Florida: Tight Water, Better Frames

    The Florida’s canopy is your best lighting asset. It creates natural diffusion all day — no harsh shadows, no blown highlights — which means you’re not chasing a narrow golden hour window. Good light exists here from shortly after sunrise until the canyon walls cut it off in late afternoon.

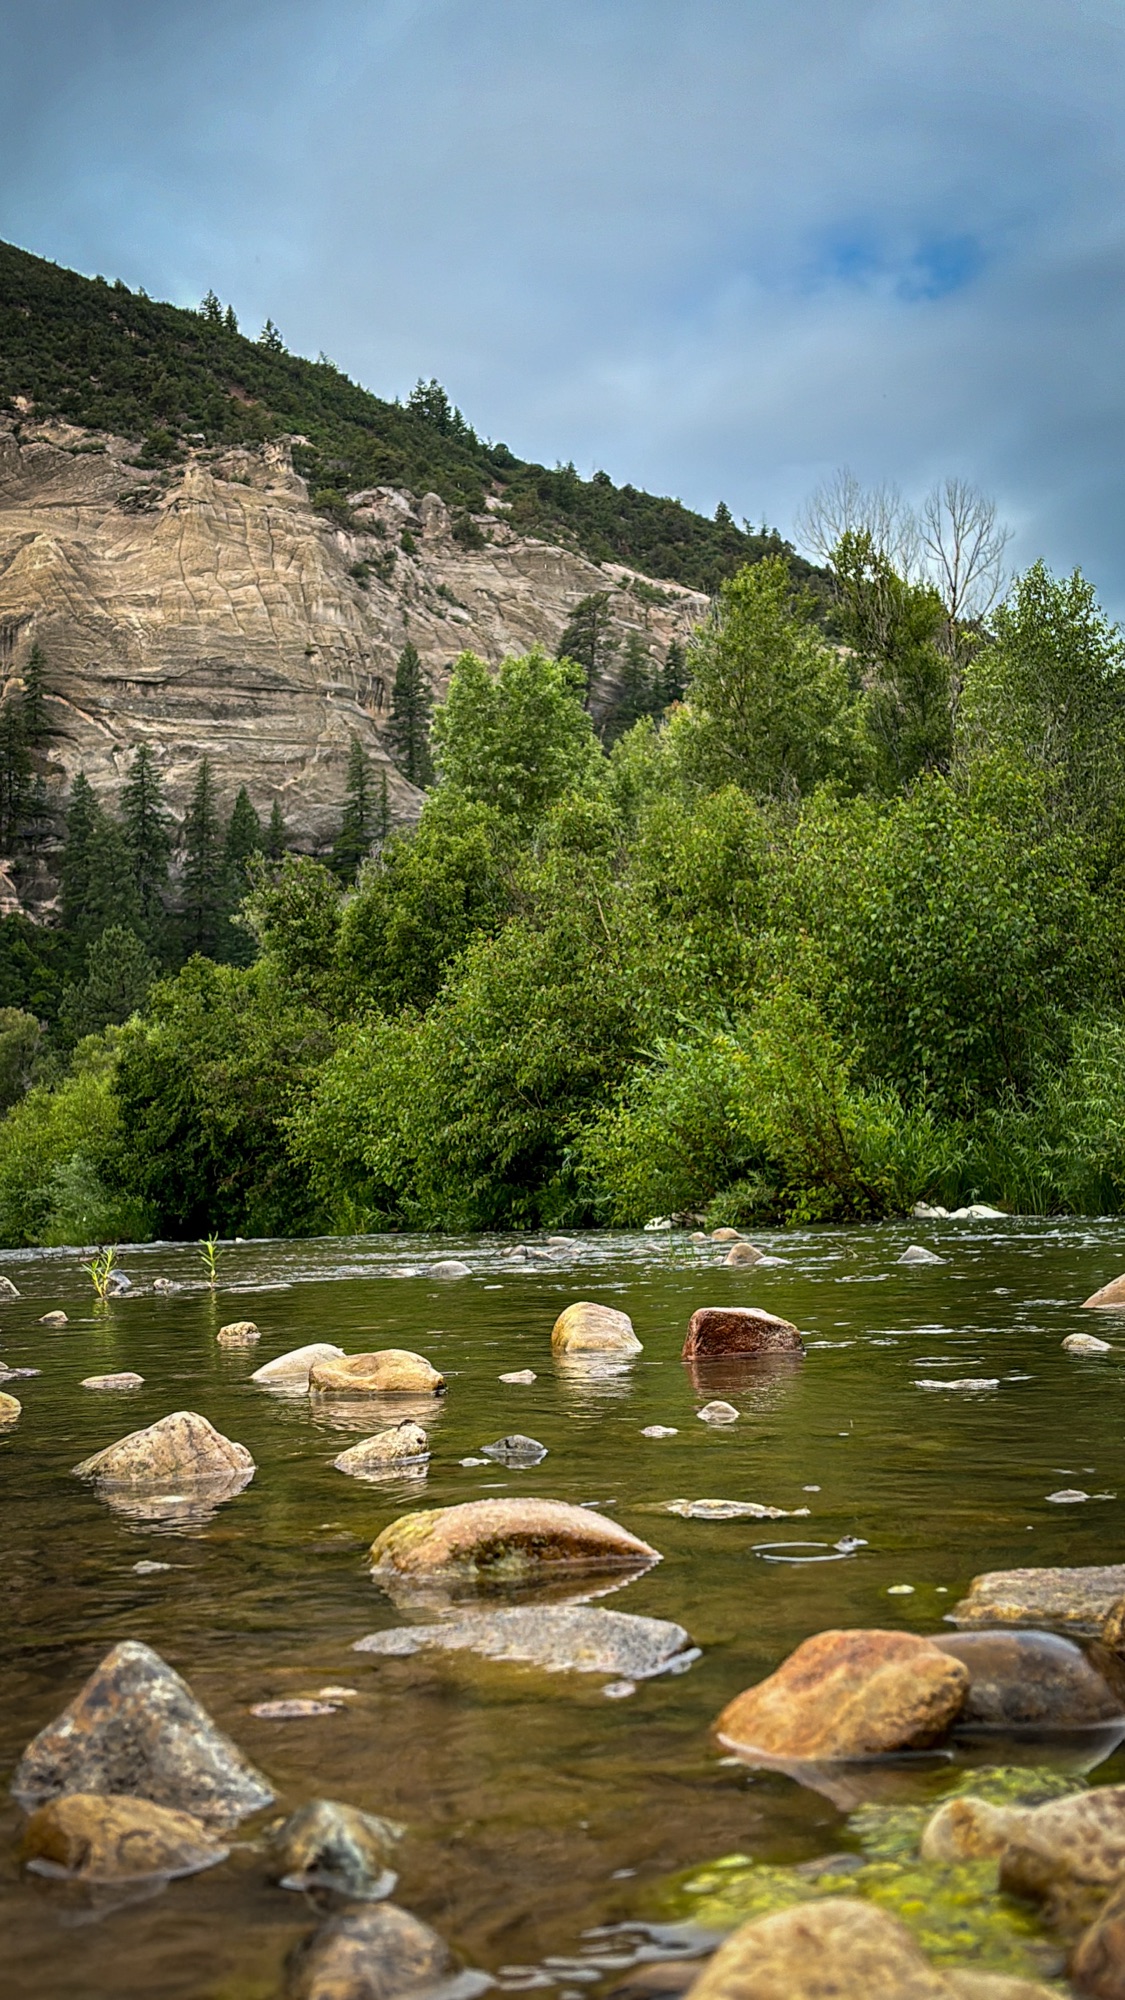
    Shooting with the Canon R5, the RF 24–105mm f/4L handles most bank situations. But the frames that hold up — the ones worth keeping — come from getting low. Camera at water level, six inches off the surface, river filling the foreground. A brown trout held just above the waterline with canyon rock and broken current behind it tells the whole story of this fishery in one frame.

    For the fight and the release, switch to the RF 85mm f/1.2L if you’re positioned downstream. That compression at f/1.4 isolates the fish against a soft, out-of-focus river background in a way the zoom can’t touch. Enable animal-eye autofocus on the R5 and let it lock on the fish as it comes to hand — it performs better than expected on a wet, moving subject in variable light.

    The release frame is almost always the strongest image. Fly line slack, fish vertical in clear water, hands extended. It communicates the ethic and the moment at the same time. Shoot burst in the last ten seconds of the fight and through the release. That’s your window.

    One rule that matters more than any gear choice: when the fish is exhausted, put the camera down. A properly revived wild trout is worth more than any photograph. The best fly fishing images happen fast or not at all.

    For more field photography from these waters, the Beyond the Cast photo gallery has the full collection from this trip and others.

    Final Takeaway: The Florida River Will Teach You Something

    Thirty-five years of fishing rivers — saltwater flats, tidal creeks, tailwaters, spring creeks — and tight water like the Florida still teaches something that nothing else can. Space is not a given. Precision is not optional. And the angler who adapts to the river’s terms instead of demanding the river adjust to theirs is the one who figures it out.

    Florida River fly fishing near Durango is not the most famous water in Colorado. It won’t be the easiest trip you plan. But if you approach it with the right tools, real reading of the water, and the discipline to slow down when everything in you wants to speed up — it will give you wild trout in wild country on your terms.

    That’s the whole deal. That’s always been the whole deal.

    Want more fly fishing tactics, backcountry water breakdowns, and field photography? Read the full New Mexico fly fishing streamer tactics post and the Dolores & Florida River canyon breakdown for the full picture on this water.
    👉 Visit Beyond the Cast for every post, the gear list, and the full photo gallery.

    👉 Follow Beyond the Cast on Facebook — new tactics, trip reports, and field photography posted regularly.

  • Chasing Canyon Browns: Dry Flies, Streamers, and Decisions That Matter on the Dolores & Florida River

    Chasing Canyon Browns: Dry Flies, Streamers, and Decisions That Matter on the Dolores & Florida River

    There are trips you remember for the fish—and then there are trips you remember for the decisions that led to them.

    The Dolores tailwater carved through that canyon doesn’t hand anything to you. It forces you to slow down, read deeper, and fish with intent. Add in a side run to the Florida River outside Durango, and this trip became less about numbers and more about adapting—hour by hour, current by current, light shift by light shift.

    This is where dry flies and streamers stop being “techniques” and start becoming tools you deploy with purpose.

    The Dolores Tailwater: Reading the Canyon Before You Ever Cast

    The first thing that hits you in the Dolores canyon isn’t the water—it’s the scale. Steep walls, broken light, and a river that changes personality every hundred yards.

    Tailwaters demand precision, but this one demands awareness.

    Flows here dictate everything. Slight bumps in release change holding water, feeding lanes, and even fish positioning against structure. You’re not just fishing seams—you’re fishing micro-adjustments in current speed.

    What I Keyed In On:

    • Inside bends with slower foam lines — consistent dry fly potential
    • Mid-river boulders creating soft pillows — prime ambush points for browns
    • Transition zones (fast → slow water) — where streamer eats actually happen

    You can’t fish this river blindly. Every cast needs a reason.

    Dry Fly Window: When the River Finally Talks Back

    There’s a moment on rivers like this when everything settles—the wind drops, the light softens, and subtle rises start showing.

    That’s your window.

    I worked small, natural profiles—nothing flashy. These fish see pressure, and more importantly, they see mistakes.

    Tactical Approach:

    • Long leaders to avoid micro-drag
    • Positioning downstream and off-angle to the fish
    • Using current seams to deliver flies naturally—not forcing the drift

    The takes weren’t aggressive. Just quiet sips. But those are the fish you’re after in water like this—educated browns that don’t move far unless it’s worth it.

    Pro Tip:

    If you see a rise but miss the eat, don’t rush the next cast. Let the fish reset. On pressured tailwaters, timing your follow-up cast matters as much as presentation.

    When Dry Flies Stop Working: The Streamer Shift

    The canyon changes fast. Light creeps higher, shadows disappear, and those rising fish vanish just as quickly as they appeared.

    That’s not failure—that’s a signal.

    Streamer time.

    But here’s where most anglers get it wrong: they fish streamers too fast, too blindly, and without structure in mind.

    The Adjustment That Changed Everything:

    Instead of covering water aggressively, I slowed down and targeted specific structure zones:

    • Deep cut banks with undercut shadows
    • Boulder clusters creating vertical drop-offs
    • Tailouts where current compresses bait

    This wasn’t about stripping hard—it was about controlling depth and angle.

    Retrieval Strategy:

    • Cast slightly upstream of the target
    • Let the fly sink into the zone
    • Short, controlled strips to mimic injured bait

    The eats came heavier. Not frequent—but decisive.

    The Canyon Factor: Light, Angles, and Fish Behavior

    Fishing inside a canyon adds a layer most anglers underestimate—light management.

    You’re not just dealing with sun position. You’re dealing with shadows that move across the water in real time.

    Fish use that.

    What I Noticed:

    • Browns pushed tighter to structure as direct light increased
    • Shadow lines created temporary feeding lanes
    • Bright overhead conditions killed mid-column activity

    This dictated everything:

    • Dry flies early and late
    • Streamers when light got harsh
    • Slowing presentations when shadows disappeared

    Pro Tip:

    Use canyon walls like a clock. Watch how shadows move across the water—it will tell you where fish are repositioning before you even see them.

    Florida River Near Durango: A Different Game Entirely

    After the Dolores, the Florida River felt tighter, more intimate—but no less technical.

    Smaller water exposes everything:

    • Your approach
    • Your shadow
    • Your first cast

    There’s no room for error here.

    Strategy Shift:

    • Shorter, more accurate casts
    • Faster decision-making
    • Fishing pocket water with efficiency

    This is where dry flies shine again—but for a different reason.

    Instead of selective feeding, you’re triggering opportunistic strikes.

    Dry Fly Approach:

    • High-floating patterns that stay visible in broken water
    • Quick drifts through pockets—don’t overwork a spot
    • Cover water, but don’t rush it

    Streamers in Tight Water: Controlled Chaos

    Streamer fishing on the Florida River isn’t about covering distance—it’s about precision strikes into tight zones.

    Think:

    • Undercut banks the size of a cooler lid
    • Boulder pockets no bigger than a bathtub
    • Current seams that exist for only a few feet

    Key Adjustment:

    Shorten everything—casts, strips, expectations.

    You’re not hunting big chases here. You’re triggering reaction eats in confined space.

    And when it happens, it’s instant.

    Mistakes That Will Cost You Fish Out Here

    This trip reinforced a few things that separate average days from dialed-in ones:

    1. Fishing Too Fast

    Most anglers move before the water has been fully read. Slow down and let the river show you where to fish.

    2. Ignoring Light Conditions

    Light controls fish positioning more than most realize—especially in canyon systems.

    3. Overworking Dry Fly Water

    If a fish doesn’t eat after a clean drift or two, change angle or pattern. Don’t force it.

    4. Blind Streamer Fishing

    Every streamer cast should target structure—not just “good looking water.”

    Photography in the Canyon: Capturing More Than Fish

    This trip wasn’t just about fishing—it was about documenting the environment that shapes it.

    The canyon gives you everything:

    • Harsh midday contrasts
    • Golden-hour glow hitting cliff faces
    • Deep shadows that create natural framing

    Shooting with the Canon R5, I leaned into:

    • Compressed canyon shots with telephoto lenses
    • Low-angle river perspectives to emphasize flow
    • Layered compositions using foreground rock + background cliffs

    Field Insight:

    In tight canyon light, expose for highlights—not shadows. You can recover detail later in Lightroom, but blown highlights are gone.

    Final Takeaway: Fish the Moment, Not the Plan

    This trip across the Dolores tailwater and Florida River wasn’t about sticking to one method—it was about adapting constantly.

    Dry flies worked—until they didn’t.

    Streamers produced—but only when fished with intention.

    Water changed—and the strategy had to change with it.

    That’s the difference between fishing and just casting.

    If you take anything from this, let it be this:

    Pay attention longer than you think you need to. The river will tell you everything—but only if you’re willing to listen.

    Florida River Fly Fishing Near Durango: Tight Water Tactics for Wild Trout

    The Florida River doesn’t give you second chances.

    You don’t get long drifts. You don’t get sloppy casts. And you definitely don’t get to fish it like a tailwater.

    Every step, every shadow, every cast—it all matters more here.

    Coming off the Dolores, this river forced a complete reset. Different water. Different fish behavior. Different decisions.

    And if you don’t adjust fast, you’ll walk away thinking there aren’t fish in it.

    There are. You just didn’t fish it right.

    Reading Tight Water: What Most Anglers Miss

    The Florida River looks simple at first glance—smaller, broken current, pocket water.

    But that’s exactly why people fish it wrong.

    They treat it like fast water instead of structured micro-water.

    What Actually Holds Fish:

    • Micro seams behind rocks (not the obvious ones—the subtle ones)

    • Undercut banks hidden by overhang

    • Foam pockets that stall for just a second longer

    Fish here don’t move far. Your fly has to land where they already are.

    Dry Fly Strategy: Triggering Reaction, Not Matching Perfection

    Unlike the Dolores, this isn’t about selective feeding.

    This is about forcing quick decisions from fish.

    Approach:

    • Short, accurate casts upstream

    • One clean drift per pocket—then move

    • Stay low and off-angle to avoid spooking fish

    Fly Selection:

    • High-floating attractors

    • Slightly oversized for visibility in broken water

    You’re not matching a hatch—you’re taking advantage of instinct.

    If you’re spending too much time trying to get the “perfect drift,” you’re losing fish.

    In water like this:

    • Good drift now > perfect drift too late

    Pro Tip: Speed Over Perfection

    Streamer Game: Precision Over Power

    Streamer fishing here isn’t about covering water—it’s about surgical placement.

    Where to Throw:

    • Tight against undercuts

    • Into dark slots between boulders

    • Along current breaks that last only a few feet

    Retrieve:

    • Minimal movement

    • Short pulses, not long strips

    • Let current do most of the work

    These fish don’t chase far—but they will react instantly.

    Positioning: The Hidden Advantage

    Most anglers lose fish here before the cast even happens.

    What Matters:

    • Your shadow on the water

    • Your angle relative to current

    • How close you get before casting

    I stayed:

    • Low

    • Slightly downstream when possible

    • Moving slower than I thought I needed to

    That alone changes your success rate.

    Mistakes That Kill Your Day on the Florida River

    1. Overcasting Water

    You don’t need distance—you need accuracy.

    2. Fishing Too Many Drifts

    If it didn’t eat on the first or second pass, it’s not going to.

    3. Ignoring Approach

    You’re being seen long before your fly lands.

    4. Treating It Like Big Water

    This is not the Dolores. Adjust or struggle.

    Photography: Capturing Tight Water Stories

    This river forced a different photography approach.

    Instead of wide canyon shots, it became about:

    • Detail

    • Compression

    • Story in small scenes

    With the Canon R5:

    • Fast shutter for moving water textures

    • Low angles to emphasize current flow

    • Close framing on pocket water and structure

    Field Insight:

    Tight water photography works best when you isolate chaos—find one clean element inside fast-moving current.

    How This Trip Connected Back to the Dolores

    This is where the strategy comes full circle.

    • Dolores taught patience and observation

    • Florida River demanded speed and execution

    Same trip. Same angler. Completely different mindset.

    That’s what makes you better.

    Final Takeaway: Adjust Faster Than the River Changes

    Most anglers fail here because they try to force one style across different water.

    That doesn’t work.

    You have to:

    • Read faster

    • Decide faster

    • Adapt faster

    Because in tight water like this, opportunities don’t last long.

  • New Mexico Fly Fishing: Streamer Tactics, Backcountry Waters & My Trout Slam Plan

    New Mexico Fly Fishing: Streamer Tactics, Backcountry Waters & My Trout Slam Plan

    There’s a moment in the mountains when everything goes quiet—wind drops, light softens, and the river slows just enough to show you what it’s holding. That’s where flyfishing for trout stops being about casting and starts becoming about reading. On my recent push toward the New Mexico Trout Slam, those moments dictated every decision I made—especially when the weather turned, flows shifted, and fish refused to play by the book.

    This isn’t about throwing streamers because dries aren’t working. This is about understanding when a trout should eat a streamer—and forcing the issue when conditions line up.

    Reading Mountain Water Before You Ever Tie On a Streamer

    Clear water in New Mexico will expose your mistakes fast. Especially in rivers like the Rio Grande Gorge or smaller tributaries where pressure and visibility make trout cautious.

    What I’m looking for isn’t just structure—it’s energy transitions.

    Step-by-step approach:

    • Start by identifying depth variance near current seams

    • Look for soft water adjacent to fast push

    • Prioritize shade lines, especially midday under clear skies

    • Pay attention to bottom composition—boulders over gravel every time for bigger fish

    On one afternoon, bluebird skies pushed fish tight to structure. Everyone around me kept fishing open seams with nymph rigs. I slid into a shadow line behind a submerged rock shelf, switched to a lightly weighted olive streamer, and slowed everything down.

    First cast—nothing.

    Second cast—tracked.

    Third cast—commit.

    That fish wasn’t feeding. It reacted.

    That’s the difference.

    Streamer Tactics That Actually Trigger Trout

    Streamer fishing in mountain water isn’t about covering ground fast—it’s about presenting something that looks vulnerable in the right zone.

    1. Weight Control is Everything

    I carry the same streamer pattern in multiple weights—some nearly weightless, others with added mass.

    Clear, low water: weightless or lightly weighted

    Higher flows (700–900 CFS): moderate weight to stay in strike zone

    Deep plunge pools: heavier, but controlled with rod angle—not just sink

    If your streamer is ticking bottom constantly, you’re out of control. If it never drops, you’re not in the game.

    2. Retrieve Cadence Based on Fish Behavior

    Most anglers retrieve based on habit. I retrieve based on what I see.

    Three retrieves I rotate through:

    Dead Drift Swing: cast upstream, let it drift, then swing at the end

    Short Strip Pulse: 2–3 inch strips with pauses (key in cold water)

    Aggressive Strip + Kill: fast strips followed by complete stop

    That last one produced my better fish. Not because it looked natural—but because it triggered reaction.

    3. Angle is More Important Than Distance

    I rarely bomb casts across the river.

    Instead:

    • Cast slightly upstream at a 30–45° angle

    • Let the current bring the fly into the zone naturally

    • Control slack to maintain contact without dragging

    Most hits came within the first 3–5 feet of the retrieve—not at the end.

    Adjusting to Mountain Weather (The Game Changer)

    New Mexico weather doesn’t shift gradually—it flips.

    Clear mornings turned into wind-driven afternoons. Clouds rolled in, light dropped, and suddenly fish that were glued to bottom started moving.

    This is where streamer fishing separates itself.

    What changed for me:

    • Increased cloud cover = fish moved into mid-column

    • Wind chop reduced visibility = more aggressive retrieves worked

    • Drop in temperature = slower presentations got ignored, faster strips triggered

    I remember one stretch along the Rio Costilla where nothing was happening. As clouds built, I switched from a subtle presentation to a more aggressive strip.

    Three fish in ten minutes.

    Same water. Different condition.

    Backcountry Water: Where the Slam is Won or Lost

    You don’t complete a Trout Slam sticking to roadside water.

    The real opportunities come from hiking in—where pressure drops and fish behave differently.

    Backcountry fish are:

    • Less pressured

    • More opportunistic

    • More willing to chase

    But they’re also tied tightly to structure and oxygen.

    How I approach new water:

    1. Study maps before the trip (elevation, gradient, access points)

    2. Identify sections with natural bottlenecks

    3. Look for areas where current slows after a push

    4. Fish methodically—not fast

    On one hike-in stretch, I spent 45 minutes on a single run. Most would’ve walked through it.

    That run produced two solid trout on streamers.

    Pro Tips Most Anglers Miss

    Watch the fish, not your fly: In clear water, you’ll often see the fish before the eat. Adjust based on their behavior.

    Use lighter tippet than you think: I run 15lb fluoro for control, but drop down when fish are tracking but not committing.

    Rod tip position matters more than line control: Keep it low and engaged during retrieves.

    Fish the water behind you: I’ve caught just as many fish on the swing below me as I have upstream.

    Don’t overfish a run: If a fish follows and doesn’t eat, change angle or retrieve—don’t just repeat.

    Mistakes That Cost Me Fish (And Will Cost You Too)

    Fishing too fast: Mountain water forces patience. Rushing kills opportunities.

    Ignoring light conditions: Bright sun vs cloud cover completely changes fish behavior.

    Overweighting flies: More weight doesn’t mean more fish—it means less control.

    Standing too close: Clear water demands distance.

    Not adjusting: If you’re not changing retrieve, angle, or depth—you’re guessing.

    Integrating Photography Without Killing the Moment

    Fishing these waters isn’t just about catching—it’s about documenting something that most people never see.

    I carry my Canon R5 paired with a mid-range zoom and a lightweight tripod strapped to my pack.

    When I shoot:

    • Early morning: soft light, low contrast

    • Midday: focus on water textures and details

    • Evening: silhouettes and depth

    Composition approach:

    • Use the river as a leading line

    • Frame shots with foreground elements (rocks, grass, rod)

    • Capture motion—water moving, line casting

    One of my favorite shots came right after landing a fish—not of the fish, but of the river settling back into stillness.

    That’s the story.

    The Bigger Picture: Flyfishing for Trout with Intent

    This trip wasn’t about numbers. It was about executing a plan—reading conditions, making adjustments, and earning every fish.

    Streamer fishing in New Mexico taught me one thing:

    You don’t wait for fish to feed—you make them react.

    That mindset changes everything.

    Final Thoughts

    If you’re serious about flyfishing for trout, especially in backcountry waters, you have to move beyond patterns and into process.

    Study your water. Watch the conditions. Adjust constantly.

    And when it all lines up—commit to the decision.

    That’s where the fish are.

    For more real-world fishing strategies, trip breakdowns, and photography from the water, follow along at:

    👉 https://beyond-the-cast.com

    👉 Follow Beyond the Cast on Facebook for updates, tactics, and new content

  • How I Find and Catch Redfish From My Kayak: Google Maps, Stake-Out Pole & Real On-the-Water Strategy

    How I Find and Catch Redfish From My Kayak: Google Maps, Stake-Out Pole & Real On-the-Water Strategy

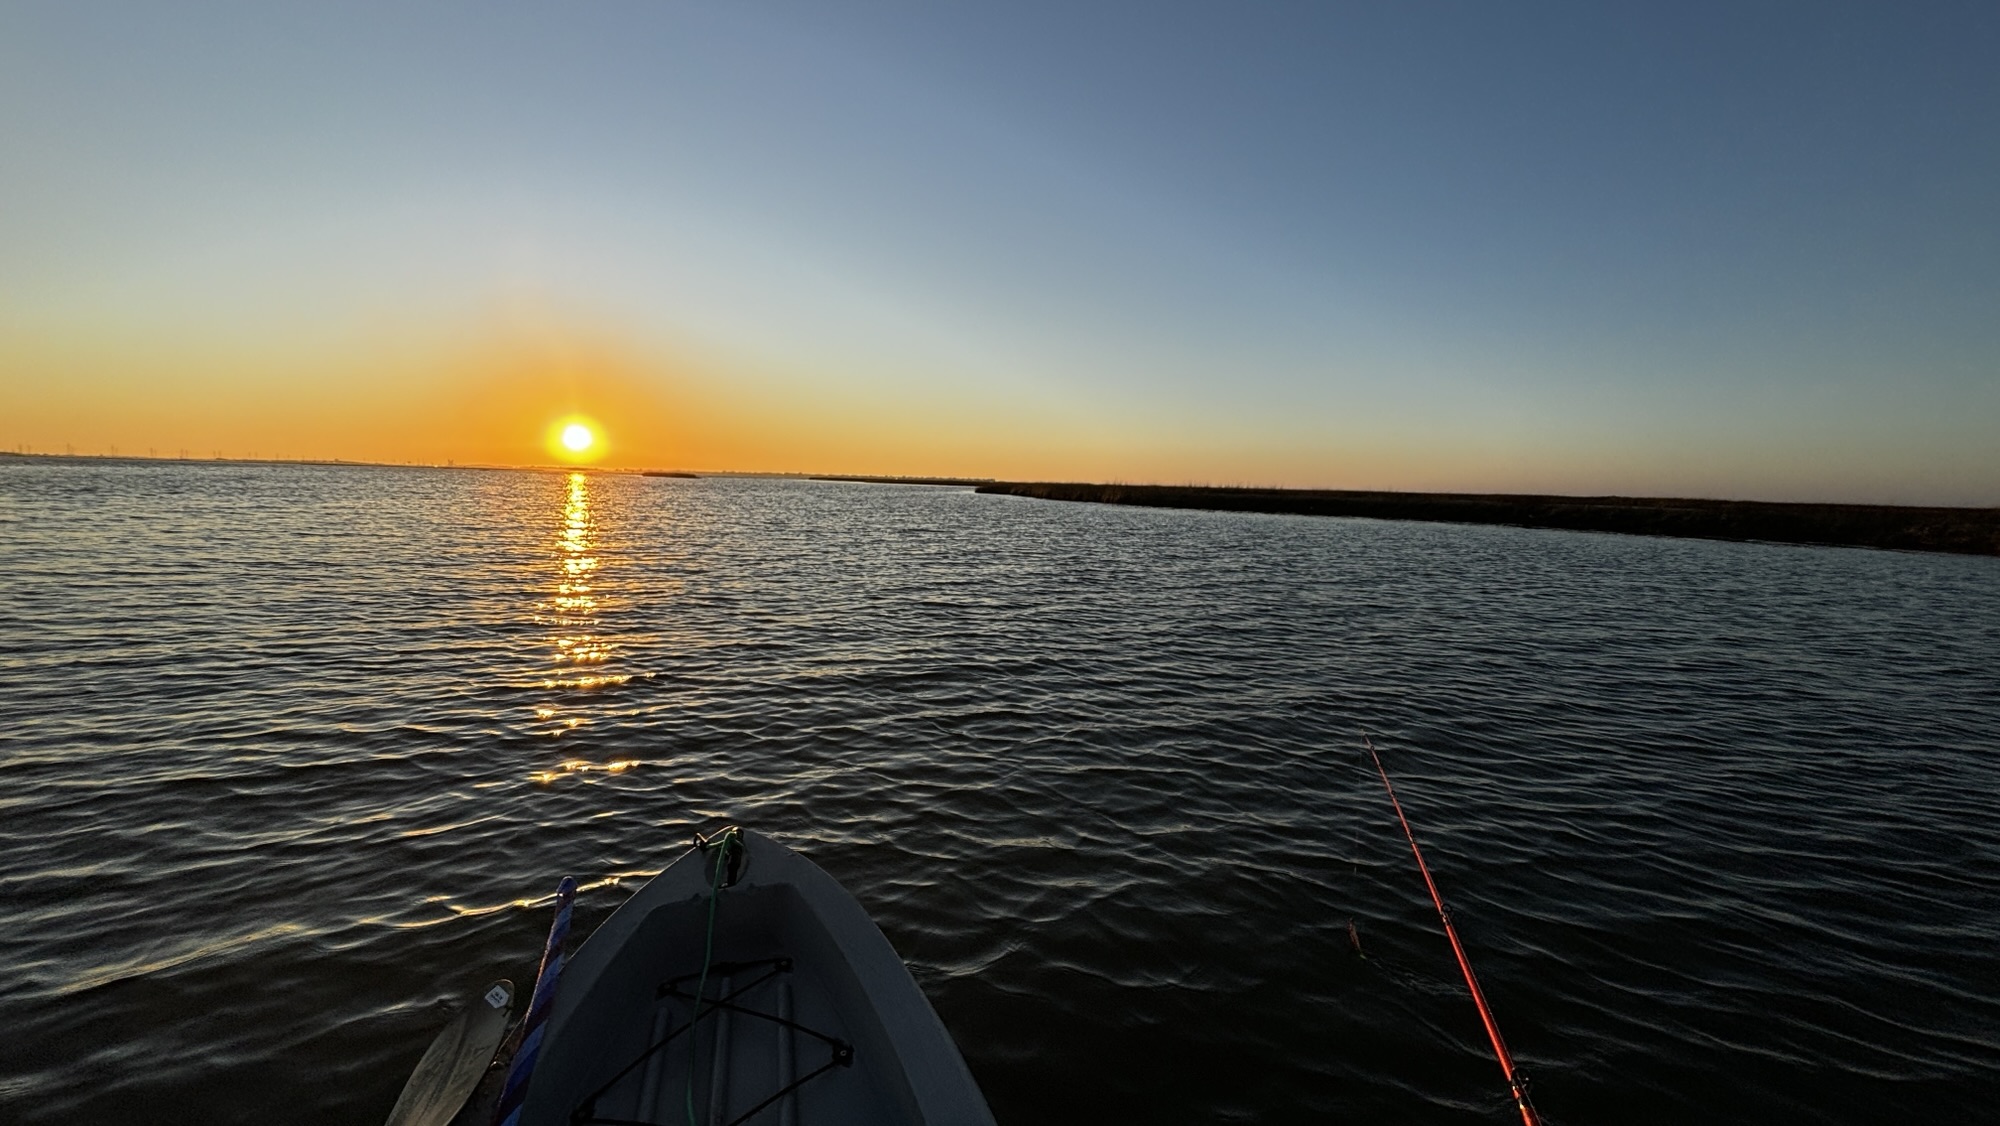
    Beyond The Cast — Real Texas inshore kayak fishing built from time on the water, reading conditions, and adapting every trip.

    This Changed How I Fish for Redfish

    Finding redfish isn’t about luck—and it’s definitely not about having “secret spots.”

    It comes down to how you find water, position your kayak, and adjust to conditions before you ever make a cast.

    Over time fishing the Texas coast from a kayak, I’ve built a system that consistently puts me on fish—and it starts long before I launch.

    How I Find Redfish Using Google Maps and Google Earth

    Before every trip, I spend time on Google Earth and Google Maps breaking down the water. I’m not just looking for spots—I’m looking for movement and structure.
    What I Look For

    • Marsh drains and cuts where water funnels bait
    • Grass flats near deeper water for feeding zones
    • Oyster beds and transitions that hold bait
    • Wind-protected shorelines for better kayak control

    These are not random spots—they’re systems that consistently hold fish under the right conditions.

    → Full breakdown: How I Find Fishing Spots

    Kayak Positioning: Where Most People Lose Fish

    Once I’m on the water, positioning becomes more important than lure choice.

    If your kayak is drifting wrong, facing the wrong direction, or making noise—you’re already behind.

    My Stake-Out Pole Setup (Simple and Effective)

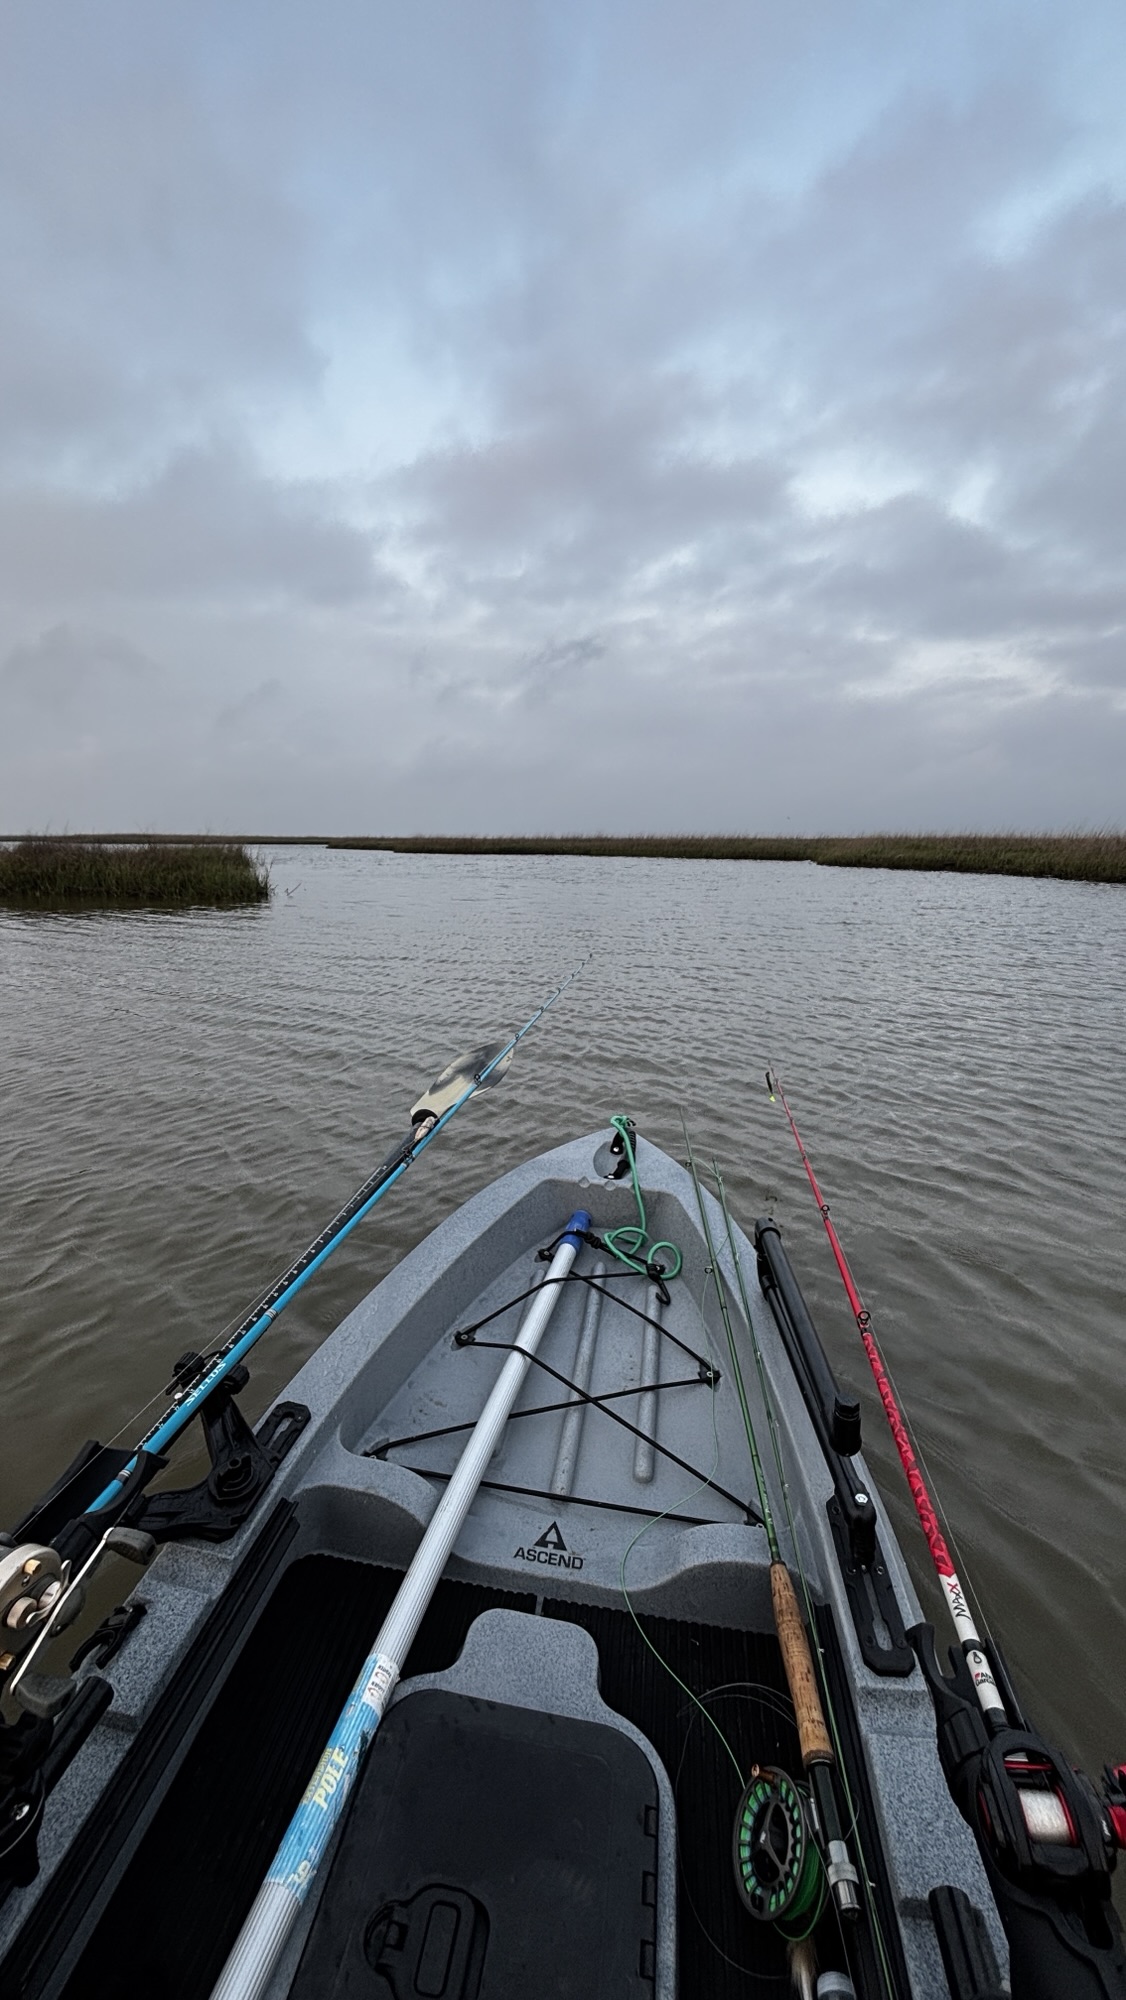
    One of the most important tools I use is a stake-out pole—and mine is nothing fancy.

    I use an aluminum extension pole I picked up at Lowe’s. It’s lightweight, durable, and gets the job done without overcomplicating things.

    Why I Use It

    • Keeps me quiet in shallow water
    • Stops unwanted drift
    • Lets me hold position on fish or structure
    • Gives control in wind and current

    How I Use It

    1. Direct Stick (Quick Hold)

    I’ll push it straight down into the bottom to lock in quickly when I see fish or want to stop drift immediately.

    2. Tethered Setup

    Sometimes I’ll attach it with a rope or trolley system to adjust angle with wind and current.

    3. Light Hold (Controlled Swing)

    I don’t always fully lock in. Letting the kayak swing slightly can create a more natural presentation.

    When I Beach the Kayak Instead

    There are times I’ll pull the kayak up instead of staking out:

    • Tight marsh drains
    • Super shallow flats
    • When I want to slow down and wade

    This gives me better angles, less noise, and more control in tight areas where fish are easily spooked.

    Fishing High Wind Days (Using It Instead of Fighting It)

    Wind is one of the biggest challenges in kayak fishing—but it can also be an advantage if you use it right.

    How I Adjust

    • Drift over entrances to cuts
    • Drift across oyster beds
    • Let wind push me through feeding zones

    This covers water naturally and puts your bait in front of fish without forcing it.

    → How Current Triggers Redfish Feeding

    How It All Comes Together

    1. Scout areas using Google Maps and structure
    2. Adjust based on wind and tide at launch
    3. Use stake-out pole, drift, or beach depending on conditions
    4. Stay mobile and read the water

    Every trip is different—but the system stays the same.

    Photography on the Water: Seeing More Than Just Fish

    Spending time behind the camera has changed how I fish. It forces you to slow down and actually observe what’s happening.

    • Bait movement before strikes
    • Subtle wakes and pushes
    • Light angles across flats
    • Water texture changes

    That awareness translates directly into finding more fish.

    Final Thoughts

    Redfish fishing from a kayak is not about luck—it’s about positioning, awareness, and adapting to conditions.

    Once you understand how to find water, control your kayak, and read what’s happening around you, consistency follows.

    Take It Further on the Water

    Get out there, read the water, and let the conditions tell you where the fish are.

  • How Current Triggers Redfish & Speckled Trout Feeding (Texas Inshore Secrets)

    How Current Triggers Redfish & Speckled Trout Feeding (Texas Inshore Secrets)

    Why Current Matters More Than You Think

    If there’s one factor that consistently separates slow days from unforgettable ones on the Texas coast, it’s current.

    Current is what moves the entire food chain. It positions bait, creates ambush points, and ultimately determines where redfish and speckled trout are going to feed.

    “When the water starts moving, everything comes alive—bait, birds, and finally, the fish.”

    Understanding how fish react to current isn’t just helpful—it’s essential.

    The most consistent pattern I’ve found:

    • Multiple small drains feeding into a larger cut

    • Fishing the point where water converges

    • Casting across current and letting bait drift naturally

    Fish position:

    Down-current side

    • Behind structure

    • Right where current slows slightly

    This creates a perfect ambush lane.

    Structure + Current = Feeding Zones

    Fish rarely sit in open current—they use structure.

    Look for:

    • Oyster beds

    • Grass edges

    • Points

    • Shoreline irregularities

    Positioning:

    • Fish hold behind structure

    • They let current bring food to them

    • They move shallow when water floods

    What Happens When Current Gets Too Strong?

    There’s a sweet spot: light to moderate current.

    When current gets too strong:

    • Fish push into grass lines

    • Move further into canals

    • Or stack tight behind structure to conserve energy

    I’ve also seen them:

    • Sit protected early

    • Then push inland as conditions change

    Flood Tide Behavior (Grass Flats Pattern)

    Beginner Breakdown: What Is “Current”?

    Before diving deeper, let’s simplify it:

    Incoming tide (flood tide) → Water moves into the bay

    Outgoing tide (ebb tide) → Water drains out of the bay

    Slack tide → Little to no movement

    Think of current like a conveyor belt:

    • It carries bait (mullet, shrimp, crabs)

    • It funnels food through tight areas

    • Predator fish sit and wait for an easy meal

    When Redfish Feed the Most

    From my experience on the water, redfish consistently turn on during:

    Early Incoming Tide

    • Baitfish and crabs begin getting pushed in

    • Water clarity improves (especially on cleaner Gulf pushes)

    • Fish start cruising and setting up ambush points

    You’ll often see:

    • Mullet getting pushed

    • Crabs drifting

    • Birds beginning to work the area

    Outgoing Tide (Most Consistent Bite)

    This has been the most reliable pattern for me across bays and bayous.

    • Water drains out of flats, marshes, and grass

    • Bait gets funneled through cuts and drains

    • Redfish stack up in predictable ambush zones

    “Outgoing tide pulls everything off the flats—when that happens, redfish don’t have to hunt… they just wait.”

    Where Fish Position in Current

    This is where things really start to click.

    Drains, Cuts, and Funnel Points

    When water floods:

    • Redfish push deep into grass

    • Tail more frequently

    • Feed on crabs and small bait

    You’ll notice:

    • More tailing activity

    • Fish spread out (harder to target)

    • Less predictable positioning

    “Flood tide spreads fish out—but outgoing tide stacks them up.”

    Speckled Trout & Current Differences

    While redfish push shallow, trout behave differently.

    Trout Patterns

    • More active on incoming tides

    • Often feed higher in the water column

    • More surface activity during clean water pushes

    They tend to:

    • Sit near drop-offs and edges

    • Use current seams instead of shallow grass

    Water Clarity and Fly Selection

    Your approach changes based on water clarity:

    Clean Incoming Water

    • Ideal for lightweight flies

    • Natural colors:

    • Tan

    • White

    • Olive

    Dirty Water

    • Visibility drops

    • Switch to:

    • Darker flies

    • Stronger silhouettes

    Reading the Signs: Bait & Birds

    The first sign I look for isn’t fish—it’s birds.

    • Birds diving = bait being pushed

    • Mullet moving = active current

    • Shrimp popping = predator pressure

    Once I see that:

    • I look for nearby funnels and drains

    • That’s where fish will be set up

    Fly Selection & Presentation

    My go-to approach:

    Patterns

    • Shrimp flies (tan, white, olive)

    • Crab patterns when needed

    Presentation

    • Cast up-current

    • Let fly drift naturally

    • Add subtle strips

    Key moment:

    • Most strikes happen when the fly drifts naturally past structure

    Case Study #1 – West Bay Drainage Bite

    Location: West Bay

    Conditions: 5–10 kt wind, clear water

    Tide: Outgoing

    Set up on a drainage point where two smaller drains fed into a larger cut.

    • Cast across current

    • Let fly drift past the point

    • Stripped lightly

    Result:

    • Redfish consistently hit as the fly drifted naturally through the ambush zone

    Case Study #2 – Tough Day Turned Around by Current

    Cold, sunny, and very windy morning—slow bite early.

    I knew the tide would start ebbing, so I moved into a flat with multiple deep cuts.

    • Anchored kayak

    • Switched to a weighted olive shrimp fly

    • Began targeting drains

    At first:

    • Missed a few strikes

    • Minimal activity

    Then everything changed:

    • Small baitfish (1–2”) appeared

    • Shrimp started moving

    • Current picked up

    That’s when the bite turned on.

    “The moment the water started moving, the entire system came alive.”

    • Multiple hookups

    • Consistent action during moving water

    • Bite died as soon as current slowed

    Final Takeaways

    Current = Feeding Trigger

    Outgoing tide = Most consistent bite

    Incoming tide = Cleaner water + trout activity

    Structure + current = ambush zones

    Too much current pushes fish into protection

    Slack tide = slower, less predictable bite

    “Find moving water, find the bait—find the fish.”

    Bringing It All Together

    This is more than just theory—it’s something you start to feel the more time you spend on the water.

    Once you learn to:

    • Read current

    • Identify funnel points

    • Watch bait and birds

    You stop guessing—and start predicting.

    And that’s when everything changes.

    How to Catch Redfish: The Complete Guide to Finding and Hooking More Reds in Any Water

  • How I Find the Best Fishing Spots Near Me (Redfish, Trout, Bass & Backcountry Fly Fishing)

    How I Find the Best Fishing Spots Near Me (Redfish, Trout, Bass & Backcountry Fly Fishing)

    If you’ve ever searched for the best fishing spots near me, you’ve probably realized quickly—good spots aren’t given, they’re found. Whether I’m chasing redfish on the Texas flats, targeting speckled trout in moving tides, or hiking into backcountry streams for fly fishing, my approach stays the same: read the water, understand the conditions, and let the fish tell you where they want to be.

    In this guide, I’ll break down exactly how I find productive fishing locations anywhere—using real tactics, tools like Google Earth, tide and current data, and on-the-water experience fishing areas like Galveston, Freeport, and Matagorda.

    “The best fishing spots aren’t spots—they’re conditions lining up in the right place.”

    Understanding What Makes the Best Fishing Spots

    Before even opening a map, I’m thinking about what the fish need:

    • Moving water (tides, current, inflow/outflow)

    • Bait presence (shrimp, mullet, crabs, shad)

    • Structure (grass flats, drop-offs, points, drains)

    • Water clarity

    • Wind direction and protection

    This applies whether you’re:

    • Fishing inshore for redfish and trout

    • Targeting largemouth bass in ponds or lakes

    • Hiking into backcountry fly fishing streams

    Fish don’t randomly sit somewhere—they position themselves where food is brought to them.

    How I Use Google Maps & Google Earth to Find Fishing Spots

    This is where everything starts.

    1. Scouting Structure from Above

    Using Google Earth and satellite view, I look for:

    • Grass flats and sand pockets (redfish & trout)

    • Shoreline points and coves

    • Drains and cuts between marsh systems

    • Drop-offs and depth changes

    • Creek bends and riffles (for trout streams)

    2. Identifying Water Movement

    I zoom in on:

    • Narrow channels

    • Marsh drains

    • Inlets and bay connections

    These areas concentrate bait—especially on moving tides.

    3. Finding Access Points

    For real-world usability, I mark:

    • Kayak launches

    • Wade fishing shorelines

    • Public bank access

    • Bridges and roadside pull-offs

    “A great spot doesn’t matter if you can’t safely and consistently access it.”

    Using Tides and Currents to Pinpoint Fish (Inshore Focus)

    Fishing the Texas coast—especially around Galveston—tides are everything.

    Click on the two images below to see tides and currents in your area

    Tide App

    Incoming Tide (Flood Tide)

    • Water pushes bait onto flats

    • Redfish move shallow to feed

    • Cleaner water often follows

    Outgoing Tide (Ebb Tide)

    • Bait gets pulled out of marshes and back lakes

    • Fish stack in drains and pinch points

    • Bite windows can last longer here

    What I Look For

    • Light to moderate current (not ripping)

    • Clear to slightly stained water

    • Wind-protected shorelines

    “If bait is moving, fish are feeding. If the water is dead, keep moving.”

    Finding Redfish & Trout in Areas Like Galveston, Freeport, and Matagorda

    In these systems, I focus on high-percentage zones:

    Key Areas

    • Marsh drains on falling tides

    • Grass flats on incoming tides

    • Shorelines with bait activity

    • Sand pockets mixed with grass

    What I Watch For

    • Mullet flipping

    • Nervous water

    • Wakes and pushes

    • Birds working

    When I start seeing life, I slow down and fish thoroughly.

    Kayak, Wade, and Bank Fishing Strategy

    Kayak Fishing

    • Launch near marsh systems or flats

    • Use wind to drift quietly across structure

    • Cover water until you find bait/activity

    Wade Fishing

    • Target clear water flats and shorelines

    • Move slow and watch for signs before casting

    • Focus on transitions (grass to sand, shallow to drop-off)

    Bank Fishing

    • Bridges (current + structure)

    • Ponds with inflow/outflow

    • Public shoreline access with depth change

    “Mobility is everything—don’t get locked into one spot.”

    How I Find Freshwater & Bass Fishing Spots Near Me

    When I switch to bass fishing, the mindset stays the same.

    What I Look For

    • Points and submerged structure

    • Grass lines and edges

    • Shade (docks, trees, overhangs)

    • Inflow areas (creeks, drains)

    Using Google Maps, I scan:

    • Retention ponds

    • Small lakes

    • River access points

    If water has structure + bait + access, I’m fishing it.

    Backcountry Fly Fishing: Finding Remote Water

    This is where things get even more strategic.

    Tools I Use

    • Google Earth (topography + water flow)

    • Trout routes and public land maps

    • Elevation and gradient changes

    What I Look For

    • Small streams off main rivers

    • Pocket water and riffles

    • Undisturbed areas away from pressure

    Key Indicators

    • Cold, moving water

    • Oxygen-rich sections (riffles, runs)

    • Access via trails or public land

    “The harder it is to get to, the better the fishing usually is.”

    Reading Conditions Over Spots

    One of the biggest mistakes anglers make is chasing spots instead of patterns.

    Instead, I focus on:

    • Water movement

    • Bait activity

    • Seasonal behavior

    • Weather changes

    That’s how you can go anywhere—even a completely new area—and still find fish.

    Final Thoughts: Build Your Own Fishing Map

    Over time, I build a mental (and digital) map of:

    • Productive tides

    • Reliable areas

    • Seasonal movements

    Every trip adds data.

    “The more water you study, the less you rely on luck.”

  • Abu Garcia Black Max 1-Year Review (2026): Still the Best Budget Baitcaster for Saltwater?

    Abu Garcia Black Max 1-Year Review (2026): Still the Best Budget Baitcaster for Saltwater?

    A Budget Combo That Keeps Proving Itself

    When it comes to fishing gear, it’s easy to get pulled into the hype of high-end rods and reels. But after putting serious time on the water, I’ve found something different.

    The Abu Garcia Black Max Rod and Reel Combo has become one of the most reliable setups in my arsenal—and it continues to prove itself trip after trip.

    Fishing primarily in saltwater and brackish environments, this combo has held strong with no rust issues, consistent performance, and durability that honestly surprised me for the price point.

    Saltwater & Brackish Performance

    Fishing the Texas coast means dealing with harsh conditions—salt, humidity, and constant exposure to the elements.

    This combo has been used targeting:

    • Redfish on the flats

    • Speckled trout in deeper pockets

    • Largemouth bass in brackish systems

    And through all of it:

    • No corrosion issues

    • Smooth casting

    • Reliable drag

    That’s not something every budget combo can handle.

    Durability & Guide Quality

    One of the biggest concerns with lower-priced rods is guide durability—especially in saltwater.

    So far, every guide on this rod is still in excellent condition:

    • No cracking

    • No insert damage

    • No corrosion

    That speaks volumes about the build quality.

    That said, I stay consistent with maintenance:

    • Rinse after every trip

    • Light wipe down

    • Proper storage

    Take care of your gear, and it will last—this combo proves that.

    The Perfect Kayak Fishing Workhorse

    This is where the Black Max really shines.

    From the kayak, you need gear that is:

    • Dependable

    • Easy to handle

    • Tough enough for repeated use

    This combo checks every box.

    It’s become my go-to setup for:

    • Working shorelines

    • Casting into grass lines

    • Covering water efficiently

    It’s lightweight enough to fish all day, but strong enough to handle solid fish.

    Added a Second to the Arsenal

    There’s one simple test for good gear:

    Would you buy it again?

    I did.

    Adding a second Black Max to my lineup wasn’t even a question. When something performs consistently in real fishing conditions, it earns its place.

    Don’t Get Caught Up in Expensive Gear

    The fishing industry pushes high-end gear hard—and there’s nothing wrong with premium setups.

    But here’s the reality:

    You don’t need expensive gear to catch quality fish.

    The Black Max proves that:

    • You can fish hard

    • Stay consistent

    • And land solid fish

    …without spending a fortune.

    Skill, time on the water, and confidence in your setup matter more than price tags.

    Is the Abu Garcia Black Max Worth It?

    Short answer: Yes.

    If you’re looking for a:

    • Budget-friendly baitcaster

    • Saltwater-capable combo

    • Reliable all-around setup

    This is one of the best options out there.

    FAQ: Abu Garcia Black Max Combo

    Is the Black Max good for saltwater?

    Yes—with proper maintenance. Rinse it after every trip and it holds up well in salt and brackish water.

    How long does it last?

    With regular care, this combo can last multiple seasons, even with frequent use.

    Is it good for beginners?

    Absolutely. It’s one of the best entry-level baitcasters, but also reliable enough for experienced anglers.

    Final Thoughts

    The Abu Garcia Black Max Rod and Reel Combo isn’t flashy, and it’s not the most expensive setup on the market.

    But it does exactly what matters:

    It works.

    And sometimes, that’s all you need when you’re out on the water.

  • Beyond the Cast: Kayak Fly Fishing for Largemouth Bass with Topwater Frogs and Streamers

    Beyond the Cast: Kayak Fly Fishing for Largemouth Bass with Topwater Frogs and Streamers

    Gearing Up for a Largemouth Bass Fly Fishing Trip

    There’s something about packing up your gear before a trip that sets the tone. The anticipation builds with every rod, reel, and fly box you load up.

    For this trip with my brother, I brought two setups I trust completely:

    Sage 5 wt fly rod – perfect for lighter presentations

    Orvis Mirage 8 wt fly rod setup – built for throwing bigger flies and handling aggressive bass

    To cover every situation, I packed a range of fly lines:

    Orvis Clearwater Floating Line – ideal for topwater frog flies

    Cortland 444 Sink Line – for getting streamers down in deeper water

    Cortland 444 Peach Line – a classic, smooth casting line

    My fly selection was built around confidence:

    • Olive streamers

    • Frog patterns

    • My custom double barrel popper

    • The always-reliable olive Circus Peanut

    This trip was focused on largemouth bass fly fishing, and I had a feeling conditions were lining up just right.

    “There’s nothing like the anticipation of a fishing trip—when every piece of gear feels like it holds potential.”

    Day One: Topwater Frog Fly Action Was On Fire

    Cloudy skies greeted us on day one—perfect topwater fly fishing conditions.

    I wasted no time tying on one of my go-to flies: a double barrel frog popper.

    From the first few casts, it was game on.

    Bass were exploding on the surface. Aggressive eats, missed strikes, and heart-pounding blowups made it one of those days you wish would never end.

    Fishing from kayaks gave us a huge advantage. We could quietly position ourselves along grass edges and shallow structure without spooking fish.

    Topwater Fly Fishing Tactics for Largemouth Bass

    Fishing topwater flies for bass is all about presentation and patience:

    Target structure – grass lines, pockets, and edges

    Let the fly sit – longer pauses triggered bigger strikes

    Use subtle pops – not too aggressive, just enough to create movement

    Stay alert – many strikes came right after the pause

    The key was slowing everything down and letting the fish commit.

    “The explosion of a largemouth bass on a topwater frog fly is something you never forget.”

    Kayak Fly Fishing Advantage

    Fishing from kayaks completely changed the game for us.

    We were able to:

    • Access shallow water and tight cover

    • Move quietly through feeding zones

    • Position ourselves perfectly for accurate casts

    For kayak fly fishing, stealth is everything—and on this trip, it paid off.

    Final Day: Switching to Streamers in the Wind

    As forecasted, the last day brought stronger winds, making topwater fishing less effective.

    Time to adjust.

    I switched over to olive streamers, including one of my favorites—the olive Circus Peanut.

    This changed the approach completely.

    Instead of surface strikes, we focused on:

    • Deeper water columns

    • Drop-offs and submerged structure

    • Maintaining a tight line for solid strip sets

    The hits were different—less explosive, but that deep, heavy thump told you everything you needed to know.

    “When the topwater bite fades, a well-presented streamer can turn the entire day around.”

    Why Olive Streamers Work for Bass

    Olive is one of the most effective colors when fly fishing for largemouth bass.

    It imitates:

    • Baitfish

    • Small bluegill

    • Frogs in low light

    The Circus Peanut fly adds extra movement and profile, making it deadly in stained or windy conditions.

    Time on the Water That Matters

    This trip wasn’t just about the fishing.

    Spending time on the water with my brother—laughing between casts, figuring things out together, and just being present—that’s what makes trips like this unforgettable.

    No distractions. Just water, wind, and time slowing down.

    “Some of the best moments in fishing happen between the casts.”

    Final Thoughts: Beyond the Cast

    From explosive topwater eats to dialing in streamer presentations, this trip had everything I love about bass fly fishing.

    But more than that, it was about connection—to the water, to the process, and to the people you share it with.

    Because in the end…

    It’s never just about the cast.

    It’s about everything that happens beyond it.

  • Rio Grande cutthroat trout: Why Conservation Feels Personal to Me

    Rio Grande cutthroat trout: Why Conservation Feels Personal to Me

    The Rio Grande cutthroat trout isn’t just New Mexico’s state fish — it’s a symbol of everything wild and resilient about the Southern Rockies. Native to the high-elevation headwaters of the Canadian, Pecos, and Rio Grande river systems across New Mexico and southern Colorado, this fish has survived in places where winters are harsh, summers can be dry, and access isn’t easy.

    When I hike into these streams, I don’t just see a trout.

    I see history. I see survival.

    And I feel responsibility.

    The Reality: Why They’re Still Vulnerable

    For decades, Rio Grande cutthroat trout populations declined because of:

    • Competition with nonnative trout

    • Hybridization with introduced rainbows

    • Habitat loss and fragmentation

    • Drought cycles

    • Wildfires and post-fire sediment damage

    Species like Rainbow trout, Brook trout, and Brown trout were stocked widely across the West. While incredible fish to chase, they altered fragile headwater ecosystems and pushed native cutthroat into smaller and smaller refuges.

    That’s the factual side of conservation.

    But the emotional side hits when you’re standing alone in a narrow alpine stream, watching a native cutthroat rise in water that almost disappeared from drought or fire just a few years earlier.

    You realize how close we came to losing something irreplaceable.

    What New Mexico Department of Game and Fish Has Accomplished

    The recovery of the Rio Grande cutthroat trout didn’t happen by accident.

    The New Mexico Department of Game and Fish, alongside conservation partners, has:

    • Removed nonnative trout from key waters

    • Installed protective fish barriers

    • Reintroduced genetically pure RGCT populations

    • Restored fire-damaged habitat

    • Committed to long-term monitoring and management

    One of the most impactful efforts has been the restoration of the Rio Costilla watershed.

    The Rio Costilla Restoration Project protected and restored:

    • Over 120 miles of stream

    • 16 lakes

    • One reservoir

    All dedicated to sustaining Rio Grande cutthroat trout habitat.

    The project also restored native populations of the Rio Grande chub and the Rio Grande sucker species that were also at risk and were ultimately kept off the Endangered Species list.

    That’s not just management.

    That’s long-term vision.

    Fishing These Waters Changed Me

    Every time I return to these mountain streams, it feels different than fishing anywhere else.

    There’s less noise.

    Less pressure.

    More intention.

    I practice strict catch-and-release. I pinch my barbs. I keep fish wet. I revive them facing into the current until they kick away strong.

    And I’ve changed something else over time — something I think more anglers should consider.

    You don’t have to take a picture of every fish you catch.

    As someone who loves photography, that wasn’t easy to admit at first. I bring my camera into the backcountry. I care about documenting landscapes, light, and the story of a place.

    But I’ve learned this:

    Sometimes the most responsible photo is the one you don’t take.

    Every second a trout is out of the water increases stress. Especially in high-elevation streams where water temperatures can fluctuate, minimizing air exposure matters. If I do take a photo, I make it quick — fish wet, camera ready, no fumbling, no extended poses.

    But many days?

    I let them go without lifting them from the current.

    The memory is enough.

    Conservation Is Behavior, Not Just Policy

    It’s easy to praise conservation agencies — and they deserve it. But conservation ultimately lives in our daily habits on the water.

    It looks like:

    • Respecting seasonal closures

    • Following bag limits

    • Supporting native restoration efforts

    • Educating others

    • Leaving no trace

    • Choosing restraint over ego

    It also means understanding that a fish’s value isn’t measured in social media validation.

    The river doesn’t care about our highlight reels.

    What matters is that the fish swims away healthy.

    Photography, Fly Fishing, and Respect

    Photography has deepened my connection to these places. Capturing morning light spilling over a canyon. Documenting the texture of current folding over granite. Framing a native cutthroat in its natural environment — not just as a trophy, but as part of a living ecosystem.

    My love of fly fishing and photography isn’t about possession.

    It’s about preservation.

    The more I experience these waters, the more I believe conservation is deeply personal. When you’ve watched a Rio Grande cutthroat rise in a stream that was once nearly lost — you don’t want to be the reason that story ends.

    Why This Matters

    Protecting Rio Grande cutthroat trout protects:

    • Entire headwater ecosystems

    • Aquatic insect populations

    • Native fish diversity

    • Downstream water systems

    • Future generations of anglers

    These fish survived fire, drought, competition, and decades of decline.

    They’re still here because people made hard decisions. Because agencies committed to restoration. Because anglers adapted their behavior.

    And when I stand in those cold mountain streams, feeling the current push against my legs, I’m reminded:

    We don’t own these fish.

    We borrow the experience.

    If we do it right — if we fish responsibly, support restoration, and sometimes choose not to lift the fish for a photo — they’ll still be here long after we’re gone.

    And that, to me, is the true measure of conservation.

  • Part Three: When Dry Flies Stop Working — Adding Streamers and Fishing With Intent

    Part Three: When Dry Flies Stop Working — Adding Streamers and Fishing With Intent

    There’s a point on most days when the river tells you it’s time to change tactics.

    After working dries and adjusting to conditions, I reached that moment on this river. The fish were still there, but surface activity slowed. The water had enough movement and depth that trout weren’t locked into feeding on top—they were positioned to ambush.

    That’s when streamers entered the picture.

    Not as a last resort—but as a deliberate choice.

    Why Streamers Made Sense in These Conditions

    Streamers shine when trout shift from feeding to reacting.

    With:

    • Broken water

    • Variable depth

    • Reduced visibility

    • Fish holding near structure

    A moving fly becomes an opportunity trigger rather than a match-the-hatch exercise.

    The goal wasn’t imitation—it was movement, angle, and control.

    Presentation Over Pattern: How the Streamer Was Fished

    The most important lesson from this day wasn’t which streamer I tied on—it was how it was presented.

    I focused on:

    • Casting across and slightly downstream

    • Allowing the fly to sink and settle

    • Swinging the streamer through likely holding water

    The swing did the work. As the fly moved across current, it naturally rose and accelerated—exactly what triggers predatory behavior.

    But the key detail was maintaining a tight line throughout the entire swing.

    Slack kills streamer effectiveness.

    The Tight Line Lesson: Where the Strikes Really Happened

    As the day went on, a clear pattern started to emerge.

    I was catching fish consistently—but I was also missing a lot of takes. Almost all of those missed strikes happened at the same point in the presentation: right as the streamer began to turn head-up at the end of the swing.

    That moment—when the fly changes direction and speed—is a trigger. The streamer looks like it’s trying to escape, and trout commit aggressively.

    But when no strike came immediately after the fly turned, the presentation wasn’t over.

    Instead of picking up and recasting, I started giving the streamer a few short, random strips at the end of the swing. Nothing aggressive—just subtle, erratic movement.

    That adjustment made a difference.

    Occasionally, one of those small strips was all it took. The fly would pulse, change direction slightly, and a trout that hadn’t committed on the swing would eat decisively. Those hookups reinforced the idea that even when the “primary” presentation is finished, the fly can still trigger a reaction if you stay engaged.

    Strip Set First, Lift Second

    Another adjustment made a big difference.

    Instead of immediately lifting the rod on a strike, I focused on:

    1. Strip setting first to drive the hook

    2. Then lifting the rod to maintain pressure

    This kept the hook solid and reduced missed fish—especially on aggressive eats at the end of the swing.

    With streamers, trout often eat with force. Let them load the line, then commit.

    Why the Swing Works So Well

    Swinging a streamer does a few critical things:

    • Keeps the fly in the strike zone longer

    • Maintains natural movement without overworking the fly

    • Allows consistent line tension for solid hook sets

    It also forces patience. You’re not rushing the retrieve—you’re letting the current and the fly do what they’re meant to do.

    A Familiar Reminder: Stay Engaged Through the Entire Drift

    That pattern of missed strikes reinforced a lesson that carried over from dry flies:

    The presentation doesn’t stop until the fly is completely finished.

    Whether it’s a dry drifting through a seam or a streamer completing its swing, trout often eat at the moment anglers relax.

    Staying connected—mentally and physically—through the entire presentation turned missed opportunities into landed fish.

    Part Three Takeaway: Intentional Movement Triggers Reactions

    Streamers aren’t about randomness or covering water blindly.

    They’re about:

    • Controlled swings

    • Tight lines

    • Reading when fish are ready to react

    When you fish them with intention, streamers become one of the most effective tools you can use—especially when surface activity fades.

    This adjustment tied directly back to a theme running through this entire series.

    Whether it’s a dry fly drifting through a seam or a streamer completing its swing, the presentation doesn’t end until the fly is completely out of the water.

    Those short, random strips weren’t a separate technique—they were a continuation of the presentation. Staying alert through that final moment turned missed opportunities into landed fish.

  • Part Two: Same River, Different Conditions — Adapting Dry Fly Tactics to Cloudy Water and Higher Flows

    Part Two: Same River, Different Conditions — Adapting Dry Fly Tactics to Cloudy Water and Higher Flows

    If Part One was about precision, restraint, and subtle adjustments, this day on the river demanded the opposite.

    As the river changed, so did the results. What really stood out was that my brother started catching more trout. That forced me to pause and study what he was doing differently instead of stubbornly sticking to my approach. His drifts were cleaner. His fly was riding naturally with less drag. And most importantly, he was targeting slightly softer water than I was — just off the heavier current, where trout could hold comfortably in the higher flows without expending unnecessary energy.

    That adjustment was the turning point. In cloudy water and elevated flows, trout shift into protection mode. They slide into seams, softer edges, and subtle pockets that are easy to overlook. Watching him find success reminded me that adapting isn’t just about changing flies — it’s about changing perspective. Sometimes the biggest lesson on the river comes from paying attention to what’s working right beside you.

    Same river. Completely different game.

    This is where understanding conditions over patterns becomes critical.

    Reading the River Again: What Changed With Higher CFS

    Higher flows reshape a river fast.

    With increased CFS:

    • Seams widen and shift

    • Soft water becomes more valuable

    • Fish slide closer to structure and edges

    • Feeding lanes compress instead of spreading out

    Instead of holding in obvious mid-river seams like before, trout positioned themselves tighter to:

    • Inside bends

    • Cushion water behind rocks

    • Softer edges just off the main current

    Fish were still feeding—but they were doing it more opportunistically than selectively.

    Cloudy Skies and Stained Water: Visibility Becomes the Priority

    Under cloud cover and reduced visibility, trout don’t inspect flies the same way they do in clear, bright conditions.

    This changes everything.

    On this day:

    • Fish had less time to analyze a fly

    • Movement and visibility mattered more than perfect imitation

    • Drift was still important—but forgiveness increased

    Instead of downsizing, I leaned into flies that:

    • Rode a little higher

    • Had more contrast

    • Were easier for fish to track in broken water

    The exact match mattered less than the fly being noticeable and natural.

    Dry Fly Presentation in Faster, Dirtier Water

    Higher flows don’t eliminate dry fly opportunities—but they do change how you approach them.

    Key adjustments:

    • Shorter, more controlled drifts

    • Targeting specific soft pockets instead of long seams

    • Letting the fly land with intention, not delicacy

    In this water, trout weren’t sipping calmly—they were making quick decisions. The goal was to put the fly where they could see it and eat it without expending unnecessary energy.

    Tippet, Leader, and Confidence Adjustments

    Unlike the clear-water conditions from Part One, this wasn’t the time to go ultra-light.

    With more color in the water and less direct light:

    • Slightly heavier tippet didn’t hurt takes

    • Fly control improved

    • Hook sets were more confident in faster current

    This was a reminder that there’s no universal “best” setup—only the best setup for right now.

    Why the Same Fly Can Fail—or Succeed—Depending on Conditions

    One of the biggest takeaways from fishing the same river under different conditions is understanding that flies don’t work in isolation.

    A fly that felt too visible or unnatural in clear water suddenly became effective when:

    • Light was reduced

    • Water speed increased

    • Fish shifted from selective feeding to opportunistic behavior

    The pattern didn’t change—the context did.

    This reinforces a key lesson:

    Choosing a fly isn’t just about the hatch. It’s about water clarity, flow rate, light, and fish positioning.

    Slowing Down Still Matters—Just in a Different Way

    Even in tougher conditions, the solution wasn’t to rush or fish blindly.

    It meant:

    • Watching where fish positioned themselves

    • Adjusting target zones

    • Fishing fewer spots more intentionally

    Instead of long observation of insect life, the focus shifted to water movement and structure.

    Different inputs. Same mindset.

    Part Two Takeaway: Conditions Dictate Strategy

    This day on the river proved something important:

    The fundamentals don’t change—but how you apply them must.

    Clear water demands subtlety.

    Higher water demands visibility and control.

    Bright days punish mistakes.

    Cloudy days forgive—but still require intention.

    Understanding those shifts is what separates anglers who adapt from those who rely on habit.

    Coming Up Next in the Series

    In the next part of this series, we’ll dive deeper into:

    • When to abandon the dry fly altogether and streamer tactics

  • When Observation Changes Everything: A Moment in the River

    When Observation Changes Everything: A Moment in the River

    There’s a moment that stands out to me clearly—and it’s one I think most anglers can relate to.

    I was standing mid-river, watching trout rise steadily in the same seam I had already cast into several times without a single eat. The rises were consistent, deliberate, and confident. The fish were there. The fly was drifting through the zone. Yet nothing happened.

    That’s when I stepped back—not physically, but mentally—and asked myself the question we should all ask more often:

    Are they not eating my fly… or am I not presenting it correctly?

    Instead of immediately tying on something different, I slowed down and started observing.

    As I looked closer, I noticed small mayflies beginning to fly around me. They were subtle, light-bodied, and noticeably smaller than the size 14 mayfly I had tied on. At the same time, it became obvious just how clear the water was. The conditions were demanding precision—not just in fly choice, but in everything attached to it.

    That realization led to two changes:

    • I dropped down to a smaller fly that better matched the insects I was seeing

    • I downsized my tippet to reduce visibility and improve drift

    Nothing else changed. Same seam. Same casting angle. Same water.

    The difference was immediate.

    Once the fly matched the size of the insects drifting naturally—and the lighter tippet allowed it to move freely—the trout began to eat. One after another, fish that had ignored my fly minutes earlier suddenly committed.

    That moment reinforced a lesson I come back to often:

    It’s rarely one single thing—it’s the combination of observation, presentation, and restraint.

    Understanding Why That Adjustment Worked

    That experience highlights why dry fly fishing demands attention to detail.

    In clear water, trout have more time to inspect a fly. A slightly oversized pattern or a heavier tippet can be enough to trigger refusal—even when everything else seems right. The fish weren’t being selective out of stubbornness; they were simply reacting to what didn’t quite fit the natural drift they were keyed in on.

    Once the fly looked right and moved right, the puzzle solved itself.

    The Bigger Lesson: Slow Down Before You Switch Flies

    Moments like this are why I try to limit unnecessary fly changes. The answer often isn’t buried at the bottom of the fly box—it’s right in front of you if you’re willing to pause and observe.

    Before cutting off a fly, ask:

    • Does the size truly match what I’m seeing?

    • Is my tippet appropriate for this clarity and flow?

    • Is my fly drifting the same way the naturals are?

    Those questions lead to more consistent success than chasing patterns ever will.

  • Dry Fly Fishing Fundamentals: Presentation, Observation, and Choosing the Right Fly

    Dry Fly Fishing Fundamentals: Presentation, Observation, and Choosing the Right Fly

    Dry fly fishing is one of the most visual and rewarding ways to catch trout—but it’s also one of the most misunderstood. Many anglers obsess over exact fly patterns while overlooking the fundamentals that actually matter: presentation, observation, and reading the water.

    In this post, we’ll break down the core principles that consistently lead to success with dry flies—without falling into the trap of endless fly changes. This approach builds confidence, saves time on the water, and helps you understand why a fly works instead of relying on luck.

    Dry Fly Presentation: The Make-or-Break Factor

    You can have the “perfect” fly and still never get a take if the presentation is off.

    Trout see thousands of drifting insects every day. What they don’t see is insects dragging sideways, skating unnaturally, or moving at a different speed than the current.

    Key presentation elements to focus on:

    Drag-free drift – The fly must move at the exact speed of the current it’s floating in.

    Line and leader control – Mends matter more than fly choice.

    Approach angle – Casting slightly upstream or across allows the fly to drift naturally into the fish’s window.

    A mediocre fly with a perfect drift will outfish the “right” fly with a poor presentation almost every time.

    Look Around First: Let the River Tell You What to Use

    Before tying anything on, slow down and observe your surroundings.

    Ask yourself:

    • Are insects actively flying?

    • Do you see bugs on rocks, grass, or logs near the river?

    • Are fish rising consistently or sporadically?

    You don’t need to identify every insect down to the species. Instead, focus on:

    Size

    Color

    General shape

    Matching those three elements gets you 90% of the way there.

    If you see small, dark mayflies hovering and fish rising gently, you already know more than someone blindly cycling through fly boxes.

    Stop Pattern Chasing: Limit Your Time Searching for the “Perfect” Fly

    One of the biggest mistakes anglers make is changing flies too often.

    Constantly swapping patterns does three things:

    1. Breaks your rhythm

    2. Wastes fishing time

    3. Masks the real problem—usually presentation

    A better approach:

    • Pick one confidence pattern

    • Fish it thoroughly

    • Adjust how you fish it before changing what you fish

    If the fly drifts well and matches the general hatch profile, it deserves time in the water.

    Reading the Water: Where Dry Flies Actually Get Eaten

    Dry flies don’t get eaten everywhere—they get eaten in predictable places.

    Focus on:

    • Seams where fast and slow water meet

    • Foam lines that collect drifting insects

    • Inside bends with softer current

    • Tailouts below riffles

    These areas funnel food naturally and allow trout to feed efficiently. A perfect dry fly dropped into dead water with no feeding lanes is still a low-percentage cast.

    Understanding water movement often matters more than matching the hatch.

    Why One Fly Works Over Another (Even When They’re Similar)

    Ever notice how two flies in the same pattern family produce completely different results?

    That’s rarely coincidence.

    Subtle differences matter:

    Silhouette – A fly that rides lower may look more natural

    Hackle density – Sparse vs bushy can change how a fly drifts

    Float posture – Upright vs flush in the film

    Visibility – Not just for you, but for the fish

    Sometimes the “better” fly isn’t closer to the insect—it’s closer to how that insect behaves in the current.

    Instead of asking “What fly should I use?” start asking:

    “How is this fly interacting with the water?”

    That mindset shift changes everything.

    Choosing Flies With Intention, Not Guesswork

    Confidence comes from understanding—not luck.

    When choosing a dry fly:

    1. Match size and profile first

    2. Consider how the fly will float

    3. Think about the water type you’re fishing

    4. Commit to fishing it well

    The goal isn’t to own more flies—it’s to understand the ones you already trust.

    What’s Next: Going Deeper Into Dry Fly Strategy

    This post lays the foundation, but there’s more to unpack.

    In the upcoming follow-up series, we’ll dive deeper into:

    • Specific dry fly patterns and when to use them

    • Adjusting presentations for different water types

    • When to switch from dries to emergers or streamers 

    • How weather and light affect dry fly success

    • Reading subtle rise forms and feeding behavior

    Dry fly fishing isn’t about perfection—it’s about awareness, patience, and understanding how trout interact with moving water.
    And once you get that dialed in, the surface comes alive.

  • January Fly Fishing in Broken Bow, Oklahoma: Winter Streamer Tactics for Big Rainbow Trout

    January Fly Fishing in Broken Bow, Oklahoma: Winter Streamer Tactics for Big Rainbow Trout

    January in Broken Bow, Oklahoma, is one of those trips that tests your patience—and rewards it if you’re willing to adjust. Cold mornings, cold water, and plenty of anglers on the river. This trip was a perfect reminder that winter fly fishing is less about forcing a pattern and more about reading the water, adapting your tactics, and committing to what the conditions are telling you.
    Winter Conditions on the Lower Mountain Fork River

    Most days started with air temps in the 30–40° range, and water temps hovered in the low-to-mid 40s. Some days were overcast with that soft winter light that feels fishy all day long, while others were bright and clear, putting the fish on edge—especially with moderate to heavy fishing pressure.

    These conditions made trout less willing to move far for a meal. They weren’t looking up much, and they definitely weren’t chasing flies across the river. Everything about the water screamed slow, deliberate, and close to structure.

    Starting with Dry Flies in Winter Conditions

    Like most trips, I started optimistic—throwing dries during the warmer parts of the day. While there were occasional looks and a few half-hearted rises, dry fly action was limited. Winter bugs were sparse, and any surface activity was short-lived.

    That’s when the switch needed to happen.

    Committing to Streamers:

    Once I stopped fishing dries and committed to streamers, the entire trip changed.

    The fly that consistently produced was a damsel green olive marabou streamer. Simple profile, tons of movement, and just enough flash to get noticed without spooking pressured fish.

    Why It Worked

    In cold water, trout don’t want to waste energy. That marabou breathed with the current, even on slow swings, making the fly look alive without aggressive stripping. The color matched winter forage well, and the subtle action triggered reaction strikes rather than feeding strikes.

    Reading the Water: Finding Winter Trout on the Lower Mountain Fork

    The key wasn’t just the fly—it was where and how it was fished.

    Seams and Soft Edges

    Most of the better fish came from seams, especially where faster water dumped into slower runs. I focused on:

    • The inside edge of seams

    • Transitions from riffles into deeper runs

    • Water where fish could sit comfortably and let food come to them

    Casting across the seam and allowing the fly to swing naturally through that transition zone was deadly.

    Big Boulders and Structure

    The Lower Mountain Fork has plenty of large boulders, and in winter, those rocks are prime holding water.

    I targeted:

    • The downstream side of boulders

    • Slight depressions created by current wrapping around structure

    • Soft pockets directly behind rocks where trout could rest

    These spots consistently held bigger rainbows, especially when other anglers walked right past them.

    The Streamer Swing: Keeping a Tight Line for Reaction Strikes

    One of the biggest producers on this trip was keeping constant tension on the line.

    Instead of stripping aggressively, I let the streamer swing under tension, rod tip slightly downstream. That tight line did two things:

    1. It let the marabou pulse naturally in the current

    2. It allowed me to feel subtle takes instantly

    Most strikes happened mid-swing or right as the fly started to straighten out below me. Big rainbows would crush the fly with intent—it wasn’t subtle when it happened.

    Beating Fishing Pressure on the Lower Mountain Fork River

    Even on crowded days, this approach produced more bites and better fish than what I saw around me. While others were cycling flies or pounding the same obvious runs, slowing down and working structure paid off.

    Winter trout aren’t everywhere—but when you find them, they’re usually grouped up and willing to eat if you present the fly correctly.

    Final Takeaways from January Fly Fishing in Broken Bow, Oklahoma

    This trip reinforced a few winter fly fishing truths:

    • Cold water means less movement, not no movement

    • Streamers shine when surface activity fades

    • Structure and seams are non-negotiable in winter

    • Keeping a tight line on the swing triggers reaction bites

    Broken Bow in January isn’t about numbers—it’s about dialing in tactics and being patient enough to let the river show you where the fish live. When it all comes together, those cold-weather rainbows make every frozen finger worth it.

    If you’re heading to Broken Bow this winter, don’t be afraid to put the dries away and let a streamer do the talking.

  • Kingfisher Blackfoot Fly Tying Vise Review – A Durable, Travel-Ready Fly Tying Vise

    Kingfisher Blackfoot Fly Tying Vise Review – A Durable, Travel-Ready Fly Tying Vise

    The Kingfisher Blackfoot Fly Tying Vise is a dependable piece of fly tying gear built for anglers who want durability, versatility, and portability. After using this vise both at home and while traveling, it has proven to be a solid fly tying vise that performs well across a wide range of fly styles and hook sizes.

    One feature that immediately stands out—especially for anglers on the move—is the durable travel case, which protects the vise during transport and makes it easy to pack for trips.

    Build Quality and Overall Durability

    The Blackfoot fly tying vise features a solid, well-balanced build that stays stable during tying. There’s no flex or wobble when applying thread pressure, stacking materials, or tying heavier saltwater patterns.

    For a budget-friendly fly tying vise, the durability is impressive. Combined with the included protective travel case, this vise is well-suited for anglers who tie flies both at home and in the field.

    Hook Holding Power and Versatility

    A quality fly tying vise must securely hold hooks, and the Kingfisher Blackfoot delivers consistent grip across a wide range of hook sizes. It handles everything from small trout hooks to larger saltwater hooks without slipping or requiring constant adjustment.

    This makes it a versatile choice for tying:

    • Trout flies

    • Redfish flies

    • Shrimp patterns

    • Baitfish and inshore flies

    The strong jaw retention is especially important when tying flies meant to hold up against aggressive fish and tough conditions.

    Travel Fly Tying Vise with a Durable Case

    Where the Kingfisher Blackfoot really shines is as a travel fly tying vise. The included durable travel case adds serious value, keeping the vise protected during transport and making it easy to throw into a gear bag, backpack, or truck box.

    Setup is quick, and despite its compact size, the vise remains stable whether tying at camp, in a rental, or on the road. For anglers who travel frequently or want a dependable portable setup, this vise and case combo is a major plus.

    Final Thoughts on the Kingfisher Blackfoot Fly Tying Vise

    The Kingfisher Blackfoot Fly Tying Vise checks all the right boxes: solid construction, strong hook-holding power, wide hook size compatibility, and true portability thanks to its protective travel case.

    If you’re looking for an affordable fly tying vise that performs well for both trout and saltwater fly tying—and travels safely without extra accessories—the Blackfoot is an excellent choice.

  • Winter Redfish Fly Fishing Tactics in Galveston Bay

    Winter Redfish Fly Fishing Tactics in Galveston Bay

    Winter fly fishing for redfish in Galveston Bay is a game of patience, observation, and precision. As water temperatures drop, redfish don’t disappear — they simply tighten their patterns. Understanding how weather, tides, and bait movement work together in the winter is the key to consistent success on the fly.

    Winter Weather & Redfish Feeding Behavior

    Cold fronts dominate the Texas coast in winter, bringing strong north winds, falling tides, and rapid temperature changes. Redfish respond by sliding into shallow flats, mud bottoms, and protected shorelines where water warms faster during sunny afternoons. These fish become less willing to chase, but they still feed heavily when conditions line up.

    The best days often come 24–48 hours after a front, when winds lay down and the sun has time to warm the shallows. Midday through late afternoon is prime time, especially on calm, bluebird days.

    Tides: The Biggest Winter Trigger

    Tides matter more in winter than any other season. In Galveston Bay, low winter tides concentrate fish, bait, and feeding lanes. I focus on:

    • Drains and guts leading off shallow flats

    • Mud-and-grass transitions

    • Shorelines with dark bottom that absorb heat

    Incoming tides following extreme lows are especially productive. Redfish move shallow to feed once water levels rise just enough to give them access, often tailing or slowly cruising.

    Fly Selection: Winter Profiles & Colors

    In winter, profile matters more than color, but color still plays a role in water clarity and light conditions. I stick with medium-sized flies that push water but don’t spook fish.

    Go-to winter fly colors:

    • Natural browns and copper tones

    • Olive and tan for clear water

    • White and gold on sunny days

    • Dark flies (black, dark olive) in muddy water

    Fly styles I rely on:

    • Shrimp patterns with subtle movement

    • Small crab patterns for slow presentations

    • Baitfish-style flies that hover

    Weight is critical. I fish flies heavy enough to get down quickly, but not so heavy they crash into the bottom and spook fish.

    Kayak, Anchored, and Wading Tactics

    From the kayak, I spend a lot of time slow drifting shorelines and staking out when I find fish. Winter reds don’t move far, so once you locate them, it pays to slow way down.

    When anchored or wading, I focus on casting ahead of cruising fish rather than to them. Lead the fish, let the fly settle, then barely move it. Most winter eats happen on the pause.

    Casting, Stripping, and Hook Sets

    Accuracy beats distance in winter fly fishing. Short, controlled casts reduce splash and allow for better presentations. I keep my rod tip low and strips subtle.

    Stripping techniques:

    • Short, slow strips

    • Long pauses between movement

    • Occasional micro-twitch to trigger reaction

    When a redfish eats, avoid the trout set. A firm strip set keeps the hook low and drives it home. Once the fish is tight, then raise the rod and let them run.

    Final Thoughts

    Winter redfish fly fishing in Galveston Bay rewards anglers who adapt to conditions and fish with intention. Pay attention to weather windows, fish the tides hard, slow your presentations, and match your fly profile to what the fish want — not what looks good in the box.

    When everything lines up, winter can produce some of the most technical and rewarding redfish fly fishing of the year.

  • Does Color or Profile Determine What Fish Are Feeding On?

    Does Color or Profile Determine What Fish Are Feeding On?

    Why Lure Profile Usually Outperforms Color

    Introduction: Is Lure Color Overrated?

    One of the biggest debates in fishing is whether color or profile matters more when choosing the right lure. Anglers obsess over color patterns and shades, but on my most recent trip, the fish made something very clear:

    Profile — not color — was the deciding factor in getting consistent bites.

    This wasn’t theory. It was proven in real-time on the water, with multiple species reacting the same way.

    My Recent Trip: When Lure Profile Changed Everything

    Testing Color vs Profile in Real Conditions

    Early that morning, conditions were perfect:

    light wind, active bait, and solid tide movement. I started cycling through several confidence lures—different colors, brands, and patterns—trying to figure out what the fish were keyed in on.

    Nothing. No bumps. No followers.

    Then I tied on a 3.5-inch lure with a very specific curling tail profile, and suddenly everything clicked.

    • Redfish crushed it.

    • Speckled trout inhaled it.

    • Bass even came out of grass lines to hit it.

    The results were so dramatic that I had to start testing it scientifically.

    Experiment #1: Changing the Color Only

    I swapped the lure to a completely different color while keeping the same profile.

    No strikes. No follows. Nothing.

    This is where most anglers would assume the “hot color” stopped working—but the fish were telling a different story.

    Experiment #2: Changing the Profile Only

    I rigged a totally different style of bait.

    Same general size, different tail and action.

    Zero interest.

    This confirmed it: the lure profile was the key factor.

    Experiment #3: Returning to the Original Profile

    I tied back on that same 3.5-inch curling-tail lure, even in a neutral color.

    Instant bites again.

    Redfish hit it hard. Trout slammed it. Bass reacted immediately.

    The verdict?

    The fish weren’t feeding based on color — they were feeding based on silhouette, size, and action.

    Why Lure Profile Matters More Than Color

    1. Predators Recognize Shape Before Color

    Most fish identify prey by:

    outline

    movement

    size

    action

    Color is often the last factor they respond to, especially in stained or moving water.

    2. Tail Action Mimics Real Forage

    The 3.5-inch curling tail produced the exact swimming motion of the baitfish that were active that morning.

    Matching the action is essential when fish are selective.

    3. Correct Size = Matching the Hatch

    This is classic match-the-hatch fishing.

    When the real forage is 3–4 inches long, using a 5-inch lure takes you out of the natural food window.

    4. Water Conditions Reduce Color Visibility

    In anything other than crystal-clear water:

    • silhouettes stay consistent

    • colors wash out quickly

    • movement becomes the true trigger

    That’s why profile wins.

    What Each Species Taught Me About Lure Profile

    Redfish

    Redfish responded aggressively to the lure’s side-to-side kick and size, likely matching small mullet or pinfish.

    Speckled Trout

    Trout hit the lure mid-column, reacting to the fluttering tail and wounded baitfish movement.

    Bass

    Even freshwater bass reacted strongly to the same profile, following it out of grass lines and ambushing it.

    Different environments, same instinct:

    If the silhouette matches prey, fish eat with confidence.

    Angler Tips: How to Pay Attention to What Fish Are Feeding On

    1. Observe Local Baitfish

    Ask yourself:

    • How big are the baitfish?

    • What shape are they? Slim? Tall-bodied?

    • Are they schooling or scattered?

    • Do they swim with vibration, glide, or dart?

    These clues tell you which lure profile to use.

    2. Match the Tail Action

    Curling tails → mimic shad, mullet, small minnows

    Paddle tails → high vibration, great for dirty water

    Straight tails → subtle action for pressured or cold-water fish

    Profile + action matters more than color every time.

    3. Change Shape Before Changing Color

    Most anglers change color first—and lose time.

    Instead, try adjusting:

    • length

    • body thickness

    • tail style

    • swimming action

    You’ll learn much faster what fish are keyed in on.

    4. Study What Fish Spit Up

    If a redfish or trout spits up bait when you land it:

    • look at the size

    • note the shape

    • compare it to your lure

    That’s your exact “match-the-hatch” blueprint.

    5. Keep a “Control Lure” in Your Box

    Once you find a productive profile, treat it as your baseline.

    Only test one variable at a time for clear results.

    The Final Takeaway

    This trip proved what many seasoned anglers know but don’t always practice:

    Color can fine-tune the bite — but profile determines whether fish strike at all.

    The 3.5-inch curling-tail bait matched the exact prey profile fish were feeding on that day. When I switched off that profile, the bites stopped. When I returned to it, the action turned on instantly.

    Next time you’re struggling or experimenting, don’t reach for a new color first.

    Match the size.

    Match the shape.

    Match the action.

    Color comes last.

  • Chasing Solitude & Cutthroat: This Year’s Northern New Mexico Fly Fishing Trip

    Chasing Solitude & Cutthroat: This Year’s Northern New Mexico Fly Fishing Trip

    Every year, the mountains of northern New Mexico pull me back with the same quiet force—towering ridgelines,  a few icy creeks, and the promise of cutthroat rising in thin air. This year’s trip was no different, though the mountains definitely made me earn every fish. Between unpredictable storms, sharp temperature drops, and long miles of backcountry hiking, it was a trip that blended solitude, struggle, and some of the best dry-fly eats I’ve had in a long time.

    A Week in the High Country

    I camped in a stretch of the mountains where cell service dies, the wind carries the sound of nothing but water and pines, and the cold comes quick the moment the sun drops behind the ridgeline. My setup was simple and reliable—my lightweight backpacking equipment and my tent staked on a soft bed of pine needles in my regular spot, my sleeping bag rated just warm enough for the 30° nights, and a small cooking kit for coffee at sunrise and meals at dusk.

    The river ran close enough that I could fall asleep to it and wake up with steam rising off the riffles. There’s a certain kind of clarity that only comes from unzipping a tent at dawn, breath hanging in the air, knowing you have nothing to do except explore water and find trout.

    The Weather That Tried to Turn Me Around

    Northern New Mexico always throws curveballs, but this year felt personal.

    One morning brought blue skies and 65°, the next hit with hail and wind that bent the aspens sideways. Storm cells crawled across the Sangre de Cristos like slow giants, and I had more than one afternoon of sprinting back to camp with thunder rolling behind me. The cutthroat didn’t seem to mind, though—they just shifted where they held, huddling deep under banks until the sun returned.

    It made the fishing more of a puzzle than usual, which honestly only added to the satisfaction.

    Dialing in the Dry Fly Game

    The cutthroat were keyed in on big terrestrials this year, but sizing mattered more than anything. Early in the week, I started tossing size 8 hoppers—big enough to ride high but small enough not to spook fish in clear, low water.

    The sweet spot:

    Size 10–12 tan parachute hoppers with a slim profile.

    The fish would swipe aggressively at anything too bulky but absolutely crushed the medium-sized bugs that matched the natural grasshoppers landing in the shallows. Most eats came on the edges of seams or right up against undercut banks where the creek grass hung over the water.

    When the water got a little off-color from storms, I switched to a hopper-dropper with a small beadhead nymph and picked up a few extra fish hiding deep. But the real magic stayed on top.

    Black & Purple Streamers That Saved the Afternoons

    When the clouds stacked up and the temperature dropped, the surface bite shut down fast. That’s when the small black-and-purple streamers came alive.

    Stripping a size 8–10 leech or thin-profile streamer through the deeper pools produced some of the biggest cutthroat of the trip. Something about the dark silhouette in that glacier-cold water gets these trout fired up, especially right before the storms rolled in.

    A slow, twitch-pause retrieve was the ticket. Too fast, and they didn’t commit. Letting the fly hover in the current triggered the chase.

    Photography in the Thin Air

    This was another trip where the camera never left my pack for long. With the Canon R5 and my go-to lenses, I found moments everywhere: mist hanging over the river, sun shafts cutting through pines, and the kind of mountain light that only lasts a few minutes but transforms everything it touches.

    Low-angle shots near the water made for the best compositions—cutthroat colors glowing in natural light, textured rock beds, and reflections off still pockets. I played with longer exposures on the tripod during the slower fishing hours, capturing the smooth flow of the river as the shadows stretched across the valley.

    Even when the fish weren’t biting, the camera gave me another reason to slow down and appreciate the place.

    Why These Trips Matter

    Every year, the world feels louder and busier, which makes trips like this one even more important. Northern New Mexico gives you exactly what you need—not always what you want. Some days were cold and tough. Some casts were blown sideways by the wind. But every fish, every moment of quiet, and every sunrise over the ridges felt earned.

    And that’s why I’ll keep coming back.

  • Fly Fishing the Dolores Tailwaters: A Day of Changing Tactics

    Some days on the water require a little patience, a little adaptation, and a whole lot of appreciation for where you are. This was one of those days.

    I made the drive up toward the Dolores River tailwaters early in the morning, winding through the rugged Colorado terrain with my 5 wt Sage reel in tow and a box full of my own hand-tied flies. The plan was simple—hit the river, work the riffles, and see what the fish were willing to take.

    Hiking into the Tailwaters

    After parking near the access point, I hiked down into the canyon, breathing in the cool mountain air and taking in the towering rock walls that framed the river. The Dolores tailwaters are a special place—remote, beautiful, and teeming with trout. The kind of water that makes you slow down and take it all in.

    I started the day with dry flies, size 14 and 16, hoping for some surface action. The morning light filtered through the canyon, and for a while, the fish were cooperating. I landed a few solid browns on small dries, watching them rise in the gentle seams. But as the day wore on and the rain clouds rolled in, the bite slowed, and it was time to adjust.

    Swinging Streamers in the Riffles

    With the drizzle setting in, I switched gears. I tied on one of my hand-tied streamers—yellow and black, a pattern that’s served me well in these waters before. Instead of focusing on delicate presentations, I turned to the riffles, picking out lanes where I could swing my streamer through deeper pockets.

    The rain had the trout fired up, and swinging streamers proved to be the right move. It wasn’t long before I felt that familiar jolt—a big brown hammering the fly mid-swing. The fight was strong, the fish pulling hard in the current before finally coming to hand.

    Adapting to the Conditions

    Fishing in the rain is all about managing comfort and efficiency. I kept my rain jacket zipped up, my gear as dry as possible, and my focus on adjusting to the changing water conditions. The rain added a bit more flow to the river, making the seams and runs even more defined, perfect for targeting fish holding in deeper water.

    A Day to Remember

    By the time I hiked out, I was soaked but completely satisfied. The Dolores had given me a little bit of everything—technical dry fly fishing in the morning, aggressive streamer action in the afternoon, and some truly incredible scenery along the way.

    Days like this remind me why I love fly fishing. It’s not just about the fish—it’s about reading the water, adjusting to what the river gives you, and taking in the beauty of the places these pursuits take us.

    Stay Connected with Beyond the Cast

    Join the conversation, share your catches, and let’s keep exploring the water together.

    Tight lines, and see you Beyond the Cast!

  • The Art of Solitude: Why I Chase Wild Places with a Fly Rod and a Camera

    The Art of Solitude: Why I Chase Wild Places with a Fly Rod and a Camera

    “In the stillness of a riverbend or the hush of pine shadows on a mountain trail, I find something that feels closer to truth than anything I’ve found in the noise of daily life.”

    Introduction: Where Silence Begins

    There’s something sacred about the sound of your boots crunching on a trail before sunrise. When the only other noise is the rustling of leaves and the distant hum of water, that’s where solitude begins. It’s not about loneliness—it’s about space. Space to think. Space to breathe. Space to reconnect.

    For me, that space has always been filled with two things: a fly rod in one hand, and a camera slung over my shoulder.

    The Pull of the Wild

    Fishing isn’t just a sport—it’s a rhythm. It slows life down. The act of watching a mayfly drift, of reading currents and shadows, and feeling the tension in a line before a strike—it pulls you into the present like few things can.

    Photography is the same. It demands patience. Observation. The willingness to wait for light to break just right through canyon walls or for the breeze to settle before clicking the shutter.

    In wild places, these two crafts merge. The fly rod casts for trout, the lens captures the light—and together, they etch a memory into your soul.

    Solitude Isn’t Escaping—It’s Returning

    People often think solitude is running from the world. But the truth is, it’s returning to what matters. Out there—along the banks of a freestone river or deep in a Texas marsh—you’re not bombarded by alerts, deadlines, or expectations. You’re just being.

    Fishing forces you to observe. To learn. To fail, and try again. The same goes for photography. It teaches you to see what you missed the first time. And in both, you learn that success is quiet. It’s not always the fish caught or the perfect photo. Sometimes it’s just that you were there.

    Why I Keep Coming Back

    I’ve fished from the saltgrass flats of Galveston to alpine streams in New Mexico, camera packed tight beside my reels. I’ve camped beside waters that sang me to sleep, and hiked miles before dawn to reach a pool that might hold a single rising trout.

    I do it for the adventure.

    I do it for the peace.

    But mostly—I do it to remember who I am when everything else is stripped away.

    The wild has a way of revealing truths. It’s where I go to reset, to listen, and to create. And every photo I take or fish I release is a thank-you note to the land that gave me the quiet I needed.

    What You Can Take With You

    If you’re someone who’s felt overwhelmed by the buzz of modern life, I’d encourage you to pick up a fly rod, a camera, or even just a journal—and go.

    Find a river. Hike a trail. Camp in the backcountry. Wake before the sun. Cast badly. Take blurry shots. But stay out there long enough to feel the noise fade.

    Because once you do—you’ll understand this:

    Solitude isn’t empty. It’s full of the things that truly matter.

    Gear I Bring for Solitude

    • Fly Rod Setup: Sage Spectrum C reel, 4–6 wt rods depending on the water
    • Camera: Canon R5 + Sigma Art & Canon L-Series lenses
    • Tripod: K&F Concept carbon tripod
    • Filters: K&F ND filters for long exposures on streams
    • Editing Workflow: Lightroom Mobile on iPad Pro during the trip, stacked images for depth

    Final Thoughts: The Quiet Places Need Our Voice

    Solitude may be personal—but it’s also endangered. As more wild places shrink under development and public land access is threatened, we have a responsibility to protect what heals us.

    I encourage you to support conservation efforts, educate others, and share your own moments in the wild. Whether through words, photos, or quiet action—remind others why these places matter.

    Because if we lose them, we don’t just lose fish or trails—we lose a part of ourselves.

  • Wild Trails & Cold Creeks: Fly Fishing and Photography in Coastal Maine

    Wild Trails & Cold Creeks: Fly Fishing and Photography in Coastal Maine

    This July, I’m heading deep into the heart of coastal Maine, where rugged landscapes, wild trout, and historic coastal towns come together in a way only New England can deliver.

    From the maritime history of Bath to the windswept beauty of Bar Harbor, this trip will blend fly fishing, hiking, and outdoor photography — all in pursuit of wild brook trout, forest light, and moments of solitude on the trail.

    Wild Brook Trout in Acadia National Park

    Acadia is one of the few places in the U.S. where you can still catch wild native brook trout in cold, clear streams surrounded by towering granite peaks and old-growth forest.

    I’ll be fly fishing small mountain creeks and hidden pools — using lightweight gear, stealth, and dry flies to fool these beautifully colored fish. Expect fly patterns, rigging tips, and reports from the field.

    Hiking Maine’s Coastal and Mountain Trails

    Beyond the creeks, I’ll be exploring Acadia’s hiking trails, from rocky ridgelines like The Beehive to forested river paths winding through the park. Each hike offers a chance to reset, recharge, and reach hidden fishing water that few ever see.

    Look for trail maps, gear lists, and scenic highlights from my time on foot across coastal Maine.

    Photography on the Edge of Land and Sea

    Maine’s dramatic light and texture-rich environments make it a dream location for photography. I’ll be capturing:

    • Morning fog and soft light on forest streams
    • Waterfalls and creeks where brookies hide
    • Sunset over Cadillac Mountain
    • Harbors, tidepools, and historic lighthouses

    I’ll also be sharing camera settings, compositions, and editing techniques using Lightroom and mobile workflow setups.

    A Bit of Maine History: Bath to Bar Harbor

    This trip also dives into the history woven into the region. Bath, Maine, known as the “City of Ships,” still reflects its shipbuilding legacy. In Bar Harbor, echoes of the Gilded Age meet rugged cliffs and crashing waves.

    Each stop along the way brings stories, heritage, and local culture into the broader journey.

    Coming Soon: Full Blog Series + Field Notes

    This is just the beginning. Over the coming weeks, I’ll be posting:

    • Fly fishing reports from wild Maine waters
    • Photography guides tailored to coastal and forest scenes
    • Hiking recaps with maps and tips
    • Behind-the-scenes gear lists for both camera and fly gear

    Make sure to subscribe or follow on social media to catch the full journey as it unfolds.

  • Luxury I can’t live without

    Luxury I can’t live without

    What’s the one luxury you can’t live without?

    “A luxury I can’t live without? Conservation programs for trout and the watersheds they depend on. It might not be material, but clean, cold water and the ecosystems behind it are what fuel every one of my passions—from fly fishing and photography to writing and exploring remote rivers.”

    For more information on this subject check out my in depth blog on conservation!

    Saving Trout: Conservation Efforts, Native Restoration, and the Bugs That Make It Possible

  • Saving Trout: Conservation Efforts, Native Restoration, and the Bugs That Make It Possible 

    Saving Trout: Conservation Efforts, Native Restoration, and the Bugs That Make It Possible 

    Photos and story by David Poole

    Trout are more than just a favorite target for anglers—they are the pulse of healthy river systems. Across the U.S., conservationists, biologists, and local communities are fighting to protect this iconic fish. From restoring native species to safeguarding bug life and clean water, trout conservation is a story of ecological revival.

    The Big Picture: Why Trout Conservation Matters

    Trout are indicator species—meaning their presence signals a healthy aquatic ecosystem. Cold, clean, oxygen-rich water is a requirement for their survival. As rivers face threats from drought, pollution, invasive species, and urbanization, trout populations have suffered.

    Conservation isn’t just about saving fish. It’s about preserving entire ecosystems, protecting biodiversity, and ensuring future generations can experience wild waters and native trout.

    State-by-State Tactics: Unique Approaches to Trout Conservation

    Every state has its own climate, terrain, and trout populations, which means conservation looks different across the U.S. Here are some standout efforts:

    State-by-State Tactics: Unique Approaches to Trout Conservation

    Every state has its own climate, terrain, and trout populations, which means conservation looks different across the U.S. Here are some standout efforts:

    New Mexico

    Focus: Native Rio Grande cutthroat trout.

    Tactics: Remote stream restoration, stream temperature monitoring, and translocation of native cutthroat to protected high-altitude waters.

    Utah

    Focus: The Utah Cutthroat Slam.

    Tactics: A public-incentive conservation program that encourages anglers to fish for native strains while funding habitat restoration through registration fees.

    Montana

    Focus: Wild trout management.

    Tactics: Minimal stocking, strict regulation on water withdrawals, and temperature-sensitive fishing closures to protect fish during droughts.

    North Carolina

    Focus: Brook trout and Appalachian streams.

    Tactics: Reforestation around streams, culvert removal for fish passage, and robust hatchery-supported native stocking.

    Tennessee

    Focus: Southern Appalachian brook trout.

    Tactics:

    Native Restoration: Tennessee has been working to restore the only native trout species in the state—the Southern Appalachian brook trout—in the Great Smoky Mountains and Cherokee National Forest.

    Genetic Protection: Biologists use genetic testing to identify and protect pure strains of native brook trout, which have been diluted by historic stocking of northern strains.

    Habitat Rehabilitation: Streams have been restructured by removing barriers like old logging roads and replacing culverts to reconnect fragmented habitats.

    Partnership Programs: Tennessee Wildlife Resources Agency (TWRA) works with the National Park Service and Trout Unlimited to monitor stream health, conduct temperature studies, and reintroduce brook trout into restored waters.

    “Brook trout are more than just a native species—they’re a symbol of our mountain streams. We’re rebuilding those lost legacies one cold stream at a time.”

    — Tennessee Wildlife Resources Agency

    Water Conservation: The Root of Trout Survival

    Water is the most critical resource for trout. Without cold, clean, well-oxygenated water, nothing else matters.

    Key Tactics:

    Riparian Buffer Zones: Planting vegetation along stream banks to reduce runoff, lower water temperatures, and provide cover.

    Flow Management: Coordinated water releases from dams and reservoirs to mimic natural stream flow and reduce thermal stress.

    Agricultural Partnership Programs: Working with farmers to limit irrigation drawdowns, reduce pesticide runoff, and restore stream access.

    The Importance of Bug Life: Mayflies, Caddis, and Stoneflies

    Aquatic insects are a foundational part of trout ecosystems. These bugs aren’t just trout food—they indicate stream health and play key roles in nutrient cycling.

    Conservation Gains:

    • Increased macroinvertebrate diversity is a sign of success in restoration projects.

    • Studies show stream habitat improvements often lead to a 30–60% increase in bug hatches within two years.

    • Healthy hatches fuel trout growth and reproduction—especially during the spring and fall feeding windows.

    Restoring Native Trout: Bringing Back the Originals

    In many watersheds, native trout were lost due to overfishing, logging, mining, and the introduction of non-native species. Conservation efforts now aim to undo that damage.

    Examples of Success:

    Greenback Cutthroat (Colorado): Once thought extinct, small remnant populations were found and used for native reintroduction efforts in the South Platte drainage.

    Apache Trout (Arizona): Federally protected, with recovery projects in high mountain streams and strong community involvement.

    Lahontan Cutthroat (Nevada & California): Massive scale-up of reintroduction projects into Pyramid Lake and nearby alpine waters.

    How Trout Are Raised: Inside Hatcheries and Wild Stocking Programs

    Raising trout plays a key role in both conservation and sportfishing. But not all hatchery programs are created equal.

    Modern Hatchery Practices:

    Genetic Integrity: Breeding programs now focus on maintaining native genetics rather than just producing numbers.

    Disease Control: UV filtration, oxygen monitoring, and isolation units prevent outbreaks.

    Stream-Ready Conditioning: Juvenile trout are raised in stream-simulation tanks with natural flow and live prey to prepare them for the wild.

    How You Can Help: Small Steps, Big Impact

    1. Practice Catch and Release: Use barbless hooks and handle fish with wet hands.

    2. Volunteer with Trout Unlimited or Local Stream Projects.

    3. Support Native Reintroduction Programs: Donate, advocate, or join citizen science efforts.

    4. Fish Responsibly: Avoid fishing during warm-water conditions or low-flow events.

    Conclusion: Conservation Is a Collective Story

    Trout conservation is a powerful blend of science, tradition, and community. Whether you’re a fly angler hiking into a remote canyon or a weekend bait fisherman on a stocked lake, your actions matter. Together, we can ensure that cold, clean trout streams continue to flow wild and full of life.

  • Untitled post 1424

    What are the most important things needed to live a good life?

    The Most Important Things for a Good Life

    In a world that constantly pushes us to do more, chase more, and worry about things far outside of our control, we often lose sight of what truly matters. The truth is, a good life isn’t built on how much we accumulate, how many followers we gain, or how fast we move—it’s built on how deeply we live, how well we love, and how easily we let go.

    Letting go has become one of the most important skills I’ve learned. Letting go of things that don’t serve you, of stress you didn’t ask for, of expectations you never agreed to carry. Life gets lighter when you stop clinging to outcomes and allow yourself to simply be. Most of the things we stress about—the small annoyances, the passing criticisms, the unpredictable curveballs—don’t matter as much as we think they do. And the ones that do matter, we face best with a calm, steady heart.

    For me, living a good life means immersing myself in the things I truly love. Time with my family. A quiet morning walk with my camera slung over my shoulder. Wading into a cold, clear river with a fly rod in hand and the sun cresting over the trees. In those moments, I’m not chasing anything—I’m just in it. Present. Grounded. Whole.

    Nature has a way of reminding us that life keeps flowing, even when we’re not in control. The river doesn’t resist the rocks in its path—it moves around them, over them, reshapes them with time. That’s something I try to carry with me in everyday life. Don’t fight what’s out of your hands. Flow with it. Focus your energy on what brings you joy, meaning, and connection.

    Whether it’s photographing a wild landscape, laughing with loved ones, or feeling the tug of a fish on the line—these moments are where I find peace. They give me space to breathe, reflect, and reset.

    A good life isn’t perfect. It’s real. It’s messy, beautiful, full of little pauses that hold a lot of meaning if you’re paying attention. Let go of the noise. Lean into what you love. And when you find your peace, don’t let go of that.

    David Poole

  • When I Walk, I Cast Shadows: Finding Peace in the Present Moment

    When I Walk, I Cast Shadows: Finding Peace in the Present Moment

    In a world constantly buzzing with noise, expectation, and pressure, peace often feels like a luxury—something far off in the distance, waiting for “the right time.” But peace isn’t a destination. It’s a practice. It’s a mindset. And for me, it starts with clearing my mind and grounding myself in the present moment.

    The Art of Letting Go

    One of the most powerful things I’ve learned is how to let go—especially of the negativity people carry and try to hand to you. Whether it’s judgment, anger, or bitterness, you don’t have to hold onto it. It’s not yours to carry.

    You have every right to protect your energy.

    Letting go doesn’t mean you stop caring. It means you stop allowing the weight of other people’s struggles to control your peace. You can’t change someone else’s mindset. You can only change how you respond.

    Don’t Dwell in the Past. Don’t Live in the Future.

    So many of us get trapped in old memories or future worries. But neither of those spaces are real anymore. The past is a closed door. The future? A hallway you haven’t walked through yet.

    Happiness—true happiness—is found in the now.

    This moment, this breath, this step you’re taking… it’s the only one that’s real. When you fully embrace it, you begin to realize how powerful and free you already are.

    This Life Is Short—Live It Fully

    We only have a short time here in this world.

    That fact can feel heavy—but it’s also deeply freeing. It’s a reminder to live.

    To do the things you’ve always wanted to do.

    To stop waiting for the perfect moment—because the days are not promised.

    If there’s a dream tugging at your heart, follow it.

    If there’s someone you love, spend time with them. Tell them. Laugh with them. Make memories.

    Don’t let life pass by in a blur of routine and regret. You are here now. Don’t waste the gift.

    Nature Is a Healer

    For me, nature is more than a backdrop—it’s a reset button.

    When I step into the woods or cast a line into quiet waters, something shifts. The noise fades. My breath slows. The world becomes still. Nature doesn’t ask you to perform. It invites you to be.

    Walk under open skies. Sit by a river. Feel the earth under your feet. Let the sun touch your face. That’s when you start to remember what peace feels like. That’s when your mind gets quiet and your heart gets louder.

    Your Peace Lives in You

    We all have different things that bring us calm. Maybe it’s reading, journaling, making art, or spending time with people who truly see you. Maybe it’s a quiet morning coffee or the routine of a good workout. Find what centers you—and do it often. Not just when you’re stressed. Do it to build the foundation of a calm life.

    The Shadow We Cast

    There’s a quote I carry with me:

    “When I walk, I cast shadows.”

    To me, that means I exist. I matter. I have presence. Even when I feel small, there’s proof that I’m here. Every step forward leaves a mark.

    Our shadows remind us that even when we walk alone, we are never invisible.

    This Is How I Live a Peaceful, Happy Life

    I clear my mind.

    I let go of the noise.

    I root myself in the now.

    I remind myself that life is short—and it’s mine to live.

    I spend time with those I love.

    I chase joy, not perfection.

    I listen to the wind and let the sun speak.

    I take deep breaths. I move forward, gently.

    And when I walk, I cast shadows.

    So here’s my invitation to you:

    Don’t chase peace—create it.

    Don’t wait for the world to be quiet—become the quiet.

    Let go, breathe deep, and come back home to the moment you’re in.

    That’s where your life is.

    That’s where your peace waits.

  • Casting Away the Noise: Why I Unplug to Reconnect

    Casting Away the Noise: Why I Unplug to Reconnect

    How do you know when it’s time to unplug? What do you do to make it happen?


    There’s a quiet signal that tells me it’s time to step away. It’s not always loud or dramatic—it might be a slow build of stress, creeping doubt, or that stretched-thin feeling that makes even simple things feel heavy.

    “When stress shows up uninvited and focus begins to drift, I know it’s time to unplug and reset.”

    Sometimes it’s my mind racing in circles. Other times, it’s just a subtle weight on my chest or that uneasy feeling that I’m no longer fully present. That’s when I listen.

    What Do I Do to Make It Happen?

    I stop—literally—and breathe. I’ll take several long, intentional breaths, letting the tension fall away with each exhale. Whether I’m standing by the shoreline or stepping out into a pine-lined trail, I breathe in the fresh air and let it remind me of what stillness feels like.

    “Before anything else, I pause and breathe deeply—filling my lungs with clean air and my mind with calm.”

    Then, I turn to what grounds me most: fishing and photography.

    A fly rod in hand or a paddle in the water, I drift back into the rhythm of nature. The act of casting into a quiet bay or stalking redfish along a grass flat becomes more than a hobby—it’s a kind of meditation. It realigns my thoughts.

    “Fly fishing isn’t just about the fish—it’s about focus, patience, and reconnecting to something deeper.”

    Other days, it’s photography that helps me reset. I’ll grab my Canon and hit the trail, chasing light and framing moments that the busy world tends to overlook. It’s a slower pace, a deeper look. Whether I’m capturing a coastal bird mid-flight or the still reflection of a riverbend, I’m reminded that beauty exists in the quiet details.

    “Photography makes me slow down, breathe deeper, and see clearer—it’s the still frame that restores the bigger picture.”

    In those moments—standing in saltwater up to my knees or hiking a mountain ridge with my camera slung over my shoulder—I’m fully present. The noise fades. The pressure lifts. I remember who I am when the world isn’t shouting.

    “Unplugging isn’t running away—it’s returning to yourself.”

    That’s how I reset. That’s how I breathe again.

  • Beyond the Cast: Saltwater Fly Fishing for Redfish and Speckled Trout in Galveston West Bay

    Beyond the Cast: Saltwater Fly Fishing for Redfish and Speckled Trout in Galveston West Bay

    Introduction

    Saltwater fly fishing in Galveston West Bay is one of the most exciting and rewarding ways to target inshore species like redfish and speckled trout. With spring bringing warmer water temperatures and shifting feeding patterns, now is the perfect time to grab your fly rod and explore the marshes, grass flats, and channels of the Texas coast.

    Whether you’re a seasoned fly angler or just getting started with saltwater fly fishing in Galveston, this guide covers everything you need to know—from essential gear and fly patterns to casting techniques and current fishing conditions.

    Essential Gear for Saltwater Fly Fishing in Galveston

    Fly Rod

    A 9-foot, 8-weight fly rod is ideal for targeting redfish and speckled trout. It offers the power to handle wind and cast larger flies while maintaining the finesse needed for accurate presentations. For windy days or larger fish, consider a 9- or 10-weight rod.

    Fly Reel

    Choose a saltwater fly reel with a sealed drag system and corrosion-resistant materials like anodized aluminum. Smooth drag is essential when dealing with the strong, fast runs of redfish or trout hooked in moving water.

    Fly Line

    A weight-forward floating line is the go-to for shallow flats fly fishing. For deeper channels or windier conditions, an intermediate sinking line will help get your fly in the strike zone.

    Leader and Tippet

    Seaguar Red Label Fluorocarbon in 15 lb test is my preferred choice for leader and tippet material. It’s abrasion-resistant and nearly invisible underwater—key for targeting spooky fish in clear coastal waters.

    Best Saltwater Fly Patterns for Redfish and Speckled Trout

    Top Redfish Flies

    Clouser Minnow (Chartreuse/White) – A must-have fly pattern that imitates baitfish.

    Redfish Crack Fly – Perfect for tailing reds in shallow marshes.

    Merkin Crab – A great choice for redfish feeding around oyster beds and muddy bottoms.

    Deceiver (Redfish Colors) – Mimics struggling baitfish, excellent for murky water.

    Puglisi Baitfish Fly – Realistic baitfish profile for sight-casting.

    Top Speckled Trout Flies

    Lefty’s Deceiver (Chartreuse/White) – Proven pattern for trout over grass flats.

    Sea Habit – Effective around structure and drop-offs.

    Whistler Fly (Pink & White) – Perfect for topwater action in warmer months.

    Schminnow – Imitates shrimp and small baitfish.

    Killer Baitfish – Bright colors trigger strikes during low light or murky water.

    Why These Patterns Work

    Each fly pattern is designed to mimic key prey like shrimp, crabs, or baitfish—staples in the diet of redfish and speckled trout. Matching the hatch with realistic movement and size will drastically improve your success rate when fly fishing the Texas coast.

    Saltwater Fly Casting Techniques

    Double Haul Cast

    Mastering the double haul will improve your casting distance and control, especially in windy coastal conditions. Practice it on dry land before hitting the flats.

    Sight-Casting

    Spotting and casting to visible fish is one of the most thrilling aspects of saltwater fly fishing. Aim ahead of cruising redfish or trout to give your fly a natural presentation.

    Redfish tailing in the shallow flats of Galveston West Bay during low tide

    A tailing redfish feeds in the skinny water of Galveston’s flats—prime conditions for sight-casting with a fly rod

    Strip Set

    Instead of lifting the rod, strip-set by pulling the line tight with your non-casting hand. This sets the hook directly into the fish’s mouth without pulling the fly out.

    Best Places to Fly Fish for Redfish & Speckled Trout in Galveston

    Redfish Hotspots

    • Shallow marsh drains on an incoming tide

    • Mud flats near shell and grass beds

    • Potholes along leeward shorelines

    Speckled Trout Zones

    • Grass flats in 3–5 feet of water

    • Shell drop-offs near marsh edges

    • Deeper structure during outgoing tides

    Fly Fishing Retrieve Techniques

    Redfish: Use slow strips with long pauses. If a fish follows but hesitates, stop the fly and twitch gently to trigger a bite.

    Redfish caught in Galveston West Bay using an imitation crab fly, displayed in shallow coastal water

    This redfish crushed an imitation crab fly in the marshy flats of Galveston West Bay—one of the most effective patterns for targeting reds in shallow water

    Speckled Trout: A consistent strip with occasional pauses mimics injured baitfish—perfect for aggressive trout.

    Recent Fly Fishing Report – Galveston West Bay

    Weather & Water Conditions

    Air Temps: Mild spring temperatures

    Water Temps: Mid-60s

    Wind: SE at 5–10 mph

    Water Clarity: Clear in protected marshes; stained on windward flats

    Tide: Incoming morning, outgoing evening

    What’s Working Right Now:

    Redfish: Redfish Crack Fly (tan/gold), Kwan Fly, EP Shrimp

    Speckled Trout: Clouser Minnow, Gurgler Fly, Seaducer

    Last week’s outgoing tides pushed bait into channels where redfish staged along marsh edges. The Clouser Minnow was deadly in 3–5 feet over grass beds, while the EP Shrimp shined for reds tailing over soft mud bottoms.

    Final Thoughts: Fly Fishing the Texas Coast in Spring

    Speckled trout caught on a fly rod in Galveston West Bay during spring fly fishing trip
    Speckled trout landed on the fly in Galveston West Bay—sighted in shallow water and fooled with a chartreuse Clouser Minnow

    Fly fishing for redfish and speckled trout in Galveston West Bay is heating up with spring’s arrival. With improving conditions, longer days, and active fish, now is a great time to target Texas inshore species on the fly.

    If you’re planning a trip this week, focus on early mornings and late afternoons. Look for clean water near current, match your fly to the forage, and practice quiet, accurate presentations.

    Tight lines!

  • Silent Watchers: A Barred Owl Encounter While Kayak Fishing

    Silent Watchers: A Barred Owl Encounter While Kayak Fishing

    While out fishing in my kayak this week, I heard a familiar sound drifting through the trees — the classic call of a barred owl echoing from the same stretch of shoreline where I’ve heard it many times before. I instinctively put my fishing rod down, grabbed my camera from the dry box, and quietly let my kayak drift.

    Perched in the dense canopy was the owl, exactly where I hoped it would be. Its deep, rhythmic call — “Who cooks for you? Who cooks for you-all?” — had led me right to it. These birds have a way of disappearing into the background, but experience teaches you where to look. Sure enough, there it was — steady, alert, and perfectly camouflaged against the mottled bark.

    I slowly raised my camera and fired off a few frames as the owl turned its head, locking eyes with the lens. The light filtering through the trees added a soft, natural glow to its feathers, and I knew I had something special. I managed several shots before it glided silently deeper into the woods.

    Barred owls are year-round residents along wooded creeks and bayous, and this particular one feels like a quiet companion on many of my fishing trips. There’s something timeless about that moment — kayak drifting, rod set aside, camera in hand, and nature doing what it does best.

    Scroll down to see a few of my favorite photos from the encounter. Minimal editing — just a little contrast and clarity in Lightroom to bring out the mood of the moment.

    Camera: Canon R5 | Lens: Canon L series 400 

    Tripod: K&F Concept (left in the kayak this time) | Edited on iPad Pro using Lightroom

    Ever spot a barred owl while on the water or hiking near creeks? Drop a comment — I’d love to hear your stories.

  • Chasing Rainbows and Smallmouth: A Spring Fly Fishing Trip to Broken Bow

    Chasing Rainbows and Smallmouth: A Spring Fly Fishing Trip to Broken Bow

    After months of planning and a long drive through winding forest roads, I finally pulled into Beavers Bend State Park and set up camp along the Lower Mountain Fork River. The spring air was crisp, the dogwoods were just starting to bloom, and the sound of moving water echoed through the pines. It didn’t take long to shake off the road and get a line in the water.

    That first evening, with the light starting to soften and the river glowing gold, I managed to connect with a few hungry rainbows. They weren’t picky—small nymphs drifted through the seams did the trick. The bites came steady enough to remind me why I love this place.

    After a quick dinner by the fire, I settled into camp under a canopy of stars, the rhythmic hoots of owls echoing through the trees.

    The next morning, I woke up early to fish the cooler temps. The water was still moving clear and strong, and once again the rainbows were willing. I caught several before the sky started turning gray and rumbles of thunder rolled over the treetops. I packed up just before the rain let loose. Back at camp, I waited it out with some lunch and watched the storm wash the dust off the forest.

    By late afternoon, the weather broke just enough to slip back onto the water. The air was cool and damp, and the fish were active again. There’s something about fishing after a storm—the river feels fresh, the light is moody, and the fish seem to know it.

    The next day I decided to stretch my legs and hike deeper into the park. The trail twisted along the river, past waterfalls trickling over mossy rocks and wildflowers blooming in hidden pockets of sunlight. With my fly rod strapped to my pack and my camera swinging from my shoulder, I made slow, intentional progress—fishing the deeper pools and riffles along the way. The reward? A mix of feisty smallmouth bass and more rainbows, all tucked away in less-pressured water.

    Waterfalls I found hiking to the river

    Between casts, I couldn’t help but take in the scenery. Spring in Broken Bow is something special—lush greens, sparkling creeks, waterfalls hidden in the woods, and skies that seem to shift with every hour. 

    I stopped often to shoot photos of blooming wildflowers, dripping foliage, and scenic overlooks. The light was perfect for moody forest shots and those soft, misty river images I love capturing.


    Over the next several days, the fishing held strong. Morning and evening were best, especially with dry-dropper rigs and small streamers. Each night brought its own rhythm—raccoons rustling around camp looking for snacks, barred owls calling across the river, and the gentle hum of the forest settling in for the night. It was peaceful, wild, and exactly the kind of escape I was hoping for.

    This trip to Broken Bow was a perfect blend of fly fishing, photography, and soaking in spring’s return. The combination of eager trout, backcountry hikes, and unexpected encounters—both wildlife and weather—made it one for the books. If you’re thinking about chasing fish and quiet in southeast Oklahoma, spring is a great time to go.

  • From the Mountains to the Marsh – Wrapping Up Beavers Bend

    From the Mountains to the Marsh – Wrapping Up Beavers Bend

    After a few peaceful days of fly fishing in the cool, clear waters of Beavers Bend State Park, I’m back home on the Texas coast. The trip was a perfect spring escape—misty mornings on the Lower Mountain Fork River, sight-casting to rising trout, and evenings by the fire with the sound of the river nearby. It’s hard to beat the mountain air and those deep pools filled with willing browns and rainbows.

    But as great as the Oklahoma waters were, there’s nothing quite like home. The salt air, the sound of mullet flipping in the back marsh, and that first tailing redfish on a still morning—it all draws me right back in. With water temperatures rising and tides shifting into summer patterns, it’s time to return to chasing reds, speckled trout, and maybe even a few flounder on the fly.

    I’ll be back out on the Galveston flats this week, rod in hand and camera packed, ready for what the tides bring in. Stay tuned for some coastal fly action—there’s plenty more coming.


    Stay tuned for the full blog on Beavers Bend trip!

    What was your last trip like—mountains or marsh?

  • Among the Aspens: A Moment in New Mexico

    Among the Aspens: A Moment in New Mexico

    High in the mountains of New Mexico, I found a glowing grove of quaking aspens just as the sun broke through the canopy. There’s something about these trees — tall, slender, golden-skinned — that draws you in. I came prepared with my Canon 90D, Canon L-series lenses, a K&F Concept tripod, and even my iPhone, knowing this scene was too good to miss from any angle.

    Canon 90D + L Series Glass: Sharpness Meets Versatility

    For wide environmental shots, I relied on the Canon 24–70mm f/2.8L, but for more intimate details — like clusters of bark, layered trunks, or isolating one tree against the backdrop — I used my Canon 70–200mm f/2.8L. This lens gave me the compression and clarity I needed to highlight subtle textures and pull distant trees forward with depth.

    Shot Breakdown:

    • Camera: Canon 90D

    • Lenses: 24–70mm f/2.8L and 70–200mm f/2.8L

    • ISO: 100

    • Aperture: f/10 for wide shots, f/2.8–f/5.6 for close-ups

    • Tripod: K&F Concept Carbon Fiber

    • Filter: K&F CPL

    Using the 70–200mm for Detail and Compression

    Aspens are photogenic both up close and from a distance. With the 70–200mm, I framed tighter compositions — trunks in golden light, black knots in the bark, and sunlit patches on the forest floor. The telephoto compression made the grove look more layered and dense, almost like a wall of trees — which added a cinematic quality to some shots.

    Pro Tip: Use the 70–200mm at 135mm–200mm to compress the forest and fill the frame with repeated lines and patterns — it’s ideal for making the grove feel deeper and more immersive.

    iPhone Photography: Don’t Underestimate Your Pocket Camera

    While the DSLR gear handled most of the heavy lifting, I also snapped a few frames with my iPhone 15 pro. With smart HDR and excellent native contrast, it delivered surprisingly strong results — especially with the wide and ultra-wide lenses.

    Tips:

    • Use portrait mode for foreground subjects like logs or leaves.

    • Tap to meter on the trunk or shadowed mid-tones.

    • If available, shoot in RAW with the Halide or Lightroom Mobile app for better editing flexibility.

    Composition in the Grove: Light, Lines, and Layers

    I timed the main shot so the sun peeked just over the tree line, creating a soft sunburst effect without washing out the scene. A fallen log led into the grove, creating a visual path that made the image feel more three-dimensional.

    With the 70–200mm, I also isolated “portraits” of individual trees and detail shots of light hitting the bark. These close-ups tell a different story — quieter, more focused.

    Editing in Lightroom: Preserving Natural Mood

    For Canon RAW files:

    • Boosted midtone contrast with the tone curve.

    • Desaturated greens slightly for a more natural forest feel.

    • Lifted shadows to expose bark detail.

    • Used radial filters to add subtle spotlighting where the sun naturally fell.

    Before and after

    For iPhone shots:

    • Adjusted highlights and whites to bring back sky detail.

    • Used Lightroom Mobile’s “Texture” slider to enhance bark detail.

    • Applied slight vignette to draw the eye inward.

    Why Aspen Trees Are a Photographer’s Dream

    Aspens offer built-in symmetry, light diffusion, and contrast. The bark’s pale tones pop in shadowy groves, while the leaves filter sunlight with a soft glow. In New Mexico’s higher elevations, these trees are often found in wide open clearings — perfect for both drone and ground photography.  What makes them even more special is their shared root system, meaning this forest is often one living organism — a fact that adds a bit of wonder every time I step into a grove.

    Closing Thoughts: Slow Down, Look Closer

    Photographing aspens is a study in rhythm and reflection. Whether you’re standing back with a 24mm or zooming in at 200mm, these trees offer something ethereal. And whether you’re carrying a full kit or just your phone, the forest rewards those who pause, observe, and frame with care.

  • Chasing Wild Trout at Beavers Bend: Fly Fishing, Photography, and Trip Planning

    Chasing Wild Trout at Beavers Bend: Fly Fishing, Photography, and Trip Planning

    As spring breathes new life into the forests and rivers, I’m gearing up for a trip that blends fly fishing, photography, and camping into one unforgettable adventure.

    Next week, I’m heading north from Houston to the beautiful Beavers Bend State Park in Broken Bow, Oklahoma — a true gem for coldwater trout fishing in the southern U.S.

    This trip isn’t just about the fish — it’s about the full experience: long drives in the Ford Bronco, misty river mornings, evenings by the campfire, and capturing it all through my lenses and drone.

    Here’s the full rundown of flies tied, gear packed, and the planning tools I used to map out this journey:

    Fly Box: Patterns Prepped for Beavers Bend

    For the crystal-clear waters of the Lower Mountain Fork River, I’ve stocked my fly box with a variety of proven patterns tailored for both rainbow and brown trout:

    Small Mayfly Patterns (Size 18–22) — Matching early spring hatches.

    Hopper Patterns (Size 12–14) — For opportunistic trout looking for a big bite.

    Small Leech Patterns (Size 10–12) — Especially effective for brown trout in deeper runs.

    Midges (Size 20–22) — Black, olive, and red variations.

    Soft Hackle Wet Flies (Size 14–16) — Perfect for swinging through riffles.

    Woolly Buggers (Size 8–10) — Olive, black, and brown for streamer action.

    Each fly is barbless for easy releases and tied specifically to imitate what’s naturally present in Beavers Bend’s ecosystem this time of year.

    Photography and Video Gear Packed

    This trip is also about capturing the story — from the early morning mist on the water to the fire-lit nights under the stars.

    Here’s the photography and video setup coming with me:

    Canon EOS 90D paired with Canon L Series lenses for high-resolution action and landscape shots.

    DJI Mavic Pro Drone for sweeping aerials over the river valleys and forest canopy.

    GoPro Hero 10 Black (chest mount) for wading shots, underwater releases, and immersive point-of-view fishing clips.

    K&F Concept Tripod and ND Filters for smooth video transitions and silky river shots.

    Photography is about more than documenting the trip — it’s about telling the story of a place and a moment in time.

    Fishing Gear Checklist

    For the river, I’ve got a streamlined but reliable setup:

    Fly Rod: 9’ 5-weight rod, capable of delicate presentations and fighting feisty trout.

    Reel: Sage Spectrum 5/6 weight reel — strong drag for river browns and rainbows.

    Fly Line: Cortland 444 floating line, ideal for precise casts and great line control.

    Leaders and Tippet: 9’ fluorocarbon leaders with 4X–6X tippet.

    Net: Lightweight, rubber bag net for safe catch-and-release.

    Waders and Boots: Breathable waders and wadding boots with studs if needed.

    I’m packing all my fishing gear into my Ghosthorn Fly Fishing Backpack — lightweight, waterproof, and easy to carry across the rocky trails and riverbanks of Beavers Bend.

    Camping Essentials

    Nothing beats setting up camp after a full day on the river:

    • Lightweight backpacking tent and insulated sleeping pad.

    • Down sleeping bag rated for cool river nights.

    • Portable camp stove, kettle, and coffee setup.

    • Firewood bundles for nights around the campfire.

    • Headlamps, lanterns, and a solar charging station.

    There’s nothing quite like brewing a morning coffee at the river’s edge, listening to nature wake up.

    Trip Planning Tools: How I Mapped It All Out

    Planning a trip like this starts long before the first cast.

    Here’s how I mapped the route and fishing spots:

    TroutRoutes App — Invaluable for locating public access points, river sections, and local fly recommendations.

    Google Earth — Used to scout deeper river bends, trailheads, and potential drone shot locations.

    Oklahoma Fishing Regulations — I made sure to double-check daily bag limits, special rules for the Lower Mountain Fork, and barbless hook requirements.

    In areas like Beavers Bend, staying aware of regulations is crucial — not just for legal reasons, but to protect the fishery for everyone who comes after.

    The Road Ahead

    It’s about more than the catch.

    It’s about the drive through pine forests in the Ford Bronco, the moment a trout flashes in the current, the sound of a campfire crackling in the dark.

    It’s about slowing down, listening to the river, and letting the story write itself.

    I’ll be documenting the trip through both photography and short films, so stay tuned for updates from the water, behind-the-scenes captures, and a full video recap once I’m back.

    Broken Bow, here we come. Tight lines, clear skies, and wide-open roads.

  • Reflection

    Reflection

    An hourglass reminds me how fleeting time truly is. Each grain represents a moment passing — quiet, irreversible, and precious. It’s a simple but powerful symbol that urges me to slow down, live intentionally, and value the present before it slips away.

    Lately, I’ve been thinking a lot about time. How fast it moves. How quietly it slips by while we’re busy—distracted, scrolling, rushing, chasing the next thing.

    I’ve been missing people I can’t call anymore. Pets that used to greet me at the door. Moments I didn’t realize were “the last” until they were already gone. And I think we all carry that—those little pieces of love and loss, tucked somewhere behind our day-to-day thoughts.

    But out in nature—on a trail, rod in hand, camera slung over my shoulder—it gets quiet. Not just around me, but in me. The noise fades. The expectations, the stress, the screens… all of it disappears behind the sound of wind through trees or water over rock.

    And in those moments, I feel peace. I feel connected to everything I’ve lost, and even more thankful for what I still have.

    Like quiet mornings with my wife—just the two of us, sharing coffee before the world wakes up. No rush, no plans, just simple presence. Those little moments mean everything. They’re grounding. They’re real.

    It reminds me to be more intentional with my time—to show up fully for my family, to listen deeper, to appreciate the now. Because we only get so many mornings, so many trails, so many shared cups of coffee.

    So I hike. I fish. I breathe it all in. I hold on to what matters. Because one day, these moments will be the memories we reach for—and I want mine to be full of peace, love, and presence.

    -David

  • Mornings of Purpose

    Mornings of Purpose

    When do you feel most productive?

    Photos and story by David Poole

    There’s something powerful about the early morning hours — a calmness before the world stirs, a stillness that invites focus and clarity. Rising early gives me a quiet advantage, a head start on the day before distractions creep in. The first light peeking over the horizon feels like a personal invitation to begin again, fresh and full of potential.

    I savor those moments when the sunrise spills its colors across the sky, painting everything in soft golds and warm pinks. As the earth wakes up, the songs of birds break the silence, a gentle orchestra tuning up for the day. The air is cooler, the mind is clearer, and even the smallest rustle of leaves or distant calls of wildlife seem richer, more alive.

    In these early hours, I can focus on what matters most — setting goals, organizing my thoughts, or simply breathing in the moment. Without the rush of midday noise, each task feels more intentional. I write more fluidly, think more sharply, and appreciate the simple beauty that often gets lost once the day speeds up.

    By the time the rest of the world is bustling, I’m already in stride — grounded, grateful, and ready. Early mornings aren’t just about productivity; they are about connecting — with the day, with nature, and with myself.

  • Kayak Fishing for Redfish & Speckled Trout Tips & Tactics

    Kayak Fishing for Redfish & Speckled Trout Tips & Tactics

    Kayak fishing brings you closer to the water, offering an unmatched level of stealth and accessibility when targeting inshore species like redfish and speckled trout. Gliding through the marsh, feeling the rhythm of the tides, and watching a redfish tail in the shallows—these moments define why so many anglers choose kayaks for their fishing adventures. But success in a kayak isn’t just about casting in the right spot. Proper preparation, technique, and safety play just as big a role as choosing the right lure.

    In this guide, we’ll cover essential gear, fishing techniques, and key safety considerations to ensure your time on the water is both productive and enjoyable.

    Kayak Fishing: Why It’s Perfect for Redfish & Speckled Trout

    Fishing from a kayak allows you to reach areas boats can’t, where pressured fish find refuge in the shallows. These quieter waters are often rich with bait, making them prime feeding grounds. Redfish thrive in skinny water, pushing into grass flats to hunt for shrimp and crabs, while speckled trout hold near oyster beds, waiting to ambush baitfish. The kayak’s silent approach gives you a major advantage in these scenarios, allowing you to get close without spooking fish.

    But with the rewards of kayak fishing come unique challenges. Unlike fishing from a boat, you need to account for factors like stability, positioning, and the ever-changing coastal environment. That’s why having the right gear and knowledge is essential.

    Essential Kayak Gear for Saltwater Fishing

    The Right Kayak

    A stable sit-on-top fishing kayak is ideal for inshore waters. Look for a model with:

    Good Stability – Wider kayaks allow you to stand and sight fish.

    Adequate Storage – You’ll need space for tackle, rods, and safety gear.

    Pedal or Paddle Drive – Pedal kayaks keep your hands free, but a quality paddle is crucial.

    Must-Have Accessories

    Push Pole – A lightweight push pole is invaluable for silently maneuvering through shallow water without disturbing fish.

    Anchor System – A stake-out pole works best for shallow flats, while a small anchor or drag chain helps in deeper water or current.

    Rod Holders & Tackle Crate – Organizing your gear prevents clutter and makes for a smoother fishing experience.

    Dry Bag & Waterproof Case – Keep your phone, keys, and important items dry and secure.

    Safety Gear

    PFD (Personal Flotation Device) – Always wear a PFD, no exceptions. A fishing-specific PFD has extra pockets for storing essentials.

    Whistle & Light – Coast Guard regulations require a whistle and a light for low-light conditions.

    First-Aid Kit – Accidents happen. Be prepared for hooks, cuts, or stings.

    Bilge Pump or Sponge – For draining excess water from your kayak.

    Kayak Positioning & Anchoring Correctly

    Staying in the right position while fishing is crucial. The wind, tide, and current all play a role in where your kayak drifts, so knowing how to control your positioning keeps you on fish longer.

    Stake-Out Pole – For shallow waters, a stake-out pole allows you to quietly anchor without disturbing the bottom.

    Drift Anchors – A drift sock slows your kayak’s movement when fishing open flats or channels in windy conditions.

    Anchoring with a Rope System – If using a traditional anchor, attach it to an anchor trolley system to adjust your positioning without changing your cast direction.

    A key tip: Always place your anchor off the bow or stern to prevent your kayak from tipping sideways in strong currents.

    Weather Monitoring & Tidal Awareness

    The conditions on the water can change quickly, and being prepared can make the difference between a great trip and a dangerous situation.

    Check the Weather Forecast – Wind speeds over 15 mph make kayaking challenging. Storms can develop quickly, so always check the radar before heading out.

    Know the Tide Charts – Both redfish and speckled trout are heavily influenced by tides. An incoming tide often brings fish into shallow feeding zones, while an outgoing tide funnels bait into deeper water, creating ambush points.

    Watch for Lightning – If you hear thunder, it’s time to head in. Open water is one of the worst places to be during a storm.

    Finding Redfish & Speckled Trout from a Kayak

    Redfish Hotspots:

    Shallow Grass Flats & Marshes – Redfish love feeding on crabs and shrimp in the grass. Look for tailing fish or nervous bait.

    Tidal Drains & Creek Mouths – As the tide moves, redfish wait in deeper cuts for bait to be pulled into their strike zone.

    Shorelines with Structure – Wind-blown shorelines, oyster bars, and submerged grass beds all hold redfish.

    Speckled Trout Hotspots:

    Oyster Reefs & Drop-Offs – Trout use reefs as feeding grounds, especially near deeper water.

    Sand and Grass Pockets – Speckled trout roam these areas, ambushing baitfish.

    Current Edges & Channels – Trout hold near points where baitfish get swept past them.

    Best Lures for Kayak Fishing

    For Redfish:

    Paddle Tail Soft Plastics – JVS Custom Baits Rip Rap in Copper Penny and H&H/DOA Paddle Tails are great for covering water.

    Gold Spoon – A classic lure for redfish, especially in stained water.

    Topwater Lures – Early mornings or calm days call for walking baits like the Super Spook Jr.

    For Speckled Trout:

    Soft Plastics on a Jig Head – The JVS Speed Shrimp in White and Gold is a deadly choice.

    Topwater Lures – Trout are aggressive surface feeders, and the Heddon One Knocker Spook can trigger explosive strikes.

    Suspending Twitch Baits – The MirrOlure 52MR is excellent for cooler months when trout feed deeper.

    Kayak Fishing Strategies for Success

    Stealth & Approach

    Kayaks give you a natural advantage in stealth, but even the smallest noise can spook fish in shallow water.

    Paddle quietly – Use soft, controlled strokes or a push pole to move.

    Avoid sudden movements – Even shifting your weight too fast can send out unnatural ripples.

    Cast ahead of your target – Let the fish come to your lure instead of landing it right on their head.

    Using the Wind & Current to Your Advantage

    Drift fishing – Let the wind and current carry you naturally along a shoreline or over a reef while casting.

    Positioning – Set up so you’re casting with the wind for longer, more accurate presentations.

    Final Thoughts

    Kayak fishing for redfish and speckled trout is one of the most rewarding ways to experience inshore fishing. With the right preparation, awareness of conditions, and strategic approach, you’ll put more fish in the kayak while staying safe on the water.

    Stay Connected with Beyond the Cast

    Thanks for reading! If you enjoyed this post and want more fishing tips, trip reports, and on-the-water action, be sure to follow along.

    Subscribe to our YouTube channel for in-depth videos, gear breakdowns, and on-the-water adventures. Stay up to date by following us on Facebook, where we share fishing reports, trip updates, and connect with fellow anglers.

    Join the conversation, share your catches, and let’s keep exploring the water together.

    Tight lines, and see you Beyond the Cast!

    What’s your top kayak fishing tip? Drop a comment below!

  • “Beyond the Trail: Adventures in Fly Fishing, Photography, and the Backcountry”

    “Beyond the Trail: Adventures in Fly Fishing, Photography, and the Backcountry”

    What topics do you like to discuss?

    Exploring the backcountry through fly fishing, photography, hiking, and travel, I seek out remote rivers, hidden trails, and wild landscapes — capturing each adventure through the lens and the line. Whether chasing trout in alpine streams or hiking rugged terrain to untouched waters, every journey is a blend of exploration, creativity, and connection with nature.

  • Risk in the Backcountry

    Risk in the Backcountry

    When is the last time you took a risk? How did it work out?

    The last real risk I took wasn’t about money, career, or anything you could measure in numbers. It was a gamble on a hunch, a blue line on a topo map and a feeling that maybe—just maybe—that little remote stream tucked into the backcountry might be worth it.

    It wasn’t easy to get to. No real trail, just a vague path of game trails and overgrown brush, with a few miles of elevation gain thrown in for fun. I packed light, but still had my fly gear, camera, tripod, and just enough food and water to make it through a long day (and maybe a rough night, if needed). I didn’t know if the stream would even hold fish—or be accessible for good photos—but I was all in.

    What I found was better than expected.

    The stream wound through a quiet alpine meadow, untouched and crystal clear, bordered by wildflowers and soft light that made the whole place glow. Brook trout darted in and out of the current, and cutthroat rose to dry flies like they hadn’t seen a human in years—maybe they hadn’t. I got some of my favorite shots of the entire trip that day. Reflections, action shots, and one perfect capture of a brookie suspended mid-release, framed by golden hour light.

    That little risk—trusting the map, the instinct, and being willing to explore—paid off big. Not just in fish caught or photos taken, but in the feeling of discovering something wild and real. Those are the risks I live for.

  • The Lone Sailor – Honoring Service Through the Lens

    The Lone Sailor – Honoring Service Through the Lens

    Photos and story by David Poole

    While walking the National Mall during golden hour, I stopped to photograph one of the more quietly powerful tributes in D.C.—The Lone Sailor statue, located just outside the National Archives. This figure stands as a symbol of all who have served in the U.S. Navy, representing both honor and solitude. The contrast of bronze and stone against the soft, fading light created the perfect opportunity to slow down and reflect through photography.

    “The Lone Sailor may be a statue, but through the lens, he becomes a reminder of those quiet moments of waiting, traveling, and sacrifice.”

    Back view of the Lone Sailor statue gazing toward the National Archives building in Washington, D.C.

    The Lone Sailor statue stands in silent reflection, facing the National Archives building in Washington, D.C.—a powerful tribute to service, memory, and history

    Composition & Creative Approach

    The first image frames the statue from behind, gazing toward the National Archives building just as the city lights begin to glow against the deep blue sky. I composed it wide to balance the lone figure with the architectural symmetry and American flags above.

    The second shot tightens the frame for a portrait-style perspective. This highlights the sailor’s detailed expression and gear, with a shallow depth of field blurring the cityscape behind him. I wanted the viewer to feel like they had walked right up to the statue for a conversation.

    Front view of the Lone Sailor statue in Washington, D.C., with detailed expression and uniform, the National Archives building in the background

    A front portrait of the Lone Sailor statue in Washington, D.C., capturing the solemn expression and dignified stance as he faces the National Archives in quiet tribute

    Gear Used

    Camera: Canon R5

    Lens: Canon RF 50mm f/1.2L

    Tripod: K&F Concept Carbon Fiber Tripod

    Editing: Lightroom (iPad Pro)

    • Selective radial filters for depth

    • Texture slider to enhance bronze details

    • Minimal color grading to preserve realism

    Photography Tips

    Golden + Blue Hour: These times give you soft, directional light with rich contrast—perfect for monuments.

    Perspective: Lower angles create more presence and power in statues. Don’t shoot everything from eye level.

    Background Awareness: A wide aperture (like f/1.2–f/2.8) helps isolate the subject and reduce distracting background elements.

    Surface Reflections: Slightly wet pavement or stone can enhance contrast and mood. Look for patterns or shine in the ground.

    Historical Note

    The Lone Sailor is a life-size bronze statue created by artist Stanley Bleifeld and dedicated in 1987 by the United States Navy Memorial Foundation. It represents the personal experiences of every Navy service member—standing watch, ready to deploy, duffle bag at his side. Positioned in the heart of the nation’s capital, the statue serves as a powerful tribute to those who’ve served and sacrificed across all naval conflicts.

    Side view of the Lone Sailor statue in Norfolk, Virginia, showing the sailor’s profile and sea bag with the waterfront in the background

    A side view of the Lone Sailor statue in Norfolk, Virginia, captures the sailor’s steady gaze and weathered sea bag, symbolizing honor and readiness by the water’s edge

    Final Thoughts

    The Lone Sailor statue isn’t just bronze and detail—it’s memory cast in metal. It honors every sailor who ever stood on a pier and looked out over uncertain waters, carrying hope, fear, pride, and purpose. Capturing it through the lens reminded me why photography matters—it freezes emotion, preserves light, and offers space for reflection.

    Whether I’m out fly fishing in the Rockies or walking through a city with camera in hand, moments like these remind me that stillness can speak just as loudly as motion. This statue, set against the hustle of Washington, D.C., tells a quiet story of duty and distance—and invites each of us to pause and remember.

    “Some monuments don’t just honor history—they make you feel it.”

    Thanks for reading and stepping into this moment with me. More photo essays, fishing stories, and explorations coming soon. Until then, keep your eyes open and your shutter ready—because meaning lives in the details.

  • The Risk I Took With a Camera in My Hand

    The Risk I Took With a Camera in My Hand

    Describe a risk you took that you do not regret.

    Photography teaches you to see the world differently—but it also teaches you to act differently. And sometimes, that means lying down on hot pavement in the middle of a city, with people walking by wondering what on earth you’re doing.

    It’s funny how self-conscious I used to feel taking pictures in public, especially from low angles or unconventional spots. But I started realizing that some of my favorite images came from those very moments—when I tuned out the world and focused on framing, texture, and perspective.

    What I’ve learned is this: chasing a vision means risking how you’re seen. And that’s a risk worth taking every time.

    “I lay flat on the asphalt for this shot—people walked past giving me side glances, but I wanted the full texture of the ground to lead into the gothic architecture.”

    “Low perspective, wide lens, and waiting on the clouds to part. I felt a little ridiculous crouched this low, but the symmetry and texture were too good to pass up.”

    So next time you’re out with your camera—or doing anything that matters to you—take the risk. Get the angle. Follow your eye. And forget what anyone else might think. Because authenticity always outshines approval.

  • From Chaos to Calm

    From Chaos to Calm

    What makes you nervous?

    The pressure to always have it figured out. The unknown.

    “To find inner peace, you must learn to observe yourself. The more you know yourself, the less you let outside events control your emotions.”

    — Shi Heng Yi

    But I’ve found the antidote isn’t in overthinking or trying to force control—it’s in stepping away. Into nature. Behind the camera.

    When I’m out in the wild—on a trail, by a river, or waiting patiently with my lens focused—those feelings start to fall away. Photography forces me to slow down and observe. It’s not about rushing or overanalyzing. It’s about waiting for the light to hit just right or watching a bird’s quiet movement through the trees.

    Fly fishing adds to that stillness. Each cast requires intention, rhythm, and awareness. Out there, nerves get replaced by focus. The anxiety fades with the sound of moving water, replaced by the simplicity of the present moment.

    Nature reminds me that life isn’t always meant to be figured out in a single breath. And photography captures those reminders—frames of peace I can return to whenever the world feels like too much.

    In a world full of pressure and unpredictability, it’s the still moments with a camera or fly rod in hand that bring me back to myself.

    Field of flowers blooming in the spring
  • Finding Stillness: How I Unwind After a Demanding Day

    Finding Stillness: How I Unwind After a Demanding Day

    Daily writing prompt
    How do you unwind after a demanding day?

    After a long, demanding day, I find peace in the simplest moments—flipping through a good book, hiking a quiet trail, casting a fly into a still pool, or just watching the light shift through the trees. Whether it’s photography that helps me slow down and focus on the little details, or a walk through the woods to reset my perspective, nature is my go-to reset button. These moments remind me to breathe deeper, move slower, and live more intentionally.

    Comanche Point
  • Easter Reflection: A Quiet Holiday, Remembering Family, and Embracing Simpler Traditions

    Easter Reflection: A Quiet Holiday, Remembering Family, and Embracing Simpler Traditions

    By David Poole

    This Easter looked different for me. I spent the holiday working, far from home, and away from the usual Easter celebrations with family. It wasn’t the Easter of big gatherings, shared meals, and laughter—it was quieter, more reflective. Still, in that stillness, I found something meaningful.

    Working on Easter and Missing Family Traditions

    Spending Easter away from family gave me the space to think back to simpler times. I remembered childhood Easters—waking up to the smell of coffee and breakfast, searching for eggs in the yard, and spending the day surrounded by the people I love. Those memories are a reminder of what really matters during the holidays: connection, tradition, and time well spent.

    Remembering Loved Ones No Longer With Us

    As I reflected on past holidays, I thought of the family members who are no longer here. The holidays always bring their absence into sharper focus, but also their lasting influence. Their stories, warmth, and laughter still live in the traditions they helped create. Remembering them is part of keeping those memories alive.

    Spring Transition: A Natural Reminder of Renewal

    Even while working this Easter, I could feel the signs of the spring transition—green leaves emerging, wildflowers blooming, and longer daylight stretching across the day. Spring reminds us of change, renewal, and hope. It encourages us to pause and notice the beauty in the everyday.

    Continuing Family Traditions and Creating Meaningful Moments

    Being away from family made me think about the importance of keeping traditions alive—not only to honor the past but to create new memories for future generations. Whether it’s a simple meal, a walk outside, or telling stories from the past, these small moments become part of something much bigger.

    Living a Life Full of Meaning

    Holidays like Easter are a good reminder to slow down and live with intention. Even when we can’t be with family or celebrate the way we used to, we can still carry the meaning of those traditions in our hearts. It’s about creating a life full of meaning—one rooted in reflection, love, and simplicity.

    Easter can also be a time to reflect on personal growth, hope, and spiritual renewal

    Conclusion: Carrying Easter Forward in Simpler Ways

    Whether you’re working this Easter, spending it solo, or surrounded by family, take a moment to reflect. Think of the loved ones who shaped you, the traditions that bring comfort, and the fresh start that spring brings. We may not always celebrate the same way, but the heart of the holiday remains—connection, remembrance, and living a meaningful life.

    Wishing you all a season full of reflection, simplicity, and moments that truly matter.

    —David


    A long-haired desert rabbit rests quietly among the scrub brush, wildflowers, and cactus—perfectly camouflaged in the spring landscape of the Southwest
  • Bridges of Time: From the Ohio River to the East River

    Bridges of Time: From the Ohio River to the East River

    Bridges fascinate me. Not just as structures, but as symbols—of movement, ambition, and connection. On a recent photo journey, I captured three iconic bridges that span both distance and time: the John A. Roebling Suspension Bridge in Cincinnati, the Brooklyn Bridge, and the Manhattan Bridge in New York. Each tells a story—woven through cables and steel—of the people who dreamed them into being.

    1. John A. Roebling Suspension Bridge – Cincinnati, Ohio

    Black and white photo of the John A. Roebling Suspension Bridge in Cincinnati, Ohio, showcasing its historic structure and intricate cables

    A black and white image of the John A. Roebling Suspension Bridge in Cincinnati, Ohio, highlighting the timeless elegance and architectural detail of this iconic river crossing

    Stretching across the Ohio River, this was the prototype for the Brooklyn Bridge. Designed by John A. Roebling, it was completed in 1866 and, at the time, held the record for the longest suspension bridge in the world. Roebling’s engineering brilliance—using a combination of wrought iron cables and stone towers—set the stage for a new era of American infrastructure.

    “Before New York, there was Cincinnati—Roebling’s first vision suspended in blue over the Ohio.”

    Color image of the John A. Roebling Suspension Bridge in Cincinnati, Ohio, with blue steelwork and stone towers spanning the Ohio River

    The John A. Roebling Suspension Bridge in Cincinnati, Ohio, captured in full color—its blue steel and stone towers standing tall over the Ohio River, blending historic charm with bold engineering

    Standing beneath it with my Canon R5 and Sigma lens, I was drawn to its symmetry and quiet strength. The bridge’s powder-blue hue gives it a timeless, almost dreamlike presence against the river’s steady flow.

    2. Brooklyn Bridge – New York City

    Black and white photo of the Brooklyn Bridge in New York City, featuring its iconic suspension cables and towering stone arches

    A black and white view of the Brooklyn Bridge in New York City, showcasing its iconic arches and sweeping cables in timeless contrast and detail

    Roebling’s ultimate vision came to life years later in New York. The Brooklyn Bridge, completed in 1883, combined stone masonry with advanced steel cable suspension, linking Manhattan and Brooklyn in a feat many once believed impossible. Its story is one of perseverance: Roebling died during early construction, and his son Washington took over—only to become bedridden from caisson disease. Washington’s wife, Emily Roebling, stepped in as a key player, relaying instructions and overseeing much of the final work.

    “A bridge that began with tragedy became an enduring symbol of grit and grace.”

    Photographing it from beneath the Manhattan Bridge felt like witnessing the ghost of Roebling’s genius lingering between towers of stone and light.

    3. Manhattan Bridge – New York City

    Black and white photo of the Brooklyn Bridge and Manhattan Bridge in New York City, with detailed suspension cables and skyline in the background

    A black and white composition featuring both the Brooklyn Bridge and Manhattan Bridge, capturing the timeless elegance of New York City’s iconic river crossings

    Just upstream, the Manhattan Bridge—completed in 1909—stands as the younger, grittier sibling of the Brooklyn Bridge. Designed by Leon Moisseiff, it marked a turning point in engineering, featuring modern steel and a design built to withstand the demands of subway traffic. It may not have the fame of the Brooklyn Bridge, but its lines are bold, and its symmetry underappreciated.

    Monochrome image of the Manhattan Bridge with the New York City skyline in the background, showcasing architectural details and urban atmosphere

    A striking monochrome view of the Manhattan Bridge framed by the New York City skyline, highlighting the bold lines and timeless character of the urban landscape

    Shot with my Canon R5 and Sigma 14–24mm f/2.8, I worked from the shoreline to emphasize its sweeping structure and moody urban drama. The overcast sky added natural contrast, highlighting the steelwork and texture.

    “Three bridges, three rivers, one story—of legacy suspended in steel.”

    Gear Breakdown:

    Camera: Canon EOS R5

    Lens: Sigma 14–24mm f/2.8 DG DN Art

    Tripod: K&F Concept (used for longer exposures in lower light)

    Editing: Lightroom for iPad Pro (Selective contrast + dehaze for architectural texture)

    Photography Tip: Use leading lines and vanishing points to draw viewers through the frame—especially when shooting suspension bridges from ground level. Don’t be afraid to tilt upward to exaggerate scale.

    Final Thoughts

    Each of these bridges tells its own story—not just of engineering brilliance, but of human resilience, vision, and the pursuit of connection. From Roebling’s first suspension design in Ohio to his iconic achievement in Brooklyn, and finally to the steel giant of the Manhattan Bridge, these structures rise above the water as monuments to ingenuity and time.

    As a photographer, standing beneath them reminds me why I chase light and line through the lens. It’s not just about capturing a structure—it’s about capturing the soul of a place, the echo of footsteps across a span, the silent stories carved into steel and stone.

    “In a world always in motion, bridges remind us that great things stand still—and still stand.”

    Thanks for following along on this journey across rivers and time. I’ll be sharing more urban photography, historical explorations, and behind-the-scenes gear tips in upcoming posts—whether it’s under a steel truss or out in the wild. Until then, keep chasing light, chasing stories, and always take the long way across.

  • My social media

    My social media

    Daily writing prompt
    How do you use social media?

    I use my social media as a visual journal to share stories from the water and the trail—whether that’s chasing redfish on the flats, hiking into backcountry rivers with a fly rod, or capturing the way light hits a mountain ridge at golden hour. It’s a mix of saltwater fly fishing, photography, and outdoor storytelling. I try to give people a window into wild places through honest posts, helpful tips, and moments that matter

  • Chasing Light and Perspective: Finding the Shot Beyond the Obvious

    Chasing Light and Perspective: Finding the Shot Beyond the Obvious

    Photography in the outdoors isn’t just about clicking the shutter—it’s about reading the light, finding intentional angles, and understanding how timing transforms a scene. Whether I’m hiking through wildflowers, waiting quietly in a bird blind, or navigating city streets with a wide lens, I’m always chasing the moment that tells the story best.

    Timing the Wild: Bald Eagle at Golden Hour

    This bald eagle shot captures more than a bird—it captures focus, patience, and light. I waited for the golden hour to gently highlight the eagle’s feathers and profile, shooting through a natural frame of blurred branches to keep attention on the intensity of its gaze.

    Close-up of a bald eagle staring intensely with sharp yellow eyes, showcasing its powerful beak and detailed feathers against a blurred natural background

    Outdoor bird photography tip: Use natural framing and soft backlight for dramatic wildlife portraits.

    Gear: Canon R5 with canon 400mm L series lens. Edited in Lightroom for natural contrast and feather detail.

    Path to the Sun: Framing With Leading Lines

    This image of a wooden boardwalk leading toward the glowing sunset was all about golden hour beach photography and using strong leading lines. The reflection of sunlight on the wet boards gave the image texture and warmth, making it feel like you’re stepping straight into the light.

    Photography tip: Position yourself at a low angle to exaggerate reflections and symmetry, especially when shooting at sunrise or sunset.

    Gear: iPhone capture, edited in Lightroom Mobile to adjust warmth, contrast, and highlights.

    Low and Wild: Bluebonnets and Cabins

    Spring in Texas brings with it a flood of color—especially bluebonnets. This low-angle wildflower shot was taken by lying on the ground to let the flowers dominate the foreground. The rustic cabin in the background gives a sense of place and scale, inviting the viewer to imagine stepping into that clearing.

    Texas Hill Country cabin with bluebonnets in full bloom, low-angle photography capturing rustic charm and wildflowers in spring
    Texas Hill Country cabin with bluebonnets in full bloom, low-angle photography capturing rustic charm and wildflowers in spring

    Photography tip: Don’t be afraid to get dirty—some of the best shots come from the ground level.

    Fog and Structure: Lighthouse in the Mist 

    Fog can strip away distractions and emphasize mood. This shot of a lighthouse barely emerging through the coastal fog was taken early in the morning. The structure becomes a silhouette, and the lack of color enhances the sense of solitude.

    Foggy morning photo of the Hudson River Lighthouse, partially obscured by mist with calm water and a moody atmosphere

    Mist drapes the Hudson River Lighthouse in a soft veil of fog, capturing a quiet, ethereal moment on the water

    Photography tip: Switch to monochrome or embrace fog’s desaturation in post to focus attention on contrast and composition.

    Moments in Motion: Washington, D.C. Street Perspective

    In this street photo of two people walking through Washington, D.C., I focused on symmetry and timing. Lining up the trees and path allowed the subjects to become part of the environment rather than the center of attention—storytelling through subtlety.

    Capture the timeless elegance of two people walking along the National Mall in Washington, D.C. Their long shadows stretch across the sidewalk, framed in black and white, offering a classic perspective of the historic landmarks.

    In black and white, two figures walk the National Mall in Washington, D.C., their shadows stretching across the sidewalk as the fading light of evening adds a touch of nostalgia to the scene

    Gear: Canon 24–70mm lens.

    Urban Giants: Low Angle in Cincinnati

    Standing at the base of a towering building in Cincinnati, I wanted to emphasize the size and geometry of the architecture. Shooting from a low angle with a wide lens, I caught clean lines pulling skyward while the morning light cast soft shadows down the building’s face. The cloudy sky above added contrast to the structure’s strong verticals.

    Historic old stone building with weathered architecture and intricate details

    An old stone building, rich with history and character, stands as a testament to timeless craftsmanship and enduring architectural beauty

    Architecture photography tip: Use a wide-angle lens and crouch low to create a sense of scale and grandeur. Overcast skies can be great for soft, even light.

    Gear: Canon 16–35mm f/4L lens. Slight Lightroom correction for vertical distortion and contrast.

    Echoes of Time: Plantation Home Beneath a Century-Old Oak

    There’s something timeless about black and white photography—especially when the subject already carries a hundred years of history in its bones.

    This image features a historical plantation home framed beneath the sprawling arms of a live oak tree that’s likely been standing for over a century. Shot in monochrome, every crack in the bark and weathered board on the home tells its own story. The absence of color lets the textures do the talking—the gnarled branches, the sharp contrast between shadow and light, the sun casting a soft glow on the edge of the roofline.

    Plantation home stands behind a century-old oak tree, showcasing its historic architecture and sprawling branches

     historic plantation home stands behind a century-old oak tree, its majestic branches creating a serene backdrop for the timeless architecture

    What drew me to this shot wasn’t just the structure, but the relationship between the house and the tree. The oak doesn’t just stand in front of the house—it presides over it. Its limbs stretch wide like protective arms, yet its roots run just as deep into the same soil that built the home.

    Photography tip: When capturing historic architecture in black and white, shoot during late afternoon or early morning when shadows stretch longer. Let contrast tell the story—light becomes your narrator.

    Gear: Canon R5, 24–105mm L lens. Converted to monochrome in Lightroom, with emphasis on clarity and shadow depth.

    Final Thoughts: Walk Farther, Wait Longer

    Every photo tells a story, but it’s the search for that story—the walking, waiting, watching—that makes the capture worth it. Whether it’s chasing golden hour on a boardwalk in the Cozumel, crouching low to frame a Cincinnati building just right, or catching the fog wrap around a lighthouse like a secret, it’s all about finding the angle that speaks.

    Some moments, like the soft silhouette of two people walking a path in D.C., are subtle. Others—like the commanding presence of a black-and-white plantation home beneath a 100-year-old oak—are loud in their stillness. They remind us that time, light, and history are always working together in the frame.

    Behind the lens and out in the wild, whether I’m on the flats chasing redfish or tucked beneath a canopy of trees chasing light, my goal is always the same: tell a story worth pausing for. Through my blog, I share not just images, but the journey it took to get them—gear tips, camera setups, editing workflows, and the terrain beneath my boots.

    Keep exploring, keep shooting, and always chase the light.

  • The Utah Cutthroat Slam: A 7–9 Day Fly Fishing and Photography Road Trip

    This fall, I’m hitting the road for a 7–9 day fly fishing and camping adventure across Utah to complete the Utah Cutthroat Slam—an incredible opportunity to catch all four of Utah’s native cutthroat trout species. Along the way, I’ll be camping, backcountry hiking, and capturing the experience through landscape and wildlife photography.

    This isn’t just about landing fish—it’s about exploring Utah’s best fly fishing rivers and lakes, experiencing fall trout hatches, and immersing myself in the wild places where native trout still thrive.

    What is the Utah Cutthroat Slam?

    The Utah Cutthroat Slam is a unique conservation-focused fly fishing challenge organized by the Utah Division of Wildlife Resources (DWR) and Trout Unlimited. Anglers are challenged to catch and release each of Utah’s four native subspecies of cutthroat trout:

    Bonneville Cutthroat Trout


    Photos – Hayden Cook – Assistant Slam Director for Utah Trout Unlimited

    Bear River Cutthroat Trout


    Photos- Hayden Cook – Assistant Slam Director for Utah Trout Unlimited

    Colorado River Cutthroat Trout


    Photos – Hayden Cook – Assistant Slam Director for Utah Trout Unlimited

    Yellowstone Cutthroat Trout


    Photos – Hayden Cook – Assistant Slam Director for Utah Trout Unlimited

    How to register for the Utah Cutthroat Slam:

    • Go to: https://www.utahcutthroatslam.org

    • Pay a $20 fee

    • Catch and photo-document each species in its native range

    • Submit your catches online and receive a medallion and certificate

    This slam supports native trout restoration, stream conservation, and public access projects throughout Utah.

    Planning the Ultimate Fly Fishing Road Trip in Utah

    This journey through Utah’s high mountain lakes, clear-running creeks, and remote rivers is part fishing trip, part photography expedition. I built the route using:

    Topographic maps and stream overlays

    Trout Routes

    Google Earth

    Fly hatch charts by elevation

    Public land and fishing access maps (Trout Routes)

    Backcountry campsite locations

    I’ll be camping near rivers and lakes in a mix of developed campgrounds and dispersed sites on public lands. Each area was chosen for both trout habitat and scenic value.

    Fall Fly Fishing in Utah: Weather Planning & Elevation Strategy

    Timing: Late September through early October

    Elevations Fished: 4,000 to 10,500 feet

    Weather Ranges: 25°F–70°F depending on elevation

    Weather can turn quickly in the mountains, so I’ve preloaded NOAA zone forecasts, packed a four-season tentdown layers, and waterproof dry bags for gear and electronics.

    Essential Cold Weather Gear for Utah in Fall:

    • Merino base layers and thermal socks

    • Midweight fleece and insulated down jacket

    • Lightweight rain shell

    • Waterproof boots

    • Sleeping bag rated for 15°F or lower

    Backcountry Photography Gear List

    Capturing the beauty of Utah’s remote trout streams is a major part of the trip. I’ll be focusing on golden aspen stands, river reflections, early morning fog, and (hopefully) those buttery-yellow fins of native cutthroat.

    Photography Equipment:

    Camera: Canon R5 (full-frame mirrorless)

    Lenses: Canon L 70–200mm, Sigma 24–70mm Art, Canon 16–35mm

    Tripod: K&F Concept carbon tripod

    Editing: Lightroom Mobile on iPad Pro

    Accessories: Circular polarizer, extra batteries, weatherproof storage (K&F Concept Camera Backpack)

    Fly Fishing Gear Checklist

    I’m using lightweight, versatile gear that works for small creeks and open lakes:

    Rods & Reels:

    • 9’ 4wt fly rod for small streams

    • 9’ 5wt fly rod for alpine lakes and wind

    • Sage Spectrum C reels with floating line

    Line & Leaders:

    Seaguar Red Label fluorocarbon (4-8 lb for leader/tippet)

    • Tippet rings, floatant, strike indicators

    Top Flies for Fall in Utah:

    • Griffith’s Gnat, Parachute Adams, BWO

    • Ants, Beetles, Hoppers

    • Zebra Midges, Soft Hackles

    • Mini Leeches and Buggers for lakes

    Route Breakdown: Fishing Locations by Species

    A screenshot of Utah’s Cutthroat Slam map displaying the drainages of native cutthroat

    1. Bonneville Cutthroat – Weber River

    • Area: Above Echo Reservoir

    • Best Flies: Midges, Adams, caddis

    • Camping: Echo State Park

    2. Bear River Cutthroat – Oakley Region

    • Streams: Small headwater creeks

    • Flies: Hoppers, beetles, ants

    • Camping: Smith and Morehouse CG

    3. Colorado River Cutthroat – Boulder Mountain

    • Lakes: Dougherty Basin, Round Willow Bottom

    • West Fork Avintaquin Creek (from DWR WMA property boundary to headwaters)
    • Meadow Creek

    • Flies: Griffith’s Gnat, beetles, mini leeches

    • Camping: Singletree or dispersed

    4. Yellowstone Cutthroat – Idaho Border Streams

    • Streams: High elevation creeks

    • Flies: Attractors, BWO, soft hackles

    • Camping: Dispersed or Clear Creek area

    Safety & Backcountry Preparedness

    Navigation & Tools:

    • Gaia GPS with topo layers and access overlays

    • Compass and printed maps

    • Satellite beacon (Garmin inReach Mini)

    Emergency & First Aid:

    • First-aid kit

    • Water filtration (Sawyer Squeeze)

    • Bear-safe food storage

    • Spare batteries + power bank

    ( Anker SOLIX C300 Portable Power Station – 288Wh | 300W )

    Helpful Resources and Downloads

    Utah Cutthroat Slam Official Site

    Cutthroat Slam Information Packet (PDF)

    Utah Stream Access Map (DWR)

    Utah Hatch Charts by Elevation (Fly Shops/Trout Unlimited)

    NOAA Zone Forecasts

    Final Thoughts: Wild Trout, Wild Places

    The Utah Cutthroat Slam is more than a checklist—it’s a tribute to the rivers that still run wild, the fish that still swim free, and the people working to keep them that way. Whether you’re drawn by the challenge, the scenery, or the stories, this trip is one you’ll never forget.

    I’ll be documenting it all in a full photo essay and fly fishing trip report once I’m back—so stay tuned.

  • Mini Street Series: Light, Lines & Legacy

    Mini Street Series: Light, Lines & Legacy

    Street photography is about more than documenting buildings or city scenes—it’s about pausing in the hum of a city’s rhythm to frame character, history, and light in a single moment. This short series explores a few such moments from my walk through the streets and riverfront of downtown Cincinnati.

    1. Lyric Piano Company & Tri-State Jeweler Row

    Black and white photo of Lyric Piano Company and Tri-State Jewelers Row storefronts, showcasing historic architecture in downtown Cincinnati
    Black and white photo of Lyric Piano Company and Tri-State Jewelers Row storefronts, showcasing historic architecture in downtown Cincinnati

    Black and white always strips a scene down to form, texture, and contrast. In this image, I was drawn to the architectural details of these neighboring buildings. The Lyric Piano Co. facade, adorned with Roman columns and arched windows, tells of a once-vibrant musical past, now quietly echoing into modernity.

    Beside it, the Tri-State Jewelers storefront anchors the present with its bold signage—functional, utilitarian, and a little worn. Above, the sky breaks into soft clouds, adding an airy counterbalance to the hard geometry of the structures below. The car, the walker—passing stories in a place that feels paused.

    2. Roebling Bridge: Steel & Shadow

    Black and white image of the John A. Roebling Suspension Bridge in Cincinnati, highlighting steel cables and dramatic shadows with architectural contrast

    Black and white image of the John A. Roebling Suspension Bridge in Cincinnati, highlighting steel cables and dramatic shadows with architectural contrast

    The Roebling Suspension Bridge, a historical marvel that spans the Ohio River, offered a chance to capture scale and symmetry. Shot in monochrome to emphasize the structural lines and mood, I waited until the sun broke through behind the towers, casting deep shadows and light beams across the clouds.

    From this angle, the bridge rises like a gateway, connecting not just Kentucky and Ohio, but the past and present—steel cables and weathered stone holding decades of transit, trade, and change. You can almost feel the wind cutting across the river as trains roll in the distance.

    Color photograph of Cincinnati City Hall with pedestrians walking along the sidewalk, capturing urban life, architecture, and street-level details

    Street-level view of Cincinnati City Hall in full color, where historic architecture meets everyday city life on the sidewalk

    3. City Hall & Sidewalk Voices

    This final image returns to full color—a bold departure that matches the mood of the scene. The warm stonework of Cincinnati’s historic City Hall glows under the midday sun, flanked by deep blue skies and kinetic clouds.

    But the most powerful element is at your feet. The painted fists and vibrant mural on the pavement transform the street into a message. It’s protest, pride, and art—urban storytelling beneath gothic towers. This contrast between civic architecture and grassroots voice is what makes street photography come alive.

    Gear Used:

    Canon R5, Sigma Art lenses, edited in Lightroom on iPad Pro with contrast-focused black and white presets and radial masking for sky balance.

    Closing Thoughts — Legacy in Every Line

    Street photography isn’t just about documenting what we see—it’s about interpreting how we feel in the presence of place, shadow, and time.

    As I walked through downtown Cincinnati, camera in hand, I wasn’t chasing the perfect subject. I was following textures, contrasts, and the way light touched the city’s surfaces. Each image in this mini series captures a layered moment: the quiet power of a historic bridge, the voice of protest beneath gothic spires, the way old storefronts still speak in black and white.

    These streets hold more than movement—they hold memory.

    Legacy is written in brick, steel, glass, and sky.

    And with every frame, we get to preserve a small part of it.

    Thank you for joining me on this walk through Light, Lines & Legacy.

    Share your own images with the tag #LegacyInLines

    And above all—keep looking deeper. The stories are always there, waiting in the light.

  • Part 6: Full Circle — What the Backcountry Teaches Us

    Part 6: Full Circle — What the Backcountry Teaches Us

    There’s a rhythm that sets in when you spend days wandering rivers, casting dry flies, and capturing the land through your lens. After hiking into La Plata, following the Pine River Trail, rising early on the Animas, and whispering along the Dolores, something starts to shift—not just in the way you fish, but in how you move through the world.

    This final chapter isn’t about a specific cast or photo. It’s about what all of this meant once I came off the trail, rinsed the mud off my boots, and looked back at the miles behind me.

    From Maps to Moments

    When I first sat down to plan this trip, it was a checklist: routes to hike, rivers to fish, hatches to chase. I studied topo maps and overlays on Google Earth, watched weather systems roll in and out of the San Juans, and marked backup camp spots in case storms closed the trail.

    But once you’re out there, none of that matters as much as the small moments. Like the first rise in a quiet pool. Or the sound of elk bugling across a valley at dawn. Or finding the perfect shaft of morning light filtering through lodgepoles, with a river bend waiting beneath it.

    The Camera Changed Everything

    I brought my Canon R5 to document the trip, but photography became more than just documentation—it became a second way of fishing. I wasn’t just casting for trout anymore. I was casting for light. Waiting for angles. Watching how clouds moved across the sunlit ridges. Timing the shutter for a take or the ripple of a rise.

    Using Sigma and Canon L-series lenses, I played with depth and storytelling: wide shots to show scale, macro shots to capture tiny streamside blooms, long exposures for rivers flowing like silk. Editing in Lightroom on my iPad Pro, often while huddled in a tent during afternoon showers, gave me time to reflect while still on location.

    What the Rivers Taught Me

    Each river had something to say.

    La Plata taught me to slow down and observe.

    The Pine River showed me the power of patience and hiking deep.

    The Animas reminded me to cast boldly, to adapt, and to respect fast water.

    The Dolores whispered the importance of silence, solitude, and light.

    Fly fishing in these places wasn’t just about catching trout—it was about connectingwith wild places. And photography made me see them differently. Not just as terrain to cover or fish to find—but as stories, shapes, and shifting light worth remembering.

    The Final Campfire

    On the last night, I sat at a bluff above the Dolores, fire crackling, stars just beginning to show. I had one more trout on the line earlier that evening, and one more photo of the sky turning peach above the canyon wall. The tent was pitched, the boots were drying, and my gear—rod and camera alike—was dusty but intact.

    It hit me then: This trip was less about fish and more about presence. About choosing to walk farther, wait longer, and look more closely. About building a rhythm between motion and stillness, casts and clicks, silence and shutter.

    So What Comes Next?

    I’ll be back on the flats of the Texas Coast soon—casting from my kayak, camera tucked into my hatch. And later this year, another mountain trip to Maine where I’ll be fishing for brooks. Then up to Colorado and Utah. Maybe back to New Mexico. That’s the beauty of it: the stories never end. The rivers are always waiting.

    Final Reflections and Tips

    Planning is critical, but stay flexible—rivers don’t follow your itinerary.

    Photography adds depth to fishing; carry your camera, even if it slows you down.

    Capture everything, not just the fish—landscape, weather, details, movement.

    Don’t chase numbers. Chase the experience. The cast. The quiet. The light.

    Bring a journal or use your camera as one. Tell your story while you’re still in it.

    Thanks for following this journey.

    Whether you’re chasing trout in the Rockies or tailing reds on a coastal flat, I hope this series inspires you to slow down, look deeper, and carry both a rod and a lens. The wild places are out there—and they’re best explored with muddy boots, weathered gear, and eyes open to everything between the casts.

    Want to revisit the full series?

    Check out the landing page https://beyond-the-cast.com/wilderness-water-a-colorado-fly-fishing-and-photography-series/ where all six parts are organized and downloadable.

  • Part 5: Whisper Water — Solitude and Browns on the Dolores River

    Part 5: Whisper Water — Solitude and Browns on the Dolores River

    If the Animas River is a bold, rushing conversation, the Dolores River speaks in whispers. Tucked between the slopes and canyons of Southwest Colorado, this river winds through rugged terrain, shifting between dense forest, rocky cliffs, and sage-covered meadows. It’s a place of stillness, where every bend feels like it belongs to you—and the browns that live here feel like a gift you earn, not a prize you chase.

    The Approach: Getting to the River

    The upper Dolores is more remote than it looks on the map. Depending on where you go—above McPhee Reservoir or toward the West Fork—you’ll wind down forest service roads, sometimes dodging rockfall or puddles from last night’s rain. I pulled off just before sunrise at a bend that looked promising. No signs, no crowds, no footprints in the sand.

    I geared up quickly: 9’ 4wt rodSage Spectrum C reel, floating line with a long 5x leader. I grabbed my K&F Concept camera packCanon R5, and my Sigma 24–70mm lens to start, knowing the early light would be soft and perfect for river compositions.

    Quiet Water and the First Cast

    The Dolores at this stretch was gentle—glasslike pools framed by golden willows, with the occasional riffle tumbling over polished rocks. I rigged a single dry: a #16 tan Elk Hair Caddis, and started casting upstream into the seams. The fish here weren’t picky, but they were spooky. Long leaders and slow movements were the name of the game.

    The first brown came from under an overhang, perfectly camouflaged against the river bottom. I crouched low, played it gently, and then paused to shoot—kneeling at water level to capture its golden flanks against the mirror-like pool behind it.

    Photographing Solitude

    Photography here wasn’t about action—it was about silence. I slowed down and started looking for compositions that told a story: a pool framed by sunlit pine branches, reflections of clouds in still water, the gentle curve of the river disappearing into cottonwood shade.

    Using a circular polarizer, I cut glare from the surface and exposed the rocks and movement underneath. I stopped often to shoot macro shots—moss on river stones, fresh caddis cases on logs, wildflowers just beginning to bloom along the bank. The Canon R5 let me switch between stills and slow-motion video, capturing the way wind moved through the reeds like a painter’s brush.

    Fly Selection and Brown Trout Behavior

    As the sun climbed higher, the trout moved deeper. I switched to a dry-dropper setup: a #14 Stimulator on top with a #18 Zebra Midge below. The browns in the Dolores aren’t huge, but they’re aggressive and feisty, especially when your drift is clean and natural.

    I targeted small plunge pools below boulder-strewn riffles and deeper pockets shaded by cliff overhangs. Most takes were subtle—a twitch or a swirl rather than a splash. The largest of the day came from a tight seam below a fallen pine: a buttery brown with red spots vivid against olive flanks. I wet my hands, admired him in the net for a moment, then let him go.

    Weather Watching and Midday Reset

    As with most Colorado rivers, the Dolores plays by mountain rules—sunny one minute, storm clouds the next. By noon, dark clouds were building behind the ridges. I took the cue to rest, retreating to a patch of grass above the river, checking radar, and reviewing my shots on my iPad Pro. I backed up files, edited a few images in Lightroom using preset adjustments for contrast and warmth, and ate lunch while a soft rain moved through.

    Evening Glow and Last Light

    By late afternoon, the rain cleared, and the golden hour was beginning. I hiked upstream a little farther to a stretch with higher canyon walls and a series of gentle cascades. The light lit up the canyon like fire—red rocks glowing, the water catching flecks of sun, and the air thick with golden reflections.

    This was my favorite photography session of the trip—shooting handheld with my 70–200mm lens, I caught reflections of cottonwoods in the river, crisp landscapes framed with long shadows, and one last brown trout rising in the golden light.

    Why the Dolores Stays With You

    Some rivers give you a lot right away. The Dolores gives slowly. It rewards patience, attentiveness, and a photographer’s eye. You may not land a dozen fish, but each one feels earned. And the scenes—the ones you only find by walking, waiting, and watching—make it unforgettable.

    Fly Fishing Dolores River Essentials

    Best Flies: Elk Hair Caddis, Parachute Adams, Zebra Midges, Stimulators, Streamers in fast water

    Rod Setup: 4wt or 5wt rod, long leaders, floating line

    Photo Gear: Canon R5, Sigma 24–70mm, 70–200mm, polarizer, K&F tripod

    Tips: Stay low, fish slow, take your time to photograph the river between casts

    Safety Note: Watch afternoon storms; bring a small first-aid kit and map (no service in remote stretches) Insure you have downloaded all your offline maps

    The Dolores River isn’t about action—it’s about appreciation. It asks you to slow down, to watch the way light plays on water, and to cast not just for fish, but for the memory of that perfect, quiet moment in the canyon.

    Next Up: Part 6 — Full Circle: Reflections, Routines, and What the Backcountry Teaches Us

  • Part 4: Animas Mornings — Big Water and Bigger Scenes

    Part 4: Animas Mornings — Big Water and Bigger Scenes

    The Animas River is a different kind of challenge. It’s not a quiet alpine trickle or a glassy meadow stream—it’s loud, wide, and unapologetically wild. Flowing straight through Durango, Colorado, the Animas is part urban fishery, part wilderness artery. It forces you to think bigger—wider water, heavier flies, longer casts—but still rewards that same backcountry patience.

    This part of my trip was about rising early, walking the banks in the soft golden light, and chasing browns and rainbows with both rod and camera in hand.

    Sunrise in Durango

    I woke up before first light, the streets of Durango still quiet. With a thermos of hot coffee, my Sage Spectrum C reel rigged on a 9’ 5wt rod, and my Canon R5 slung over my shoulder, I made my way to the water’s edge just as the sky began to glow.

    The Animas River Trail makes access easy through town, but don’t let that fool you—there are real fish in this river, and they know how to fight. I found a spot just below a rocky chute, where the water slowed into a deep green run bordered by cottonwoods.

    Casting into the Current

    Big water requires smart setups. I tied on a #10 Pat’s Rubber Legs with a #14 Flashback Pheasant Tail dropper, running under an indicator with a bit of split shot to get it deep. These trout hold tight to seams and structure, often near the bottom.

    On my third drift, the indicator twitched. I set the hook and felt immediate weight—no acrobatics, just a steady pull. A few minutes later, I landed a thick rainbow, chrome-bright and peppered with tiny spots. I kept the fish in the net, let it rest, and grabbed a few quick shots with my 24–70mm lens and a shallow depth of field to blur out the river behind.

    Photography on Big Water

    The Animas is perfect for dramatic shots. With high banks, old iron bridges, and light that shifts quickly with the clouds, it’s a river made for wide angles. I switched to a 16–35mm lens, shot low from the riverbank, and captured the first sunlight hitting the canyon walls with the water reflecting every shade of blue and green.

    I experimented with ND filters for long exposures, letting the current blur while boulders and logs stayed sharp. These kinds of photos tell the story of movement—how the river breathes and shifts around each bend.

    Wildlife Along the Banks

    Between casts, I kept my eyes open for more than just trout. I spotted a flicker of movement near a rock outcrop—just a blur of fur and a flicking tail. I crouched low and reached for my camera. There, nestled in a patch of wildflowers, a chipmunk was nibbling on a seed head, completely unaware of me. I dialed in my Canon R5 with the 70–200mm lens, adjusted for soft natural light, and waited. The frame came together perfectly: golden grass swaying in the breeze, the chipmunk centered in a moment of stillness. A quiet, unexpected portrait of mountain life, full of charm and detail.
    With my 70–200mm lens, I captured tight shots from a distance—one of the benefits of shooting early before the trail sees much foot traffic.

    I also grabbed some frames of the little things—dewdrops on wild grassclose-ups of river stonescaddis cases clinging to rocks—the quiet details that add depth to both fishing and photography.

    Urban Meets Wild

    Fishing the Animas in Durango is a unique experience. You can hear the occasional train whistle or morning jogger on the trail, yet still feel completely locked in with the river. It’s a good reminder that wild places don’t have to be far from home—they just have to be approached with the right mindset.

    With a few solid fish landed and a full memory card, I took a break under the old railroad bridge, watching the light shift across the river. That’s the magic of a morning on the Animas—you show up early, stay patient, and let the day unfold at its own pace.

    Tips for Fly Fishing and Photography on the Animas River

    Best Time: Early mornings for light, fewer people, and active fish

    Top Flies: Pat’s Rubber Legs, Flashback Pheasant Tails, Jigged Hare’s Ear Nymphs

    Gear: 5wt or 6wt rod, Sage Spectrum C reel, floating line with split shot

    Photography Musts: Wide-angle lens, polarizer, tripod for longer exposures

    Location Notes: Durango River Trail access is great, but hike downstream or upstream early for quieter water

    Fly fishing the Animas taught me how to adapt—heavier flies, bolder casts, and a willingness to pause the fishing for a perfect photo. It reminded me that the story isn’t just about the catch—it’s about the experience, the light, the sounds, and the stillness between the casts.

    Next up: Part 5 — Whisper Water — Solitude and Browns on the Dolores River

  • Part 3: Chasing Trout and Light on the Pine River Trail

    Part 3: Chasing Trout and Light on the Pine River Trail

    Some rivers don’t give up their secrets easily. The Pine River, also known as Los Pinos, is one of them. Tucked deep in the Weminuche Wilderness of Southwest Colorado, it requires effort, patience, and a willingness to hike into solitude. But if you’re after wild trout in clear mountain water—and the kind of light that makes your photos glow—there are few places more rewarding.

    The Trailhead to Solitude

    The journey starts at the Pine River Trailhead near Vallecito Reservoir. It’s a dusty parking lot, a worn wooden sign, and a reminder that you’re on the edge of something vast—the largest wilderness area in Colorado.

    The trail runs along private land for the first few miles, so fishing and camping are off limits early on. But once you cross into the national forest boundary, the river opens up, wild and remote. The elevation gain is steady but forgiving, and the views just keep getting better. Towering peaks peek through pines, and wildflowers bloom along the trail like a postcard from July.

    With my Canon R5K&F Concept backpack, and 5wt rod, I hit the trail just after sunrise. The air was crisp, golden light filtered through the lodgepoles, and the river sparkled below.

    Early Light and River Mist

    I stopped just past the wilderness boundary where the river flattened into a lazy bend. The mist rose off the water like breath, and I dropped my pack to capture the moment. Using my 70–200mm lens, I focused on the layers—backlit pine branches, the soft swirl of fog, and the glint of sun hitting the waterline.

    For long exposures, I mounted my tripod, dialed in a low ISO, and let the shutter run. These are the kinds of images I live for—where the emotion of the place shines through the frame.

    Setting Up the Rig

    The Pine River demands versatility. I rigged up a dry-dropper setup: a #14 Parachute Adams up top and a #16 Hare’s Ear Nymph trailing below. These fish are educated and spooky, especially in slow pools. I used long, fine tippet and cast from behind boulders, keeping my shadow off the water.

    The first fish came from a seam near a fallen log—a small but healthy brown. I paused to photograph the catch, using my hand and net for scale, carefully positioning the fish with the sun behind me to avoid harsh glare. A few quick shots, then back in the water.

    Fishing and Shooting in Rhythm

    Backcountry fly fishing is about finding rhythm—between casts, between hikes, between light and shadow. I alternated between fishing pocket water and photographing the surroundings. A high ridge caught my eye, so I swapped out lenses and shot wide to capture the dramatic sweep of the river carving its way through the forested canyon.

    I kept my camera settings flexible, using aperture priority mode to adapt quickly between moving trout and landscape shots. My K&F Concept backpack made transitions easy, with side access panels for grabbing a lens mid-hike or stashing a fly box fast.

    Wild Trout and Wild Moments

    The further I hiked, the wilder the water became. Cutthroat started showing up—small, brilliantly colored, and lightning quick. I switched flies to a #12 Yellow Humpy with a CDC midge dropper, and it paid off. Several fish rose in tight, riffled corners that required tricky casts and precise drifts.

    I kneeled in cold, mossy shallows, capturing tight macro shots of wildflowers along the riverbanks—bluebells, Indian paintbrush, and buttercups reflected in the water’s surface. These images tell just as much of the story as the fish themselves.

    Storms and Staying Safe

    Mid-afternoon, the familiar rumble of thunder rolled through the canyon. I packed up fast, knowing that weather in the high country turns fast. The trail turned slick, and I was glad I had lightweight rain gear and a waterproof pack.

    Back at camp, I dried off and reviewed photos on my iPad Pro, backed up my files, and journaled the day. A deep sense of satisfaction settled in—the kind you only get after chasing trout and light deep into the wilderness.

    Pine River Highlights

    Best Flies: Parachute Adams, Hare’s Ear Nymphs, Yellow Humpies, CDC Midges

    Best Light: Early morning mist and late golden hour

    Photography Gear: Canon R5, 24–70mm lens, 70–200mm lens, K&F carbon tripod

    Fishing Tip: Approach low, cast upstream, and let your dry fly lead the way

    This stretch of the Pine River is what I chase—trout in untouched waters, scenes only your boots can reach, and photos you can’t take from the side of the road.

    Up Next: Part 4 – Animas Mornings: Big Water and Bigger Scenes

  • Shadows & Stone: New York and Virginia in Black and White

    Shadows & Stone: New York and Virginia in Black and White

    There’s something powerful about black and white photography—how it reduces the noise and highlights the soul of a scene. On a recent walk through New York and Virginia , I brought my camera and captured moments that felt timeless, quiet, and full of contrast.

    Brooklyn bridge New York 
Bridge

    • Brooklyn Bridge in Shadow: Steel cables, towering arches, and a sky fading to white. A frame that speaks of structure and history.

    • Reflections in a Puddle: A tall New York building reflected in rainwater. Urban symmetry at its most fleeting.

    • Statue of Neptune: Weathered bronze, lost in thought, surrounded by stone. The sea god looks at home in the chaos of the city.

    • Clocktower & Gravestone: A juxtaposition of time—one ticking on, the other long past. The cemetery, quiet beneath the gaze of an old city clock.

    Photography 
Building 
New York

    • Buildings in Contrast: Sharp angles and soft skies. Light breaking across brick, glass, and iron.

    Closing Paragraph:

    These black and white shots reminded me why I love wandering with a camera—because the smallest things become monumental in the right light. In a city that never slows down, this series let me freeze moments that often go unnoticed.

  • Part 2: Into the Pines — Hiking to the La Plata River with a Fly Rod and a Camera

    Part 2: Into the Pines — Hiking to the La Plata River with a Fly Rod and a Camera

    There’s something about hiking into trout water that changes the whole rhythm of a trip. You leave behind the road noise, the cell signal, the crowded pull-offs—and start tuning into the sound of the wind through lodgepoles and the hush of a river just over the next rise. That’s what drew me to the La Plata River, tucked into a quiet stretch of high country in Southwest Colorado. Part fishing trip, part photo expedition—this was a day I won’t forget.

    Starting the Hike: Pines, Shade, and Altitude

    The La Plata River trailhead isn’t flashy. It starts modestly with a dirt pull-off and quickly dips into shady pine groves. The trail follows the contour of the valley with occasional glimpses of the river down below. What makes this hike special isn’t just the destination, but the quiet, ever-changing terrain: groves of aspen, mossy boulders, and alpine meadows dotted with summer wildflowers.

    With my K&F Concept camera backpack strapped tight and a 4wt fly rod rigged up and ready to go, I eased into a slow pace, letting my eyes adjust to the light and scanning the trail for photo moments—a glint of water through the trees, a mule deer in the brush, shafts of light through pine needles.

    Wildflowers and Wildlife: Photography on the Move

    Early summer in this part of Colorado is a photographer’s dream. Bright orange Indian paintbrush, purple columbines, and patches of lupine lit up the trail edges. I switched to my 24–70mm lens, using a low angle to capture the pop of color against the green pines.

    Light is everything here. I used a circular polarizer to punch up the color and reduce glare when shooting near water. My Canon R5 handled the dynamic light shifts like a champ—especially when a young mule deer stepped out into a clearing, perfectly backlit, right as I crested a ridge.

    First Glimpse of the River

    About two miles in, I heard it before I saw it. The La Plata winds through tight canyons and then flattens into glassy, slow runs bordered by grassy banks. I dropped my pack, switched into my wading shoes, and tied on a #14 Yellow Stimulator with a Beadhead Pheasant Tail dropper.

    The water was crystal clear—trout country through and through.

    Stealth and Strategy: Small Water Fly Fishing

    Fishing the La Plata is a finesse game. These are wild fish, likely never hooked, and they spook at shadows. I crouched low, casting upstream into shady runs and behind midstream boulders. Several small browns darted for the fly but refused last second. On a good drift, the dropper disappeared and I brought in my first fish of the trip—a buttery brown trout with fire-orange spots. I paused for a quick photo with the fish hovering just above the net, backlit by the sun.

    I love these moments—the stillness, the soft light, the ripple of success after a quiet approach. The fish here aren’t big, but they’re beautiful and strong.

    The Midday Light Shift

    By midday, the lighting got harsh—tougher for photos, but perfect for exploring. I shot reflections along a wide bend of the river, switching to a 70–200mm lens to compress layers of pine ridges and storm clouds moving in.

    Back at a mossy boulder overlooking a slow pool, I set up my tripod for a long exposure of the water sliding through rocks. These are the frames I love—where fly fishing meets fine art photography.

    Safety First in the Backcountry

    Clouds started to build, as they often do in Colorado’s high country. I kept my eye on the sky, wrapping up fishing and heading back toward the trailhead before the afternoon storms rolled in. That’s one lesson I’ve learned: no fish is worth getting caught in a lightning storm above 9,000 feet.

    On the hike out, I paused one last time to shoot the fading light over the valley, grateful for a day that felt more like a retreat than a mission.

    Tips for Fishing & Photographing the La Plata River

    Start early: For soft light and calm water, hit the trail before sunrise.

    Use a dry-dropper rig: Small dries like Stimulators or Elk Hair Caddis paired with beadhead nymphs are deadly.

    Pack light, but smart: The K&F backpack let me carry camera gear, fly gear, food, and a rain shell without overload.

    Bring a polarizer: It transforms mid-day shots and makes colors pop.

    Shoot with purpose: Capture the fish, but also the landscape, light, and journey—it tells the full story.

    This hike into the La Plata River reminded me why I chase these moments—where the line between fishing and photography disappears. The sound of moving water, a trout rising to a dry, and the snap of the shutter are all part of the same rhythm.

    Up Next: Part 3 — Chasing Trout and Light on the Pine River Trail

  • Comanche Point – Valle Vidal, New Mexico (Scenic Viewpoint, Hiking, Wildlife, Photography)

    Comanche Point – Valle Vidal, New Mexico (Scenic Viewpoint, Hiking, Wildlife, Photography)

    Comanche point in New Mexico 
Mountains
    Comanche Point

    Nestled in the heart of Valle Vidal, New MexicoComanche Point offers one of the most dramatic and scenic viewpoints in the state. Surrounded by vast alpine meadows, aspen forests, and rugged ridgelines, it’s a top destination for hikingwildlife viewing, and landscape photography in northern New Mexico.

    This remote area—part of the Carson National Forest—is known for its solitude and abundance of elk, black bears, and wild turkeys. The views from Comanche Point stretch across the Sangre de Cristo Mountains, making it a must-see stop for outdoor enthusiasts and road trippers exploring Valle Vidal.

    Perfect for a day hike or scenic stop on a backcountry adventure, Comanche Point captures the raw beauty and history of the New Mexico high country.

  • Part 1: Waders, Lenses, and Maps — Planning a Colorado Fly Fishing Photography Trip

    Part 1: Waders, Lenses, and Maps — Planning a Colorado Fly Fishing Photography Trip

    Planning a backcountry fly fishing and photography trip is a lot like tying the perfect fly—you’ve got to think ahead, match conditions, and be ready to adapt. In this first part of my Colorado series, I want to share how I planned my multi-river adventure into the high country, blending two of my favorite things: fly fishing for wild trout and capturing the wild beauty of the mountains through a camera lens.

    This trip took me deep into Southwest Colorado, targeting remote stretches of the La Plata RiverPine RiverDoloresAnimas, and Florida River. Each river offered its own challenges, scenic backdrops, and trout behaviors—making the planning stage even more important.

    Mapping the Adventure

    I started with tools like Google EarthGaia GPS, and the TroutRoutes app to scout access points, trailheads, and water that looked fishy from above. Topo maps helped me estimate mileage and elevation gain for hikes, and I cross-checked each section with known public lands or wilderness boundaries.

    The Pine River Trail and the La Plata River hikes stood out for their mix of beauty, remoteness, and good trout habitat. I marked down potential campsites along the trail and noted river crossings or sections that might become hazardous with runoff.

    Timing the Trip

    Late summer (late July through early September) is prime time for Colorado backcountry fly fishing. Snowmelt has usually slowed, making rivers more accessible, while hatches are still consistent. Wildflowers peak during this window, and the weather (though unpredictable) is often stable enough for longer treks.

    I kept a close eye on weather reports, snowpack data, and monsoon activity, especially since lightning and flash floods are real dangers in the high country. I packed accordingly—with quick-dry layers, a solid rain jacket, and a waterproof K&F Concept camera backpack to keep my gear safe.

    Fly Fishing Gear Considerations

    Fishing gear
Waders
Rod and reel

    I packed a 9’ 5wt rod for open water and a 7.5’ 4wt for tighter streams. I went with my trusty Sage Spectrum C reel and a variety of floating lines, knowing I’d fish mostly dries and light droppers. My fly box included a carefully curated selection:

    Parachute Adams (#14–18)

    Elk Hair Caddis (#14)

    Yellow Stimulators (#12–14)

    Beadhead Pheasant Tails (#16)

    CDC Midges (#20)

    Black Woolly Buggers (#8)

    Hoppers and flying ants (for summer action)

    This wasn’t just a fishing trip—I had to think like a backpacker and a photographer, which made my packing even more dialed in.

    Photography Planning

    When it comes to fly fishing photography, weight and protection are huge. I brought my Canon R5, a 24–70mm f/2.8 lens for landscapes and action, and a 70–200mm f/2.8 for compression shots and wildlife. My K&F Concept carbon tripod gave me a lightweight but stable base for long exposures and evening light.

    I also packed:

    • Circular polarizer to reduce water glare

    • ND filter for waterfalls and river movement

    • Lens cloths, extra batteries, and SD cards

    • Lightroom Mobile on my iPad Pro for quick edits in camp

    When planning photography in the backcountry, it helps to scout shot locations beforehand using satellite images or even previous trip photos. I created a loose shot list: mist rising over pools, trout in hand with glowing light, macro shots of wildflowers, and long exposures of rivers at sunset.

    Safety & Self-Sufficiency

    One of the most critical parts of a backcountry fishing trip is safety. I carried a Garmin inReach Mini for emergencies and communication, plus a first-aid kit, headlamp, multitool, and bear spray (just in case). I let family know my plan, printed a trail map, and downloaded offline GPS maps.

    Keeping camera gear dry was also a safety issue—because nothing ruins a trip faster than soaking your camera in a surprise storm or river dunk. The K&F camera backpack’s waterproof bottom and removable insert gave me peace of mind, even while wading or crossing creeks.

    Building Flexibility Into the Plan

    No matter how dialed in your route is, backcountry travel in Colorado demands flexibility. Storms can shut down trails. Rivers can blow out overnight. You can get to a perfect pool and find it unfishable due to runoff or debris.

    So I planned several alternate camps and marked backup spots with easier access. I also packed extra food in case a day ran long, and my fly box had both attractors and match-the-hatch options.

    Final Thoughts Before Hitting the Trail

    Planning is half the fun of a trip like this—imagining where the fish might be, where the light will hit the canyon walls, and how to tell the story when it’s all over. I hope this series helps inspire your own adventures, and if you’re dreaming about chasing wild trout in wild places, stay tuned. Part 2 takes us into the forest along the La Plata River, where the trail narrows, the river gets clear, and every cast counts.

    Up Next: Part 2 – Into the Pines: Hiking to the La Plata River with a Fly Rod and a Camera

  • Planning My Fishing Trips: From Texas Marshes to Colorado’s Wild Trout Streams

    Planning My Fishing Trips: From Texas Marshes to Colorado’s Wild Trout Streams

    Every fishing trip I take starts with a map, a cup of coffee, and a little imagination. Whether I’m launching my kayak into the quiet marshes of Galveston Bay or loading up my fly rod for a week chasing trout in the mountains of southwest Colorado, I treat every trip like its own adventure.

    Over time, I’ve built a system that helps me find the right water, prepare for changing conditions, and capture moments along the way through fishing photography. It’s a mix of digital scouting, tide and river flow research, fly fishing strategy, and a lot of intuition.

    Here’s how I plan my trips—from coastal redfish missions to high-country fly fishing—along with the tools, tactics, and gear that help me get the most out of every cast.

    Step One: Finding the Right Water

    When I’m planning a coastal trip around Galveston, I start with Google Earth fishing maps. I zoom in on marsh drains, shell reefs, and grass flats, marking potential ambush points where redfish and speckled trout might be waiting for bait to push through with the tide.

    For trout fishing trips, I turn to the TroutRoutes app, especially when heading into places like the Dolores River, Pine River, Animas River, or Florida River in Colorado. TroutRoutes shows me public access points, fly fishing regulations, and real-time stream flows—all in one spot. It’s hands-down one of my favorite apps for planning fly fishing trips in Colorado.

    Screenshot trout fishing map of Dolores River using TroutRoutes
    Screenshot trout fishing map of Dolores River using Google Earth

    I also pull up local fly shop reports and check in with forums and social groups. A few minutes of reading recent trip reports can save me hours on the water later.

    Timing is Everything: Tides, River Flows & Weather

    Fishing success is all about timing and conditions.

    On the coast, I build my trips around tide charts, solunar tables, and wind forecasts. I want to be on the water as the tide’s moving—either pulling bait into the marsh or draining it out through cuts and creeks. That moving water gets everything active, especially when paired with stable pressure and clean water.

    For my Colorado trips, I pay close attention to USGS stream gauges. If flows are too high from runoff or summer storms, I might switch to a smaller tributary or hit a tailwater like the lower Dolores. Watching water temperature is equally important—trout get lethargic in warmer water, especially in late summer.

    “Success often comes down to 15 minutes of movement—when the tide shifts or the hatch explodes.”

    My Fishing Strategies: Flats to Freestones

    Inshore Fishing: Texas Marsh Tactics

    When I’m chasing redfish on the flats, I’m looking for signs of life—nervous bait, shrimp jumping, birds diving, or the golden back of a redfish pushing through grass. I love fishing with paddle tails, especially the JVS Custom Baits Rip Rap in Copper Penny or a 3.5” Speed Shrimp when fish are keyed in on crustaceans.

    If I’m fly fishing in the marsh, I keep it simple: crab and shrimp patterns, long leaders, and a quiet approach. Sight casting to tailing reds never gets old.

    Mountain Fly Fishing: Reading Water & Matching the Hatch

    In Colorado, fishing rivers like the Pine or Animas means constantly adjusting to what the water gives me. One bend might call for dry flies in pocket water, the next might demand nymphs under an indicator in a deep, slow pool.

    When the hatch is on—especially during a caddis or stonefly emergence—I’m in heaven. There’s something about watching a trout rise in fast water, especially when I’ve hiked in for miles with just a small pack and a fly box in my pocket.

    Safety First: Especially in the Backcountry

    Whether I’m kayaking a remote bay system or hiking into the upper Florida River, I take safety seriously.

    • I carry offline maps and GPS, especially when I’m deep in the mountains or out of cell range in a bay system.

    • I use a Personal Locator Beacon (PLB) for emergencies—peace of mind goes a long way.

    • In mountain country, I pack layers for changing weather, a water filter, and bear spray when needed.

    Knowing how to read the weather—and knowing when to pull the plug—has saved me more than once.

    Capturing the Experience: Fishing Photography in the Field

    Fishing is about more than just catching fish. For me, it’s also about the quiet moments between casts—the mist rising off a river at dawn, a redfish tail breaking the surface, or a trout slipping back into cold, clear water.

    That’s where photography comes in. I bring my Canon R5, along with a few key lenses: a Canon L-series for landscape shots, and a Sigma for tighter portraits of fish and wildlife.

    I use:

    • A K&F Concept tripod for stability when shooting long exposures

    Polarizing filters to cut glare and bring out the detail in water shots

    • A dry bag and padded camera insert to protect my gear in the kayak or backpack

    Some of my favorite moments are captured during the golden hour—sunset glowing off a canyon wall in the Animas, or first light over the saltgrass back home in Galveston.

    Final Thoughts: Why I Plan Fishing Trips This Way

    I fish for the thrill of the catch—but also for the quiet, the challenge, and the story. The time I spend planning my trips—researching tides, scouting rivers, organizing gear—is all part of the journey.

    Fishing the Dolores River one day and stalking redfish on the Texas coast the next keeps me connected to the water in totally different ways. Both require patience, curiosity, and a little humility.

    If you’re planning your own trip—whether it’s chasing tailing redfish or hiking into a hidden trout stream—take your time. Look at maps. Check the flows. Watch the weather. Bring a camera. And most importantly, enjoy the ride.

    Tight lines and clear skies—see you out there.

  • Following the Wings: Birding and Migration in Galveston’s Coastal Flats

    Following the Wings: Birding and Migration in Galveston’s Coastal Flats

    Long-billed Dowitcher

    Galveston’s coastal marshes, beaches, and tidal flats serve as critical stopover points for migratory birds along the Central Flyway. For bird photographers, this region offers a dynamic blend of year-round residents and seasonal migrants, each presenting unique opportunities to capture stunning images.

    Spending time on the water fishing, hiking through coastal trails, or wading the back bays gives me a front-row seat to this natural phenomenon. In this blog, I’ll explore the best locations for birdwatching in Galveston, break down the camera gear and settings that work best for bird photography, share editing tips, and discuss how angles and composition can elevate your shots.

    Best Locations for Bird Photography in Galveston

    Finding the right location is key to capturing great bird photographs. Galveston and the surrounding areas provide a variety of habitats, from salt marshes to coastal woodlands, attracting different species. Here are some of the best spots:

    1. Bolivar Flats Shorebird Sanctuary

    Great Egret

    • One of the best spots for photographing shorebirds, pelicans, and wading birds.

    • Low tide reveals expansive sandbars and mudflats, which attract feeding birds.

    • Ideal for capturing birds in flight, reflections on wet sand, and birds interacting in flocks.

    • Best time: Early morning and late afternoon for softer light and active bird behavior.

    2. Galveston Island State Park

    White Ibis in Galveston State Park

    • A mix of beachfront, salt marshes, and coastal prairie draws a diverse range of species.

    • Great location for spotting roseate spoonbills, ospreys, and herons.

    • The marsh boardwalk offers close-up views without disturbing birds.

    • Best time: Sunrise and sunset for golden light and fewer crowds.

    3. San Luis Pass

    • Excellent for capturing birds in action, such as pelicans diving or ospreys hunting.

    Osprey with a freshly caught fish

    • Strong currents and sandbars make this a hotspot for terns, gulls, and waders.

    • The dramatic landscape adds depth to compositions.

    • Best time: Morning, when birds are actively foraging.

    4. Lafitte’s Cove Nature Preserve

    • A wooded sanctuary perfect for warblers, buntings, and other migratory songbirds.

    • A great place to practice close-up photography with perched birds.

    • Best time: Spring and fall migration, when small songbirds stop to rest after crossing the Gulf.

    5. Freeport Marshes & Christmas Bay

    • These shallow waters attract egrets, herons, spoonbills, and ibis.

    • Best explored by kayak to get low-angle shots and access hard-to-reach spots.

    • Best time: Mid-morning when the sun is high enough to illuminate the birds.

    Spoonbill

    Camera Equipment for Bird Photography

    1. Camera Body Recommendations

    Bird photography requires fast autofocus, high resolution, and good low-light performance. My go-to camera is the Canon R5, which offers:

    • 45MP resolution for capturing fine feather details.

    • Animal Eye Autofocus to track birds in motion.

    • Fast burst shooting (up to 20 FPS) for action shots.

    Other great options include the Sony A1, Nikon Z9, or Canon R7 (for a budget-friendly APS-C choice).

    2. Best Lenses for Bird Photography

    A telephoto lens is essential for getting close to birds without disturbing them. My favorites:

    • Canon RF 100-500mm f/4.5-7.1 L IS USM – Versatile for both perched and flying birds.

    • Sigma 150-600mm f/5-6.3 DG OS HSM – Budget-friendly but sharp.

    • Canon RF 600mm f/11 IS STM – Lightweight for handheld shooting.

    A 1.4x or 2x teleconverter can extend reach but may reduce autofocus speed.

    3. Ideal Camera Settings

    • Shutter speed: 1/1000s or faster to freeze motion.

    • Aperture: f/5.6–f/8 for sharpness and depth of field.

    • ISO: 100–800 in good light, 1600+ in low light (with noise reduction in post).

    • Focus mode: Continuous autofocus (AI Servo/AF-C) for moving birds.

    Angles & Composition for Better Bird Photography

    1. Eye-Level Shots

    • Birds appear more engaging and natural when photographed at their eye level.

    • How to do it: Shoot from a low position—kneel, lie down, or use a kayak.

    • Example: A close-up of a sandpiper walking through shallow water, with a blurred background.

    2. Backlit Silhouettes

    • Creates dramatic, artistic images, especially at sunrise or sunset.

    • How to do it: Position the bird between you and the sun for a glowing outline.

    • Example: A heron standing in the marsh at dawn, surrounded by golden light.

    Tricolored Heron in West Bay Galveston

    3. Action Shots

    • Captures birds hunting, taking off, or interacting.

    • How to do it: Use fast burst mode and pre-focus on the area where the action is likely to happen.

    • Example: An osprey diving for fish with wings fully extended.

    4. Reflections & Water Scenes

    • Water can add a symmetrical, serene effect to photos.

    • How to do it: Shoot when the water is calm and position the bird where the reflection is clearest.

    • Example: A pelican gliding over glassy water with a perfect mirror image below.

    Pelican

    Editing Techniques in Lightroom & Photoshop

    1. Adjusting Exposure & Contrast

    • Increase contrast to define feathers.

    • Adjust highlights and shadows to recover details.

    2. Enhancing Colors Naturally

    • Use the HSL panel to fine-tune individual colors without oversaturation.

    • Warm up images slightly for morning/evening shots.

    3. Noise Reduction for High ISO Shots

    • Use Lightroom’s Noise Reduction slider to smooth out grainy images.

    • Apply selectively—too much can remove fine details.

    4. Cropping for Composition

    • Use the rule of thirds to position the bird in a natural frame.

    • Leave space in front of the bird for a sense of movement.

    Conclusion

    Bird photography in Galveston offers a perfect blend of challenge and reward. Whether you’re tracking a flock of migrating shorebirds, watching a spoonbill feed in the marsh, or capturing an osprey mid-dive, each moment tells a unique story.

    By knowing the best locations, using the right camera gear, mastering angles, and refining editing techniques, you can create images that truly showcase the beauty of the birds along the Central Flyway.

    What’s your favorite birding spot in Galveston? Let me know in the comments!

  • Kayak Fishing Dickinson Bayou

    Kayak Fishing Dickinson Bayou

    Dickinson Bayou is an underrated gem for Texas anglers, offering a rare mix of inshore and freshwater fishing opportunities. This winding waterway, stretching between Houston and Galveston, features both brackish and freshwater environments, making it one of the few places where you can catch redfish, speckled trout, flounder, and largemouth bass—all in the same trip. With easy kayak access, plenty of structure, and year-round fishing opportunities, it’s a must-visit for anglers looking to mix things up.

    Sunrise on Dickinson Bayou

    In this Beyond the Cast blog, we’ll break down the best launch points, seasonal patterns, and proven techniques for targeting both inshore and freshwater species in Dickinson Bayou.

    Why Kayak Fish Dickinson Bayou?

    Unlike open water areas like West Bay or Christmas Bay, Dickinson Bayou offers a controlled, protected environment with minimal wind and boat traffic, making it ideal for kayak anglers. The bayou features oyster beds, submerged structure, and marsh drains that hold inshore predators, while its upper sections provide excellent largemouth bass fishing around laydowns and submerged timber.

    The brackish water mix creates a unique opportunity where you can catch bass and redfish in the same stretch of water, depending on the salinity levels.

    Best Kayak Launch Points

    1. Paul Hopkins Park – A great starting point for bass fishing in the upper bayou. This area has more freshwater influence, submerged timber, and slower-moving water where largemouth bass thrive.

    2. Ray Holbrook Park – Provides access to both freshwater and brackish areas, making it a great spot to target multiple species in one trip.

    3. Dickinson Bayou Boat Ramp (Highway 146) – A prime launch for inshore species like speckled trout, redfish, and flounder, as the bayou transitions to saltier water.

    Target Species and Seasonal Patterns

    Inshore Species (Redfish, Trout, Flounder)

    Redfish
    Speckled Trout
    Flounder

    Redfish: Present year-round, redfish move between the shallow marsh edges and deeper bends of the bayou. Look for them near oyster beds or ambushing bait near structure.

    Speckled Trout: More common in the lower bayou where salinity is higher. They hold in deeper holes during winter and move toward bait schools in summer.

    Flounder: A spring and fall favorite, flounder stack up near drains and along drop-offs.

    Largemouth Bass

    Spring & Summer: Bass are highly active, staging near submerged trees, grass lines, and deeper pockets along the bank. Topwater frogs and spinnerbaits shine in the warmer months.

    Fall & Winter: Bass move deeper into holes and near structure, where slow-moving soft plastics and crankbaits are the go-to options.

    Best Lures for Dickinson Bayou

    Inshore Lures:

    H&H Paddle Tails and DOA Paddle Tails – Excellent for covering water, especially rigged on a light jighead and bounced off the bottom.

    JVS Custom Baits 3.2 Rip Rap in Cinnamon Gold – This lure mimics baitfish well in the stained waters of the bayou.

    JVS Speed Shrimp in White and Gold – Great for targeting speckled trout and redfish near deeper channels.

    Gulp! Shrimp or Mud Minnow on a Jighead – Deadly for flounder, especially near marsh drains.

    Largemouth Bass Lures:

    Bass caught on Dickinson Bayou

    H&H Paddle Tails (White or Chartreuse) – A great crossover lure for bass in brackish water, these work well on a light jighead or weighted swimbait hook. Slow-roll them near laydowns and grass lines for reaction bites.

    Texas-Rigged Soft Plastics (Creature Baits, Worms, Flukes) – Perfect for working submerged timber and drop-offs.

    Spinnerbaits (White or Chartreuse) – A great way to trigger reaction bites around structure.

    Frogs & Topwater Lures – In the summer, bass explode on frogs in the backwaters and grassy edges.

    Crankbaits & Jerkbaits – Ideal for cooler months when bass are holding deeper.

    Fishing Strategy and Tidal Influence

    Like most Texas waters, understanding tides plays a crucial role in Dickinson Bayou fishing.

    Outgoing Tide: Fish stage near marsh drains, creek mouths, and bends where baitfish get pulled out.

    Incoming Tide: Redfish push shallow to feed, while bass tend to stay near structure unaffected by tides.

    Slack Tide: Slower fishing for inshore species, but bass can still be caught by working deeper structure.

    Final Thoughts

    Dickinson Bayou is a fantastic spot for kayak anglers looking to mix inshore and freshwater fishing in one trip. Whether you’re tossing a paddle tail for speckled trout or slow-rolling an H&H Paddle Tail for largemouth bass along a submerged tree, this bayou offers a little bit of everything.

    Stay tuned to Beyond the Cast for more in-depth breakdowns of Texas inshore and freshwater fishing, and be sure to check out our YouTube channel for on-the-water footage of kayak fishing in Dickinson Bayou!

    Tight lines!

  • Kayak Fishing Safety Tips Every Angler Should Know

    Kayak fishing is an incredible way to explore the water and catch fish in remote areas, but it also comes with risks. Whether you’re navigating Texas inshore waters, marshes, or open bays, safety should always be a top priority. Here are essential kayak fishing safety tips every angler should follow.

       Always Wear a PFD (Personal Flotation Device)

    USCG-approved PFD is the most important piece of safety gear you can wear. Even the strongest swimmers can get into trouble in strong currents, cold water, or unexpected weather conditions.

    • Choose a comfortable fishing-specific PFD with pockets for tools.

    • Ensure a proper fit—it should be snug but allow full movement.

    • Always wear it—don’t just keep it on the kayak.

    Photo by Brett Sayles on Pexels.com

       Check the Weather & Tides Before Heading Out

    Texas coastal waters can be unpredictable, with strong winds, fast-moving storms, and shifting tides.

    • Use apps like Windy, NOAA Marine Forecast, and Navionics to check conditions.

    • Avoid kayak fishing in winds over 15 mph, especially in open water.

    • Be aware of incoming storms and tide changes that could strand you in shallow areas.

       Know Your Limits & Plan an Exit Strategy

    • Stick to areas within your paddling and endurance level.

    • If fishing far from shore, identify exit points in case conditions change.

    • Avoid paddling alone when possible—a fishing buddy can help in emergencies.

       Carry a Communication Device

    If you capsize or get stranded, you’ll need a way to call for help.

    Cell Phone in a Waterproof Case – Keep it easily accessible.

    VHF Radio (for Coastal Waters) – Reliable for emergencies if out of cell range.

    Personal Locator Beacon (PLB) or GPS Device – Great for offshore and remote areas.

       Dress for the Conditions & Water Temperature

    Even in Texas, water temperatures can be dangerously cold in winter.

    • In warm weather, wear light, breathable clothing and UV protection.

    • In cooler months, use layered, moisture-wicking clothing to prevent hypothermia if you fall in.

    Neoprene booties or water shoes provide foot protection in oyster beds and rocky areas.

       Rig for Safety: Secure Your Gear

    Leash Your Paddle & Rods – Losing a paddle can leave you stranded.

    Use a Float Plan – Let someone know where you’re fishing and your estimated return time.

    Keep Deck Space Clear – Prevent tripping hazards if you need to move quickly.

       Learn How to Re-Enter Your Kayak

    If you flip, you need to be able to get back in.

    Practice deep-water re-entry in a controlled environment.

    • Keep a grab handle or stirrup to help pull yourself up.

    • Consider self-rescue floatation devices if fishing offshore.

    Essential First-Aid for Kayak Anglers: What to Carry

    Accidents happen, and being prepared with the right first-aid kit can make all the difference. Here’s what every kayak angler should have in their emergency kit.

      Waterproof First-Aid Kit

    A compact, waterproof kit should be easily accessible and include:

    Adhesive Bandages – For minor cuts and blisters.

    Sterile Gauze & Medical Tape – For deeper wounds.

    Antiseptic Wipes & Antibiotic Ointment – To clean and prevent infection.

      Tools for Hook & Stingray Injuries

    Hook Removal Tool or Cutters – If a hook gets embedded deeply.

    Super Glue or Liquid Bandage – Helps seal small cuts quickly.

    Hot Packs or Thermos of Hot Water – Helps relieve stingray stings by breaking down venom.

       Sun & Heat Protection

    Electrolyte Tablets or Powder – Prevents dehydration.

    Sunscreen & Lip Balm (SPF 30+) – Protects against sunburn.

    Cooling Towel – Helps regulate body temperature in extreme heat.

       Hypothermia & Exposure Gear

    Emergency Blanket or Bivvy Bag – Retains body heat if you get wet and cold.

    Hand & Foot Warmers – Useful for cold-weather fishing.

       Pain Relief & Allergy Meds

    Ibuprofen or Acetaminophen – For pain relief.

    Antihistamines (Benadryl, etc.) – In case of allergic reactions from insect bites or jellyfish stings.

       Emergency Signal Devices

    Whistle & Signal Mirror – For attracting attention.

    Small Flashlight or Headlamp – For night fishing or low-visibility conditions.

    Final Thoughts

    Kayak fishing is an incredible way to experience the water, but safety should always come first. Wearing a PFD, preparing for weather changes, and carrying a well-stocked first-aid kit can make a huge difference in an emergency. Whether you’re fishing the Texas flats, marshes, or deeper channels, having a plan and the right gear can keep you safe while enjoying the adventure.

    What safety gear do you always bring on the water? Let me know in the comments below!

  • The Art of Outdoor Photography: Gear, Techniques, and Editing

    The Art of Outdoor Photography: Gear, Techniques, and Editing

    Photography is more than just capturing an image—it’s about telling a story, finding the perfect composition, and adjusting to ever-changing outdoor conditions. Whether I’m fishing in Texas, hiking through the mountains, or capturing the night sky, my approach to photography combines technical knowledge with an artistic eye.

    On my recent trip to New Mexico, as I pursued the Trout Grand Slam, I found myself surrounded by some of the most breathtaking landscapes I’ve ever photographed. The Rio Grande Gorge, Red River, and Rio Costilla offered not only incredible fishing but also endless opportunities for photography.

    My Gear Setup

    Camera and Lenses

    I shoot with the Canon R5, a powerhouse mirrorless camera with outstanding image quality and dynamic range. To adapt to different shooting conditions, I rely on a mix of Sigma series lenses and Canon L series lenses, which offer sharp optics and great performance in low light.

    For landscapes, my go-to is a wide-angle lens, such as the Canon RF 15-35mm f/2.8L, which allows me to capture vast mountain vistas and sweeping coastal scenes. When shooting astrophotography, I use fast prime lenses, like the Sigma 14mm f/1.8 ART, which excels at gathering light for crisp, detailed shots of the night sky.

    Accessories for Outdoor Photography

    K&F Concept Backpack – A durable and spacious pack that safely holds my camera gear, extra batteries, and filters.

    K&F Concept Tripod – A sturdy, lightweight tripod is essential for long exposures, low-light photography, and astrophotography.

    ND and Polarizing Filters – Useful for managing reflections, enhancing colors, and allowing for longer exposures in daylight.

    Mastering Exposure: ISO, Shutter Speed, and Aperture

    One of the keys to great photography is understanding the exposure triangle: ISO, shutter speed, and aperture. Since conditions can change rapidly outdoors, I keep a cheat sheet handy for quick reference:

    ISO – Keep it low (100-400) for bright conditions to avoid noise. Increase it in low light but balance it with shutter speed.

    Shutter Speed – Fast (1/1000s or higher) for action shots, slower (1/10s to several seconds) for landscapes, and long (15s+ for astrophotography).

    Aperture (f-stop) – Wide (f/1.8–f/2.8) for night shots, mid-range (f/8–f/11) for landscapes, and narrow (f/16+) for deep depth of field.

    Composition and the Art of Photography

    A great photo isn’t just about sharpness—it’s about composition and storytelling. I look for leading lines, balance, and unique angles to create compelling images. Shooting from different perspectives—such as low to the ground for foreground depth or high vantage points for expansive views—makes a huge difference.

    Protecting Gear in Harsh Conditions

    Since I shoot in rugged environments—mountains, rivers, and coastal areas—protecting my gear is crucial. I always bring:

    Weather-sealed camera covers to protect against rain and dust.

    Microfiber cloths for wiping lenses.

    Silica gel packs in my bag to prevent moisture buildup.

    Lens hoods to reduce glare and shield against elements.

    Editing on the Go: Lightroom & iPad Pro

    Once I’ve captured my shots, I refine them in Adobe Lightroom, often using my iPad Pro for quick field edits. This allows me to adjust exposure, contrast, and color balance on-site without waiting to get back to my desktop.

    Key Lightroom Techniques:

    Photo Stacking – Merging multiple shots for sharper images.

    Graduated Filters – Enhancing skies and landscapes selectively.

    Noise Reduction – Crucial for high-ISO astrophotography.

    Before and After

    Astrophotography: Lenses & Techniques

    Astrophotography is one of my favorite challenges. Fast prime lenses like the Sigma 14mm f/1.8 ARTor the Canon RF 24mm f/1.4L allow for more light intake, creating sharp, vibrant night sky images. Using a tripod and remote shutter release, I capture long exposures (15-30 seconds) at a high ISO (3200-6400).

    Astrophotography in the Mountains

    There’s nothing like seeing the Milky Way stretch over a remote mountain range. Shooting astrophotography at high altitudes reduces light pollution and enhances clarity.

    Final Thoughts

    Photography is an art that blends technical skills with creativity. Whether I’m shooting sunrises on the coast, rugged mountain landscapes, or the Milky Way, every photo tells a story. With the right gear, knowledge, and post-processing techniques, I can capture the world the way I see it—one shot at a time.

    Stay Connected with Beyond the Cast

    Thanks for reading! If you enjoyed this post and want more fishing tips, photography tips, trip reports, and on-the-water action, be sure to follow along.

    Subscribe to our YouTube channel for in-depth videos, gear breakdowns, and on-the-water adventures. Stay up to date by following us on Facebook, where we share fishing reports, trip updates, and connect with fellow anglers.

    Join the conversation, share your catches, tips, photos and let’s keep exploring the water and outdoors together.

    Tight lines, and see you Beyond the Cast!

  • Fly Fishing in New Mexico – A Guide to the Land of Enchantment

    Fly Fishing in New Mexico – A Guide to the Land of Enchantment

    New Mexico, often celebrated for its stunning desert landscapes and rich cultural heritage, is also a hidden gem for fly fishing enthusiasts. The state’s diverse geography offers a unique blend of fishing experiences, from high-mountain lakes to flowing rivers nestled in canyons. Whether you’re a seasoned angler or a beginner looking to explore new waters, New Mexico has something to offer. In this blog, we’ll take a look at some of the top fly fishing destinations across the state and share valuable tips to help you make the most of your time on the water. So grab your rod, pack your flies, and get ready to cast your line in the Land of Enchantment.

    1. The Rio Grande

    Rio Grande Gorge

    The Rio Grande River flows through some of the most scenic parts of New Mexico, offering great opportunities for fly anglers. This river is home to native Rio Grande cutthroat trout, as well as brown and rainbow trout. It’s ideal for both beginner and experienced fly fishers, with sections that are perfect for dry fly fishing and nymphing.

    Best Fishing Seasons:

    Spring & Fall: These are the prime times for fishing the Rio Grande, with trout being more active in cooler temperatures.

    Fly Patterns & Techniques:

    Dry Flies: Rio Grande cutthroats are often attracted to dry flies. Use patterns like Parachute Adams, Elk Hair Caddis, or a smaller, light-colored Stimulator.

    Nymphs: For deeper holes, go with nymph patterns such as Pheasant Tails, Zebra Midges, or a San Juan Worm.

    Techniques: When nymphing, focus on pockets near rocks or deeper runs. Dry fly fishing is best during hatch periods, so watch for rising fish and match your fly to the hatch.

    2. The San Juan River

    Known for its world-class tailwater fishing, the San Juan River is one of New Mexico’s premier destinations for anglers. Flowing below Navajo Dam, the river is rich with trophy-sized rainbow and brown trout. The clear waters and consistent flows make it a favorite among fly fishers.

    Best Fishing Seasons:

    Winter & Spring: The San Juan is a year-round fishery, but the best time to catch big fish is in the colder months when the fish are more concentrated.

    Fly Patterns & Techniques:

    Nymphs: Patterns like the Zebra Midge, Hare’s Ear, and Egg Patterns are effective in the deeper runs of the San Juan.

    Hare’s Ear

    Dry Flies: The San Juan also offers hatch periods with mayflies and caddisflies. Patterns like the Blue-Winged Olive, Griffith’s Gnat, and PMDs are great for dry fly action.

    Techniques: Focus on dead drifting your nymphs along the riverbed, especially in the deeper, slower-moving sections. During hatches, look for fish rising and cast your dry flies to them.

    3. Chama River

    The Chama River offers both challenging and rewarding fly fishing. Located in northern New Mexico, this river runs through the Chama Valley, where anglers can find wild brown trout, rainbow trout, and cutthroats. The river is divided into sections that are suited to different fishing techniques.

    Best Fishing Seasons:

    Spring & Fall: These seasons offer good fishing conditions as the water is cool and the fish are active.

    Fly Patterns & Techniques:

    Streamers: Large streamers like Woolly Buggers, Clouser Minnows, and Sculpin patterns are great for targeting larger trout.

    Nymphs: Go with patterns like Copper Johns or Prince Nymphs to target fish feeding on the bottom.

    Dry Flies: Use smaller patterns like Elk Hair Caddis or Griffith’s Gnat when fish are rising to the surface.

    Techniques: When using streamers, focus on casting across the current and stripping them back. For nymphing, look for the deeper holes and fish your nymphs near the bottom.

    4. Pecos River

    The Pecos River, located in the Sangre de Cristo Mountains, is a pristine spot for fly fishing. The river has crystal-clear waters and is filled with brown trout, rainbow trout, and the occasional brook trout. It’s a great place to hike to, with a wilderness feel and little development.

    Best Fishing Seasons:

    Summer & Fall: During these seasons, the Pecos River is perfect for fishing due to warmer water and increased fish activity.

    Fly Patterns & Techniques:

    Dry Flies: The Pecos is ideal for dry fly fishing. Patterns like the Elk Hair Caddis, Adams, and Parachute Adams work great during hatches.

    Nymphs: Patterns like Hare’s Ear, Pheasant Tail, and Zebra Midges are ideal for the deeper runs.

    Techniques: Dry fly fishing is most productive during hatch periods when fish are actively feeding on insects. For nymphing, try the classic upstream drift technique, especially in slower sections.

    5. High Country Lakes and Streams

    For those seeking more solitude and high-altitude adventure, New Mexico’s high-mountain lakes and streams offer great fly fishing. Places like Santa Fe National Forest and Wheeler Peak Wilderness Area boast pristine alpine waters, teeming with native cutthroat and rainbow trout.

    Best Fishing Seasons:

    Summer: High-altitude lakes are accessible during the warmer months and offer a peaceful, scenic fishing experience.

    Fly Patterns & Techniques:

    Dry Flies: Small patterns like Parachute Adams, Griffith’s Gnat, and small attractors like the Royal Wulff are effective in alpine lakes.

    Streamers: Woolly Buggers, Matuka, and Zonkers are good options for larger trout in the deeper parts of these lakes.

    Olive streamer size 10 3xl

    Techniques: Cast near the shorelines and retrieve streamers slowly through the deeper areas. For dry fly fishing, look for rising fish and match the hatch.

    Essential Gear for Your Fly Fishing Trip to New Mexico

    To ensure your fly fishing adventure in New Mexico is a success, packing the right gear is crucial. Here’s a list of essentials for your trip:

    Fly Rod: A 4- to 6-weight rod is versatile for most New Mexico waters. If fishing in high-altitude lakes, a lighter rod (3 to 5 weight) is ideal for smaller fish, while a 5- to 6-weight rod is great for larger rivers like the Rio Grande and San Juan.

    Fly rod and reel

    Fly Reel: A quality reel with a smooth drag system is key, especially for larger trout. Make sure the reel is matched to your rod and has a good line capacity.

    Fly Fishing Line: Weight-forward floating lines are ideal for most situations, especially in rivers and lakes. For deeper nymphing, a sink-tip line or full sinking line may be needed for some sections.

    Leader and Tippet: 9 to 12-foot leaders are typical, with 5X to 6X tippet being common for clear water and smaller fish. For larger fish, go with 4X or 3X.

    Flies: Carry a variety of dry flies, nymphs, and streamers. Some of the top patterns for New Mexico include:

    Dry Flies: Parachute Adams, Elk Hair Caddis, Stimulator, and Royal Wulff.

    Nymphs: Pheasant Tail, Copper John, Zebra Midge, and Hare’s Ear.

    Streamers: Woolly Bugger, Clouser Minnow, Zonker, and Matuka.

    Fly Box: A durable, waterproof fly box to keep your flies organized and safe.

    Waders: For rivers, especially in the spring and fall, a good pair of breathable or neoprene waders is essential. Don’t forget wading boots with felt or rubber soles for traction.

    Casting Tools: Don’t forget a high-quality fly fishing net, nippers, forceps, and a fly tying kit if you want to customize your flies on the go.

    Sun Protection: A wide-brimmed hat, polarized sunglasses, and sunscreen are essential for fishing in New Mexico’s sunny climate.

    Backpack: A small, durable backpack will help carry all your gear, snacks, and water, especially if you’re venturing into remote areas.

    Tips for Fly Fishing in New Mexico:

    Respect the Regulations: New Mexico has various fishing regulations, including specific season dates and restricted areas. Always check the latest regulations from the New Mexico Department of Game and Fish before heading out.

    Special Trout Waters (Catch and Release)

    • Many rivers and streams in New Mexico have areas designated as “special trout waters,” where only catch-and-release fishing is allowed. In these areas:

    No fish may be kept – all trout must be released back into the water immediately.

    Artificial flies and lures only – in some areas, only flies or lures may be used, and live bait is prohibited.

    Barbless hooks – some waters may require barbless hooks to reduce injury to fish during release.

    Altitude Matters: Many of New Mexico’s best fishing locations are in high-altitude areas. Be prepared for the thinner air, especially if you’re planning on fishing in the mountains.

    Watch for Hatch Times: New Mexico has some great hatch opportunities, but they vary by location. Know the types of hatches that occur in your fishing spot to choose the right fly patterns.

    Stay Safe in Remote Areas: Many of New Mexico’s best fishing spots are in remote areas. Always carry enough water, a first-aid kit, and a map or GPS device.

    Conclusion:

    Fly fishing in New Mexico offers a wide variety of landscapes, fish species, and fishing techniques. Whether you’re seeking a quiet mountain stream, a big river, or a remote lake, there’s a spot for you. The state’s unique waters, coupled with the opportunity to catch wild and native trout, make it a must-visit destination for any fly fishing enthusiast. So grab your rod, pack your flies, and head to the Land of Enchantment for an unforgettable fishing adventure.

    Stay Connected with Beyond the Cast

    Thanks for reading! If you enjoyed this post and want more fishing tips, trip reports, and on-the-water action, be sure to follow along.

    Subscribe to our YouTube channel for in-depth videos, gear breakdowns, and on-the-water adventures. Stay up to date by following us on Facebook, where we share fishing reports, trip updates, and connect with fellow anglers.

    Join the conversation, share your catches, and let’s keep exploring the water together.

    Tight lines, and see you Beyond the Cast!

    Leave a Reply

  • Fluorocarbon vs. Mono Leaders: What I Use and Why

    Fluorocarbon vs. Mono Leaders: What I Use and Why

    Every time I hit the water, I have to make a choice—fluorocarbon or monofilament for my leader? It might seem like a small detail, but over the years, I’ve learned that the right leader can make all the difference in whether I land fish or leave frustrated.

    This debate has played out for me countless times on the Texas flats, whether I’m sight fishing for tailing reds or working a cut on an outgoing tide. I’ve used both, and while I lean heavily toward fluorocarbon, I still keep mono in my tackle bag for specific situations.

    Fluorocarbon: My Go-To for Most Situations

    Most days, I’m running 15 lb Seaguar Red Label Fluorocarbon on my Black Max reel, and I do it for a few key reasons. First, it’s nearly invisible underwater, which makes a huge difference when I’m fishing clear, shallow flats and reds are being picky. I’ve watched redfish spook off a lure before they even get close to it, and I have no doubt it was because my leader was too visible.

    Fluoro is also tough—which is exactly what I need when I’m fishing near oyster beds and rocky shorelines. I’ve had reds take me into structure, rubbing my line against shells, and fluorocarbon has saved me from heartbreak more than once.

    Then there’s the sensitivity. When I’m throwing a H&H paddle tail and working it slowly through a drain, I want to feel everything—every tap, every bump, and the moment a red inhales my lure. Fluorocarbon has less stretch than mono, which helps me react faster and set the hook with confidence.

    When I Switch to Mono

    That being said, I still use monofilament, mainly when I’m throwing topwater lures like a Spook Jr. or a Rapala Skitter Walk. I learned this lesson the hard way—one morning, I was working a topwater over a shallow grass flat, and I noticed the lure wasn’t “walking” as well as it should. Turns out, my fluorocarbon leader was sinking just enough to mess with the action.

    Mono, on the other hand, floats, keeping my topwater lures running properly. It also has more stretch, which helps absorb the impact of aggressive topwater blow-ups and prevents me from pulling the hook too soon.

    Another reason I might use mono is cost. Fluorocarbon isn’t cheap, and when I’m fishing in murky or off-colored water where visibility isn’t a concern, I sometimes opt for mono just to save a few bucks.

    Real-World Example: Choosing the Right Leader on the Flats

    A few weeks back, I launched early in the morning, kayak in tow, targeting redfish on the flats. The water was clear, and as soon as the sun got up, I spotted reds tailing in the shallows. I tied on my usual fluorocarbon leader and threw a H&H paddle tail in cock of the walk right in front of a fish. It didn’t hesitate—it inhaled the lure, and after a solid fight, I had a slot red in the kayak.

    Later in the morning, I switched to a topwater Spook Jr. to see if I could pull a few more fish out of the grass. The first few casts didn’t feel right, and I realized my fluoro leader was sinking and affecting the lure’s movement. I quickly cut off the fluoro and tied on 15 lb mono, and within minutes, I had another red explode on my lure. That one simple change made all the difference.

    Final Thoughts: Which One Should You Use?

    If you fish inshore like I do, fluorocarbon is my top choice for most situations, especially when throwing soft plastics or working subsurface lures. But monofilament has its place, mainly when using topwater lures or fishing in murky water where stealth isn’t as critical.

    Here’s a quick rundown of when I use each:

    SituationLeader ChoiceWhy?
    Sight fishing for reds in clear waterFluorocarbonLess visible to fish
    Fishing near oyster beds & structureFluorocarbonMore abrasion-resistant
    Throwing soft plastics on an outgoing tideFluorocarbonSinks & provides better sensitivity
    Working topwater luresMonofilamentFloats & allows natural lure action
    Fishing in murky waterMonofilamentVisibility isn’t a concern, saves money
    Wanting more stretch for shock absorptionMonofilamentHelps prevent pulled hooks

    At the end of the day, both leader types have their strengths, and knowing when to use each will help you put more fish in the kayak.

    What’s your go-to leader for inshore fishing? Let me know in the comments—I’m always up for a good fishing debate!

    Stay Connected with Beyond the Cast

    Thanks for reading! If you enjoyed this post and want more fishing tips, trip reports, and on-the-water action, be sure to follow along.

    Subscribe to our YouTube channel for in-depth videos, gear breakdowns, and on-the-water adventures. Stay up to date by following us on Facebook, where we share fishing reports, trip updates, and connect with fellow anglers.

    Join the conversation, share your catches, and let’s keep exploring the water together.

    Tight lines, and see you Beyond the Cast!

  • Capturing Nature: The Art of Photography While Fishing and Hiking

    Capturing Nature: The Art of Photography While Fishing and Hiking

    There’s something about being out in nature that awakens the creative side of me. Whether I’m fishing in the still waters of a misty morning or hiking through rugged mountain trails, my Canon R5 is always by my side, ready to capture the beauty that unfolds around me. Photography, much like fishing, is a pursuit of patience and precision—waiting for the right moment, the perfect light, and the ideal composition to bring a scene to life.

    The Art of Seeing While Fishing

    Fishing has always been about more than just the catch for me. It’s about the experience—the rhythm of the water, the way the sky shifts in color as the day progresses, and the subtle interactions of nature happening all around. When I’m on the water, I’m not just scanning for signs of fish; I’m searching for those fleeting, beautiful moments that make fishing such an immersive experience.

    The golden hour, when the first light of dawn touches the water or when the sun dips low in the evening, offers some of the most magical photography opportunities. The reflections on the water, the soft hues blending across the horizon, the silhouette of a wading bird patiently stalking its prey—all of these moments tell a story. I often find myself pausing mid-cast just to take it all in, knowing that sometimes the most rewarding part of the trip isn’t reeling in a fish but capturing the essence of the moment through my lens.

    The challenge of photographing on the water lies in movement—both mine and my surroundings. Kayak fishing, in particular, adds an extra layer of difficulty. The water shifts, the wind pushes, and my subject rarely stays still. But that’s part of the excitement. It forces me to be deliberate in my composition, to anticipate the perfect frame before I even lift my camera. The Canon R5’s fast autofocus and incredible dynamic range allow me to capture fine details, from the scales of a freshly caught redfish glistening in the sun to the intricate ripples left behind by a leaping mullet.

    Beyond the technical aspects, photography while fishing is a way of documenting the journey. It’s about freezing those perfect, untamed moments—like the way the early morning mist clings to the water’s surface or how a storm front builds over the horizon, creating a dramatic contrast against the calm bay. These are the images that bring back the feeling of the trip long after I’ve left the water.

    Finding Beauty in the Mountains

    When I’m not on the water, I often find myself drawn to the mountains. Hiking is an entirely different experience, but one that feeds my love for both adventure and photography. Unlike fishing, where I’m often stationary for long stretches, hiking presents an ever-changing landscape, each bend in the trail revealing new opportunities to frame a shot.

    Colorado Blue Columbine

    The mountains have a way of humbling you. Standing at the base of a towering peak or gazing out over a valley stretching endlessly into the horizon, you realize how small you are in comparison to the vastness of nature. Capturing that feeling in a photograph is both a challenge and a joy. Composition plays a crucial role—finding the right foreground elements to give a sense of depth, using leading lines to draw the eye toward a distant summit, or waiting for the clouds to break just enough to let a dramatic ray of light cascade down the slopes.

    I love the contrast between grand landscapes and small details. While a panoramic shot of mountain ridges bathed in morning light can be breathtaking, sometimes it’s the little things that tell the most powerful stories—the gnarled roots of an ancient tree gripping the rocky soil, a single wildflower blooming defiantly at the edge of a cliff, or the way frost patterns form on a high-altitude lake at dawn. My Canon R5 excels at capturing both extremes, allowing me to shoot sweeping landscapes and intricate macro shots with equal clarity.

    One of my favorite aspects of mountain photography is how the environment constantly changes. Weather in the mountains is unpredictable, and that unpredictability creates some of the most striking images. A sudden break in the clouds after a storm can flood the valley with golden light, turning an otherwise ordinary scene into something spectacular. The play of shadows as the sun moves across jagged peaks can create dramatic contrasts that make the landscape come alive. It’s all about being in the right place at the right time—another parallel between photography and fishing.

    Blending Adventure with Artistry

    What I love most about photography, whether on the water or in the mountains, is how it forces me to slow down and truly see the world around me. It’s easy to rush through a fishing trip focused only on the next cast or to hike with a mindset of simply reaching the summit. But photography encourages me to be present—to notice the light filtering through the trees, the patterns in the waves, the way nature composes itself in perfect harmony if you take the time to see it.

    Fishing and hiking both offer a sense of escape, a break from the noise of everyday life. Photography allows me to take a piece of that escape with me, to relive those moments through images that hold not just the visuals, but the emotions of the experience. It’s about more than just snapping a picture; it’s about telling a story—one of adventure, of solitude, of the raw beauty that exists in the natural world.

    With every trip, I come home with a collection of images, each one a reminder of where I’ve been and what I’ve seen. Some of them end up shared, printed, or framed, while others remain personal, tucked away as snapshots of my journey. But all of them serve the same purpose: they capture the moments that make being out in nature so meaningful. And as long as I have a fishing rod in one hand and my Canon R5 in the other, I know there will always be more moments waiting to be captured.

    Stay Connected with Beyond the Cast

    Subscribe to our YouTube channel for fishing videos, gear breakdowns, and on-the-water action. Stay up to date by following us on Facebook, where we share fishing reports, trip updates, and connect with fellow anglers.

    Join the conversation, share your catches, and let’s keep exploring the water together.

    Tight lines, and see you Beyond the Cast!

    Leave a Reply

  • How to Read Tides for Better Kayak Fishing: Understanding Movement and Positioning

    How to Read Tides for Better Kayak Fishing: Understanding Movement and Positioning

    Kayak fishing is all about being in the right place at the right time, and nothing dictates fish movement more than the tide. Whether you’re chasing redfish pushing into the shallows or speckled trout staging near structure, understanding how water moves will help you position yourself for better catches.

    Unlike fishing from a boat, a kayak limits how far and fast you can move. That means planning around the tides isn’t just helpful—it’s essential. In this post, we’ll break down how tides work, where fish go during different stages, and how to position your kayak to take full advantage of tidal movement.

    The Basics of Tides: What You Need to Know

    Tides are the rise and fall of water levels caused by the gravitational pull of the moon and sun. Along the Texas coast, we generally experience a mix of:

    Two high tides and two low tides per day (semi-diurnal tides)

    One high tide and one low tide per day (diurnal tides)

    These patterns shift throughout the year, and understanding them helps you predict when and where fish will be actively feeding.

    Tides affect more than just water depth—they influence current strength, bait movement, and fish behavior. Let’s look at how different tidal stages impact fishing.

    How Each Tide Stage Affects Fish Movement

    Incoming Tide (Rising Water)

    What happens: Water pushes up onto the flats, flooding marshes and grass beds. Baitfish, shrimp, and crabs move into shallow areas, followed by hungry predators.

    Best fishing areas:

    • Grass flats and flooded marshes where redfish hunt for crustaceans.

    • Oyster bars and sand pockets where speckled trout ambush bait.

    • Creeks and drains where baitfish move inland with the rising water.

    Kayak positioning tip: Set up near marsh edges, grass flats, or points where water is moving in. Cast lures upcurrent and let them drift naturally toward the strike zone.

    High Tide (Peak Water Level)

    What happens: Water levels are at their highest, spreading bait over a larger area. Fish can be more scattered, making them harder to locate.

    Best fishing areas:

    • Shallow pockets where redfish are cruising, often tailing.

    • Deeper grass edges where speckled trout stage.

    • Channels and drop-offs where fish wait for the next tidal shift.

    Kayak positioning tip: Paddle quietly along flooded grass flats and look for signs of activity like wakes, tailing fish, or nervous bait. If fish are spread out, cover water with a paddle tail soft plastic or a topwater lure to draw attention.

    Outgoing Tide (Falling Water)

    What happens: Water drains from the flats, concentrating bait into deeper channels, cuts, and drop-offs. Predators position themselves to take advantage of the easy meals being pulled by the current.

    Best fishing areas:

    • Tidal drains and creek mouths where baitfish get funneled into deeper water.

    • The edges of oyster reefs where trout wait to ambush prey.

    • Wind-blown shorelines with structure that hold redfish.

    Kayak positioning tip: Anchor near a drain or channel mouth and work lures with the outgoing current. A popping cork with a shrimp imitation works great in these scenarios, as does a soft plastic jig bounced along the bottom.

    Low Tide (Lowest Water Level)

    What happens: Water is at its lowest, exposing oyster reefs, mud flats, and deeper potholes. Fish retreat to deeper water but still remain close to structure.

    Best fishing areas:

    • Deeper channels and holes where fish are concentrated.

    • Drop-offs near sandbars and reefs.

    • Shallow areas where fish may be “trapped” waiting for the next incoming tide.

    Kayak positioning tip: If the tide is really low, be cautious of getting stuck in shallow areas. Focus on deeper structure and work slower-moving baits like suspending twitch baits or soft plastics on a jig head.

    How to Use Tides to Plan Your Kayak Fishing Trip

    1. Check the Tide Charts Before You Launch

    Apps like Tides4FishingNOAA Tide Predictions, or Windy provide real-time tide data for your area. Look at when the tide will be rising or falling and plan your trip around those peak movement windows.

    2. Consider Wind Direction

    Wind can either help or hurt your fishing trip. A strong wind against the tide can slow water movement, while a wind pushing with the tide can accelerate it. Adjust your kayak positioning accordingly to take advantage of natural bait movement.

    3. Look for Areas That Funnel Water

    Anywhere water is forced through a smaller area—like a creek mouth, jetty, or channel—will create a natural ambush point for predators. These areas are excellent for targeting redfish and trout as the tide moves in or out.

    4. Use the Current to Your Advantage

    Instead of fighting the current, position your kayak so you can cast into it and retrieve your lure naturally with the flow. This mimics how baitfish move, making your presentation more effective.

    5. Stay Mobile, but Be Strategic

    Kayak fishing requires efficiency. Instead of paddling aimlessly, use the tide to drift through productive areas, covering more water with minimal effort. If the bite slows down, move to a new location where the current is stronger or weaker, depending on the stage of the tide.

    Final Thoughts

    Tides are one of the most important factors in inshore fishing, and learning to read them will significantly improve your success on the water. By understanding how water movement affects fish behavior and positioning your kayak accordingly, you’ll put yourself in the best possible spots to find actively feeding redfish and speckled trout.

    Next time you hit the water, take a few minutes to study the tide charts and plan your approach—you’ll be amazed at how much of a difference it makes.

    Stay Connected with Beyond the Cast

    Thanks for reading! If you enjoyed this post and want more fishing tips, trip reports, and on-the-water action, be sure to follow along.

    Subscribe to our YouTube channel for in-depth videos, gear breakdowns, and on-the-water adventures. Stay up to date by following us on Facebook, where we share fishing reports, trip updates, and connect with fellow anglers.

    Join the conversation, share your catches, and let’s keep exploring the water together.

    Tight lines, and see you Beyond the Cast!

    What’s your favorite tide stage to fish? Drop a comment below and share your experience!

    Leave a Reply

  • Abu Garcia Black Max Rod and Reel Combo Review: A Budget-Friendly Workhorse for Fresh and Saltwater Fishing

    Abu Garcia Black Max Rod and Reel Combo Review: A Budget-Friendly Workhorse for Fresh and Saltwater Fishing

    When it comes to finding an affordable yet reliable baitcasting combo, the Abu Garcia Black Max Rod and Reel Combo consistently ranks among the best options for beginner and budget-conscious anglers. Designed primarily for freshwater fishing, I wanted to see how it would hold up in saltwater conditions, particularly for targeting redfish, speckled trout, and flounder along the Texas Gulf Coast.

    After testing this setup in both environments, I found that the Black Max combo delivers solid performance in a variety of fishing situations—but with some important considerations if you plan to use it in saltwater.

    First Impressions

    Right out of the box, the Abu Garcia Black Max combo has a sleek, aggressive design with a black and red color scheme. The reel is lightweight, and the rod has a good balance between sensitivity and power. While it’s marketed primarily as a bass fishing combo, I wanted to see how it performed against hard-fighting inshore species.

    Rod Features & Performance

    The 24-ton graphite rod is lightweight but strong, making it a solid choice for both freshwater and inshore saltwater fishing. Here’s what stands out:

    Medium Power, Fast Action – Offers great hook-setting power while maintaining enough sensitivity for finesse techniques.

    Decent Durability – The rod holds up well for light to medium saltwater fishing, but it’s not built for heavy-duty offshore applications.

    How It Performs in Saltwater

    I tested the Black Max rod with a variety of lures, including soft plastics, topwaters, and spoons. It casted well, handled redfish and speckled trout without issue, and provided enough flex to absorb strong runs. However, after extended saltwater use, I did notice some corrosion on the guides, so regular rinsing and maintenance are essential.

    Reel Features & Performance

    The Abu Garcia Black Max Baitcaster is one of the best entry-level reels on the market, offering smooth operation, decent casting distance, and a reliable drag system.

    Key Features:

    4+1 Ball Bearings – Provides smooth retrieval and casting.

    MagTrax Braking System – Helps prevent backlash, making it beginner-friendly.

    Smooth Drag System (18 lbs Max) – Strong enough for bass, redfish, and smaller saltwater species.

    Lightweight Graphite Frame – Durable for freshwater but requires extra care in saltwater.

    Casting & Drag Performance in Saltwater

    The Black Max reel performed surprisingly well in saltwater, handling slot-sized redfish and speckled trout without issue. The drag system is smooth and powerful, which is key when fighting fish that make long runs, like redfish in the marsh.

    However, the reel is not fully corrosion-resistant. After a few trips, I noticed some rust developing on the screws and internal components, even with proper rinsing. If you plan to use this reel regularly in saltwater, I recommend applying corrosion-resistant oil after each trip.

    Pros:

    Pros & Cons for Saltwater Fishing

    Affordable & Great Value – One of the best baitcasting combos for the price.

    Smooth Drag & Casting – Handles inshore species well.

    Versatile – Works for bass, redfish, trout, and even flounder.

    Not Fully Corrosion-Resistant – Requires extra care in saltwater.

    Lightweight & Comfortable – Easy to use for long fishing sessions.

    Cons:

    ❌ Line Guides Prone to Corrosion – Rinse and dry thoroughly after saltwater use.

    Tips for Using the Abu Garcia Black Max in Saltwater

    If you plan to use this combo in saltwater, here are a few key tips to extend its life and improve performance:

    1️⃣ Rinse thoroughly after every trip – Use freshwater to remove any salt deposits, especially from the reel, guides, and handle.

    2️⃣ Lubricate with corrosion-resistant oil – Apply a light coating of oil to the bearings, screws, and drag system after each saltwater trip to prevent rust.

    Comfortable EVA Handle – The grip is ergonomic and comfortable for all-day fishing.

    3️⃣ Use braided line with a fluorocarbon leader – 30-40 lb braid is a great mainline choice for strength and sensitivity in saltwater. Pair it with a 15-20 lb fluorocarbon leader for stealth, abrasion resistance, and better lure presentation when targeting redfish, speckled trout, and flounder.

    4️⃣ Consider upgrading to a saltwater-rated reel – If you fish in saltwater frequently, a reel like the Abu Garcia Revo X Inshore will offer better corrosion resistance and longevity.

    5️⃣ Check the line guides regularly – The rod’s guides can corrode over time, especially with salt buildup. Cleaning them after each trip will help maintain smooth casting and prevent damage to your line.

    By following these tips, you can maximize the lifespan and performance of your Abu Garcia Black Max combo, even in saltwater conditions!

    Q&A Section

    Q: Can the Abu Garcia Black Max be used in saltwater?

    A: Yes, but with proper maintenance. It’s designed for freshwater, so it’s not fully corrosion-resistant. Make sure to rinse and lubricate it after each saltwater trip.

    Q: How does it perform against saltwater fish like redfish and trout?

    A: It holds up well against slot-sized redfish, speckled trout, and flounder. However, for larger bull reds or stronger inshore species, you may need a heavier-duty combo.

    Q: What’s the best fishing line to use with the Black Max in saltwater?

    A: 15-20 fluorocarbon works great for saltwater fishing. It casts well and provides the strength needed for inshore fish.

    Q: How does the braking system handle windy conditions?

    A: The MagTrax braking system helps reduce backlash, but it’s not as adjustable as high-end baitcasters. In windy conditions, you may need to tighten the spool tension knob to prevent backlashes.

    Q: Would you recommend this combo for someone who primarily fishes saltwater?

    A: If you occasionally fish saltwater, yes—it’s a great budget-friendly option. However, if you fish saltwater frequently, I’d recommend upgrading to a saltwater-rated baitcaster like the Abu Garcia Revo X Inshore or Shimano SLX XT.

    Final Verdict: Is the Abu Garcia Black Max Worth It for Saltwater Fishing?

    For anglers who fish both freshwater and saltwater, the Abu Garcia Black Max combo is a fantastic budget-friendly option. It offers smooth casting, reliable drag, and decent power for inshore species like redfish, speckled trout, and flounder.

    However, since it’s not fully corrosion-resistant, proper maintenance is essential. If you’re looking for a low-cost baitcaster for occasional saltwater trips, the Black Max is a solid choice.

    Would I buy it again? Absolutely—for  a budget-friendly setup, the Abu Garcia Black Max delivers great value.

    Review of the Abu Garcia

    Stay Connected with Beyond the Cast

    Thanks for reading! If you enjoyed this post and want more fishing tips, trip reports, and on-the-water action, be sure to follow along.

    Subscribe to our YouTube channel for in-depth videos, gear breakdowns, and on-the-water adventures. Stay up to date by following us on Facebook, where we share fishing reports, trip updates, and connect with fellow anglers.

    Join the conversation, share your catches, and let’s keep exploring the water together.

    Tight lines, and see you Beyond the Cast!

  • In-Depth Spring Redfish Behavior in Freeport & Galveston

    In-Depth Spring Redfish Behavior in Freeport & Galveston

    Spring is an exciting time for inshore anglers targeting redfish along the Texas coast, especially in the Freeport and Galveston areas. As water temperatures rise, redfish transition from their winter haunts into the shallows, feeding aggressively on baitfish and crustaceans. To consistently find and catch redfish this season, it’s crucial to understand their movement patterns, feeding behavior, and how tides and weather influence their activity.

    In this post, we’ll break down spring redfish behavior and proven tactics for both the Freeport and Galveston areas so you can make the most of your time on the water.

    Seasonal Transition: How Spring Affects Redfish

    Redfish spend much of the winter in deeper channels, back lakes, and protected bayous, where they seek out stable water temperatures. As spring brings warmer weather, they begin pushing into shallow grass flats, marsh drains, and oyster beds, where food becomes more abundant.

    Recent Observations from the Water

    Last week, I noticed a significant increase in redfish moving into the shallows and grass flats. Both slot-sized reds and bull reds were cruising shorelines, especially in the marshy backwaters of Freeport and the grassy flats around Galveston’s West Bay. The warming trends throughout the day had these fish feeding aggressively, with multiple tailing reds in less than a foot of water.

    Key environmental changes driving redfish movement:

    Rising water temperatures (60°F-75°F) – Increases redfish activity and feeding.

    Bait migrations – Shrimp, mullet, and menhaden begin pushing into shallower estuaries.

    Tidal influences – Higher tides allow reds to move into newly flooded grass flats.

    Spring rains and freshwater flow – Can impact redfish locations, especially near river mouths and marsh drains.

    Redfish Movement Patterns in Freeport & Galveston

    Recent Trip Insights

    On my last trip, I noticed redfish moving into wind-protected flats and bayous as the day warmed up. In the morning, reds were still hanging around deeper drop-offs near bayous and channel edges. By late morning, they were actively feeding along shorelines and oyster reefs in Christmas Bay, Drum Bay, and the backwaters of Galveston’s West Bay.

    Key Areas to Target in Freeport & Galveston

    Freeport

    Bastrop Bay & Christmas Bay – Shallow grass flats, oyster reefs, and marsh drains hold plenty of reds during a rising tide.

    Drum Bay & Hoskins Bayou – Great for targeting redfish in marsh channels and deeper bayous during outgoing tides.

    Cold Pass & San Luis Pass Back Lakes – Clearer water and strong tidal flow make these areas prime for sight fishing.

    Galveston

    West Bay (North Deer Island & Greens Lake) – Excellent springtime spots for redfish hunting bait along grassy shorelines.

    Jones Bay & Chocolate Bay – Shallow mud and shell bottoms warm up quickly, attracting feeding reds.

    East Bay (Anahuac Pocket & Marsh Drains) – Productive on an outgoing tide as bait flushes from the marshes.

    Tides, Wind, and Feeding Behavior

    Tides & Best Feeding Windows

    On my last trip, the outgoing tide was the most productive, especially near marsh drains where redfish were stacked up waiting for bait to flush out. Slack tides were slow, but once the water started moving again, the bite picked up fast.

    Outgoing tides – Best for ambush feeding near marsh drains and cuts.

    Incoming tides – Reds push into newly flooded grass flats and shoreline pockets.

    Slack tide – Slower bite; good time to relocate or make adjustments.

    Wind & Its Effect on Redfish

    South winds help push warmer water into the bays, keeping reds more active.

    North winds after a front can slow things down, pushing fish into deeper areas.

    Slight chop vs. calm conditions

    • Slight chop makes redfish more aggressive.

    • Calm conditions make reds spookier, requiring long casts and stealthy approaches.

    4. Feeding Patterns & What Redfish Eat in Spring

    Primary Forage for Spring Redfish

    Shrimp – A top bait choice in early spring, especially around marsh drains.

    Mullet – Bigger mullet become a key food source as temperatures warm up.

    Crabs – Found in grassy shorelines and a favorite target of tailing reds.

    Menhaden & Pinfish – Common in open water and around reefs.

    Best Lures from My Last Trip

    JVS 3.5 Speed Shrimp (White & Gold) – Worked great on a slow retrieve along the flats.

    H&H Paddle Tail (Golden Bream) on a 1/8 oz Jighead – Perfect for bouncing near oyster beds.

    Gold Spoon (1/4 oz) – Great for covering water and triggering reaction bites.

    Adjusting to Changing Spring Conditions

    Cooler Mornings

    • Work slow-moving soft plastics near deeper bayou edges.

    • Look for mud-bottom areas that retain heat overnight.

    Warmer Afternoons

    • Target flats and grass shorelines, where reds become more active.

    • Throw paddle tails or topwaters near structure.

    Windy Days

    • Focus on wind-blown shorelines, where bait is being pushed.

    • Use louder lures like a popping cork with a shrimp imitation.

    Calm & Clear Days

    • Look for tailing reds in the shallows.

    • Scale down to lighter fluorocarbon leaders (12-15 lb) and more natural-colored baits.

    Interactive Map: Best Spring Redfish Locations

    Google earth screenshot
    Google earth screenshot

    For a better look at these key fishing spots in Freeport and Galveston, I recommend using Google Earth or interactive fishing maps. These tools can help identify:

    Oyster reefs and grass flats where redfish are feeding.

    Marsh drains and bayous that hold fish on moving tides.

    Depth changes and structure that redfish relate to in different conditions.

    Final Thoughts

    Spring is one of the best times to target redfish in Freeport and Galveston, with warming waters bringing fish into the shallows and increasing feeding activity. Whether you’re working marsh drains, grass flats, or oyster reefs, understanding how redfish move with the seasons and tides will give you an edge on the water.

    Every trip is a learning experience, so get out there, apply these strategies, and adjust to what the fish are telling you. Don’t forget to share your catches and experiences with us!

    Stay Connected with Beyond the Cast

    Subscribe to our YouTube channel for fishing videos, gear breakdowns, and on-the-water action. Stay up to date by following us on Facebook, where we share fishing reports, trip updates, and connect with fellow anglers.

    Join the conversation, share your catches, and let’s keep exploring the water together.

    Tight lines, and see you Beyond the Cast!

  • Mastering Inshore Saltwater Fishing in Galveston West Bay for Bigger and Better Catches

    Mastering Inshore Saltwater Fishing in Galveston West Bay for Bigger and Better Catches

    Grass flats Galveston West Bay

    Inshore saltwater fishing is an exciting challenge, especially when targeting prized species like redfish and speckled trout. Success in these waters requires more than just casting a line—you need to understand the right techniques, how fish behave with tidal movements, and where to find them. In this guide, we’ll break down essential strategies, including the use of maps to illustrate tidal flows and prime fishing spots, to help you land bigger and better catches.

    Understanding Tidal Movements and Fish Behavior

    Tides play a crucial role in inshore fishing, influencing how and where redfish and speckled trout feed. These species rely on moving water to bring food to them, so knowing when and where the tides are strongest can greatly increase your chances of success.

    Incoming Tide – As the tide rises, baitfish and shrimp move into marshes, grass flats, and estuaries. Redfish and trout follow, feeding aggressively in these areas.

    Outgoing Tide – As water drains out, bait is pulled through channels, cuts, and creek mouths. This creates prime ambush points for hungry fish.

    Slack Tide – Minimal water movement can slow down feeding activity, making it a less productive time to fish.

    Hotspot: Fishing Galveston West Bay

    Galveston West Bay is one of the top inshore fishing destinations on the Texas coast, offering a mix of shallow flats, oyster reefs, and deep channels that make it ideal for targeting redfish and speckled trout. Here are some key areas to focus on:

    North Shoreline – The marshy edges and grass flats along the north side of the bay are excellent for sight fishing redfish, especially on an incoming tide.

    Oyster Reefs (like Confederate Reef & Carancahua Reef) – These structures hold bait and attract both trout and redfish, making them great places to fish during moving tides.

    Cold Pass & Greens Lake – These areas serve as natural funnels for tidal movements, creating excellent ambush spots where fish congregate.

    Using maps to analyze these locations along with tidal patterns can help you plan your trips more effectively. 

    Seasonal Strategies for Galveston West Bay

    Winter Fishing Tactics

    During winter, water temperatures drop, pushing redfish and speckled trout into deeper, more stable areas. Key strategies include:

    Targeting Deep Channels & Holes – Areas like the ICW (Intracoastal Waterway), deeper sections of West Bay, and channels leading to the Gulf hold fish seeking warmer water.

    Slow-Presenting Soft Plastics – Using a slow retrieve with a soft plastic on a jig head mimics sluggish baitfish, making it a go-to technique for cold-water trout.

    Fishing Mud & Shell Bottoms – These areas retain heat better than sand, attracting fish looking for slightly warmer conditions.

    Summer Fishing Tactics

    As temperatures rise, fish patterns shift, and early mornings or late evenings become prime times to target them. Key strategies include:

    Topwater Action at Sunrise & Sunset – Speckled trout and redfish become aggressive in low-light conditions, making this the perfect time for walking-the-dog-style lures.

    Fishing the Marsh & Grass Flats – Higher water levels push redfish into shallow marshes and grassy shorelines, where they feed on shrimp and baitfish.

    Working Deeper Structure Midday – As the sun heats up, fish retreat to deeper reefs and channels. Using live bait or slow-sinking lures can be effective.

    By adjusting your approach based on the season and using maps to track tidal movements, you can maximize your success in Galveston West Bay year-round.

    Using Maps to Identify Prime Fishing Spots

    Google earth showing tidal movements

    To maximize success, I use existing maps with annotations to highlight key areas where tidal movements concentrate bait and fish. Some top locations include:

    Grass Flats & Oyster Bars – These areas hold bait and attract redfish, especially during higher tides.

    Creek Mouths & Drains – Outgoing tides pull bait through these pinch points, making them ideal ambush zones for trout and redfish.

    Drop-offs & Deep Holes – In colder months or during extreme heat, fish retreat to deeper areas where water temperatures are more stable.

    Maps help visualize these areas and understand how tides move water through them, improving your ability to predict fish activity.

    Techniques for Catching Redfish and Speckled Trout

    Looking at Redfish tailing on the edge of the banks

    Sight Fishing for Redfish

    When water clarity allows, look for redfish tailing in shallow flats or cruising along marsh edges. Using a weedless soft plastic or a live shrimp under a popping cork can be deadly in these situations.

    Jigging for Speckled Trout

    Trout are aggressive feeders, and a jig with a soft plastic (such as a paddle tail or shrimp imitation) bounced near the bottom often gets their attention. Target deeper drop-offs and areas with moving water.

    Topwater Action

    During low-light conditions—early morning or late evening—both species will strike topwater lures. Walk-the-dog style baits, like the Zara Spook, work well over shallow flats and near oyster beds.

    Bringing It All Together: Video and Visuals

    To better explain these techniques and locations, I include videos and pictures in my blog posts. This way, you can see real-life examples of these fishing strategies in action. The combination of on-the-water footage, maps with annotations, and detailed explanations ensures you have all the tools needed to improve your inshore fishing game.

    Final Thoughts

    Mastering inshore fishing for redfish and speckled trout isn’t just about luck—it’s about understanding how these fish move with the tides, using maps to pinpoint the best locations, and applying the right techniques. By combining these strategies with real-time conditions, you can dramatically increase your success on the water.

    Thanks for reading! If you enjoyed this post and want more fishing tips, trip reports, and on-the-water action, be sure to follow along.

    Subscribe to our YouTube channel for in-depth videos, gear breakdowns, and on-the-water adventures. Stay up to date by following us on Facebook, where we share fishing reports, trip updates, and connect with fellow anglers.

    Join the conversation, share your catches, and let’s keep exploring the water together.

    Tight lines, and see you Beyond the Cast!